Category Archives: Sustainability

Free Chairs Are Rarely Free

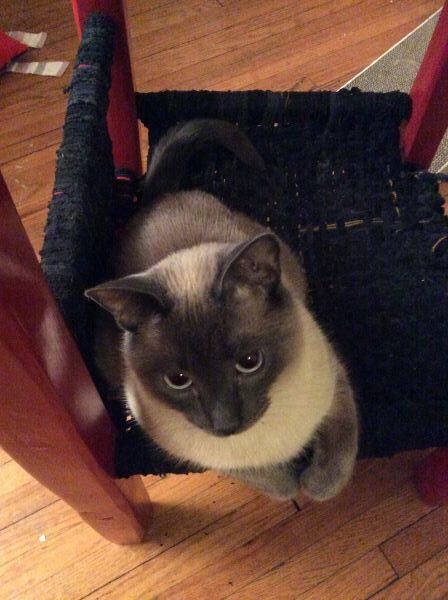
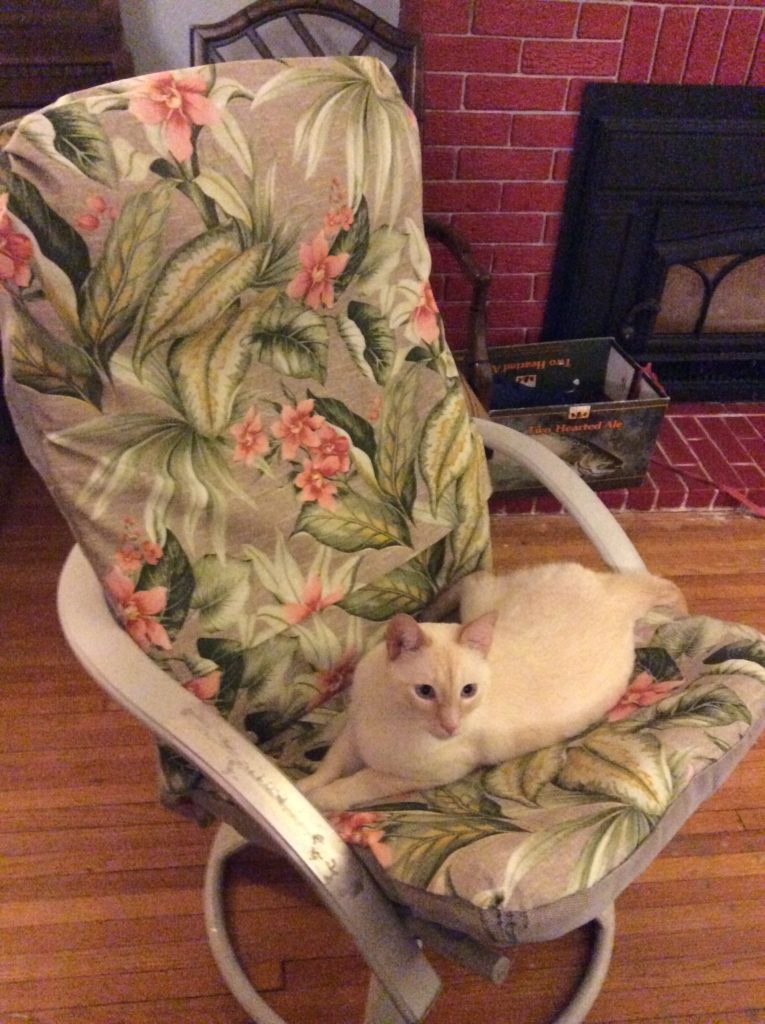
It’s predictable. Whenever I bring a new chair into the house, Bert will claim it.
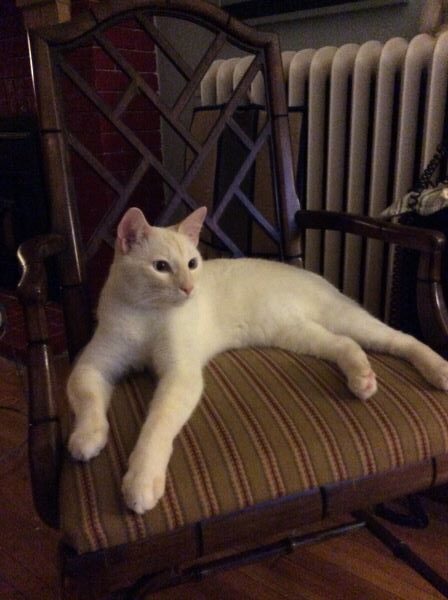
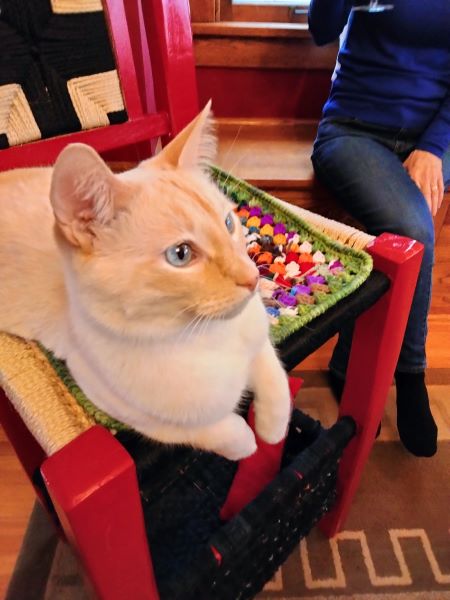
Cat sitting on dining chair.
Bert sitting on free chair.

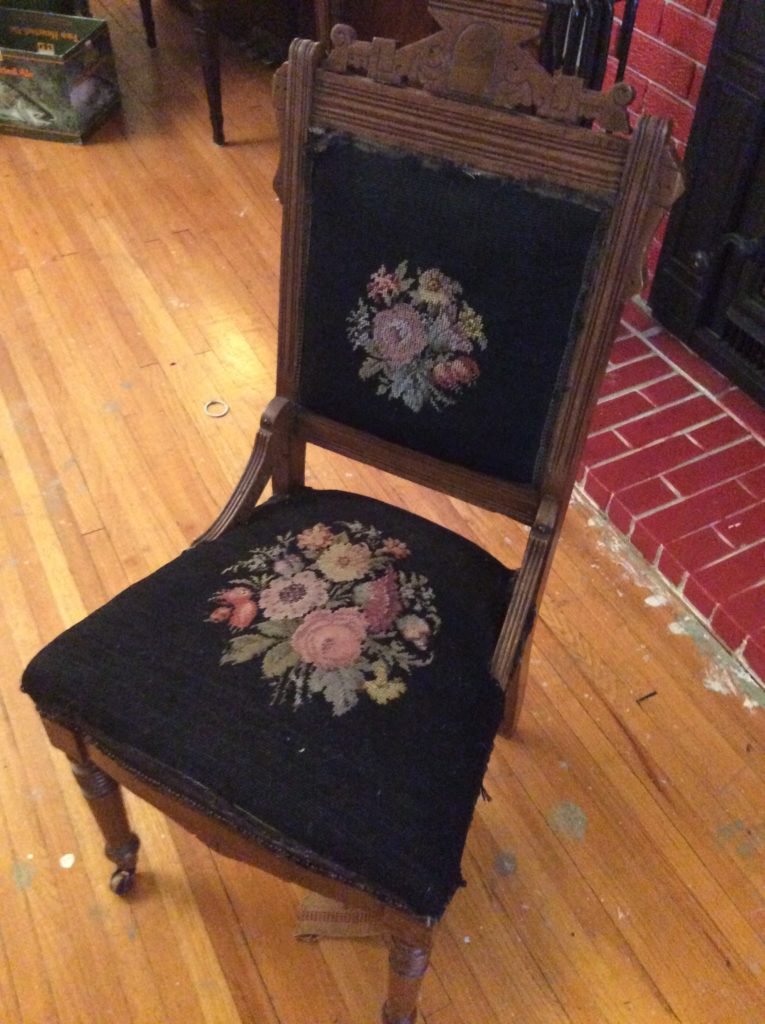
He’s grown quite a bit since I took the above picture, which is to say that it takes me a while to get around to fixing the chairs that I’ve been collecting. Several layers of fabric covered this particular one. Michael liked the floral pattern.
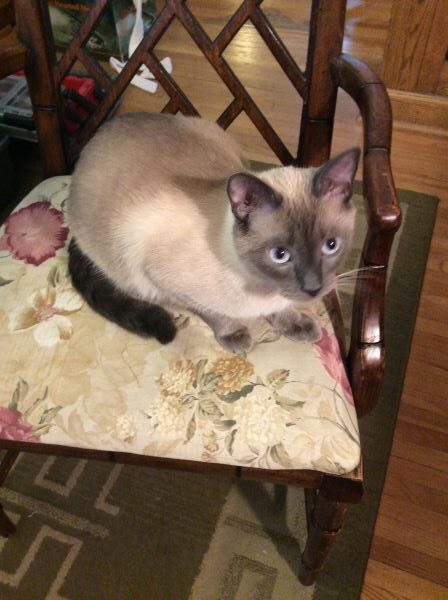
Cat sitting on dining chair.
Michael sitting on free chair minus several covers.

However, someone else covered it with plaid.
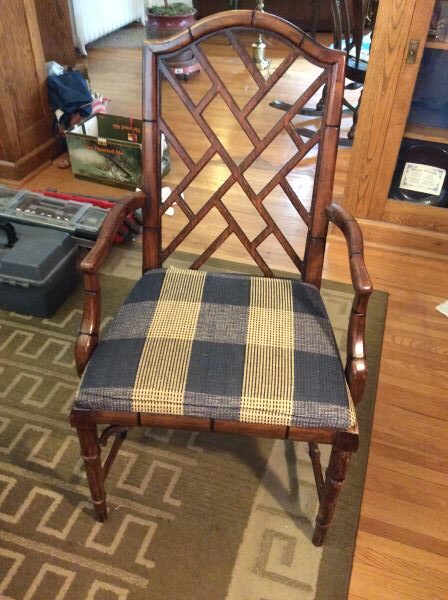
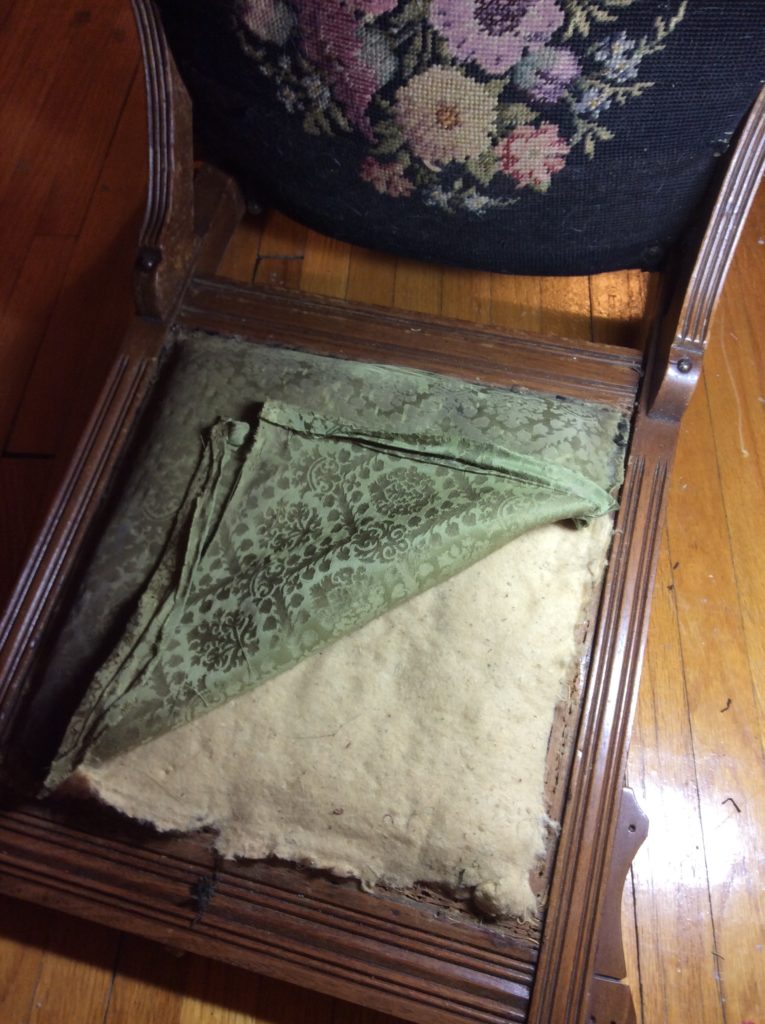
The chair had several layers of fabric on it.

The original upholstery was gold with boxing and piping (sorry, no picture). It’s only a coincidence that I chose fabric in a similar color ($50 +) to cover the new cushion ($25) that replaced one that was gross and crumbling.
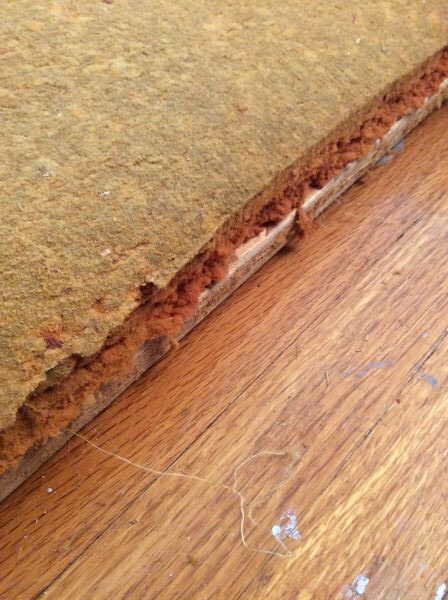
Crumbling cushion needs to be replaced.
The cushion was shot.

Needing practice before cutting into my new not-free fabric, I made a pillow out of scraps. And then I used sheets to make a dummy cover that mimicked the original style, which had boxing with welting along the top and bottom.
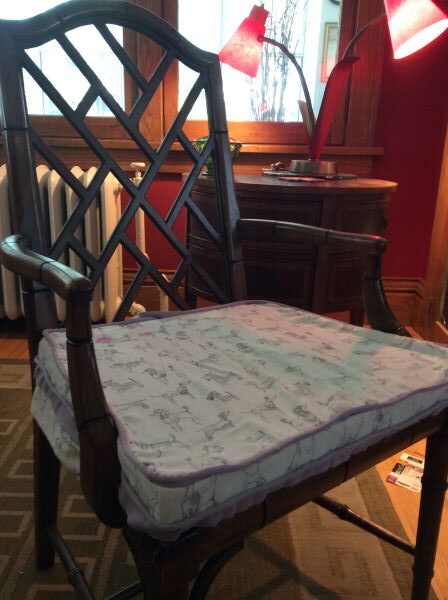
To practice, I made a dummy cover using an old sheet. Notice the piping on the top and bottom of the cushion. This is how the original cover was.

I also made a cut pattern using Inkscape, which is a vector-based design program. I know the software just enough to muscle my way through a project like this. Apart from the inherent problems with my plan (see below), it worked great. In fact, I was so excited about this discovery that I wanted to make a tutorial in which I would explain how to draw a rectangle to represent the size of your fabric and similarly how to draw the pattern to scale. The best part was using the “transform” option to put an object at a perfect 45-degree angle for those pieces that are to be cut on the bias. Explaining such basic things is like pretending that I’m Julia Child whenever I make a grilled cheese sandwich, as if anyone needs to be told how to butter bread.

Still, making a quick video might be useful to someone and it would be good to keep up with my video editing skills. One problem. There’s no such thing as a quick video. Somehow, what was supposed to be a five-minute demonstration kept creeping over the half-hour mark. It gave me an appreciation for the preparation, talent and (ironically) time that’s needed to make succinct tutorials.

Cut pattern for box seating.
This cut pattern was made using Inkscape.

As for the problem with my cut plan, the cushion has welting/piping/cording on the top edge and the bottom edge. I understood how to attach the top part, even if I still can’t do it perfectly. However, based on how the original cover was done, and limited in experience, I came up with a rather wasteful way of attaching the bottom welting, hence the diagonal strips that are over 6″ wide in my cut plan. Because the cover is stretched and stapled to the bottom of the slip seat, I thought I would need enough fabric in the welting to accomplish this. Unless we’re talking about salt, too much is better than too little when you’re guessing. At least that was my logic.
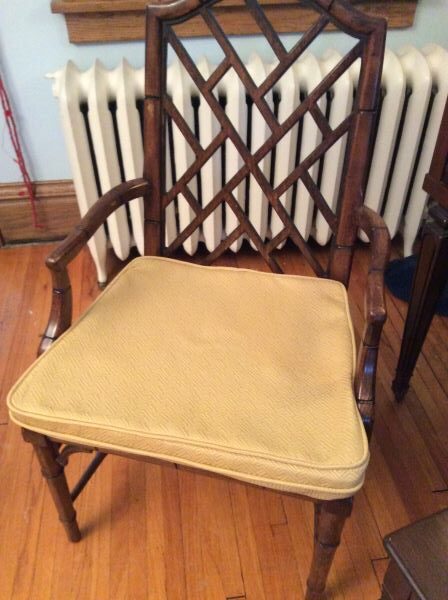
Box cushion
This is the new cover without batting or the crown.

I finally worked up the courage to cut my fabric using the pinking shears that I found in my Christmas stocking last year. I was suspicious of the scissors, as they were not like the ones my mother has, the same ones my sister used to cut her hair when we were kids. My new scissors looked like something you would find in a preschool art room. There were also the YouTube videos that convinced me that a hot knife was essential. What’s the point of starting without it? I understand the contradiction. On the one hand, give me what I grew up with. On the other hand, how am I supposed to cut an accurate line without a tool that I discovered yesterday watching a Salerite video?

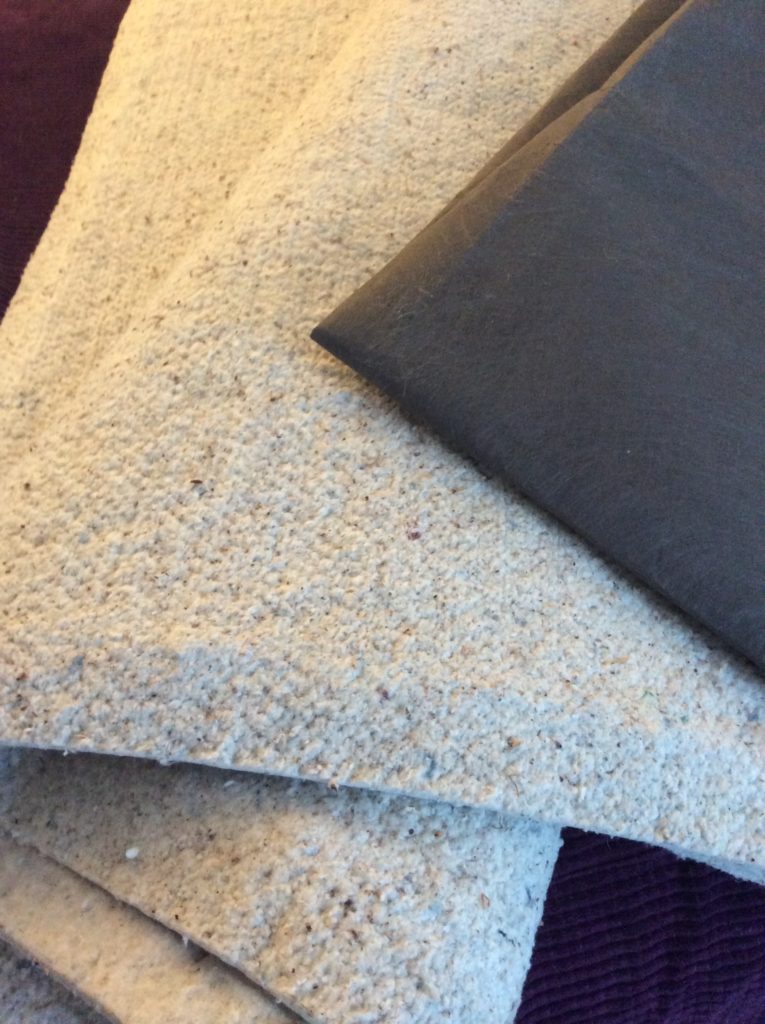
The pinking shears worked great. I made the cover and it fit the cushion fine. It’s pictured above with the new cushion but without the batting (FREE) that is supposed to cover the foam to give it a better shape (and make the seat more comfortable?). For that I used the cotton that I recovered from an old box spring. Because a synthetic covering protected the material, the cotton was clean and in perfect shape. However, it did contain seeds. But given that I’ve found hay and horse hair in some of these old chairs, I figured that it should be okay.

Later I was looking at Steve Cone’s book on upholstery and noticed a different method for attaching the bottom cording, as opposed to the convoluted way that I did it. It is stapled to the bottom of the seat after the cover is stapled in place. This made a lot more sense, as it seemed tricky to attach the bottom cording in exactly the right place on the boxing before it is stretched over the cushion and attached. It certainly required less fabric. It’s probably like a lot of things with upholstery. There’s more than one way to do it. Either way, I opted to undo some of my work and attach the bottom welting with staples as opposed to sewing it onto the boxing.

By accident, I discovered that the welting on the bottom needs to be reinforced with a cardboard upholstery tack strip ($16 for 20 feet). I will also need to get some black cambric to cover the bottom of the chair, which is supposed to be cheap. I thought about using scrap fabric but figured that the cambric is super lightweight for a reason. And though I do have a roll of landscape fabric that seems like it could do the job, I’m going to get the cambric.

Here’s the result, including my test pillow, which is a mess, but I like it anyway.
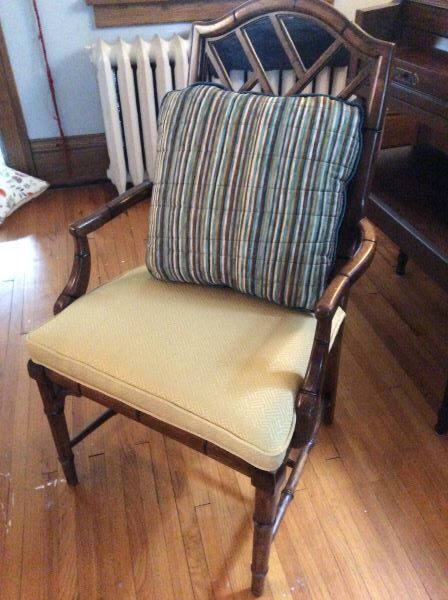
Recovered slip seat.
The mostly finished chair, with batting and the cover stapled in place.

As for forming the “crown,” (you might be able to see the curve of the cushion in the above picture), I put together scraps of polyester batting left over from other projects and placed it under the foam cushion. Absent those remnants, which I’m glad to have saved, could I have used something else? Could I use old socks? And if so, would I need to shred them to keep them from feeling too hard or lumpy underneath the cushion?

Aside from the supplies already listed, there was adhesive and enough staples to do an entire dining set (lots of doing and redoing). In addition, the stretchers on the chair needed to be glued. It’s nice to get to a point when a repair like that doesn’t require a trip to the hardware store, as I had clamps that worked. There were also spots on the legs that needed to be touched up. Again, it was cool to have the supplies on hand. I never addressed the decorative pieces at the corner of the legs, except to remove the broken ones. To make the chair right, I would either need to remove the remaining ones or replace the missing ones. Finally, I still need to screw to seat to the chair (after adding the dust cover/cambric to the bottom).

Taking a class would give me a better eye for what’s done and what needs more work. In this case, I can see the chair isn’t perfect. Some live instructions might be needed to get it closer. For now, this is good enough.

Once again, Bert has claimed the chair in its new incarnation. He still needs to be reminded not to claw on it.
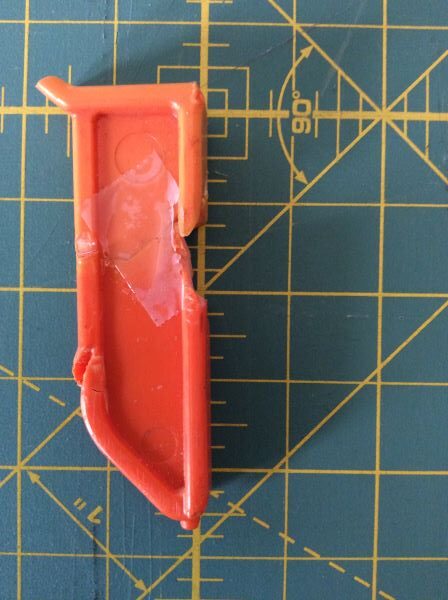
How to Replace a Lost Lawn Mower Key

Last year Brian ran over the starter pin/key for our Remington electric lawn mower with… the lawn mower. I did not remember this until… I wanted to mow the lawn. After searching for a replacement and getting nowhere, I glued what was left of our mangled key back together.

Lawn Mower Key glued back together
I took a lot of pictures and measurements of the key that turned out to be mostly unnecessary.

Aside from wanting to keep the machine going from an environmental perspective, the mower was a housewarming gift from my parents. It was 2008 and we were so excited to have it, I made a thank you video.

As I tried to clamp the unclampable broken key, I thought of Bron Zeage of the Secret Underground Laboratory Recovery and Salvage, and I thought of Colin Knecht of WoodWorkWeb. Those guys can clamp anything. I thought about IQ tests. They should include a clamping challenge. I thought about how you have to see a lot of clamping solutions multiple times before any of them would ever naturally present themselves to you in a pinch. As such, I resorted to taping the glued joint, an idea I took from YouTube videos about fixing ceramics. It felt like giving up. But it worked.

Before trying to use my newly glued key and possibly damaging it even more, my friend Craig suggested that I document the dimensions. It was a good idea, as the key no longer easily slid into the keyhole. Ultimately, it did not work. And until I figured out why, it would be pointless to ask my neighbor to print me a new key using his 3D printer. Maybe someone already posted a design on ThingiVerse.com? No such luck. Maybe someone had one I could borrow now that Sear’s didn’t make the part anymore? My post received no bites on FreeCycle. And on FaceBook, I could not get past the various pop-up privacy statements (which I assume went something like, “Screw you!”) to post anything there. I checked eBay, CraigsList, Parts Select and came up with zip.

Alternatively, Craig suggested that it might be possible to circumvent the need for a key by adding a toggle switch. He said this like knowing how a light switch works is common knowledge, which made me think that it should be (along with being able to tie a boat to the top of a car and any number of clamping challenges). With instructions to send Craig a picture of the lawn mower so that he could further assess the problem and help me, I went out to the garage with my camera/iPad. And then, seeing the three screws that keep the “key box” together, I became hopeful that a solution would be obvious once I took the thing apart.

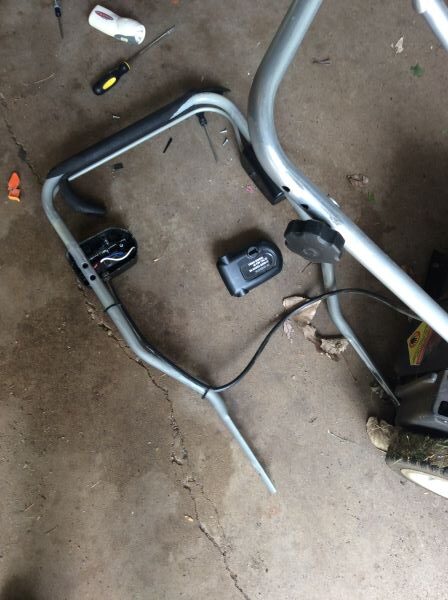
Nothing was obvious (including the disassembly). The screws that I removed were deep inside a channel. I worried that it would be impossible to put them back.

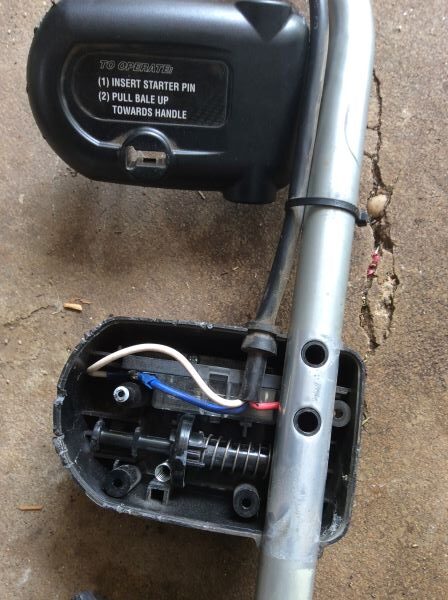
Remington lawn mower. Disassembled "key box."
Taking the “key box” apart seemed like a good idea at the time.

After discussing the mower with Brian over lunch, we decided to take it to a repair shop. We were about to load it into the back of my Mazda when inspiration struck. As I was telling Brian about how the key mechanism confused me, it dawned on me how the thing worked. This is not the first time that an answer revealed itself as I tried to explain a problem to Brian. For some reason, just his standing there while I’m fiddling with something can induce insight. Though other times, I need a ton of space to think. It’s on him to know the difference.

At first glance, I couldn’t make sense out of the key mechanism.

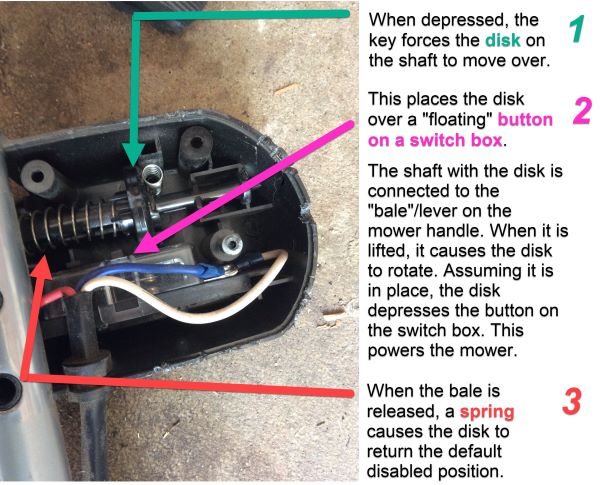
When the key is inserted, its 45° angle at the tip pushes over a disk that is on a shaft with a spring. This places the disk over a button on a switch box. When the lever on the lawn mower handle is pulled up at the same time the key is in place (and the disk is over the button), it makes the disk rotate. This depresses the button on the switch box. I will call this a “floating” button because there must be pressure on it for it to be engaged, as opposed to a button that remains depressed after pressing it. Once the mower starts, the key pops out with the force of a small spring. Sometimes the key pops out with such force that it lands on the ground and if you don’t notice, you might run over it.

Diagram of "key box" of Remington electric lawn mower showing how the starter key works.
It’s clever how the key mechanism in this lawn mower works.

This kind of ingenuity cheers me up. Marvelous, isn’t it? Likewise, the oversight is amusing. Whatever happened to a hole and some string? Why not attach the key to the mower? That way it would be unlikely that a person would ever lose or damage it.

Many of the measurements I took of the key turned out to be unnecessary. However, knowing the rough shape and size of the original key was critical. And I would need to remember that the 45° angle on the key must face the disk. This requirement probably explains the shape of the key that forces it to be inserted in the right direction. Making a new key should be simple. I thought about using wood. Ultimately, I used vinyl. Two layers of tiles with adhesive were rigid and about the perfect thickness. It was also relatively easy to cut with an X-Acto knife, making easy work of any fine tuning that would be needed.

The vinyl pieces I used came to me via FreeCycle.org. I had an idea for how I might use a case of them but then changed my mind. So, I took the tiles to ReStore, which is a second-hand building supply center affiliated with Habitat for Humanity. When I discovered that I had missed a few, it was annoying because it seemed unlikely that I could reunite the spare pieces with the larger group and they were probably useless on their own. And now they were taking up room in my garage. Who knew that I would be making a lawn mower key out of them years later? Or that it would feel like a privilege to have such junk at my disposal? It’s just too bad that it didn’t work.

Getting the disk to line up over the button on the switch box was fussy. I feared that I had messed something up when I took the thing apart (Is this a good time to mention the “spare pieces?”). So, I went inside to watch some YouTube videos about how to install a toggle switch. I had settled on a solution. I would install a big red button on the mower. Huge! And then I would put on a red plastic nose, the big shoes, striped jumpsuit, wig, the works. And then, dressed like a clown, I’d mow the lawn. We would become known as those people who rarely mow the lawn. But when they do, wow. What a show.

And then my dad called.

When my mom mentioned the key fiasco — something I must have told her about when I called to celebrate a Timberwolves victory — my dad had some suggestions. And he made me think that I should try my “vinyl key” again, even though it seemed futile. I went back to the garage. This time, instead of trying to hold things together by hand as I tested the key, I enlisted Brian’s help and took the time to screw the “key box” back together. There was no problem getting the screws back into that deep channel where it’s impossible to see. Once inside, the design forces the screw to go in straight (This was not the case with a similar design on a fan I took apart to clean. The channel wasn’t narrow enough to keep the screw straight.) When Brian pulled up on the bale, I was surprised when the mower revved up. We tested it again. Still worked. Again? Still? Brian mowed the yard. No problem. There. I fixed it.

Because the key is a tight fit, it’s permanent; the spring cannot eject it. Should I pull it apart and do some more fine tuning? Maybe. But I’m nervous about fussing with it. Let’s call it done.

Hopefully, we can get another decade out of our mower. After I re-wrap the handle with some leftover tennis racket tape, get the blade sharpened and eventually make one more repair that I’m saving for my friend Craig, it might be possible. After all, my dad is still nursing along his riding lawn mower, which he has had for 35 years.

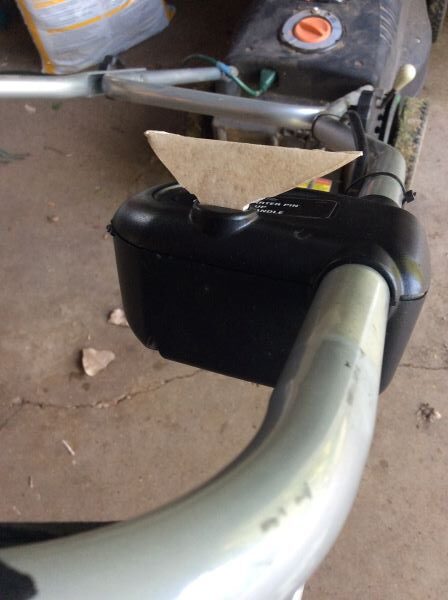
Lawn Mower with makeshift key made out of vinyl.
Had I realized that this key was going to be “the key,” I might have put a little more thought into the design.
Cat on cat furniture

Bar Stool Turned Cat Furniture

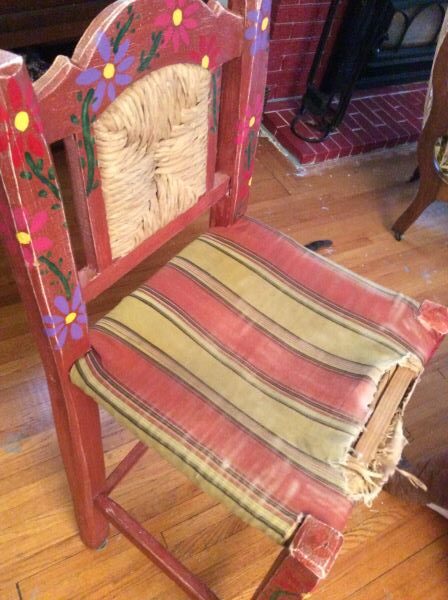
I have a weakness for free chairs. Here’s a bar stool that Brian and I found while taking a walk.

Bar stool in need of repair.

I imagine a student made this chair in shop class back when there were industrial arts in high school. Or someone — a man who was born knowing how to use a table saw — took an afternoon to make the chair in his garage. It was raining that day, and he was trying to escape the house where his wife was hosting a party for a recently divorced friend. Whatever its origins, a chair like this should be part of a set but I doubt it ever was.

In the city, leaving an item on the curb is a common way to pass it on. But I still look around for permission before taking anything. “Is this broken, hideous chair that’s sitting next a toilet and a dumpster full of construction debris free? Amazing!”

Wanting to give the chair a chance, the woman I spoke to had moved it from the alley to a prominent corner. Picturing this made me think of ants who are always busy moving material of various sorts: an errant crumb, the foundation of my house. This woman and I must be some kind of recycling ants. Her job is to unearth treasures and put the bright shiny things on the main trails where other roving ants like me will see them, whereupon they will enlist a stronger ant to carry the item for several blocks back to the nest.

Upon a closer look, I might have reneged on taking the chair. But seeing how my initial interest had perked up the ant-woman who was invested by this point, my obligation was clear. Or it could have been that it was the height of the pandemic, and fixing junk replaced recording interviews for my podcast. Or maybe it was my age that compelled me to take the chair. I can still hear my neighbor who is a little older than me say, “I also went through a chair phase,” while another friend joked that I was one step away from glazing a bowl in a shop window.

As expected, my cats claimed the bar stool. We’re not keeping it. So, don’t get too attached, Bert.

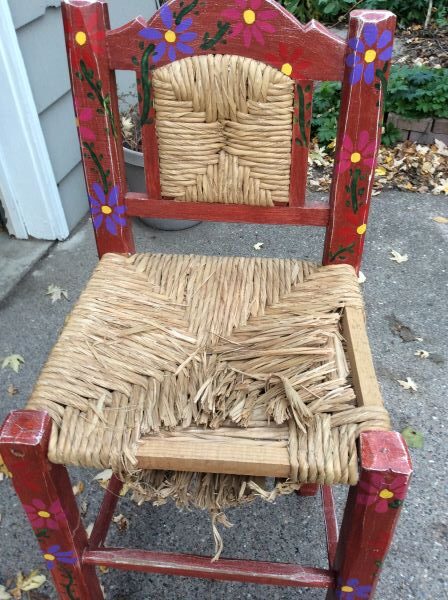
Bar stool with broken rush seat.

I brought the chair to the cat-free garage and started to investigate. This is the first step to fixing anything. It’s interesting to see what the ants before me did to beautify the piece. In this case, fabric covered a worn-out rush seat, proving that we do what we know how to do. In this case, someone knew how to use a staple gun. Was the fabric chosen or was it just handy? The flowers that are painted on the frame were also someone’s idea of an upgrade. They were supposed to cheer up the place or camouflage an objectionable shade of brown. Regardless, it was a job to remove it.

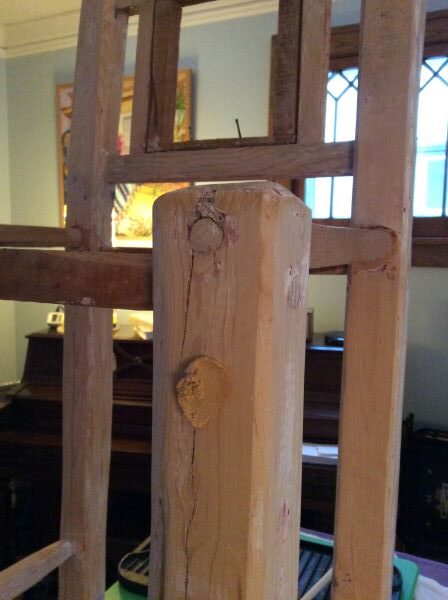
Stripped to the wood bar stool.

Once I stripped the chair, it became clear that whitewashing it (a technique I saw on YouTube) would not produce the desired effect. Though the joints were tight (Thank goodness! I wouldn’t need to “Take it apart and glue it back together again,” as one of my favorite YouTubers is always saying), the wood was cracked and mismatched and generally in rough shape. My neighbor suggested painting it red and that sounded good.

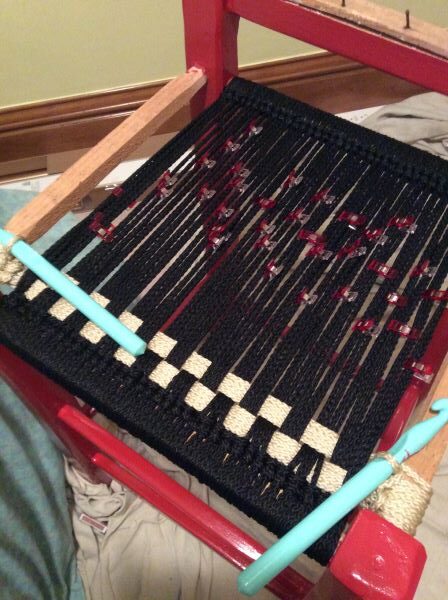
Unable to find the right shade of red, I considered black. Brian was against it, saying that a chair like this needed the advantage of a pop of color. So, I stuck with my plan, which meant watching more YouTube videos about how to weave a rush seat. Then one day I woke up thinking about a checkered pattern. When my neighbor (the same who suggested the red) independently suggested checkers for the seat, I had to try it.

Bar stool with macrame checkered seat.

The checkers could have been bigger, and the improvement might have outweighed the cost of a weaker seat. But it was hard to justify starting over. Maybe I was being lazy. But there is something to be said for being done. However, even though I didn’t plan to keep this chair, I wanted to love it. I wanted it to be something I could sell or proudly give away. I wanted it to be state-fair-ribbon worthy. This was falling short of that fantasy.

Bar stool with macrame seat.

Sometimes a project does not give a person satisfaction. Again, I wonder if I should have gone with a black frame. Again, Brian says no. Maybe finishing the back support would help? It did not. The black cross is accidental, something I’m always explaining. It reminds me of the God’s eyes we used to make in elementary school. I wouldn’t be surprised if there’s one in the things my mother returned to me — old report cards, yearbooks, etc. — some years ago.

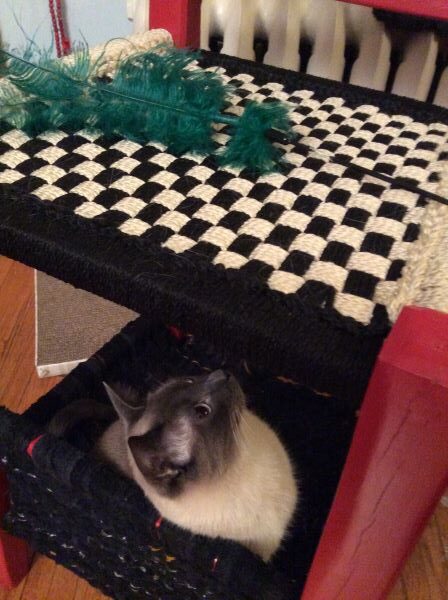
As I worked on the chair, the cats persisted in claiming it, especially Bert. So, I surrendered to the idea and eventually quit scolding him for scratching on it, which he loves to do. “At least let me take a few pictures before you destroy it, Bert.” Fully embracing the idea that this was cat furniture that I was making, I wove a box to the bottom rungs of the bar stool because Michael and Bert love a box. It was also a chance to experiment with using cut up old socks (pieces are cut into loops and woven like how many of us made potholders as kids). It would not have been suitable to support the weight of a person (Yes, I wanted to try using old socks to refurbish a lawn chair. Fortunately I’ve been convinced that it would be a waste of time.). However, the socks work great to make a box or a hammock for a cat, assuming you can tolerate the shedding (of the socks, though cats shed too).

To assure me that my efforts would be worth it, both cats would sit on the chair while I was weaving it. Michael and Bert like to be involved in projects.

A cat sitting on an unfinished woven box.

Here’s Michael sitting in the finished box.

Cat sitting in a woven hammock at the bottom of a bar stool.
Cat sitting in a hammock woven onto the bottom of a bar stool.

The cats do love this chair, especially when you mix it with playtime.

Cat playing on bar stool that has been converted into cat furniture.

Here’s Bert on his highchair with a pad that my sister Amy crocheted using bits and bobs from her yarn closet.

Though sturdy, this chair had its limitations. Or maybe I lack the imagination and the skill to make it the best that it can be. But I liked how the project evolved. And I like that it is done. And I love how Michael and Bert have given the chair its purpose. Down the road, an ant will look at this chair and say, “That red is terrible! Was it chosen or was it just handy?” She will wonder, “Is that supposed to be a magazine rack on the bottom?” and declare, “Poor chair!” She will drag it home. Take it apart and put it back together again. And think, “Surely, we can do better than this!”

There, I fixed it.

It has been a long time since my friend Paul introduced me to a website that featured DIY plugger repairs. “There, I fixed it,” perfectly summed up the eyeglasses that were held together with zip ties or the mirror that was taped to a car. My latest low-budget solution indeed made me yell those words out loud. I solved a problem that had arose from the solution for a different problem, which in turn gave me an idea for a future episode of my long-dormant podcast, QuOTeD – The Question of the Day.

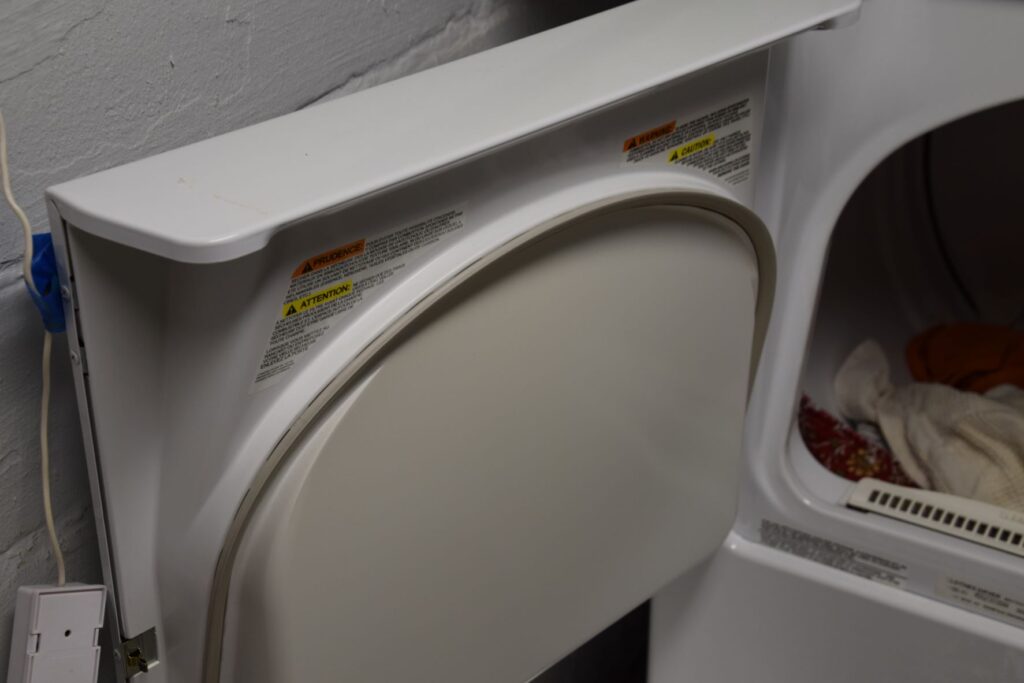
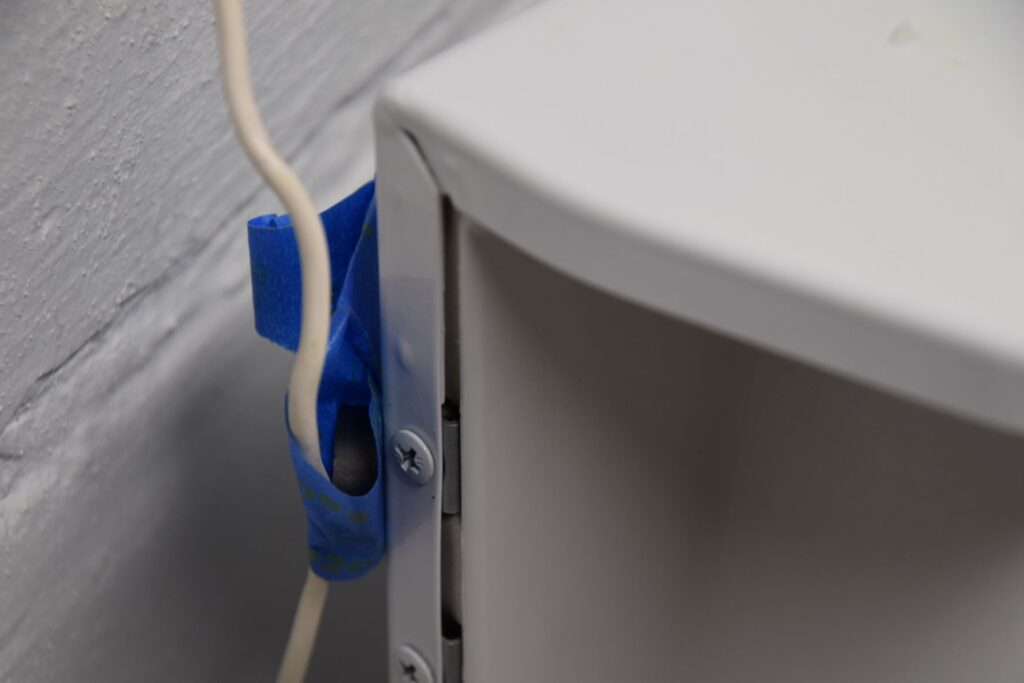
It only took 14 years of living in this house to realize that the door on the dryer is reversible. Making the switch would mean that I could transfer clothes from the washer to the dryer without the door blocking me. However, one improvement exposed the need for another one. The dryer isn’t level. Now the door swings closed from a resting state. It might be worse than the original problem was. The solution is to level the dryer. But until I get around to it, I’m using a magnet to hold the door open. It’s taped to a random wire that will be removed – again – when I get to it.

Hold dryer door open with magnet.
There’s a magnet buried in the blue tape.

In more fix-it news, I made some updates to the various websites that I manage. Had I been pinged by the social scientists who are collecting happiness data, it would have been a low point for me. But I don’t think it was the task itself that I hated. It was having to do it instead of something else. In fact, I might have preferred to troubleshoot websites over putting up the apples from my neighbor’s tree. In this case, any unhappiness I might have been feeling didn’t stem from a specific task, annoying that it might have been. But it was about the perceived or real pressure to do more than can be done in a day. I suppose one lesson here is to ignore the dire messages to make software upgrades until you can put it on the schedule. In the meantime, find your happiness in crossing your fingers and trusting that it’ll be fine.

Taking a walk this morning, Brian and I stumbled upon another swell fix-it job.

Cheap landlord or ingenious solution?

It’s nice when things fix themselves. I was late planting my garden this spring and on top of that, it appeared that I had planted some non-producing beans – if that’s such a thing. But then one day I was working in my yard and saw green beans hanging from the top of the arbor.

Nature doing its thing.

I wish the environment could fix itself on a timeline conducive to supporting life as we know it. Regardless, I’m still heartened by the bees that make the yard hum.

Bees go wild for the chives and sedum that line the back walk.
Chives and sedum make a pretty mix.

If only I would fix the compost, maybe Brian wouldn’t cringe whenever I hand him a bucket to empty. It’s pretty wild back there.

Can you spot the compost bin in this jungle?
You’ll have to fight the raspberries to get to it!

There’s a lot yet to fix around here. But it’s important to remember to stop and take pictures of the flowers.

As for my question, given that it took me over a decade to make a simple improvement – reversing the swing on the dryer door – I’m wondering if others have such projects. Are there easy home improvements or repairs that you put off doing until, for reasons you might not fully understand, you woke up and decided today is the day. You tackle a task only to wonder: What took me so long?

It’s just sewing.

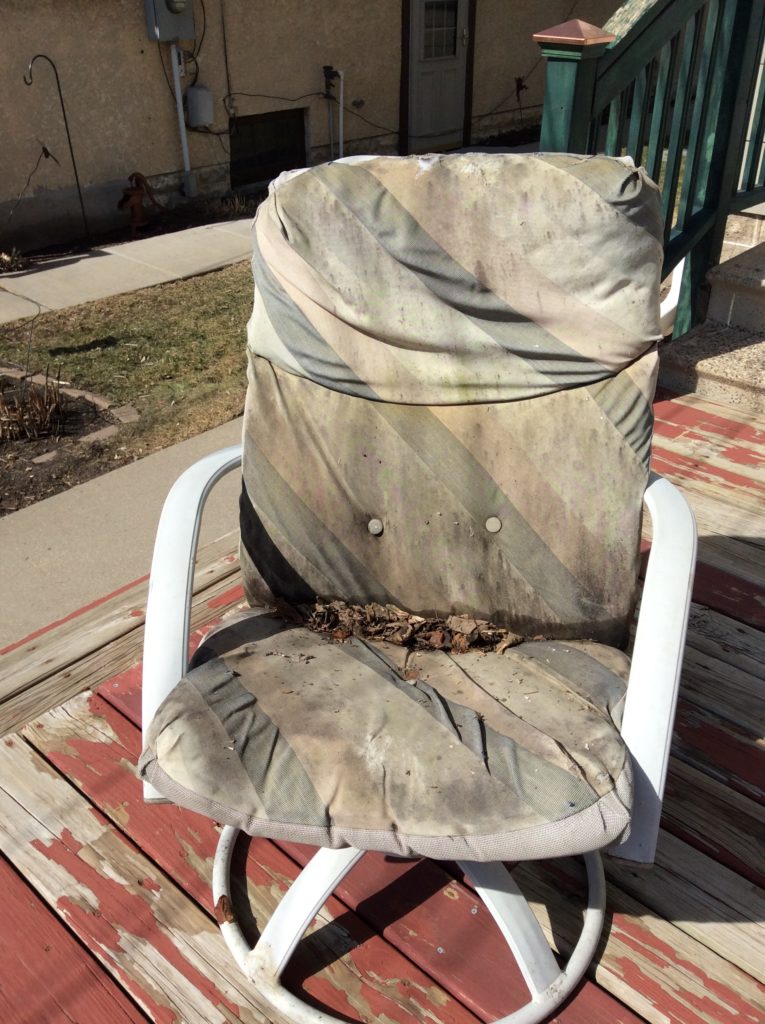
In the past, whenever someone came over to visit and we sat on the deck, I’d throw an old sheet over one of the patio chairs that have seen better days. This was going to be the year to address the problem. We should have replaced the cushions a long time ago when Steve offered to make them at cost. He wanted to return a favor, if you can call being patient a favor.

We first met Steve Cone when we hired him to reupholster the old chair that Brian had inherited forty years ago during his time at Rural Sociology at the U of M. While it was supposed to take weeks to fix the chair, due to extenuating circumstances, the initial deadline was blown by several months. We didn’t care. As long as our dusty chair with its springs that dragged on the floor sat in Steve’s shop, it wasn’t in the living room. Mission accomplished, as far as I was concerned. There was no favor to return. But Steve insisted on giving us the deal.

“It’s just sewing,” he said.

It made me think that a person in his line of work must be accustomed to fussing or downright difficult clients.

Steve was a rock star in the world of upholstery and I feel lucky to have crossed paths with him when I had the chance. Recently, when a salesperson at A-1 Foam recommended his book, Singer Upholstery Basics Plus: Complete Step-by-Step Photo Guide, she said “People have started businesses based on what they learned in that book.” I couldn’t help myself and had to make it known that we too had met the man and knew of his greatness. What I didn’t say was that I have good memories of how easy it was to chat with Steve and I feel strangely proud that he felt the same way about me.

Maybe he made everyone feel that way, which would have been another testament to his greatness.

As he went over the numbers for the patio chairs, Steve said that he could reuse the fabric on the back of the cushion, which was this light gray plastic weave that’s used for sling chairs. I wasn’t so sure I liked that idea. I was sick of these awful cushions and I wanted something new. Wasn’t that the point? Whatever we decided, before he could do the job, Steve would need some time to give his hands a chance to rest. In a couple of months, I was supposed to call him to get on the schedule. Then time got away from me, as it always seems to do. When the Christmas card I sent to Steve was returned in the mail, I had a sinking feeling that too much time had slipped away. And I was right. At the age of 71, Steve had a heart attack and died.

He missed the first pandemic shutdown by just a month or so. He also would have missed the last party we had before the coronavirus took over the world. If only we had invited him…

It was a stupid calculation. On the one hand, I could see him at the table. On the other hand, it was early on in the dinner party experiments that Brian and I were planning for the year… So, maybe we should stick with people who we knew would roll with it regardless of whether a silly little game worked as planned or whether anyone had anything insightful to say about the topic at hand or whether the evening went south in some other unexpected way. We would invite Steve once we figured out what could help keep things interesting yet comfortable enough amongst a group that didn’t necessarily know each other very well. In the meantime, there’s no need to torture anyone or to look foolish so early on in what I had hoped would become a friendship. Had I to do it over again… would’ve, could’ve, should’ve… I should’ve trusted that Steve could’ve rolled with it and it would’ve been fine.

So, back to square one with the chairs. “Send photos!” a handful of upholsterers said.

We bought this secondhand patio set fourteen years ago. That pattern strikes me as 80’s but I’m not sure.

So far, there has been one response, not counting a prompt response from Repair Lair that doesn’t do upholstery even though It’s just sewing.:

Rebekah,

These cushions are pretty complicated and definitely beyond my sewing skills….

S*

At another place, we were warned to be prepared for how expensive cushions can be: “The stuff made in the factory is cheap. So, when you have them custom made, they’re going to cost you more than what you paid for the entire set.” In addition to that, a backlog of work meant that it would take weeks just to get an estimate.

Next stop: A big box store where they stock bolts of fabric so that a person can walk out with a yard. Probably inspired by watching too many YouTube videos, I would try to repair the cushions myself and I needed supplies to experiment. Whether my consumer-end sewing machine was up for the task was just “part of the discovery process,” as Brian likes to put it.

So far, so good.

Bert approves of the newly recovered chair, though he was also happy to claim the dirty naked Dacron that’s been sitting on the floor by the front door for the last few weeks.

In an upcoming post, I’ll describe what I did to deal with the worn parts of fabric that I reused on the backside of the cushion (I came to appreciate Steve’s suggestion to reuse the fabric and have noticed that upholsters in general take pride in keeping what’s salvageable), explain how I got around installing a zipper (and why I wanted to avoid it), and let you know how I ultimately finished this cushion. For now, I have discovered enough to know that what I’m trying to do is possible. As for the frames of the chairs, eventually I’ll repaint them.

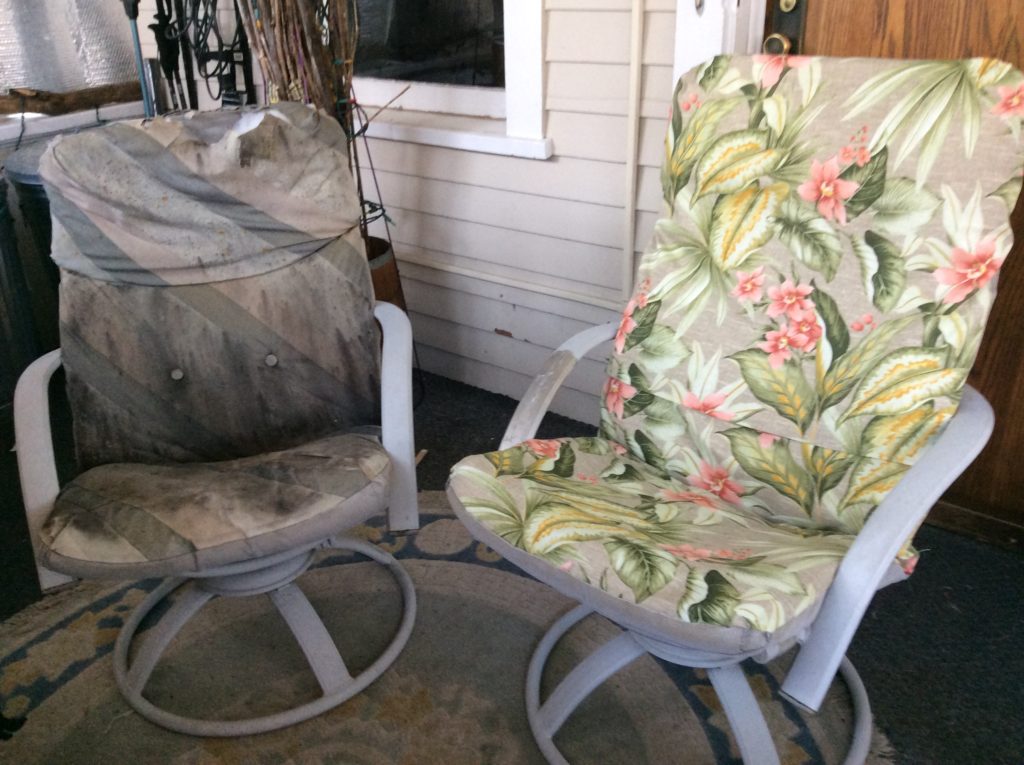
In case you forgot, here’s a before and an almost-done after.

Steve has been on my mind as I’ve been working on this project. I’m on shaky ground, as I am not a sewer. Just cutting into the fabric feels scary. So, telling myself, “It’s just sewing,” can be helpful whenever I get stuck.

Steve Cone and Brian who is sitting in the newly reupholstered chair that Steve just delivered.
The chair Steve Cone recovered for us.

Organizing Screws, Nails, etc.

In the summer of 2020, I spent some time organizing the garage. This included facing the yogurt containers full of miscellaneous screws, nails, paperclips and the random cafe curtain ring. It was a tiresome task that used up my allotment of decision-making power for the day. Nevertheless, it felt good to do it. Tidying up always gives me a sense of accomplishment. And it’s particularly satisfying when I can benefit from my effort down the road, as I recently did.

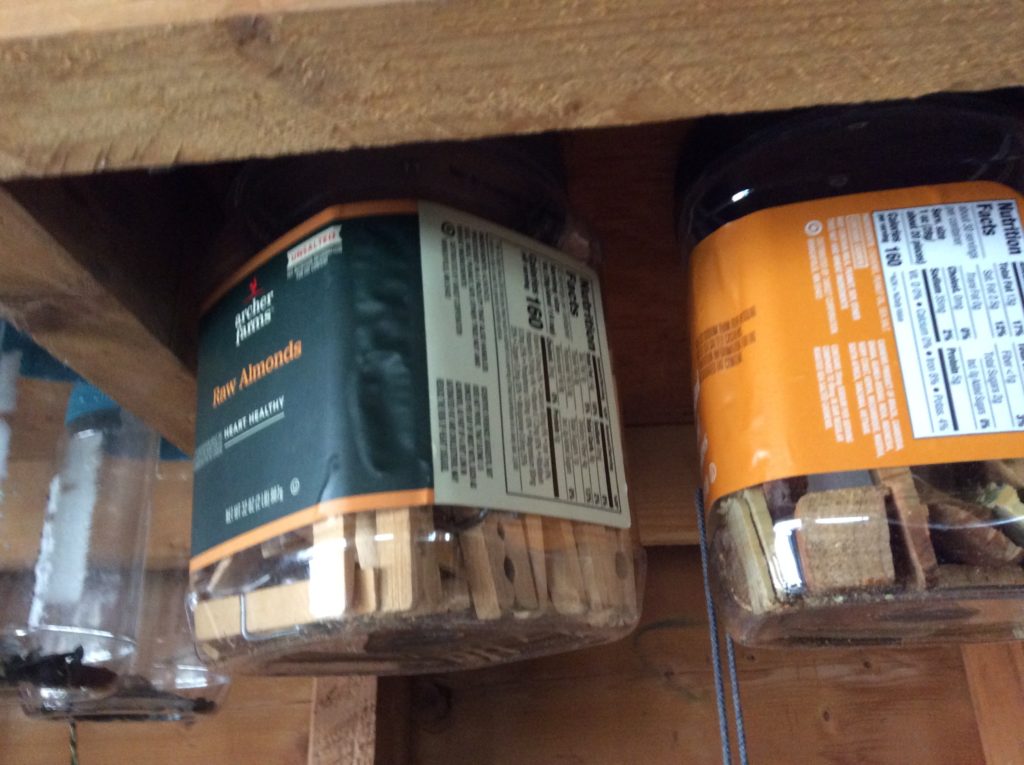
I was, once again, organizing the garage and needed some really short screws that could be used to attach container lids to the bottom of a shelf. At first, it was looking like a trip to the hardware store was in order. But then I remembered that not only did I save some random screws, I organized them in such a way that they could be useful.

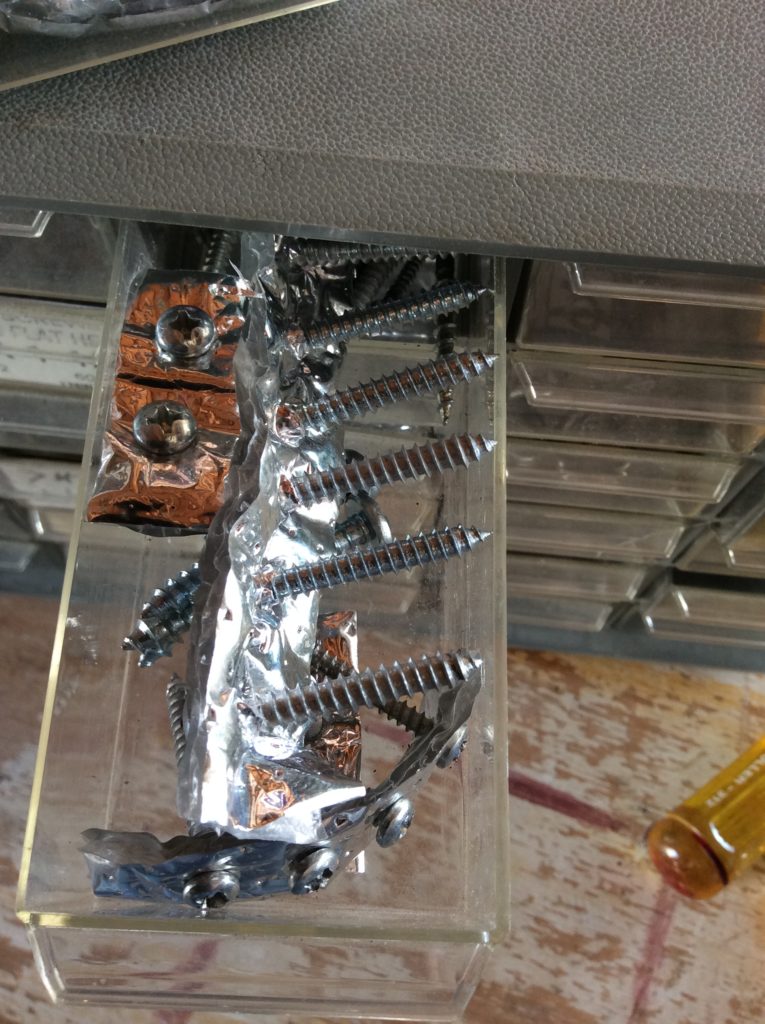
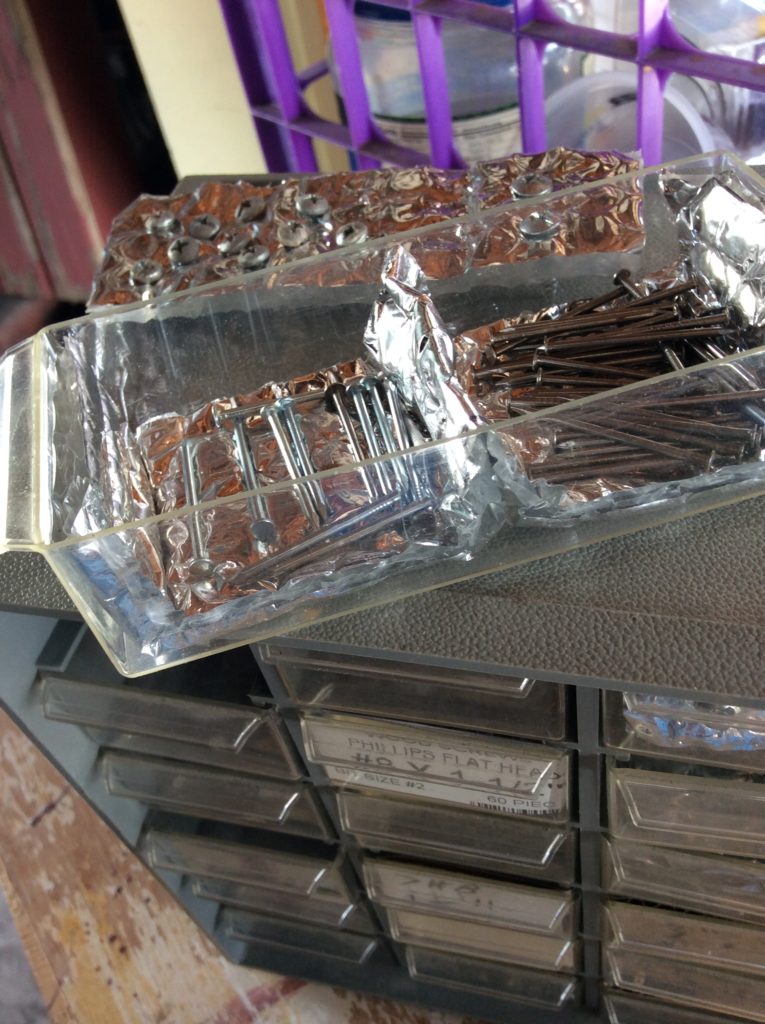
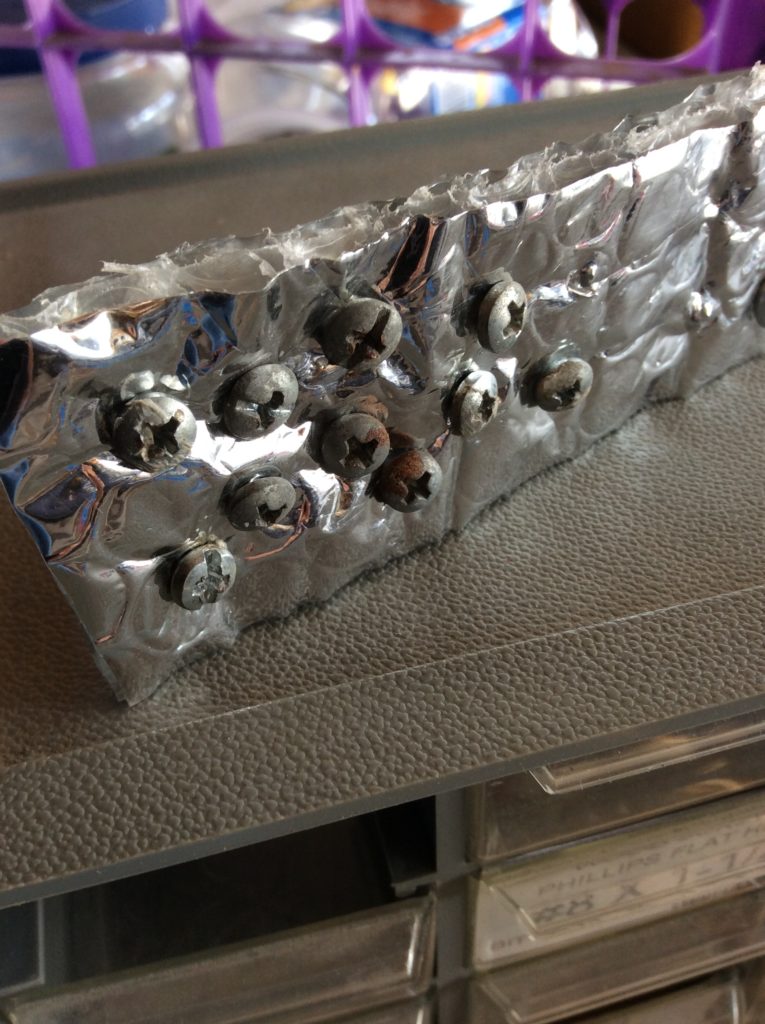
In one case, I used scraps of foil insulation to further divide the drawers in the hardware organizer that I was using. Other materials like a piece of thin cardboard would also work. Take a strip that is the width of and a bit longer than the drawer. Make a crease for however many dividers you want, being careful that the resulting divider doesn’t exceed the height of the drawer. Pinch. Staple. Insert.

Here’s a picture where you can see how two different types of nails are separated within the same drawer:

In another case, where I had a handful of onesies and twosies, I punched the screws through a scrap of foil insulation. This keeps them together nicely.

Then you can just put these little sheet of screws in a drawer:

As for why I wanted to screw container lids to the bottom of a shelf: more storage.

Ironically, as I was tidying up this year, I found three – count ’em! three! – yogurt containers full of random hardware.

Ugh!

Box Spring Seedling Stand

My friend Santwana started a zero waste Facebook page for her neighborhood. So, when I told her about the seedling rack that I made out of a box spring, she wanted pictures to share on her page. Here’s an overview:

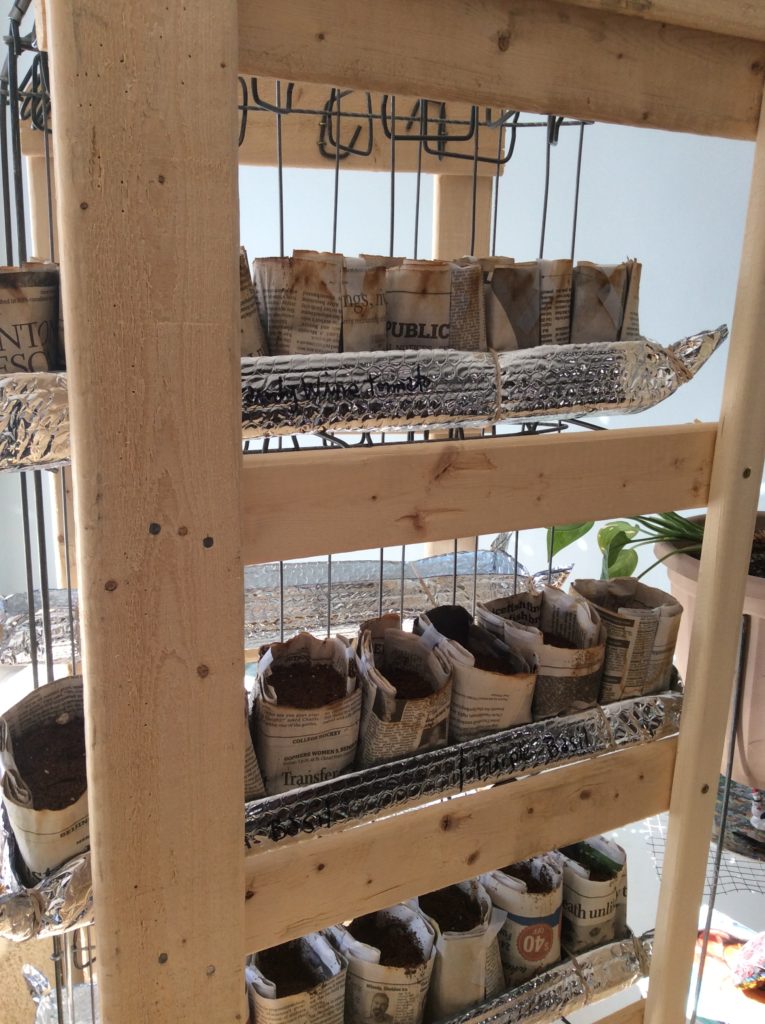
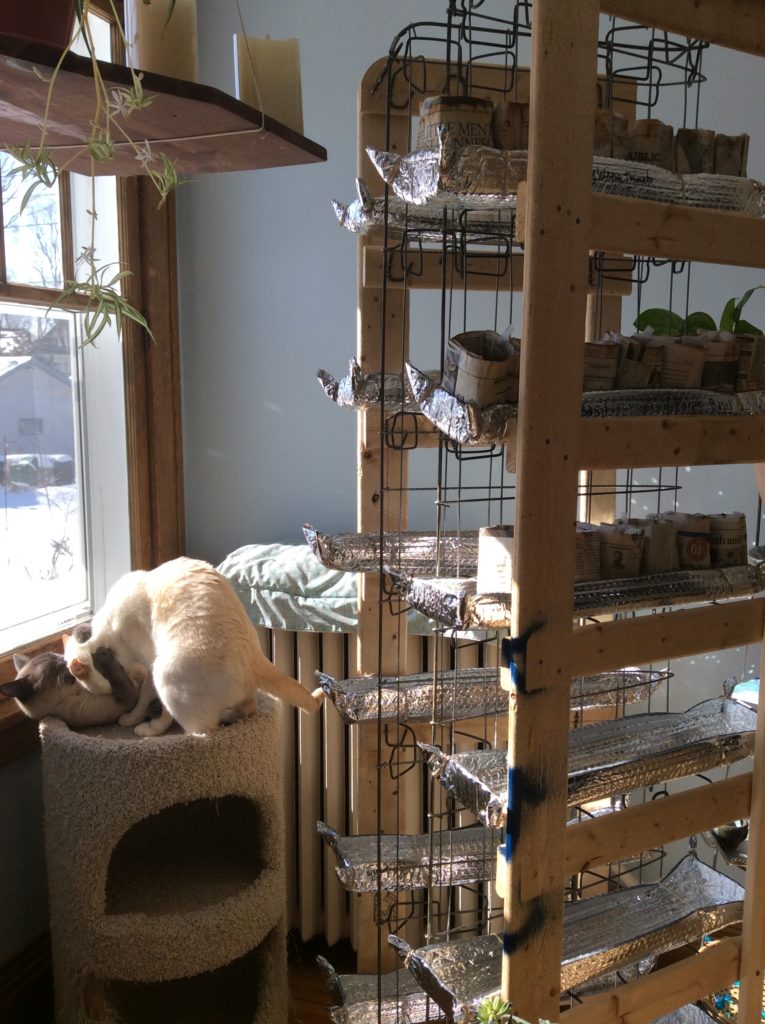
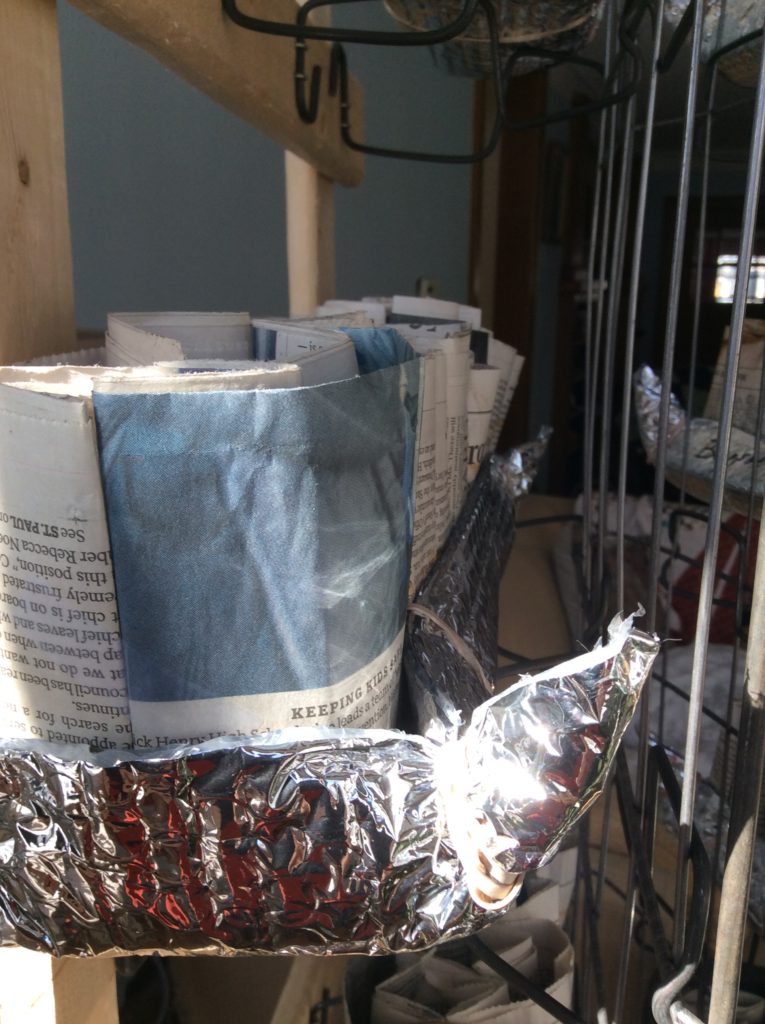
This twin box spring was cut in half and folded to stand freely on one end. It made natural shelf space for trays of seedlings.

If I recall correctly, some mattress warranties are dependent on using the box spring that comes with it. So, with every new mattress coming with a new box spring, how are the two ever separated? And yet orphaned box springs are a dime a dozen online.

Correction: They are free.

Taking a box spring that I didn’t need was the price of a free bed frame from FreeCycle. The people who were giving away/off-loading these items were trying to avoid a disposal fee. Since our regular trash service allows for three “large trash” pickups a year, I took the deal. I just needed to make a call and put our new box spring on the schedule. Then like magic someone would come and haul it away. Easy. And yet there it sat in the garage. Maybe someone could use it? But no one ever responded to my posts. Maybe it could be upcycled? But the votive candle holders everyone was making out of box spring springs just seemed like reshaped junk, much like a lot of pasta dishes that require varying degrees of effort.

In the meantime, I’ve been developing an interest in restoring old furniture. Knowing very little about it, I wondered if the springs some people were using to make Christmas wreaths could be used in the seat of a chair. Maybe I should open up the box spring to see what’s what. But wait! Finally, a bite. Someone actually needs a box spring sans mattress. Fine. I brought it in the house to inspect it more closely and vacuum it. False alarm. She won’t be needing the box spring after all. In the meantime, Michael and Bert – our cats – claimed it as a scratching post. And they liked napping in the perfect hammock of a box spring turned on its side.

With all of the chairs I’ve been collecting, my house was already taking on a workshop vibe. But the box spring pushed it into grunge.

So, I took it apart with the idea of reshaping it into a cat palace. A bigger better hammock with a footprint more to my liking. It would be something Michael and Bert could climb like a tree. Unfortunately, there weren’t any springs like the ones I saw on YouTube. So, there was nothing in that respect for my rescued chairs. However, the black fabric that covers the bottom of box springs is the perfect material to cover the bottom of a chair. And the padding from the box spring could be used for the seat of a chair. Having been covered in the factory with bomb-proof polyester, it was in great shape.

I’ll use the padding from the box spring and the black material that covered the bottom of it for my rescued chair projects. Instead of folding the black material, I should have rolled it to avoid causing creases that can’t be ironed.
This chair was free on Craigslist.
The first layer under the fabric is cotton. Underneath that is horsehair which can be reused.

After removing the upholstery from the box spring, I removed the center brace and cut the cross slats in half. This gave me a chance to use my fancy laser level. It let me strike a line down the center of the slats, so that I could easily cut each one in the same location. Then with Brian’s help, I folded the box spring in half lengthwise and stood it up on its end. I reattached the center brace to support the open end of the slats that had been cut. Then I attached an additional strip of wood to support the slats on the other side of the fold.

The next morning, I couldn’t see a cat tower anymore. I don’t know why but it became a tower for seedlings instead. Thankfully, Michael and Bert didn’t seem to mind, although I did wake up one morning to find a tray on the floor with teeth marks in it.
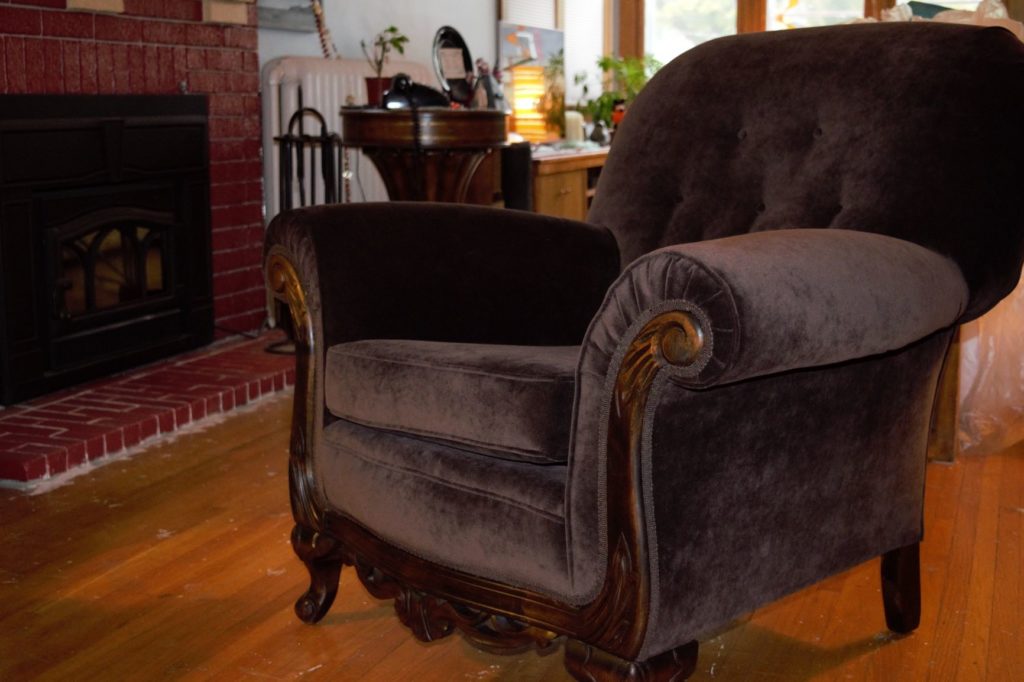
I started with making trays that fit seven pots and it worked. But I decided to go with shorter trays so that everything was contained within the frame.

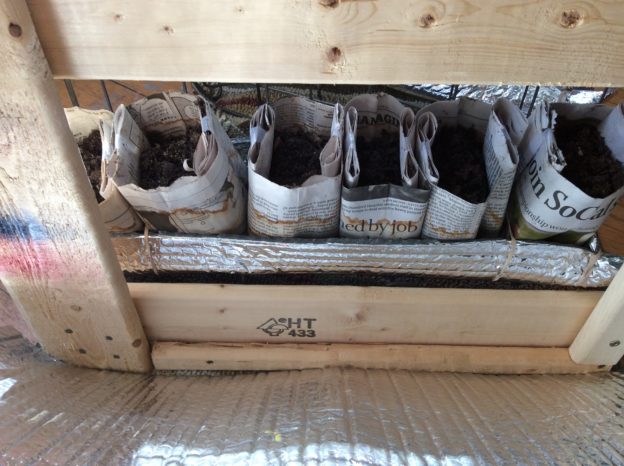
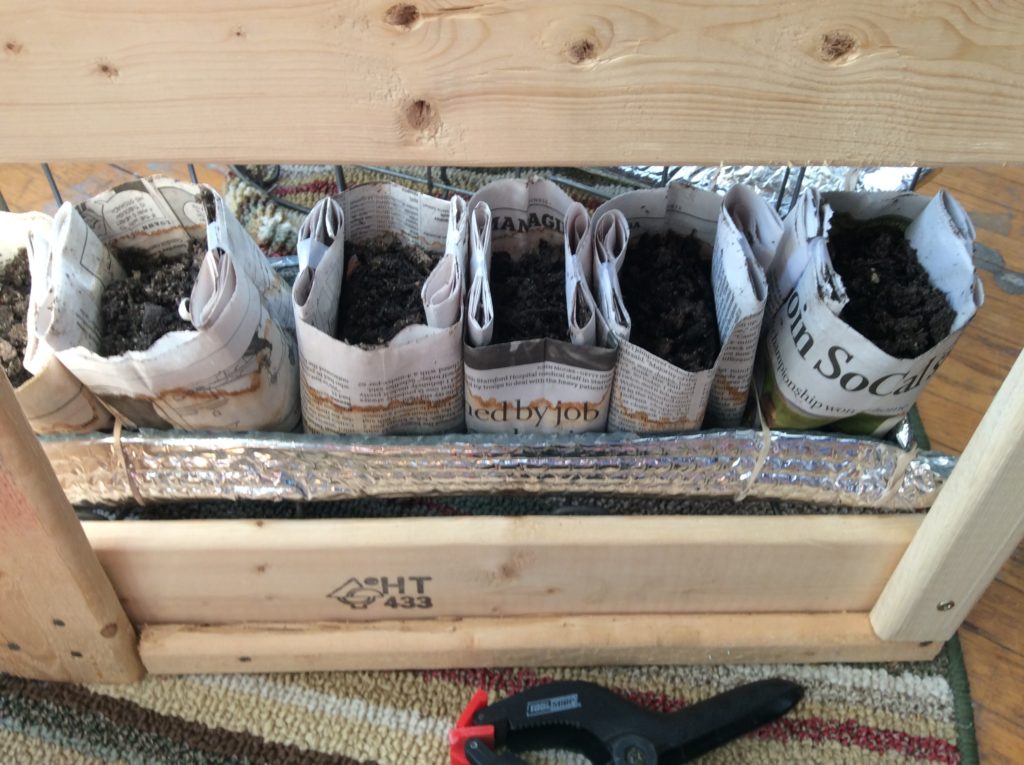
Since I needed trays of a specific size, I made them using foil insulation. To make them, I cut an 8 x 21″ piece of insulation then pinched each corner and secured it with a rubber band. To add support and to more uniformly hold up the sides, I added a rubber band around each end of the tray.

There are fourteen shelves – seven on each side of the fold – that hold trays with six pots each.

Yes, those pots are made out of newspaper and a dab of tape. I’ve used them in the past and they work great. Here’s the YouTube video where I learned how to make them. Or if you do a search for newspaper seedling pots, you’ll find other methods that do not require any tape.

While I really like the look of my seedling tower (I don’t get an old mattress vibe at all. I think it’s really cool!), I figured that it would be a pain to water. But for me, it’s fine. A little water in the bottom of the tray and a couple of squirts with a spray bottle seems to work fine. In case I wanted to make adjustments to maximize the sun exposure, I put the seedling tower on a rug so that it’s easy to slide on the wood floors.

I saw a YouTube video where someone made a display rack for a store with the same idea of using these built-in shelves. In that case, they did not fold the box spring in half. They also added wheels. I can see where that might make a nice seedling rack too.

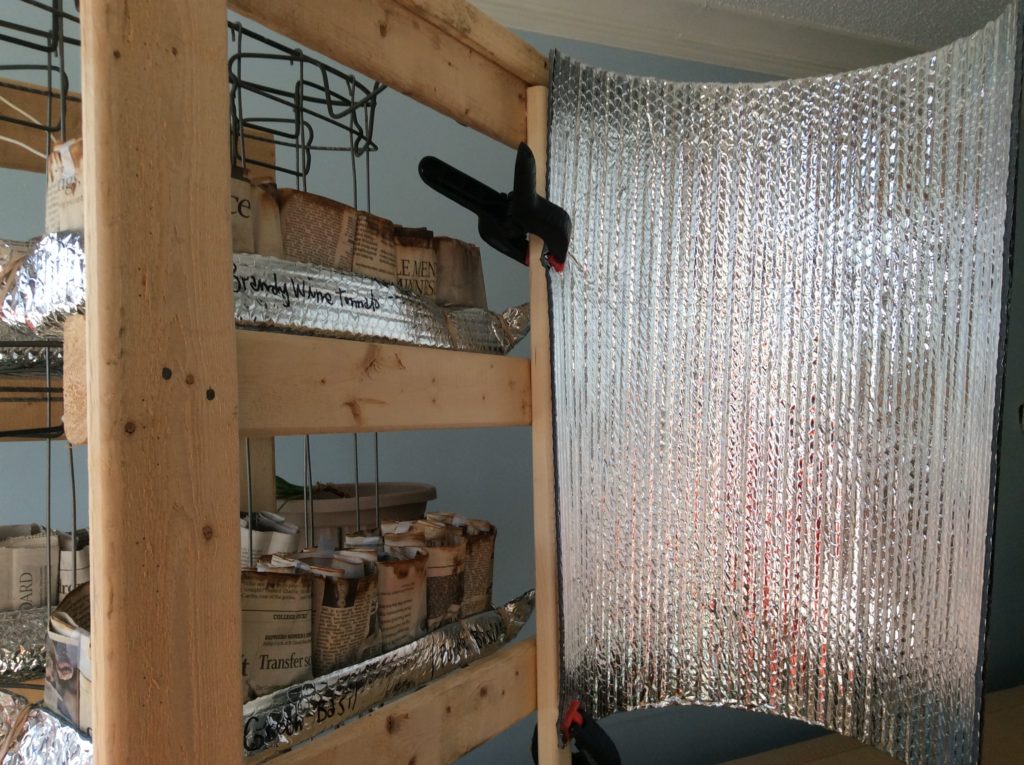
To maximize light, I’m thinking about adding more foil insulation so that it can close around the structure at night and open and reflect light back to the tower during the day. There’s probably an optimal way of doing this, but I don’t know what it is.

I’m playing around with the idea of adding foil insulation that could be closed around the structure at night and opened to reflect light back onto the structure during the day.

Somewhere I have lights I could potentially add.

We’ll see how this works. In the past, I’ve just had luck putting seedlings in a tray by the window and keeping them moist. As I learn more about it, I can see there are some best practices that might yield even better results. In the meantime, I’m also trying winter sowing. My friend Santwana mentioned that she was doing this, which is what prompted me to do seedlings this year. It’s funny how life is a circle that way.

If you wanted to try this, I’m sure you could make someone’s day by taking an old box spring off of their hands.

Let me know if you have ideas for improvements.

Upcycled Oven Mitt

Today our friend Faith stopped by for our regular Saturday coffee hour. When she mentioned that she needed some mousetraps, I was happy to save her a trip to the store. Her visit was timely, as I’ve been in a decluttering mode. While extreme examples of hoarding make me feel sick to my stomach, even more repulsive is how easily we throw things away, wherever that is. A-W-A-Y. It sounds more like paradise than a landfill or an incinerator. Or it could be a prison: He’s going away for a long time.

The language around acquiring and discarding stuff is interesting. I feel sorry for the artificial Christmas tree that’s posted on Craig’s List or FreeCycle with a note that says: “We need to get rid of it by Sunday.” After twenty years of service, this is how it ends. They just “get rid” of you, as if treating a case of lice. It feels disrespectful. On the other end of the spectrum there’s “rehome.” That’s a little precious. “I would be glad to rehome the working treadmill that you’re not using.” Of course, up top, I’ve already said “upcycle” and “declutter”, two words that spellcheck doesn’t like, though it’s notable that “spellcheck” is just fine. If you can’t beat ’em, join ’em.

Staring into my kitchen drawer, I wonder how many oven mitts a person can use at once. It’s a maximum of two, right? One of the mitts has a hole in it, something I discovered months ago when I burned myself on a baking sheet. And yet, there it is. Un-re-homable. I’ll have to throw it away or let these things pile up until pictures of them are posted on the Estate Sale app next to my teddy bear.

This is where YouTube comes in. Somewhere along the line, YouTube decided that I might be interested in learning how to reupholster furniture. One thing leads to another, and now I’m learning how to make box cushions. That’s why I saw a drink cozy as I looked at this useless mitt. While my sewing skills are limited, I could picture it. So, I tried to make one.
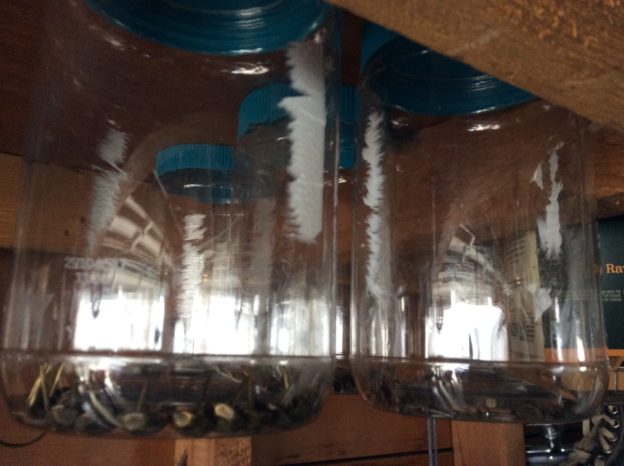
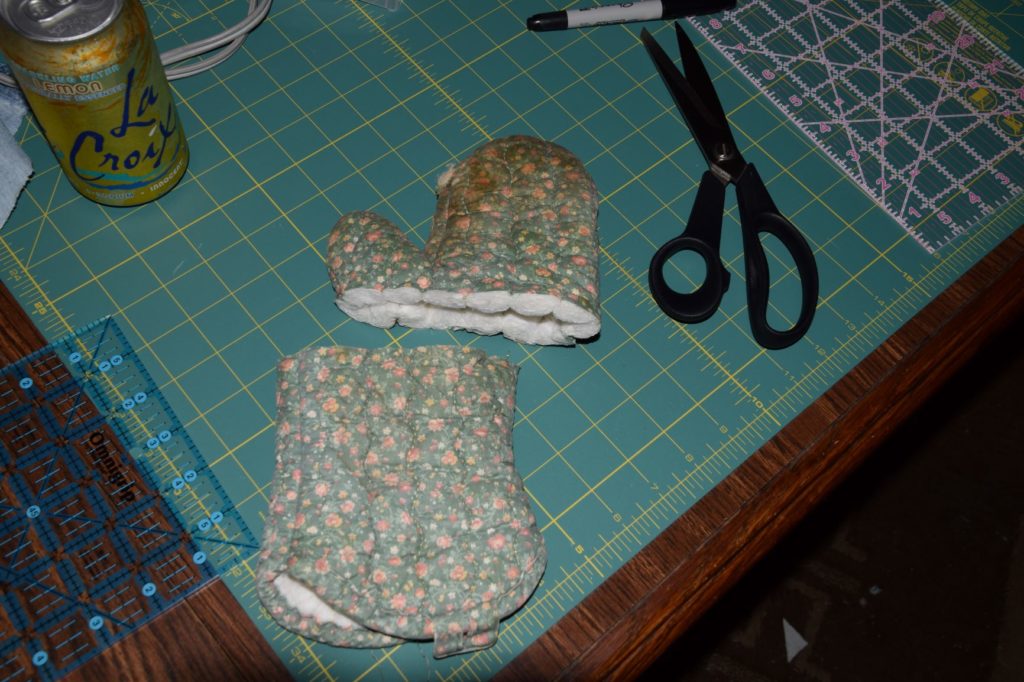
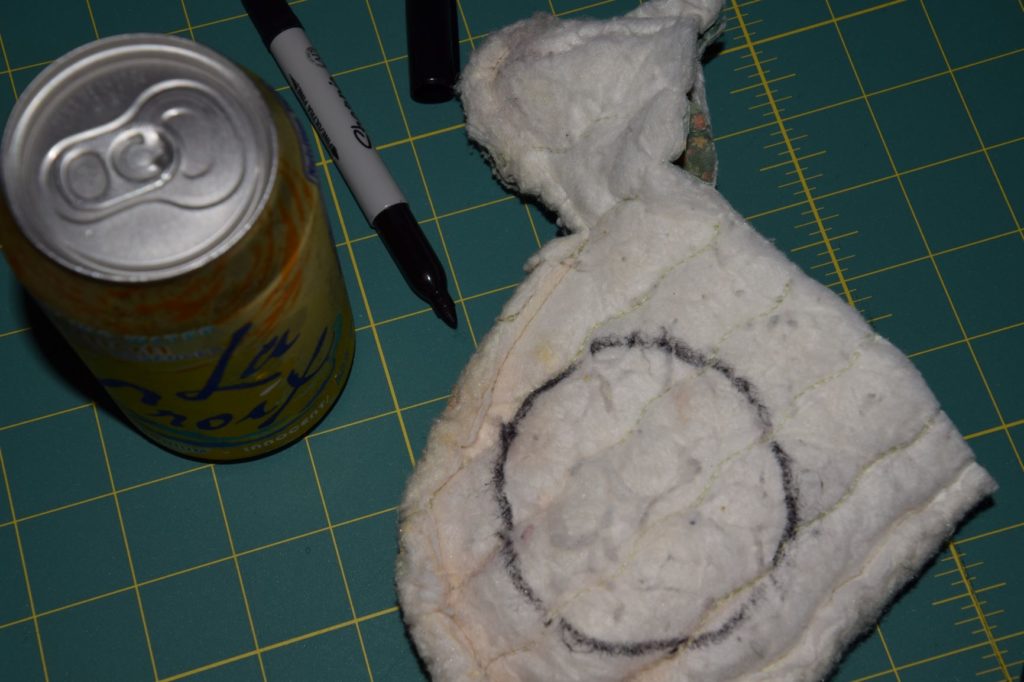
Being careful not to tap the soda can with the sharp scissors, cut the stained worn out top from the bottom that doesn’t wear out as fast. Take out one seam on the sides of each of the two pieces and open them up in a single flat layer.
Trace a soda can on the top part of the open mitten. Then trace a bigger circle around that. If I did this again, I would use the measurement from the cup I used for the outer circle and use a compass to make a pattern.
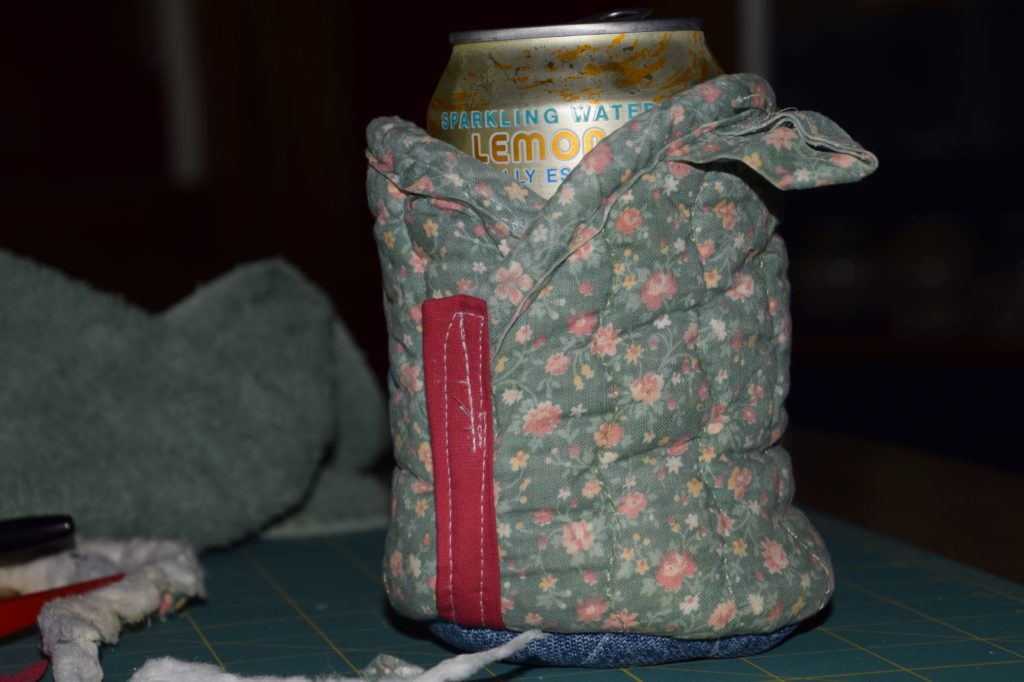
Wrap the bottom part of the mitt – finished side up – around the can. Move it so the top of the can extends past it enough to drink from it. Use a pin to mark the fabric where the bottom of the can is. Trim off the bottom from the pin plus a 1/2 inch or so for the seam allowance. Secure the binding on the top, if needed. Add more binding to each side. I used part of an old sheet (the red strip). Cut out the circle for the bottom. Mine didn’t look so great, so I topped it with denim from some old jeans. I covered the inside of the bottom with the red sheet, but didn’t do anything with the sides on the inside.

Once the two pieces were ready, I sewed the side piece to bottom, using what I learned from the YouTube videos about making box cushions. A better sewer could whip out a much nicer version of this in no time. Other than starting with a perfect circle, if I did this again, I would consider adding a button hole to the top edge of the overlapping side. I don’t think I can do that now that everything is assembled.

The good news is that there’s less to throw away. The not so good news is that we’ve never used cozy’s. We have friends who use them and that’s what gave me the idea. In fact, I have a foam cozy that was a freebie at an event and it was my intention to give this thing to my cozy-loving friends. Now, instead having one cozy that we never use, we have two of them!

At least I didn’t make a wind chime out of old CDs.

In the spirit of giving old things a new life, I gave my new cozy an honest try. I could appreciate the appeal of it. When Brian saw it he laughed and immediately recognized his old oven mitt. He had to admit that it was convenient to put down his drink without being tethered to a coaster.
After I’m dead, people are going to come to my estate sale and they’re going to find this cozy on a table full of kitchenware and possibly, unless a relative feels some attachment to it, a bear.

Restoring Old Homes

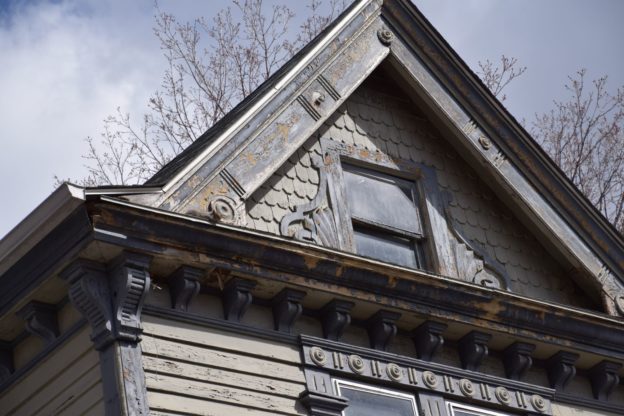
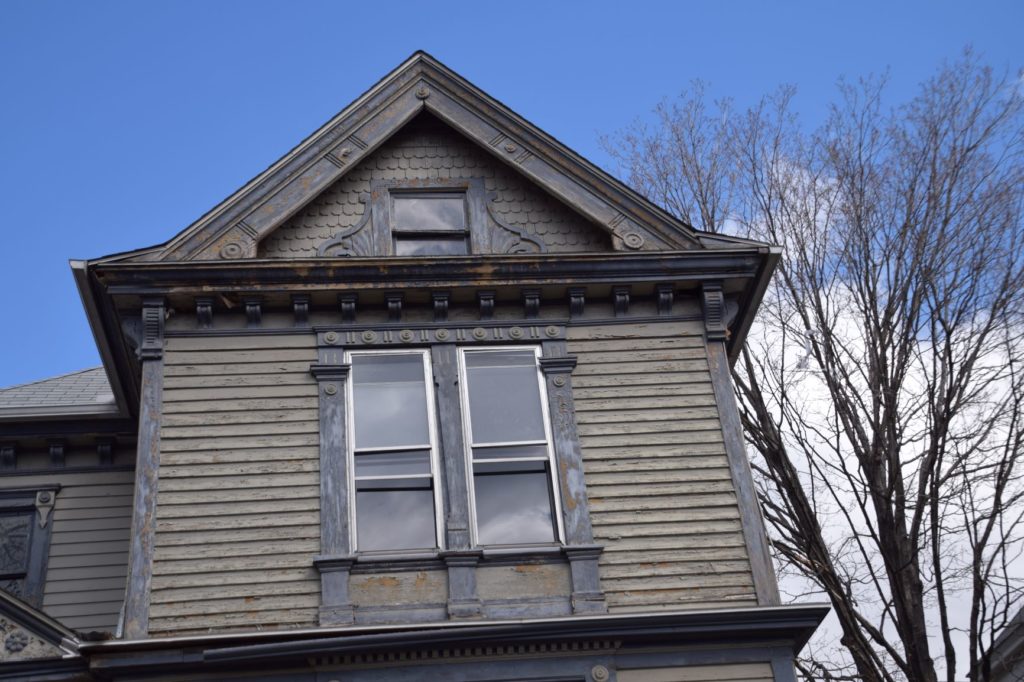
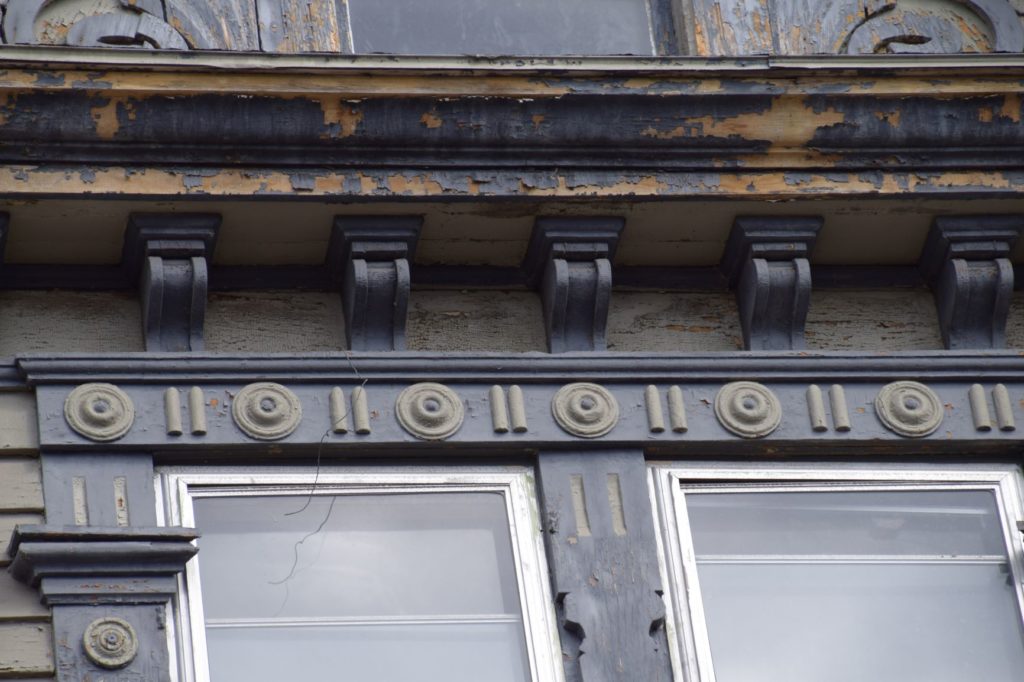
With all of the old homes that are being torn down in our neighborhood in favor of density, it was distressing to come upon a gem that had some “architectural interest,” though it had fallen into disrepair. Next to an open lot – maybe two – that had already been cleared of the homes that used to be there, I was certain that Brian and I were looking at the future site of yet another apartment building that would be made with particle board. My heart sunk. I didn’t think that the house had much of a chance of escaping the wrecking ball.

I was wrong.

Southwest corner of the house.

Recently, Brian noticed a crew working on the home. We confirmed that the place is being restored and I am relieved. For starters, the house is sitting on a brand new foundation after having been moved from the adjacent empty lot. On Sunday, two guys were busy framing a new garage.

Front.
Front zoom.
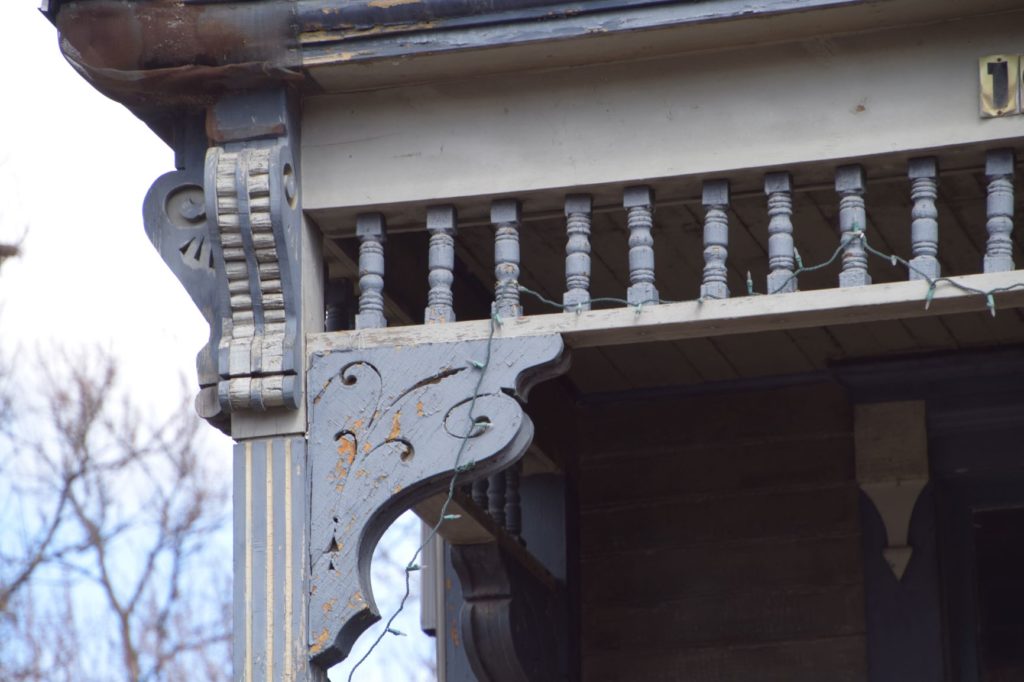
Porch. The Christmas lights on the front porch hint at an interesting story. Who put them there? The previous owners? Was it a last hurrah of some sort? The new owners – the people who are fixing it up? I am picturing a celebration after they had just bought the place.

Density in the city core is supposed to be the environmentally responsible thing to do. However, if that’s the case, then why not require the buildings that replace old homes to meet LEED (Leadership in Energy and Environmental Design) standards? They should be state-of-the-art, zero-waste and carbon-free (almost free?) structures. Green roofs. Grey water. Passive solar. The works. They could be made to last for centuries. And they could be made for Minnesota. What do I mean by that?

Several years ago, I was in Virginia for a wedding. The area had been going through a crazy heat wave that ultimately took the power out for many of its residents, including the family of the bride. The hotel where several of us were staying was not effected and so there was some shifting to accommodate various guests, some of whom were getting baked out of the spare bedrooms where they were staying with the locals. Even the bride took over one of the rooms at the hotel so that she could get ready for the big day.

It was scary. And it made me wonder. When did we stop designing buildings based on the conditions of the natural environment versus the assumption that air conditioning (or heat) would always be a simple flip of the switch? Do we have to go back to adobe homes? Our own house that is just over a hundred years old was also built with the belief that we would never need to worry about the supply of cheap power or the consequences of using too much of it. So we have added insulation and taken some other steps to conserve energy. But now that we know what we know, when we build new housing, shouldn’t we build for the environment from the start?

When I took these snapshots, I didn’t anticipate that I was going to make a video with them. But I wanted to try it and used what I had.

And that is just considering the energy standards. There are also human standards. For example, we were talking to a couple at a friend’s party (pre COVID-19) who were telling us about their woes looking for a town home in a retirement community. The good ones have – ahem – community spaces. And this couple was holding out for one such place. According to them, the newer developments treated things like lounges and meeting rooms as wasted space, which is to say that they were not included. While the two embraced downsizing, retreating to their pod where they would feel isolated wasn’t what they had in mind when they decided to retire.

There is also green space to consider, which is another aspect of the human standard. New buildings should have green rooftops. Courtyards. Enough grass for a picnic. Balconies. Playgrounds. We cannot concern ourselves with this, right? However, we do concern ourselves with how many parking spaces there will be, which is funny since density is packaged with this idea that the new arrivals will use the public transit and therefore should eliminate any concerns about the impact on traffic. In the meantime, in one of the apartments going up near us, eliminating balconies from the plan is supposed to assuage the fears of the neighbors who see the development for what it is. College housing. Elsewhere, another development received a variance that essentially traded green space for parking.

It feels like people are pitted against each other in weird ways and bad decisions come out of that. I wonder if it’s because economic problems are easier to solve than human ones (I think I am channeling Brian here because this is a theme for him.). If I only have to think about the cost per square foot, it is easy to find a solution. But if I have to ask myself whether I want my grandmother to live in a place where there will be almost no chance that she will get to know her neighbors or whether a little kid wouldn’t be better off growing up in a place where there are trees and grass – those are bigger, messier questions that will depend more on stuff that cannot be expressed algebraically. These are values that exist outside of ledgers.

A while ago, I recall reading about a family that was selling their house on Marshall Avenue to a developer. The neighbors were upset for all of the reasons you would expect. But the sellers insisted that they had no choice. They needed the money to retire (it might have been a case of a parent who needed to move to assisted living, but the point here is the same). I just hope that they were able to find a place where the developer did not skimp on the community space because that is what the market dictated. Now, why people are in the position of making economic choices that they would rather not make is another issue. But I mention it here because long term care security and a broken health care system are a part of this story that should be explored further.

Finally, I have a question about how the neighbors are economically impacted by these developments. For example, down the street from where I live, a property sold for over a million dollars to a developer. The one on the corner across from it sold for 700,000 dollars. But what if suddenly having an apartment building next to your house makes your property value go down? Or what if, you can no longer see the sky when you look out of your office window and this really depresses you? What if it shades your tomato plant? Should you be compensated for this? Conversely, do these over-market-value sales have an impact on my property taxes, since home valuations are based on recent sales of comparable homes in the area? Or should I expect my property taxes to go down since there will be more people to share costs?

This is not a rant against density. However, it is an observation that it is not the only thing and it can be taken to an extreme. The airlines serve as a cautionary tale. Over the years, we have watched legroom on flights disappear. And now just as we thought that it would have been impossible to jam another row of seats into economy class, the industry has been considering yet another tier of traveling where passengers would essentially stand for the duration of the trip. Yep. Too far.

Harvesting Butternut Squash in the Middle of the Night

We have a lot of squash to share.

We have a lot of squash to share.

Last Wednesday night I was in my voice class at the Guthrie Theater when the teacher mentioned that she had been working hard in her garden that day to get ahead of the hard frost expected that night. I couldn’t think about anything else after that. During a break I sent a frantic text to Brian, “Frost! Plants!”

Dreading a late night scramble to salvage what we could, I perked up when I remembered a stocking stuffer Santa had given me last year or the year before – a headlamp. Intended to help me with the ongoing painting projects around the house, the lamp would free up a hand otherwise needed for a flashlight. It would make it a lot easier to pick tomatoes and to find the butternut squash that had taken over the yard this summer.

Note to self: Headlamp definitely makes it on the list of essential household tools.

I’ve already used one of them for a very nice squash soup. Let me know if you would like to have some squash. We’re happy to share.

Actually… I’m sort of famous for growing gourds

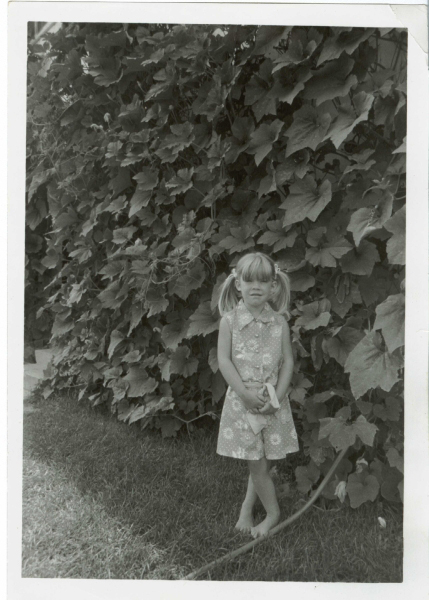
I got my picture in the paper at Wurtsmith Air Force Base for growing these gourds.

I got my picture in the paper at Wurtsmith Air Force Base for growing these gourds.

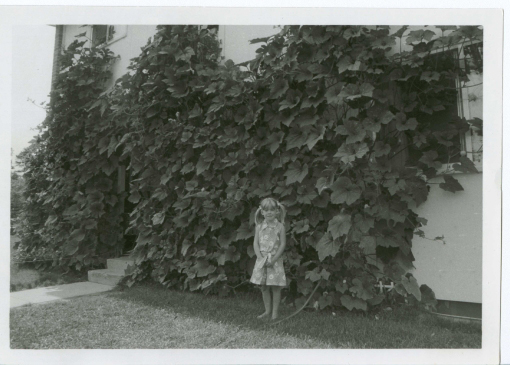
Truthfully, I’m not sure why out of six kids I was the one who got credit for the gourds. I don’t remember planting them. This is something my parents must have noted. I was quoted as saying something about watering them every day. I do remember objecting to the outfit I am wearing in the picture. It was actually a very cute orange jump suit.

Someone from the paper noticed the gourds covered the front of the house and thought it would make a nice picture.

Someone from the paper noticed the gourds covered the front of the house and thought it would make a nice picture.