My friend Santwana started a zero waste Facebook page for her neighborhood. So, when I told her about the seedling rack that I made out of a box spring, she wanted pictures to share on her page. Here’s an overview:
If I recall correctly, some mattress warranties are dependent on using the box spring that comes with it. So, with every new mattress coming with a new box spring, how are the two ever separated? And yet orphaned box springs are a dime a dozen online.
Correction: They are free.
Taking a box spring that I didn’t need was the price of a free bed frame from FreeCycle. The people who were giving away/off-loading these items were trying to avoid a disposal fee. Since our regular trash service allows for three “large trash” pickups a year, I took the deal. I just needed to make a call and put our new box spring on the schedule. Then like magic someone would come and haul it away. Easy. And yet there it sat in the garage. Maybe someone could use it? But no one ever responded to my posts. Maybe it could be upcycled? But the votive candle holders everyone was making out of box spring springs just seemed like reshaped junk, much like a lot of pasta dishes that require varying degrees of effort.
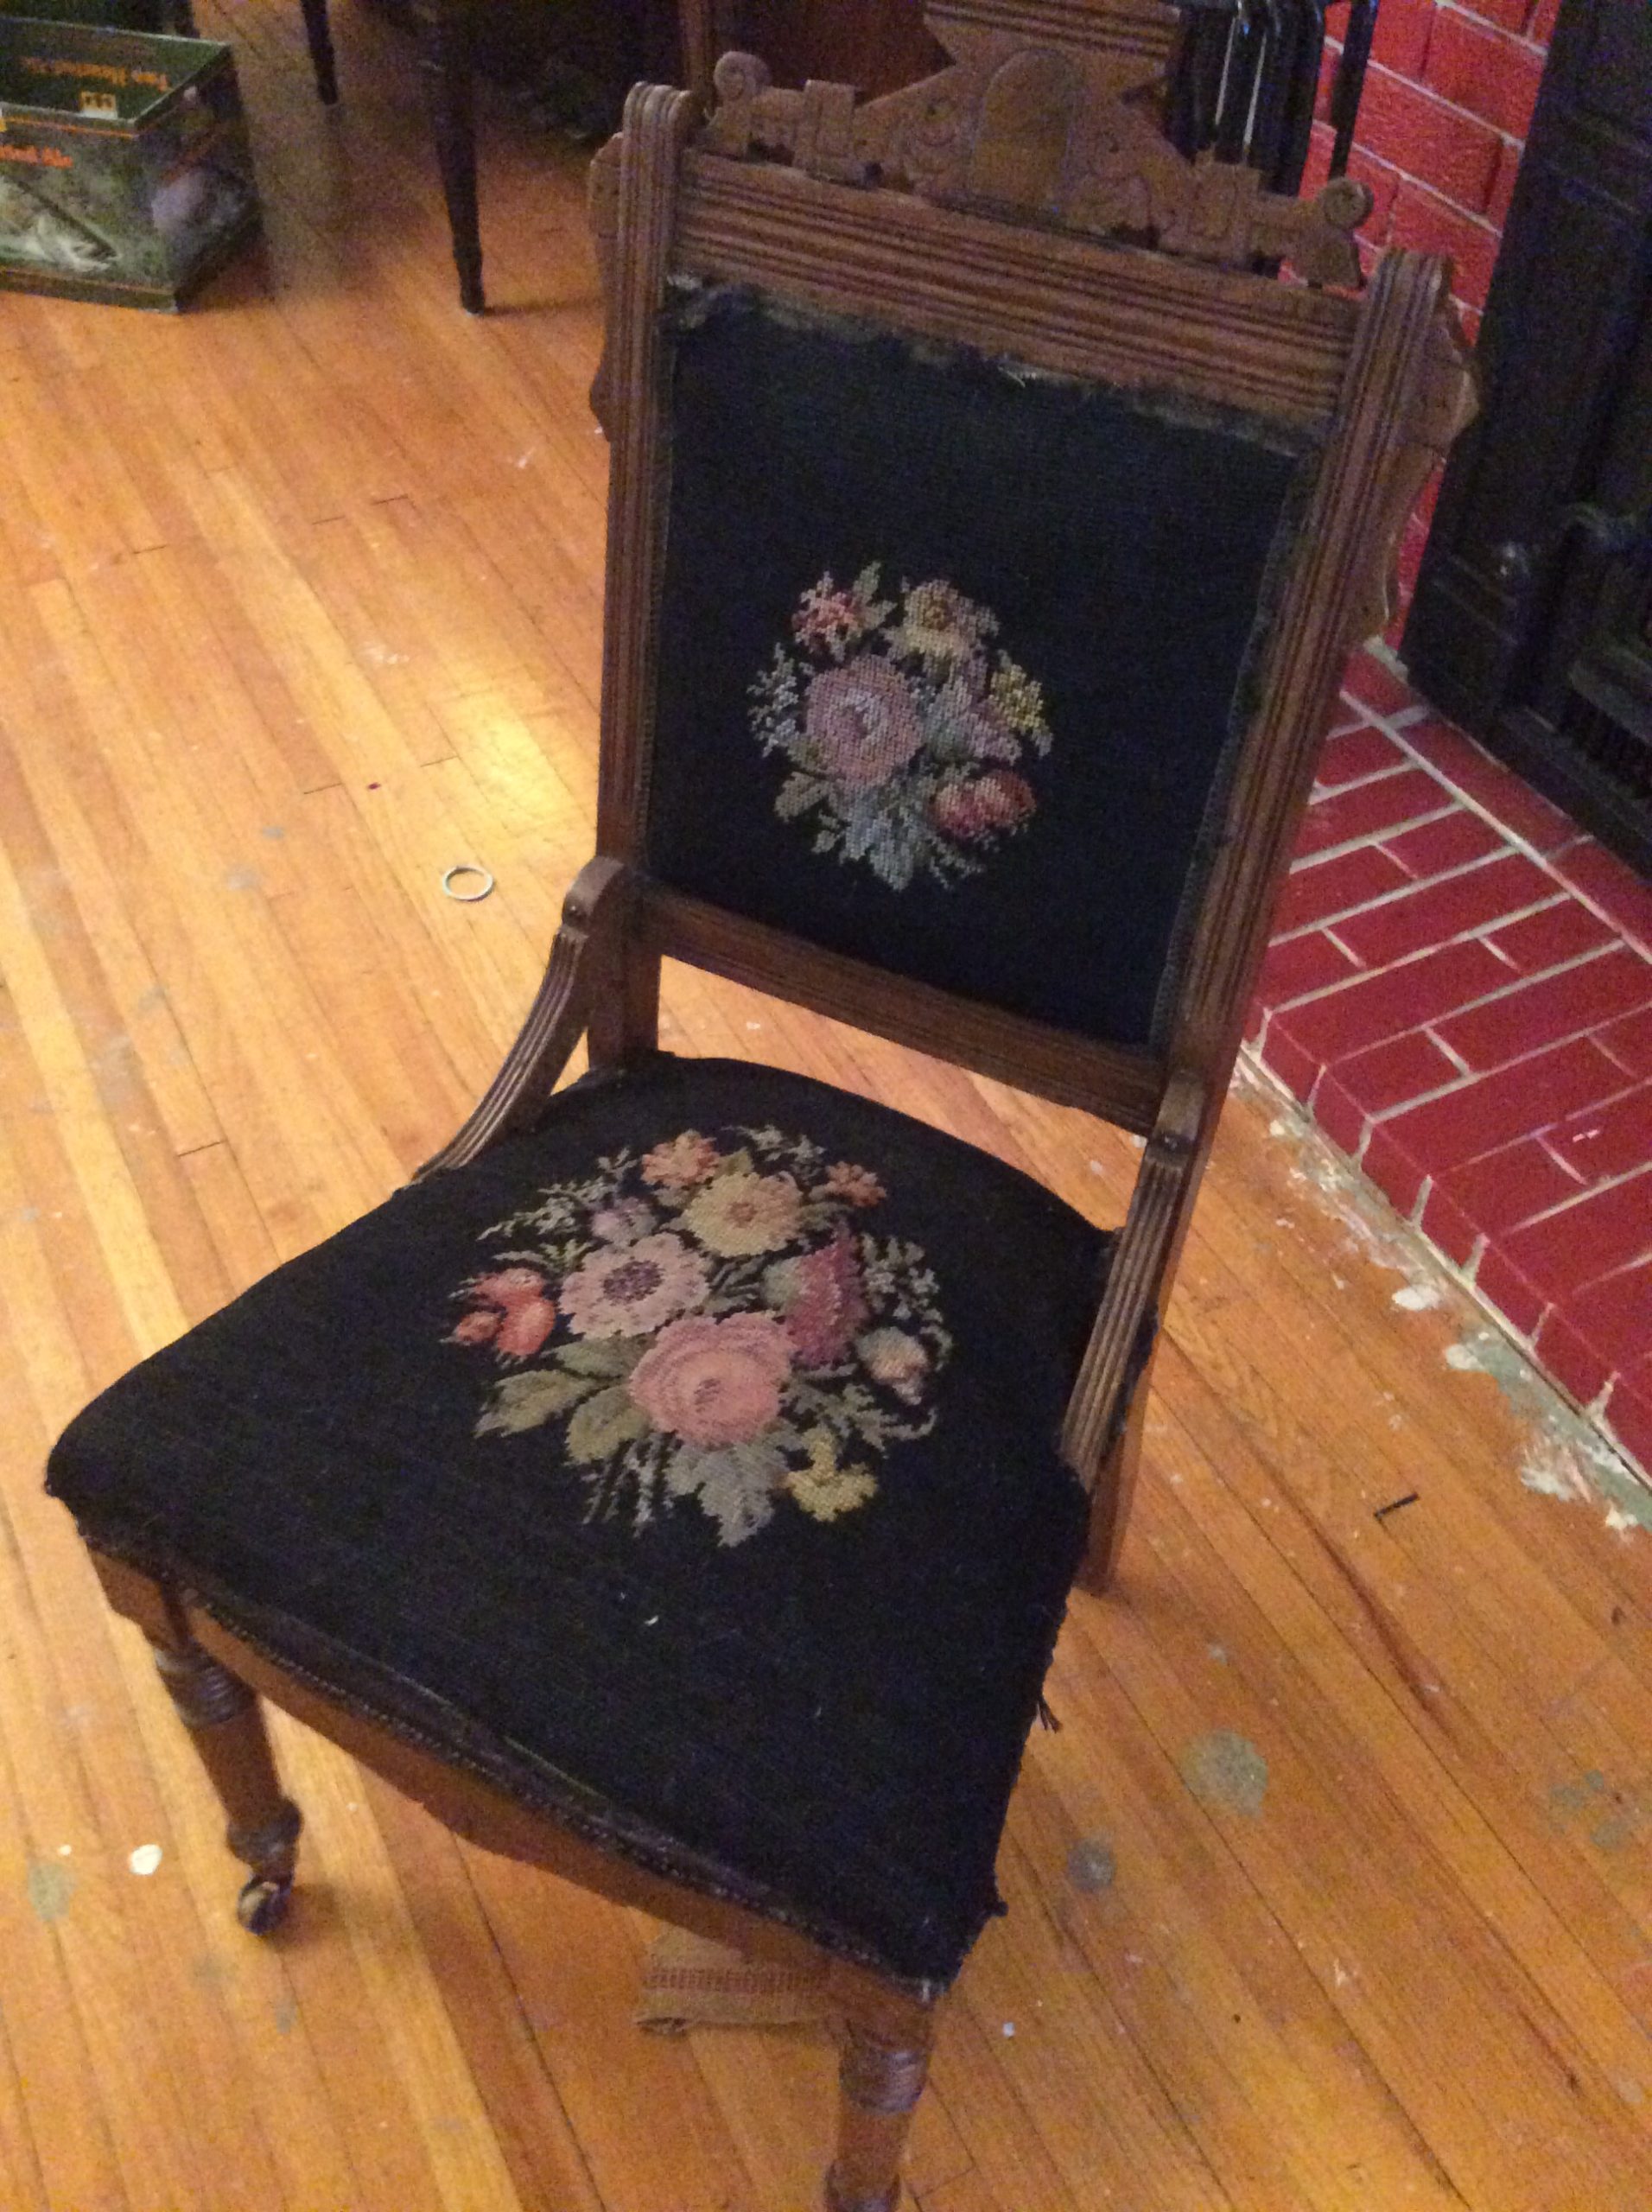
In the meantime, I’ve been developing an interest in restoring old furniture. Knowing very little about it, I wondered if the springs some people were using to make Christmas wreaths could be used in the seat of a chair. Maybe I should open up the box spring to see what’s what. But wait! Finally, a bite. Someone actually needs a box spring sans mattress. Fine. I brought it in the house to inspect it more closely and vacuum it. False alarm. She won’t be needing the box spring after all. In the meantime, Michael and Bert – our cats – claimed it as a scratching post. And they liked napping in the perfect hammock of a box spring turned on its side.
With all of the chairs I’ve been collecting, my house was already taking on a workshop vibe. But the box spring pushed it into grunge.
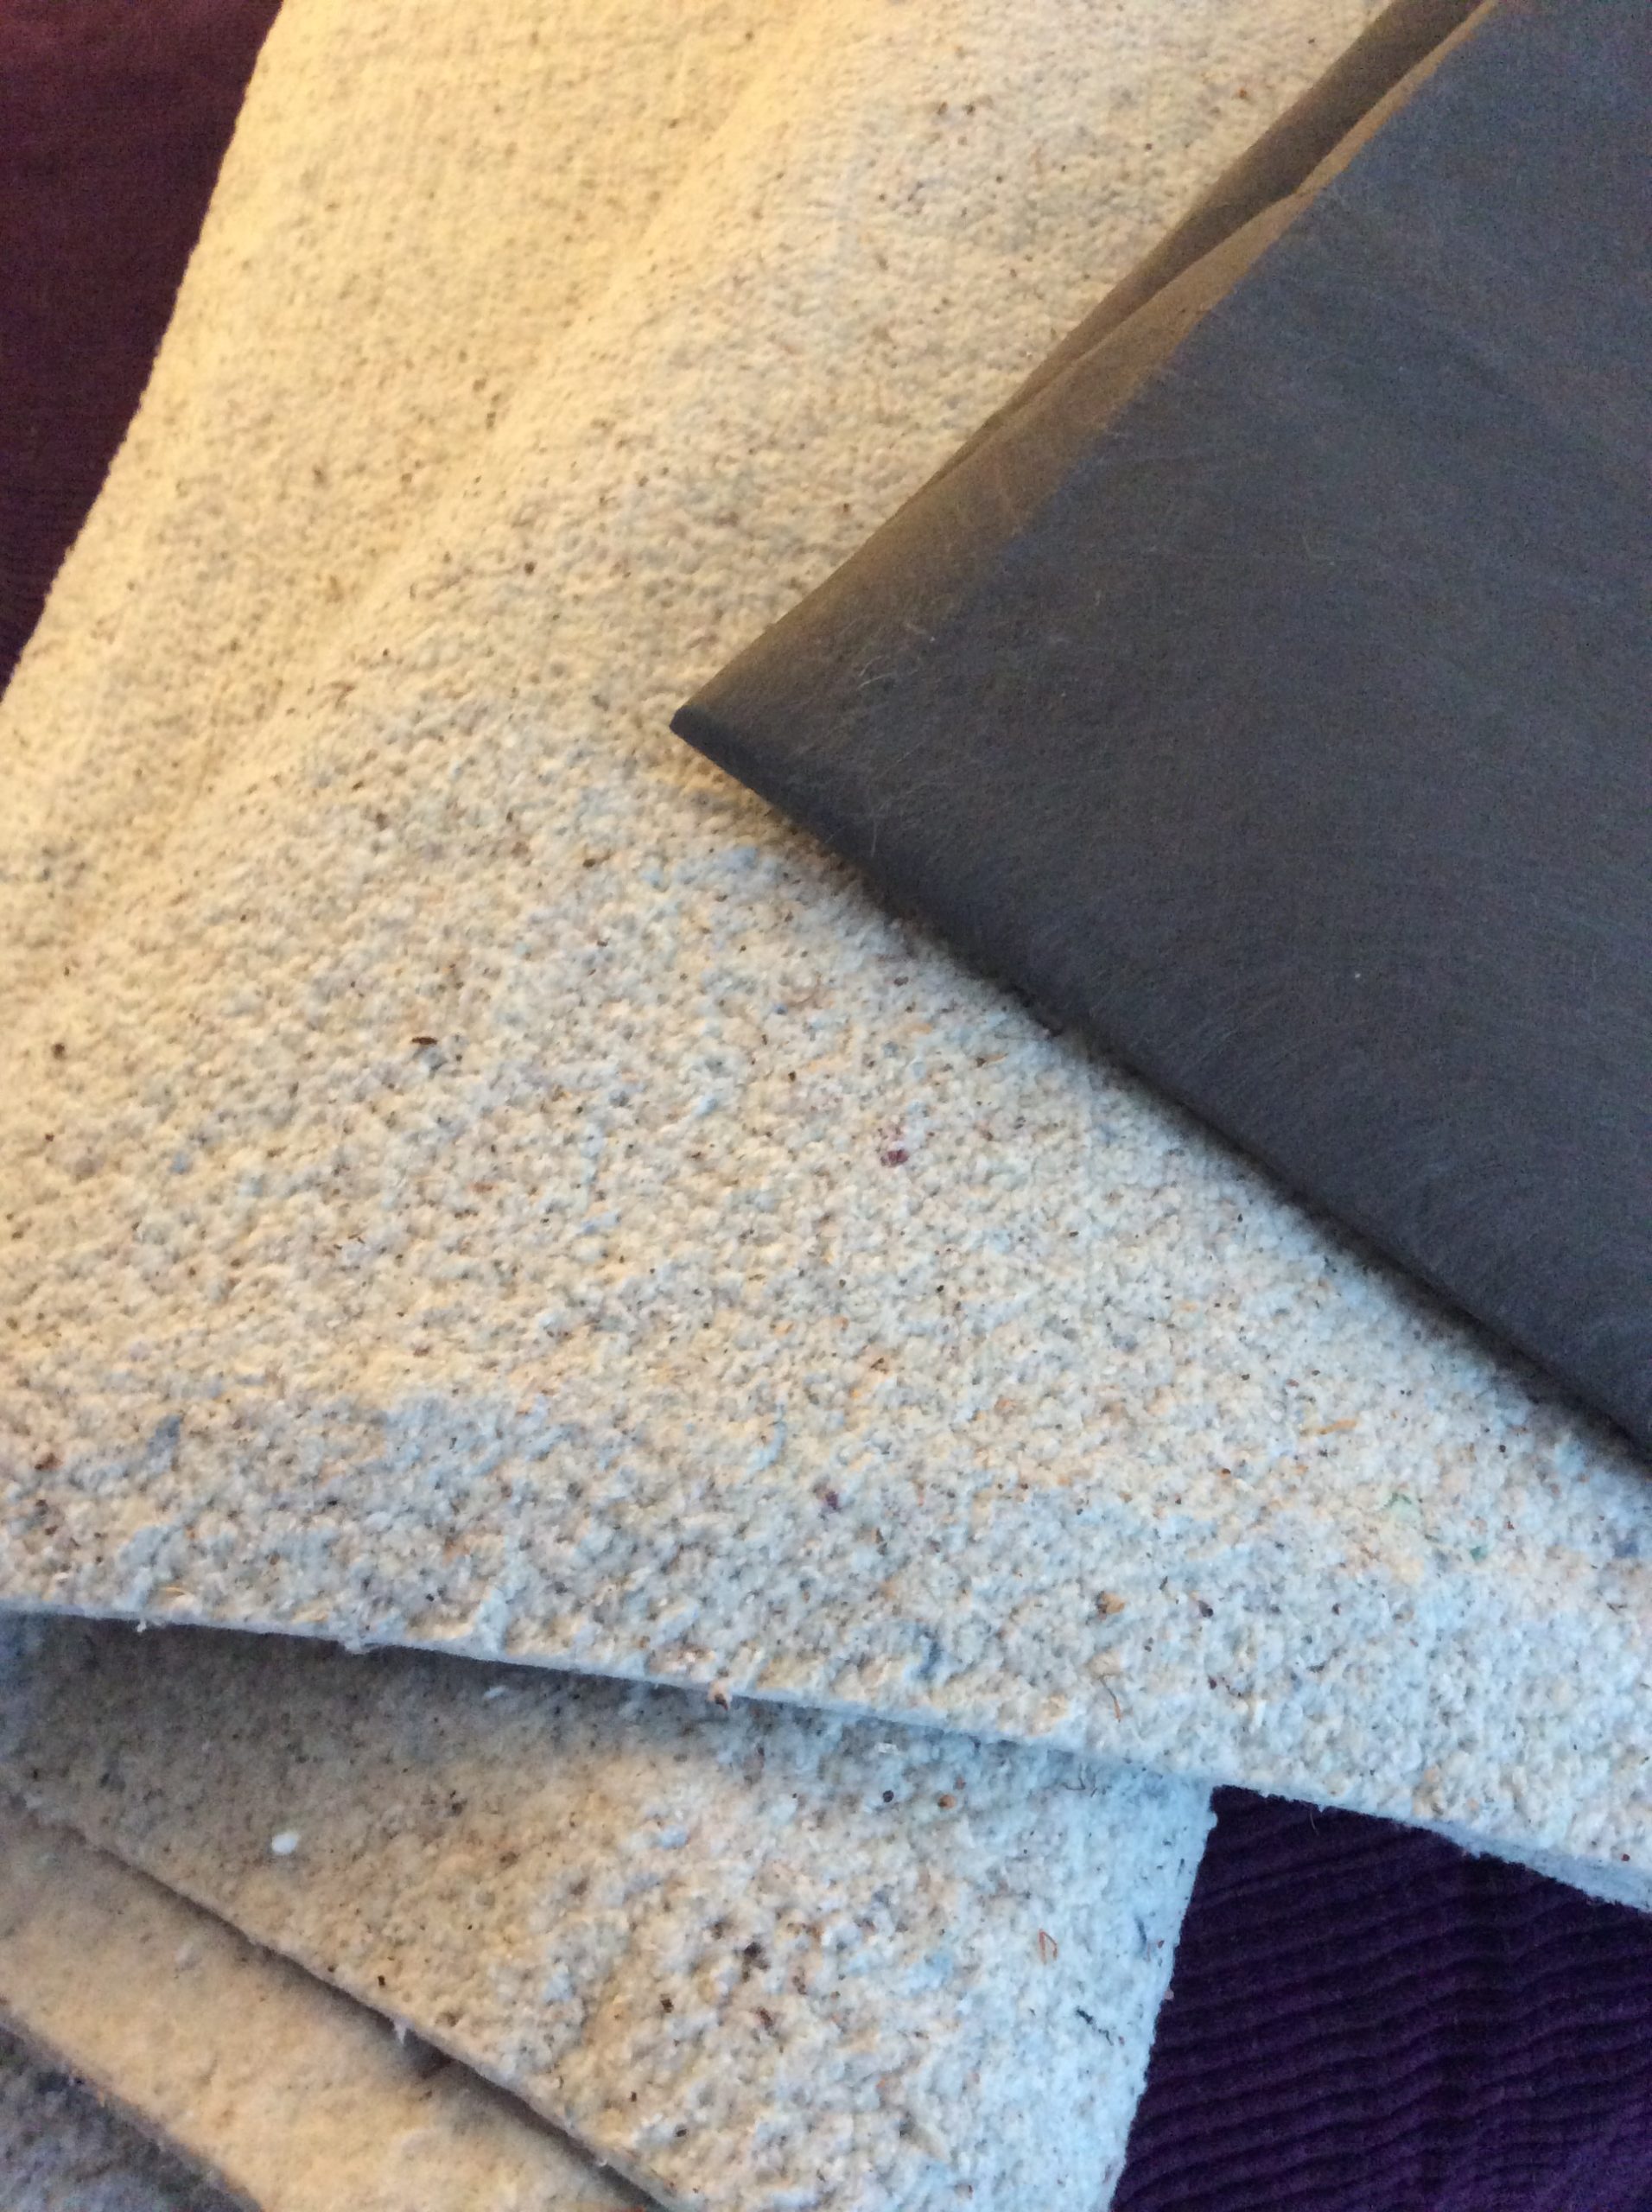
So, I took it apart with the idea of reshaping it into a cat palace. A bigger better hammock with a footprint more to my liking. It would be something Michael and Bert could climb like a tree. Unfortunately, there weren’t any springs like the ones I saw on YouTube. So, there was nothing in that respect for my rescued chairs. However, the black fabric that covers the bottom of box springs is the perfect material to cover the bottom of a chair. And the padding from the box spring could be used for the seat of a chair. Having been covered in the factory with bomb-proof polyester, it was in great shape.
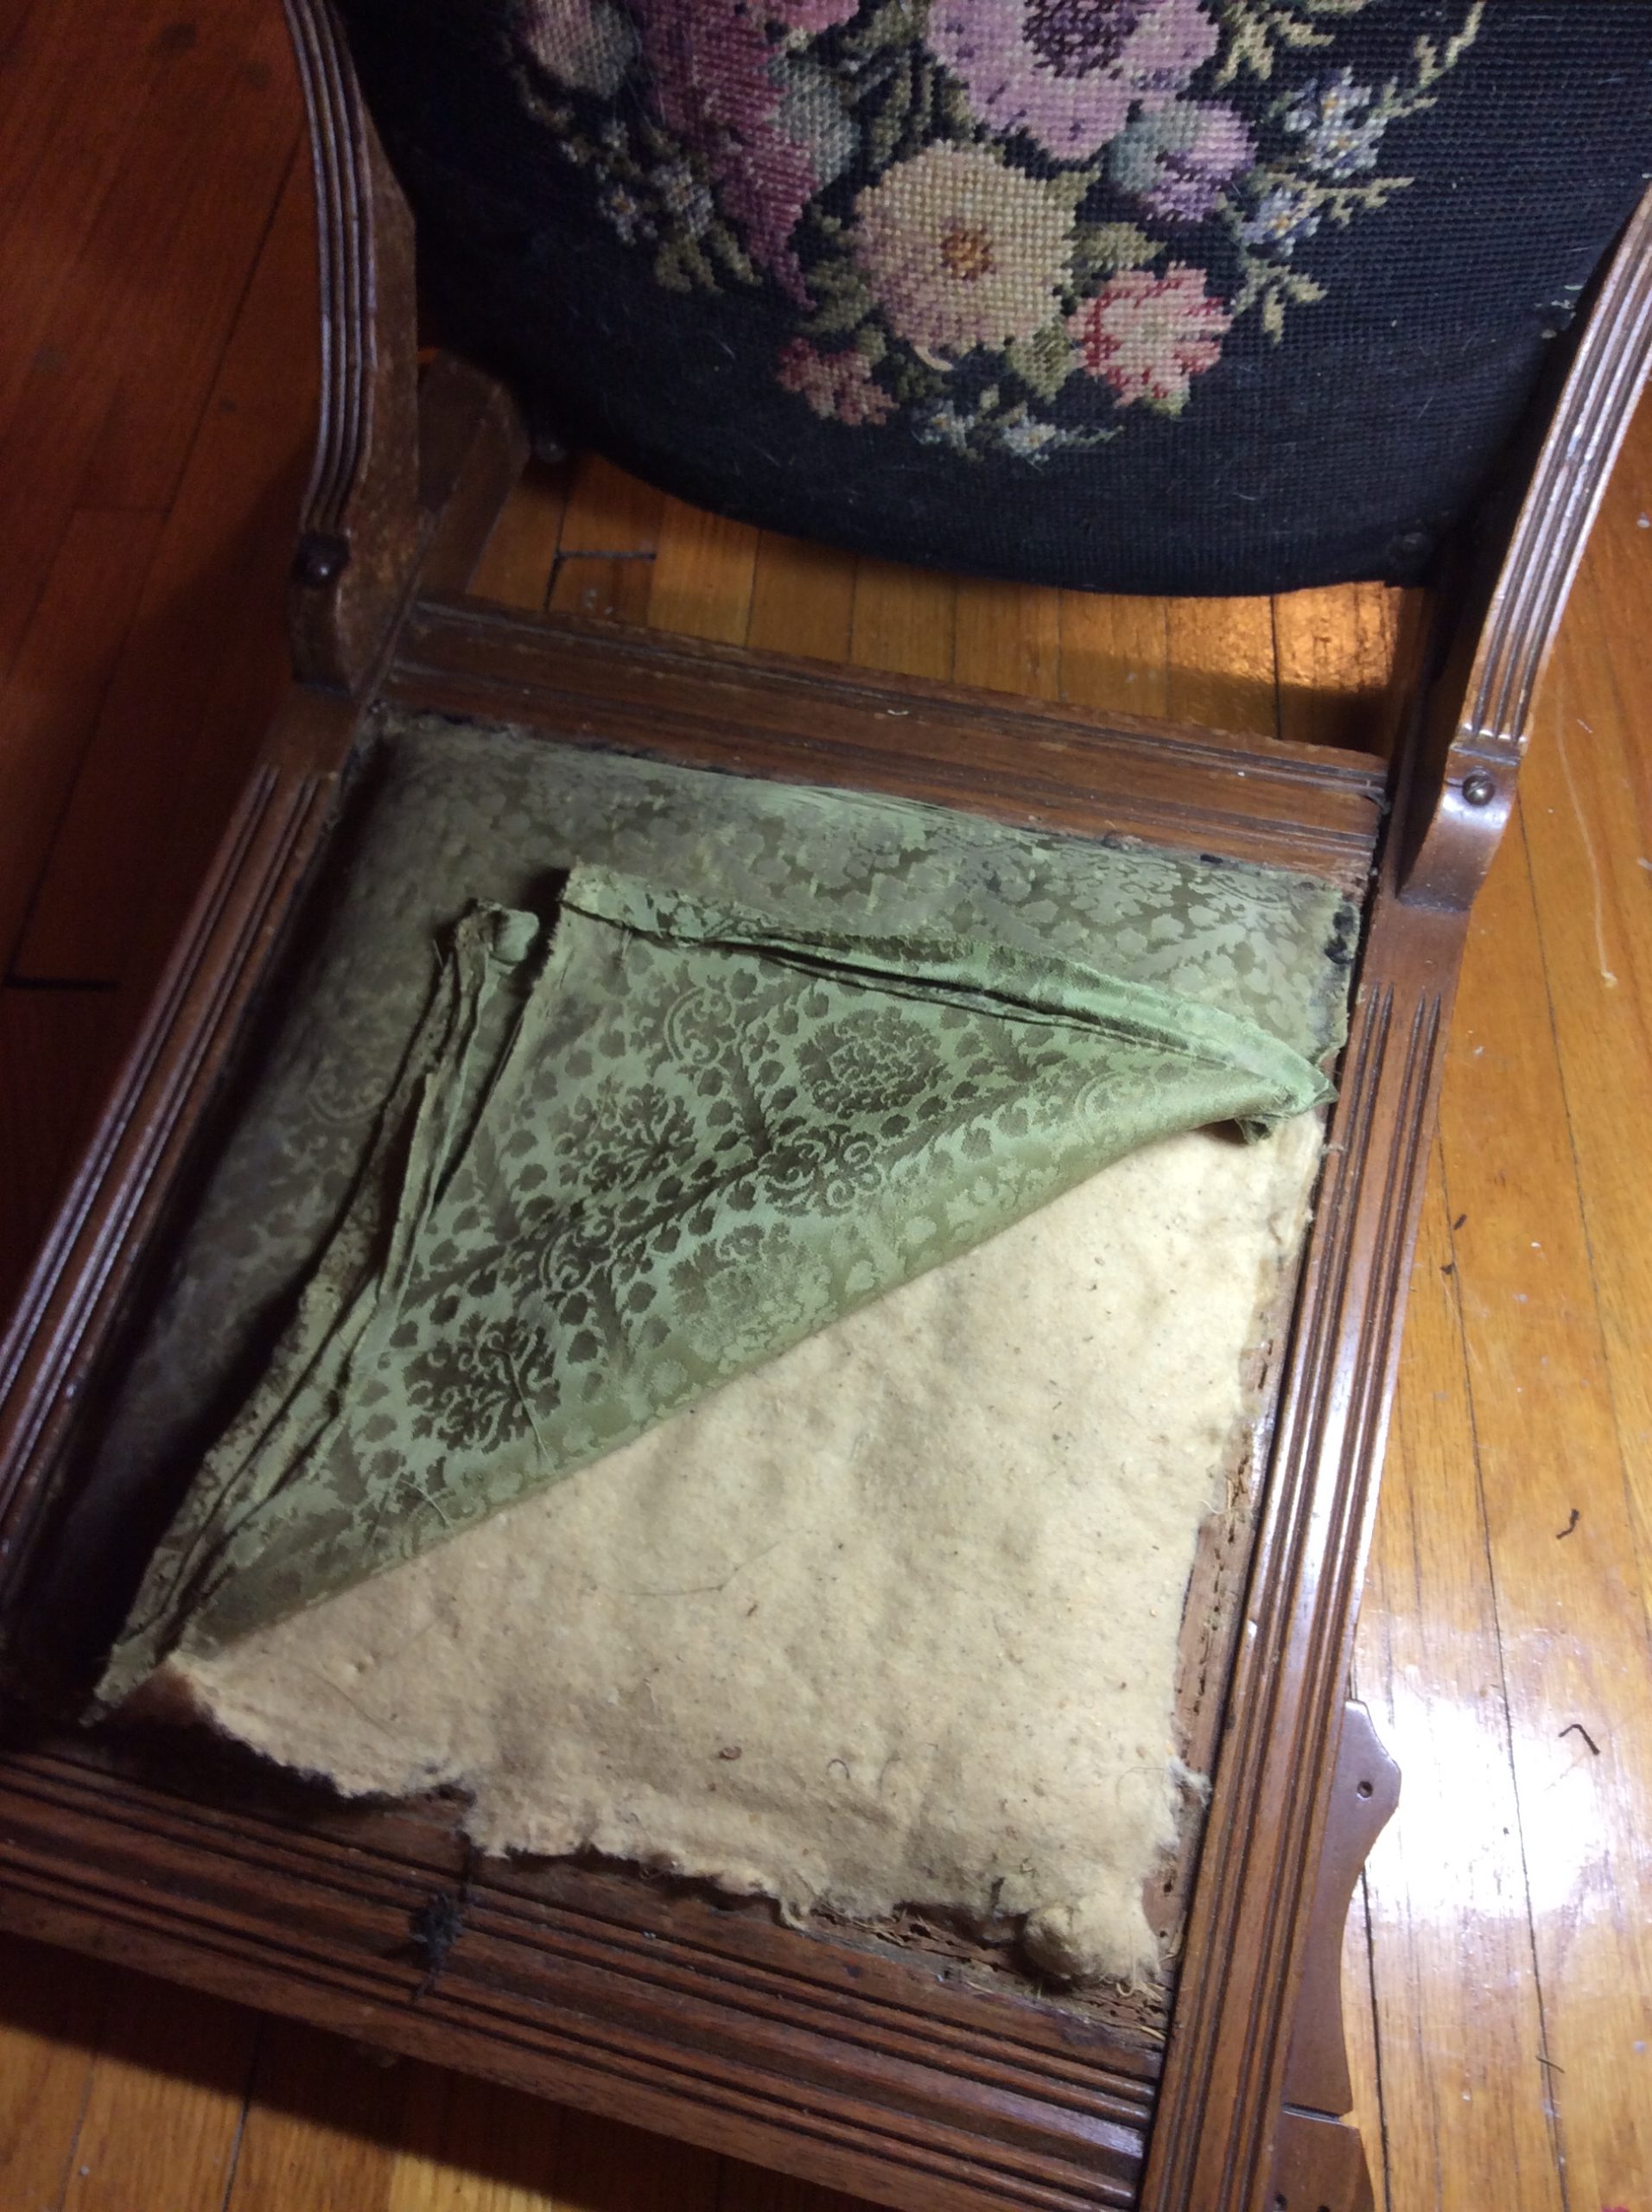
After removing the upholstery from the box spring, I removed the center brace and cut the cross slats in half. This gave me a chance to use my fancy laser level. It let me strike a line down the center of the slats, so that I could easily cut each one in the same location. Then with Brian’s help, I folded the box spring in half lengthwise and stood it up on its end. I reattached the center brace to support the open end of the slats that had been cut. Then I attached an additional strip of wood to support the slats on the other side of the fold.
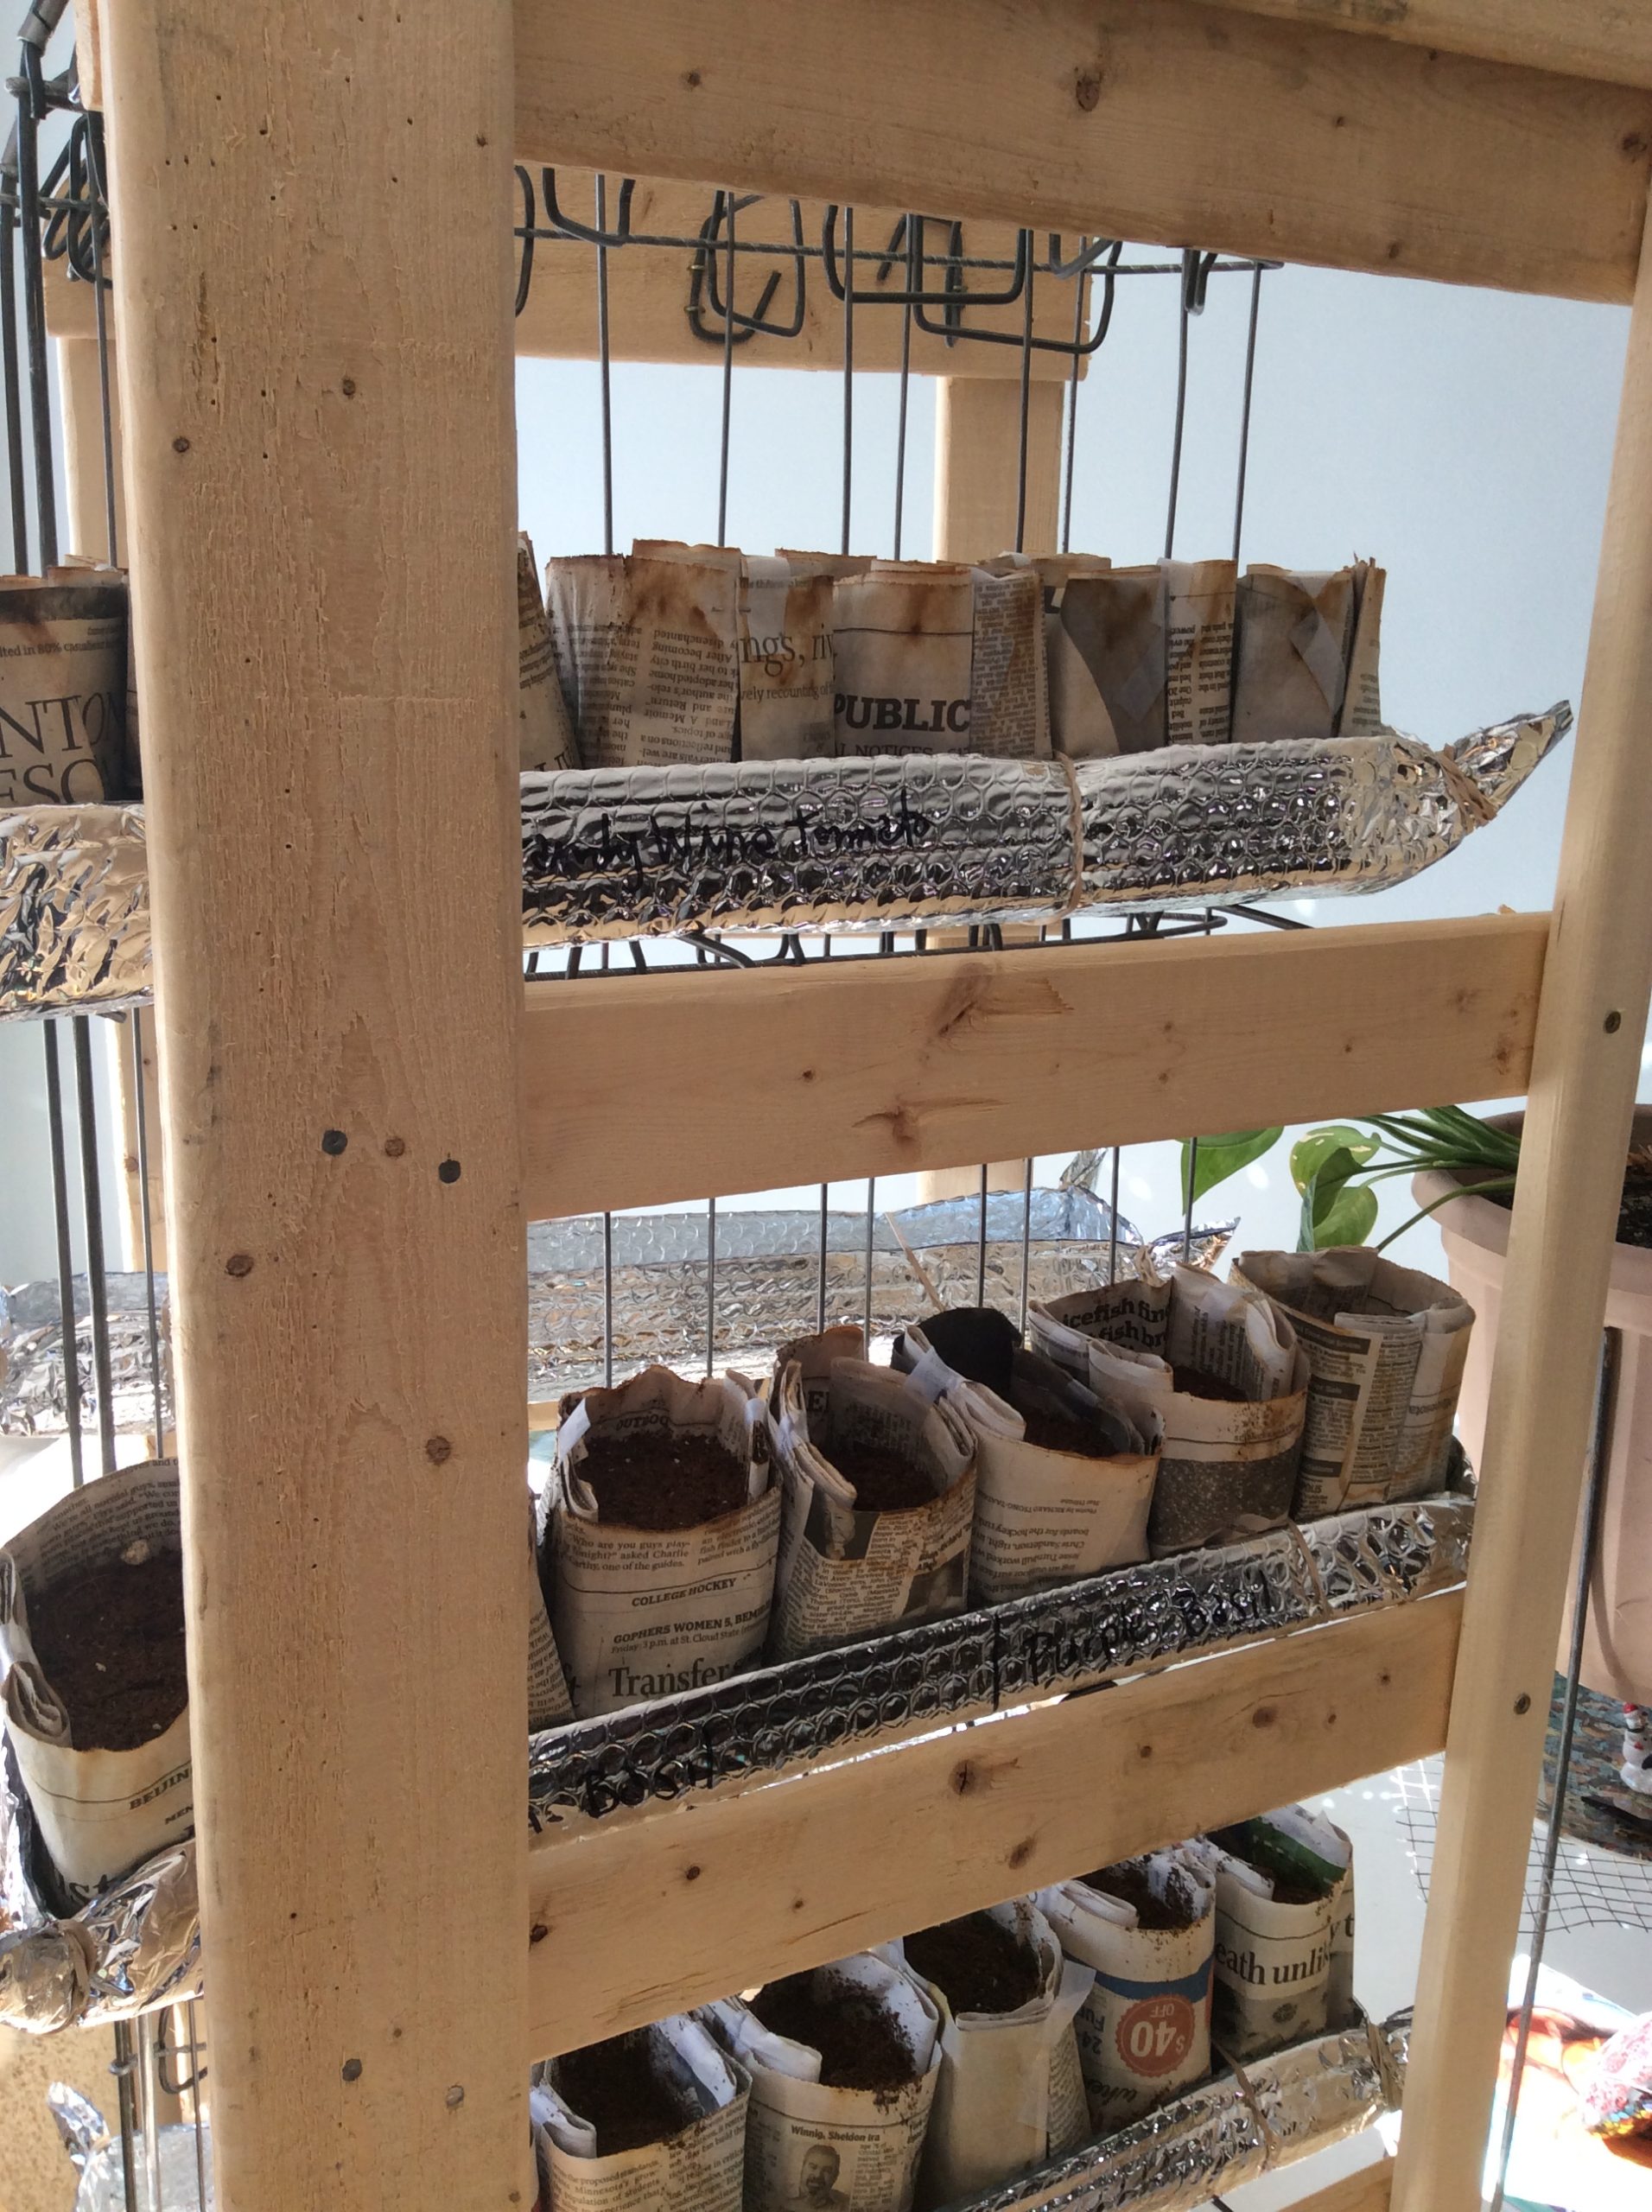
The next morning, I couldn’t see a cat tower anymore. I don’t know why but it became a tower for seedlings instead. Thankfully, Michael and Bert didn’t seem to mind, although I did wake up one morning to find a tray on the floor with teeth marks in it.
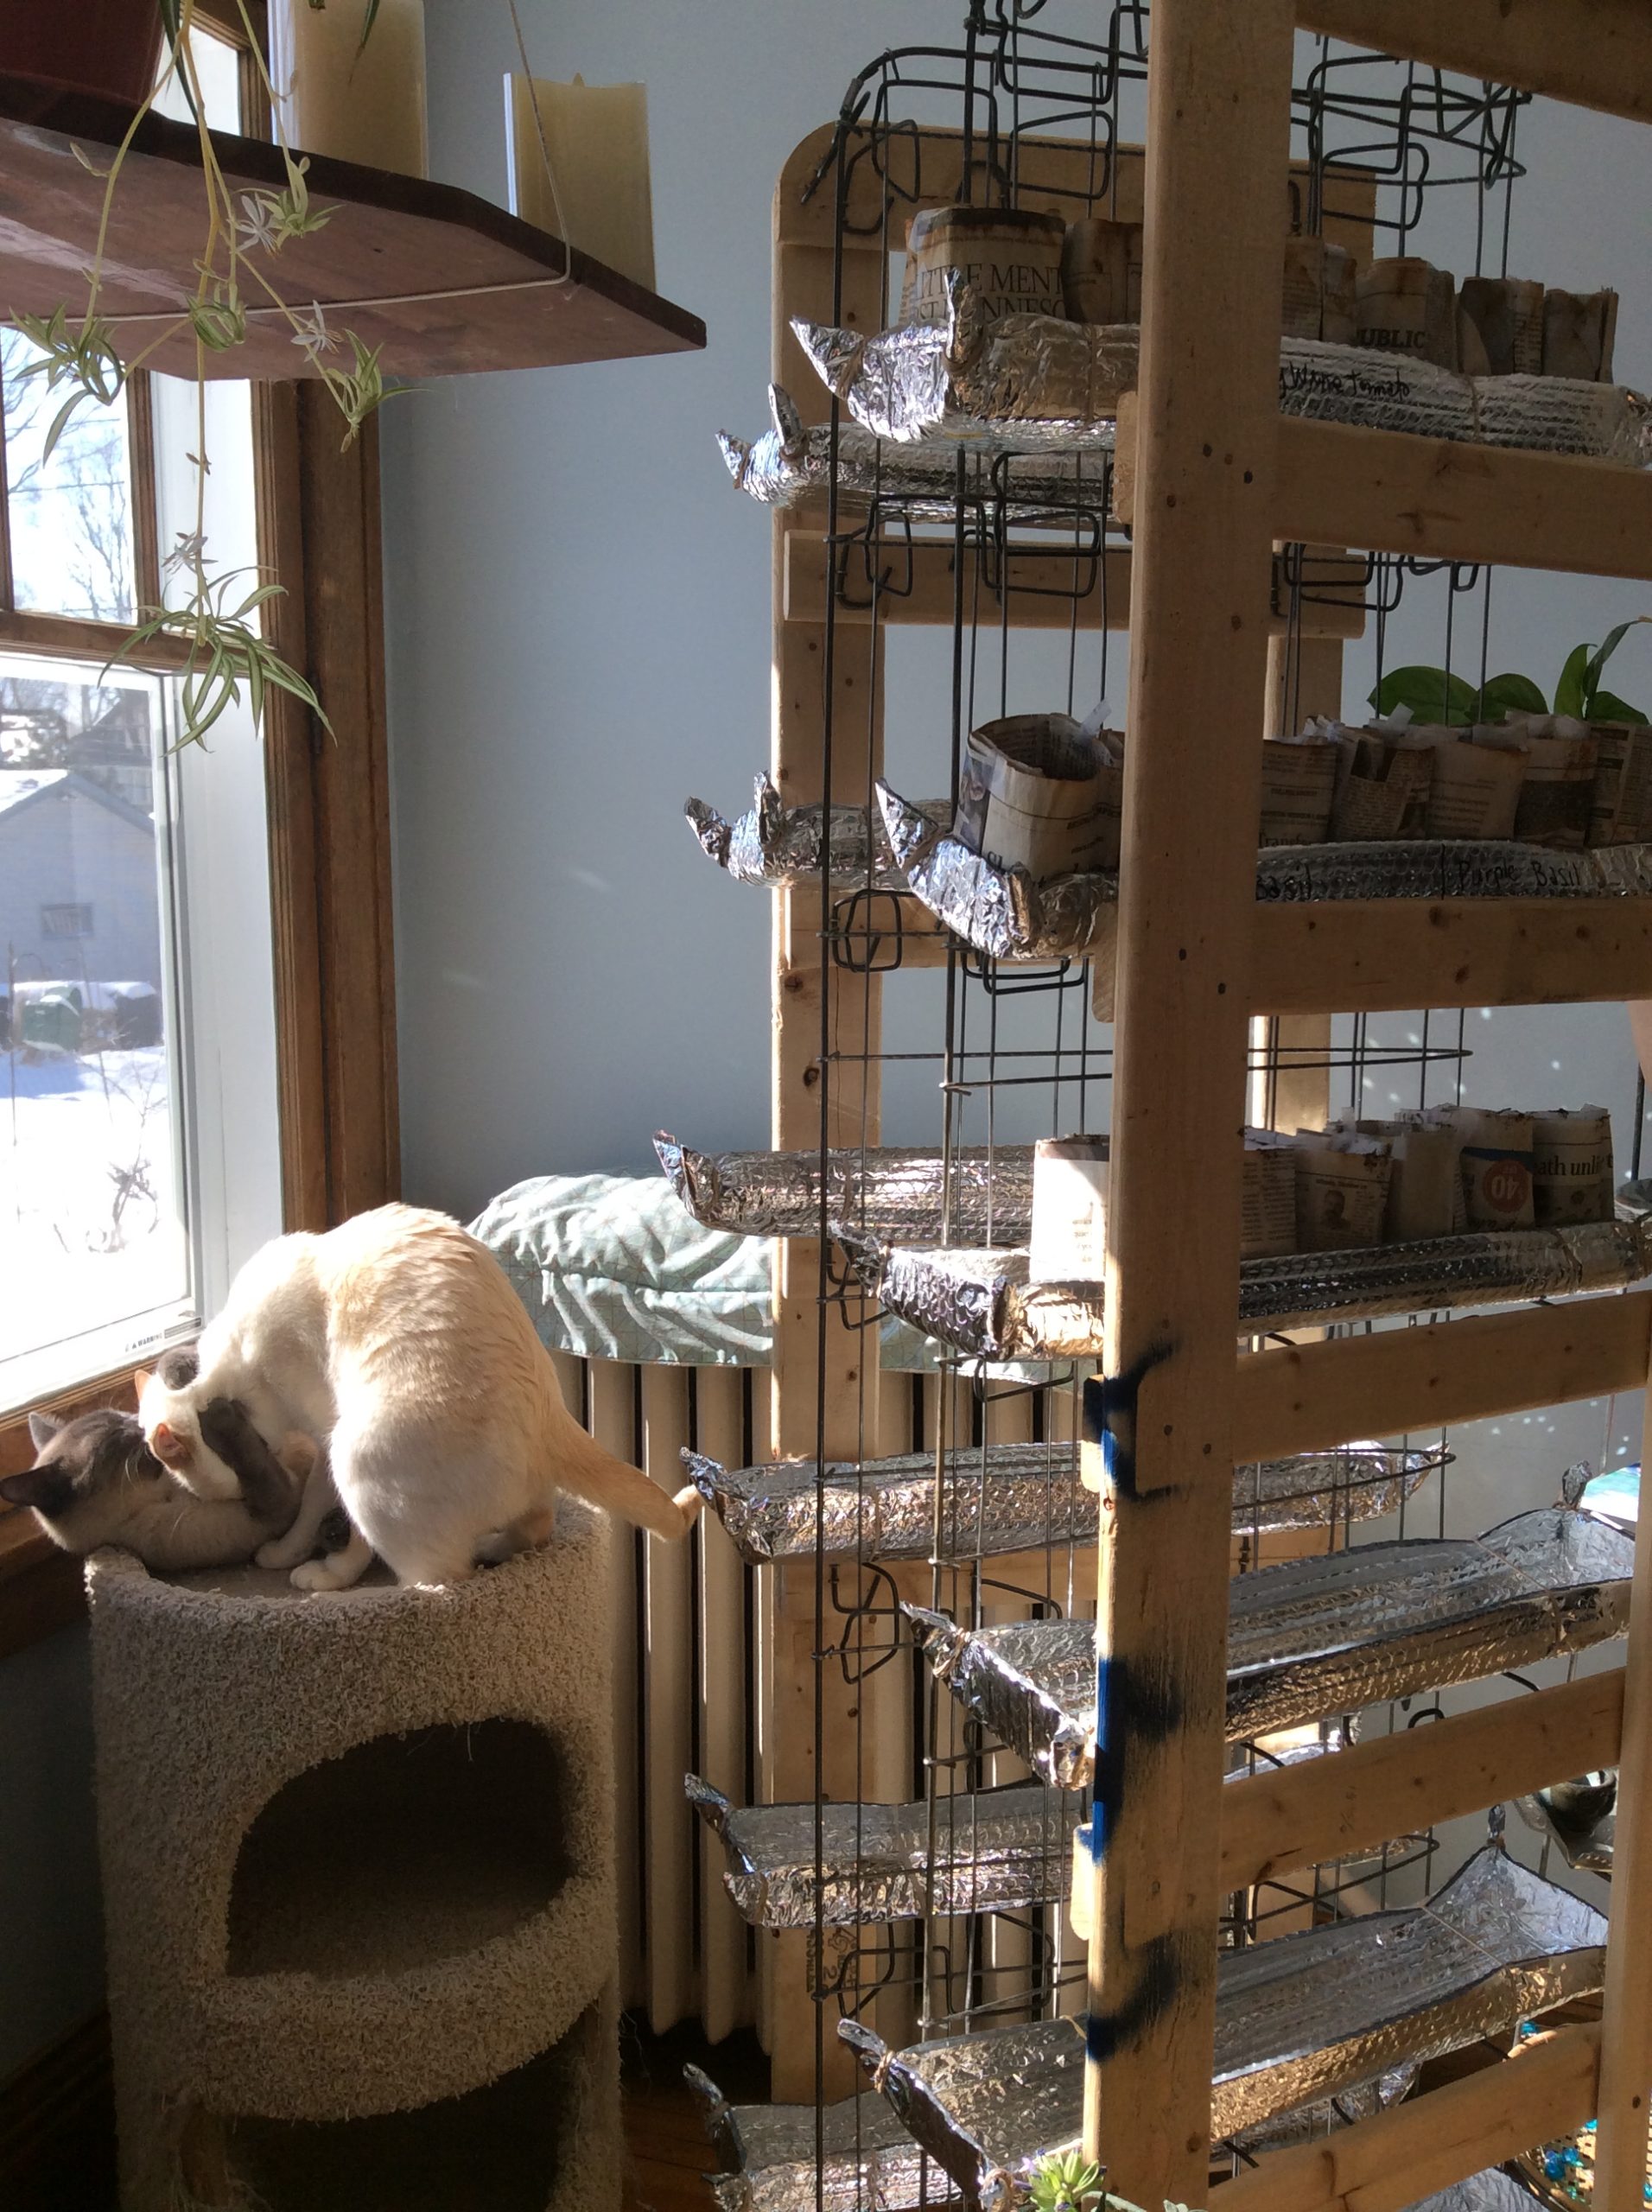
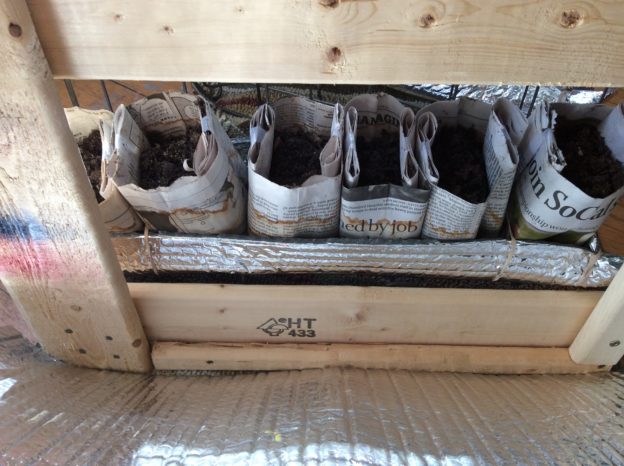
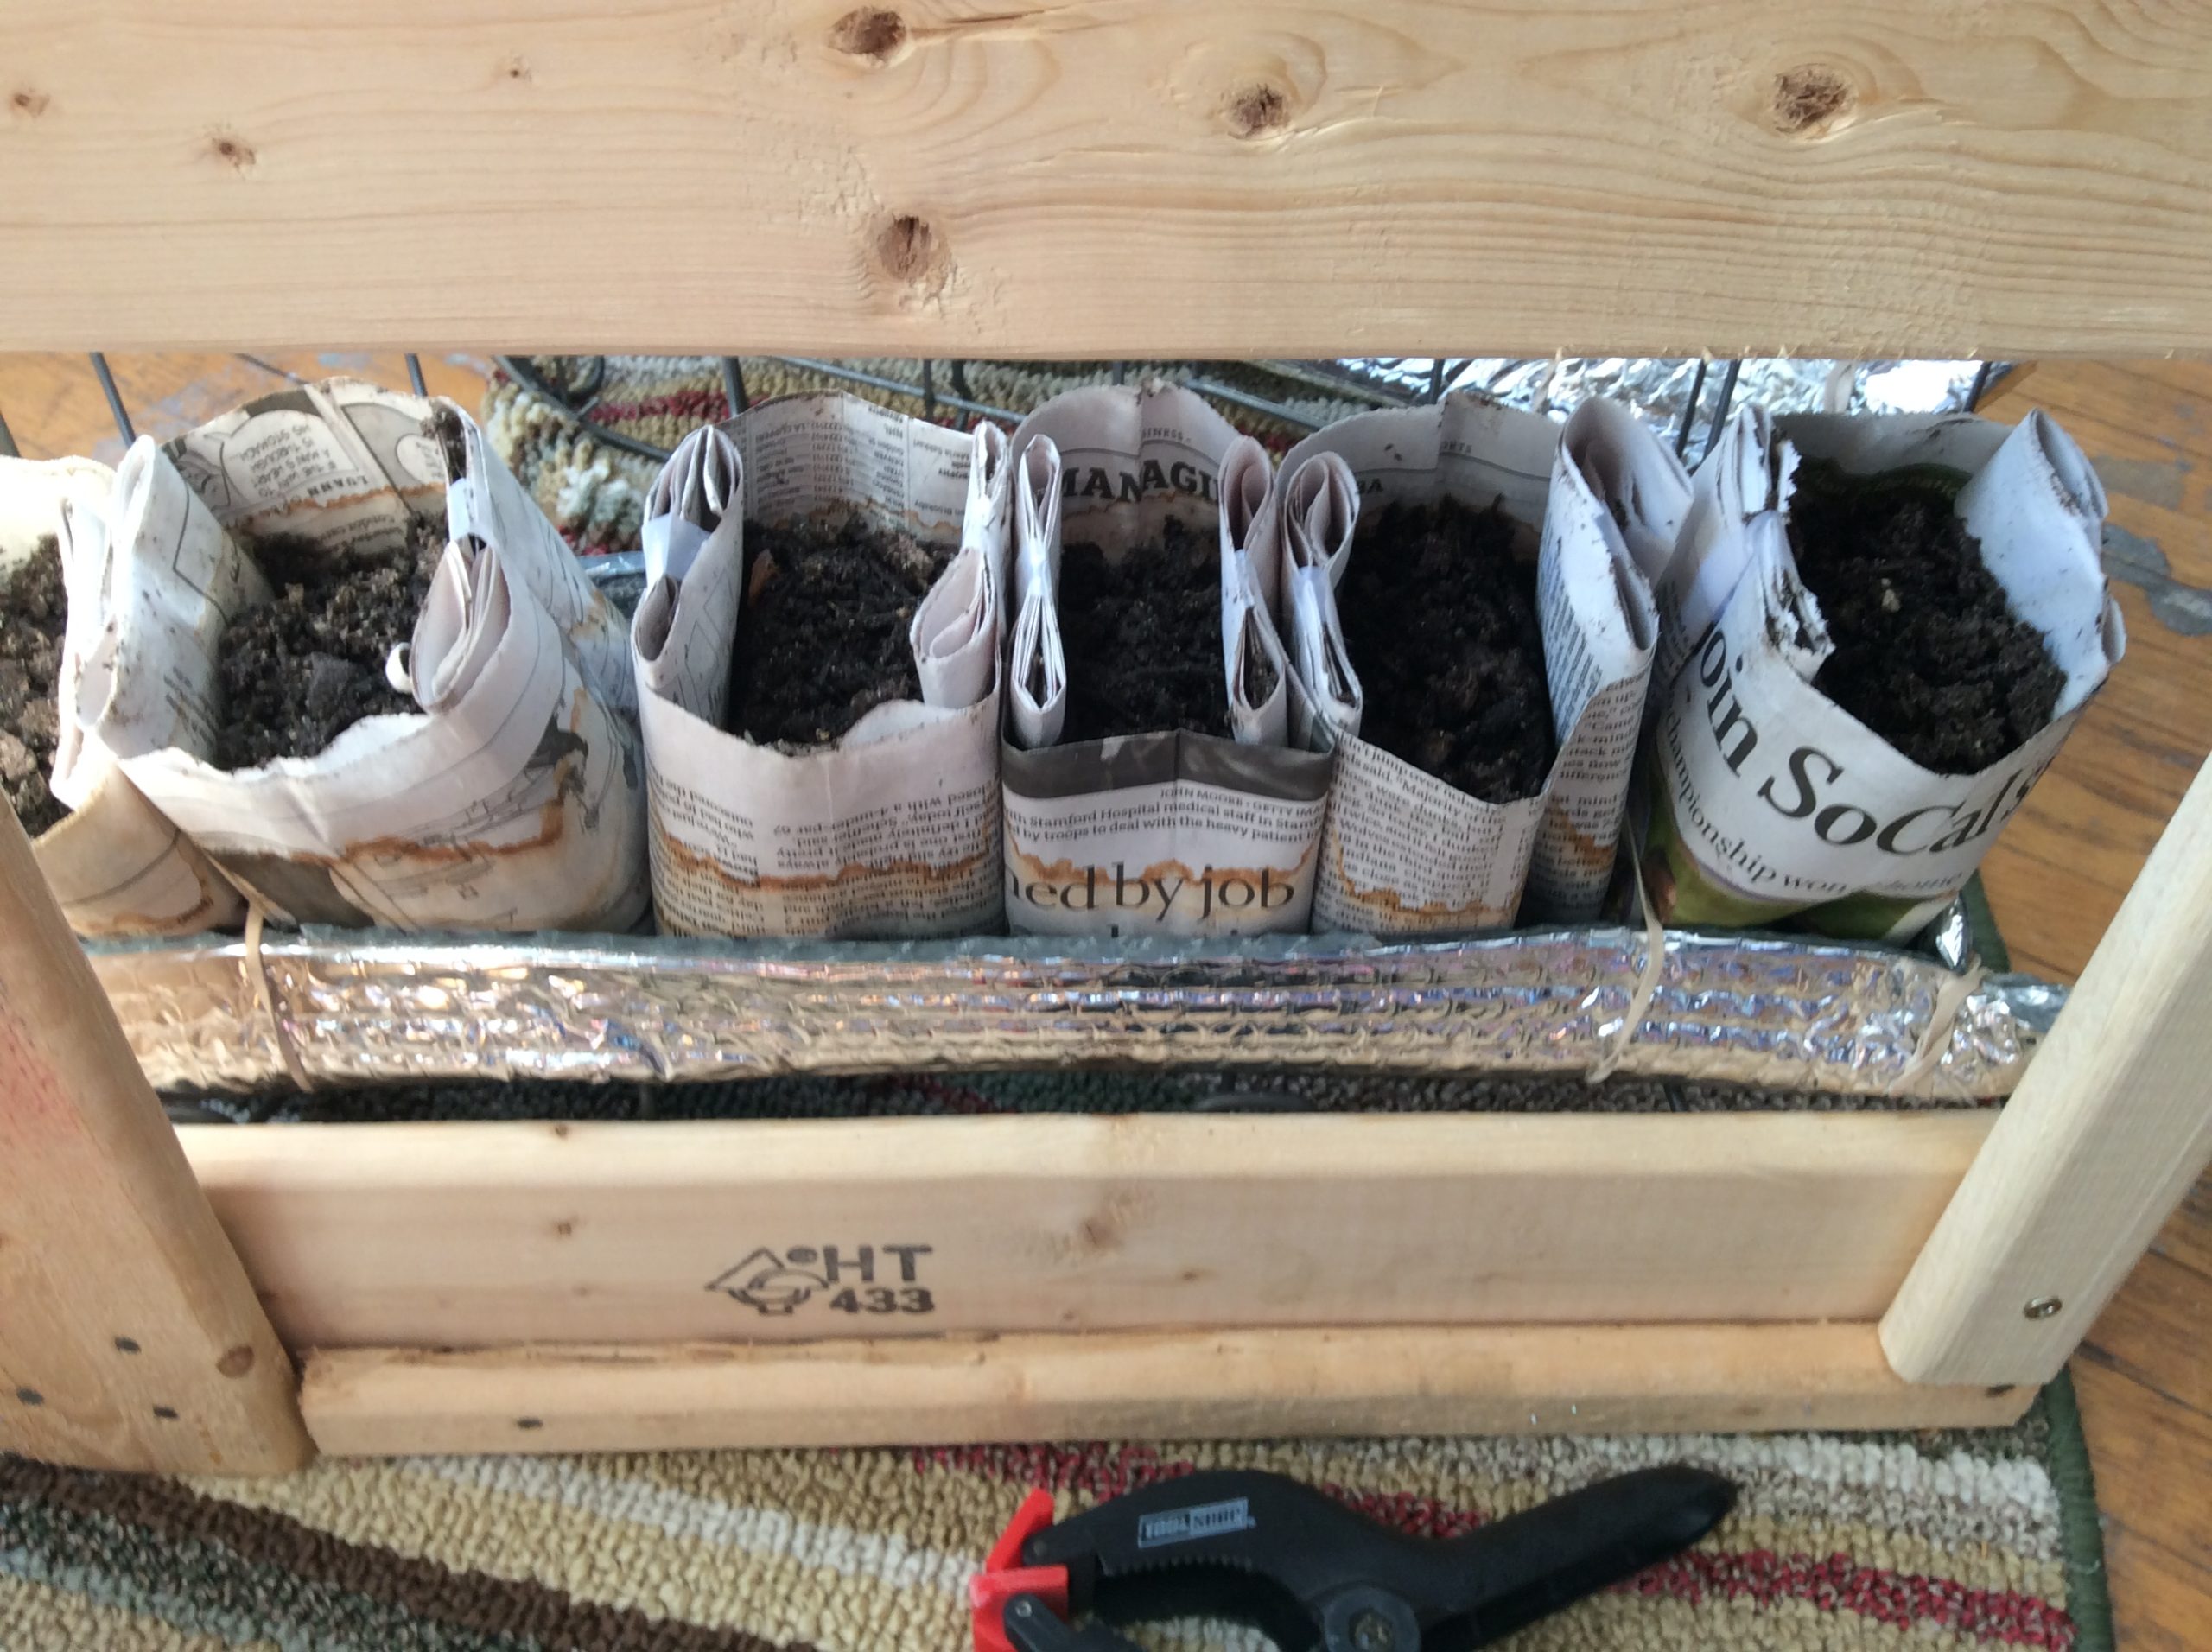
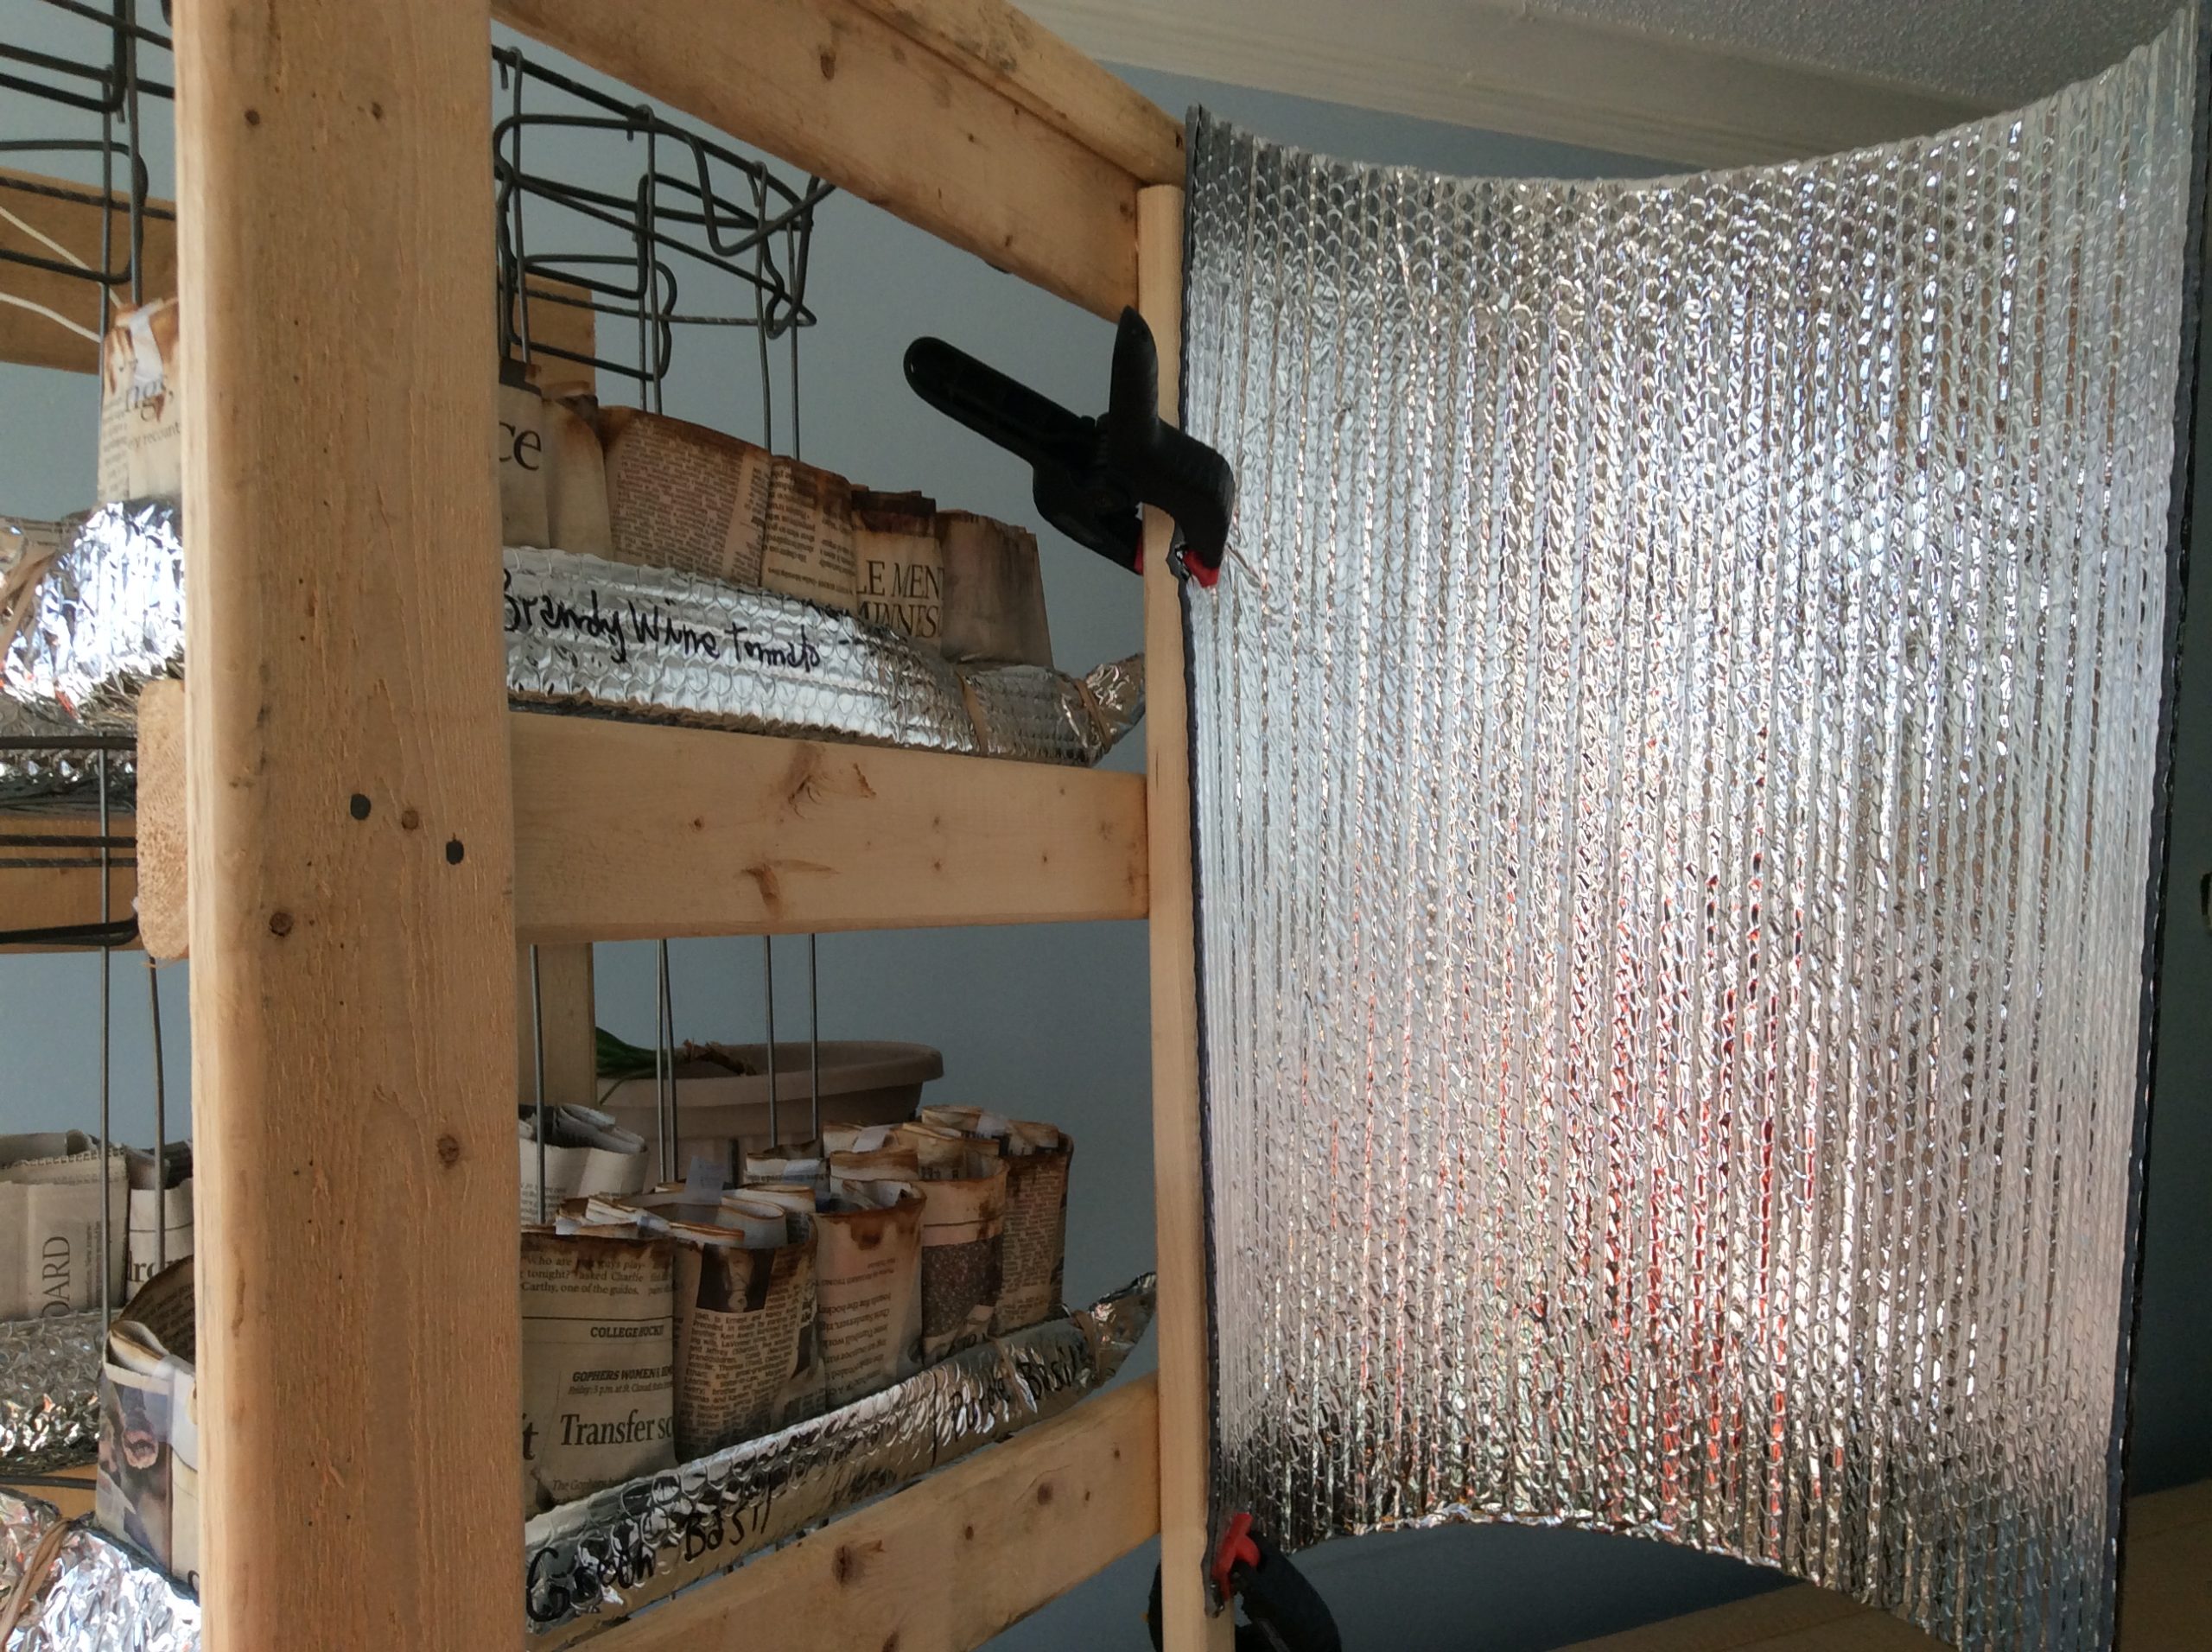
Since I needed trays of a specific size, I made them using foil insulation. To make them, I cut an 8 x 21″ piece of insulation then pinched each corner and secured it with a rubber band. To add support and to more uniformly hold up the sides, I added a rubber band around each end of the tray.
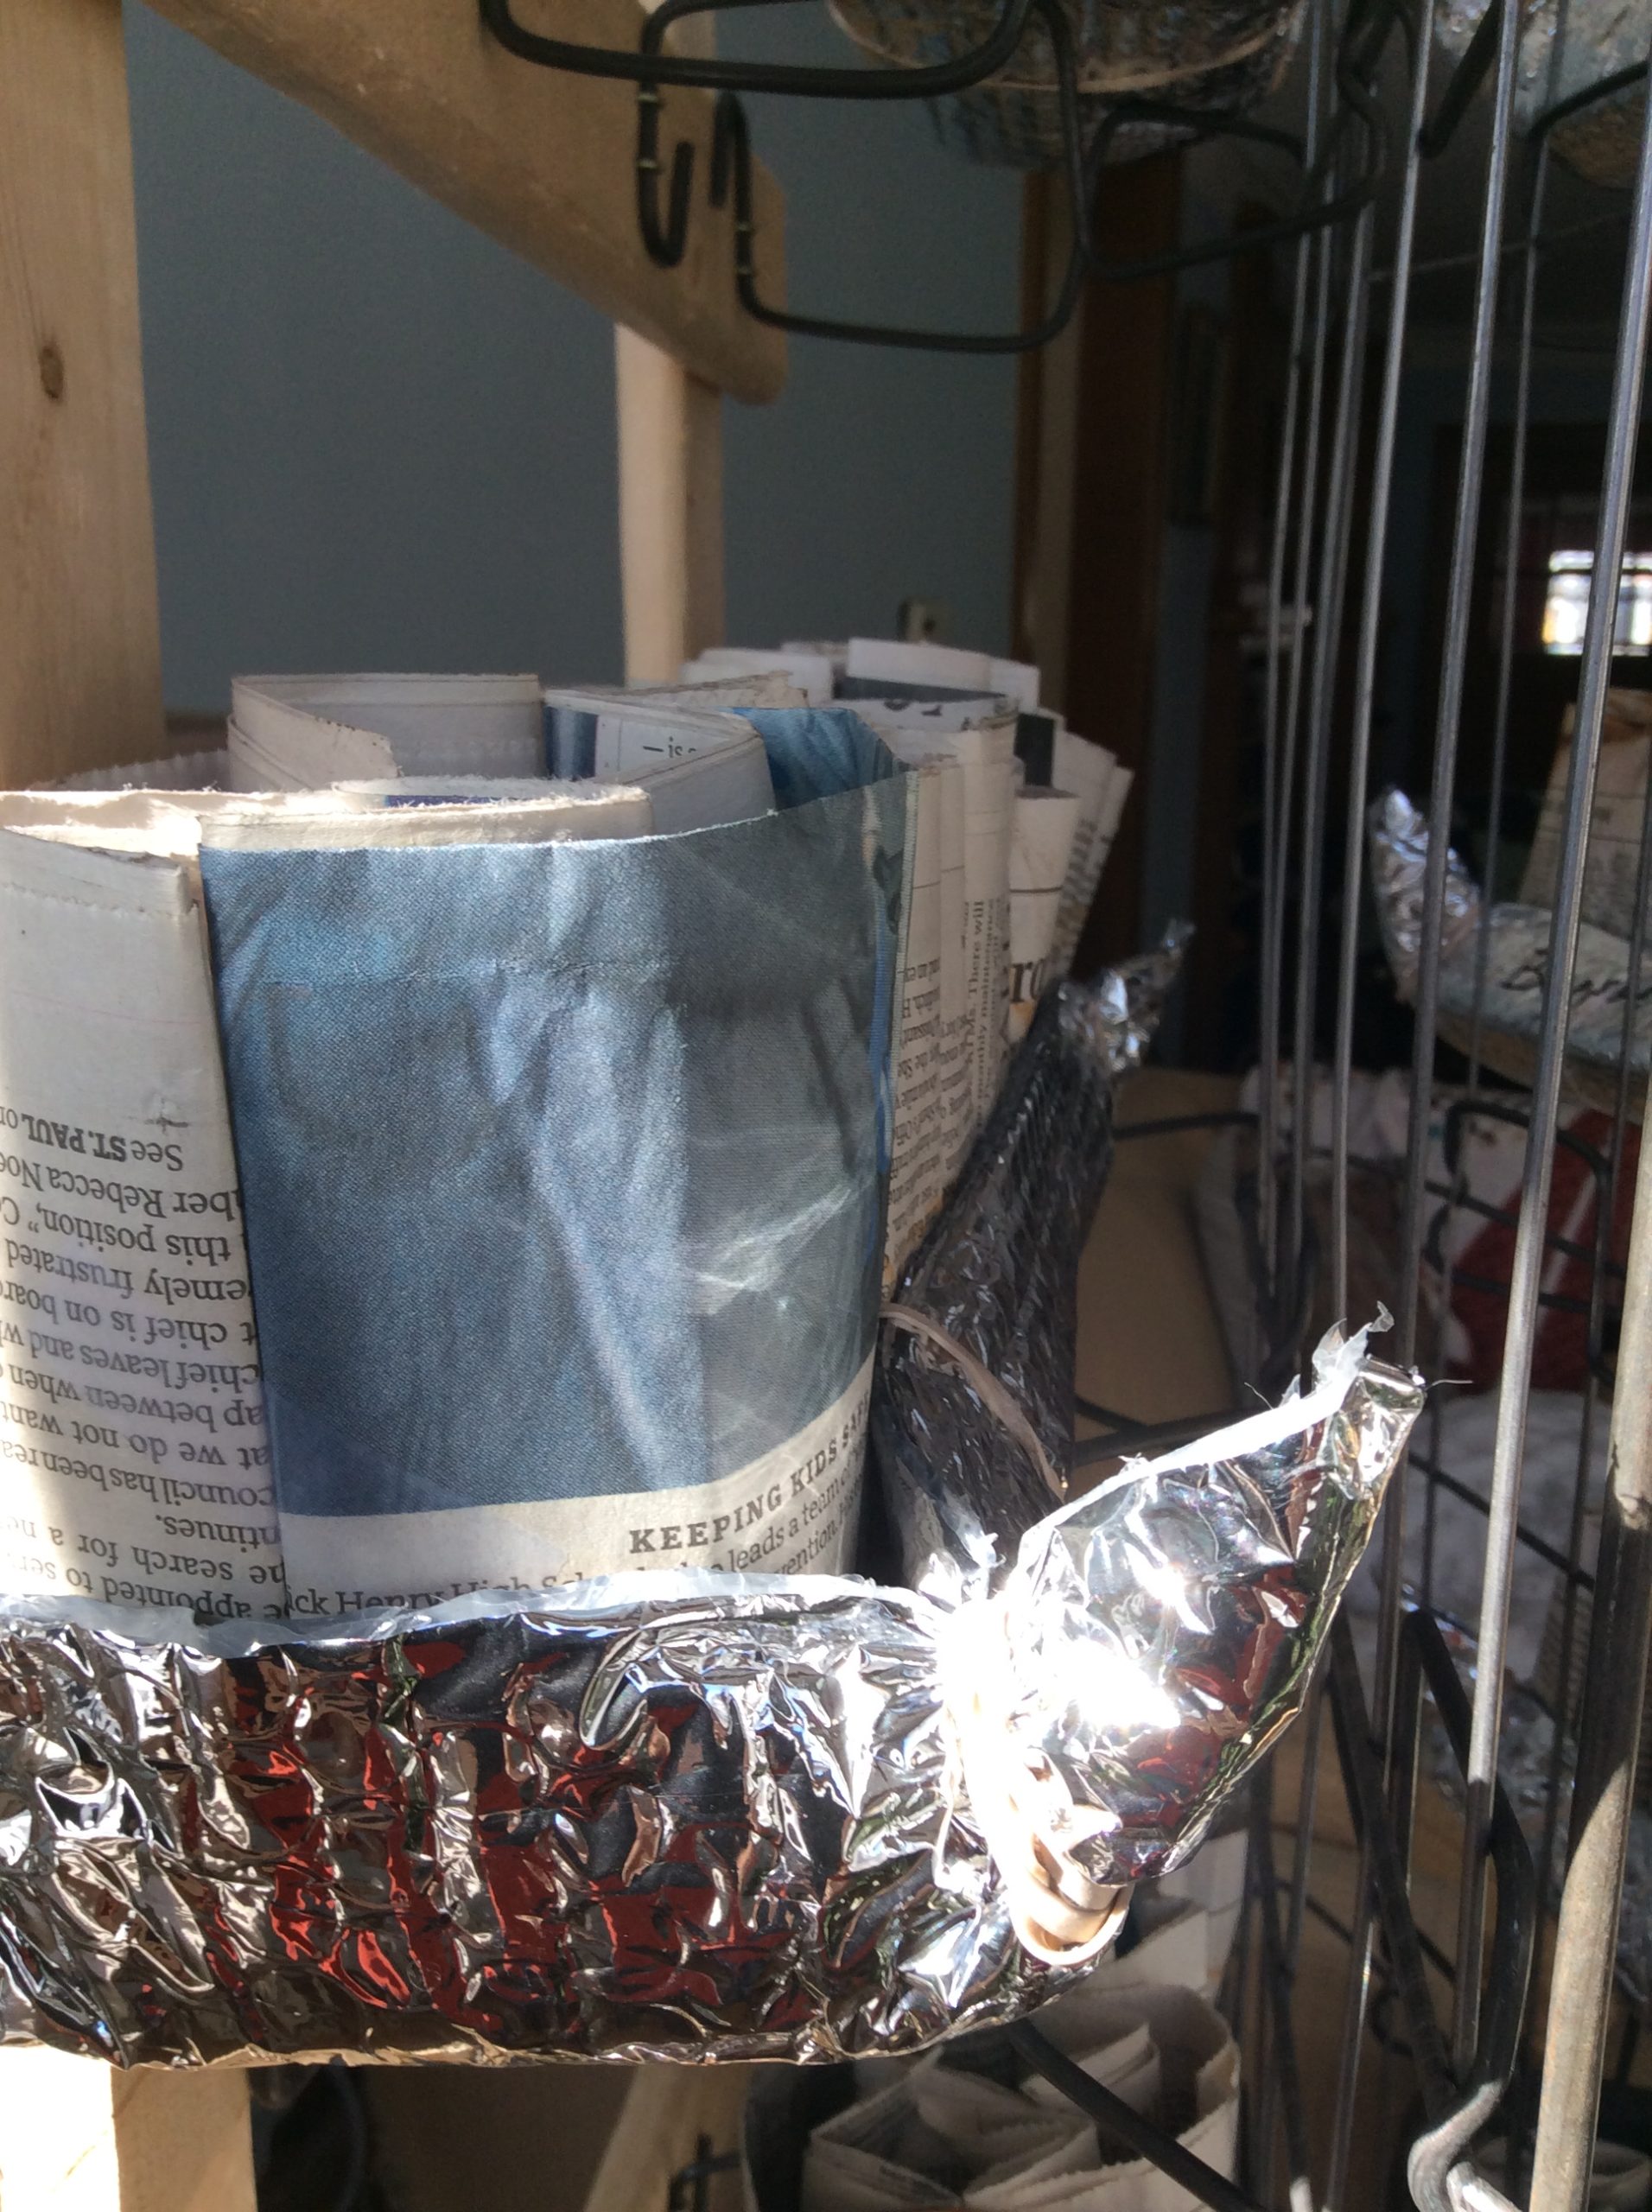
Yes, those pots are made out of newspaper and a dab of tape. I’ve used them in the past and they work great. Here’s the YouTube video where I learned how to make them. Or if you do a search for newspaper seedling pots, you’ll find other methods that do not require any tape.
While I really like the look of my seedling tower (I don’t get an old mattress vibe at all. I think it’s really cool!), I figured that it would be a pain to water. But for me, it’s fine. A little water in the bottom of the tray and a couple of squirts with a spray bottle seems to work fine. In case I wanted to make adjustments to maximize the sun exposure, I put the seedling tower on a rug so that it’s easy to slide on the wood floors.
I saw a YouTube video where someone made a display rack for a store with the same idea of using these built-in shelves. In that case, they did not fold the box spring in half. They also added wheels. I can see where that might make a nice seedling rack too.
To maximize light, I’m thinking about adding more foil insulation so that it can close around the structure at night and open and reflect light back to the tower during the day. There’s probably an optimal way of doing this, but I don’t know what it is.
Somewhere I have lights I could potentially add.
We’ll see how this works. In the past, I’ve just had luck putting seedlings in a tray by the window and keeping them moist. As I learn more about it, I can see there are some best practices that might yield even better results. In the meantime, I’m also trying winter sowing. My friend Santwana mentioned that she was doing this, which is what prompted me to do seedlings this year. It’s funny how life is a circle that way.
If you wanted to try this, I’m sure you could make someone’s day by taking an old box spring off of their hands.
Let me know if you have ideas for improvements.
You are so clever. What a great job you have done with your seed planting. Nice to know I have neighbors doing such wonderful, creative, earth affirming projects.
Thanks, Beverly! It’s fun to see things sprout!
This is just so great and yet another example of your thoughtfulness about objects as well as your stunning creativity. I loved reading this, and I can’t wait to see your “chair workshop” and what is coming out of it! XO
Thanks, Florence! With the warmer weather, I was actually able to do a couple of small things in the garage. So, hopefully the workshop will move there and we’ll get our house back soon!