Category Archives: Crafts

macramé lawn chair

Macramé Lawn Chair

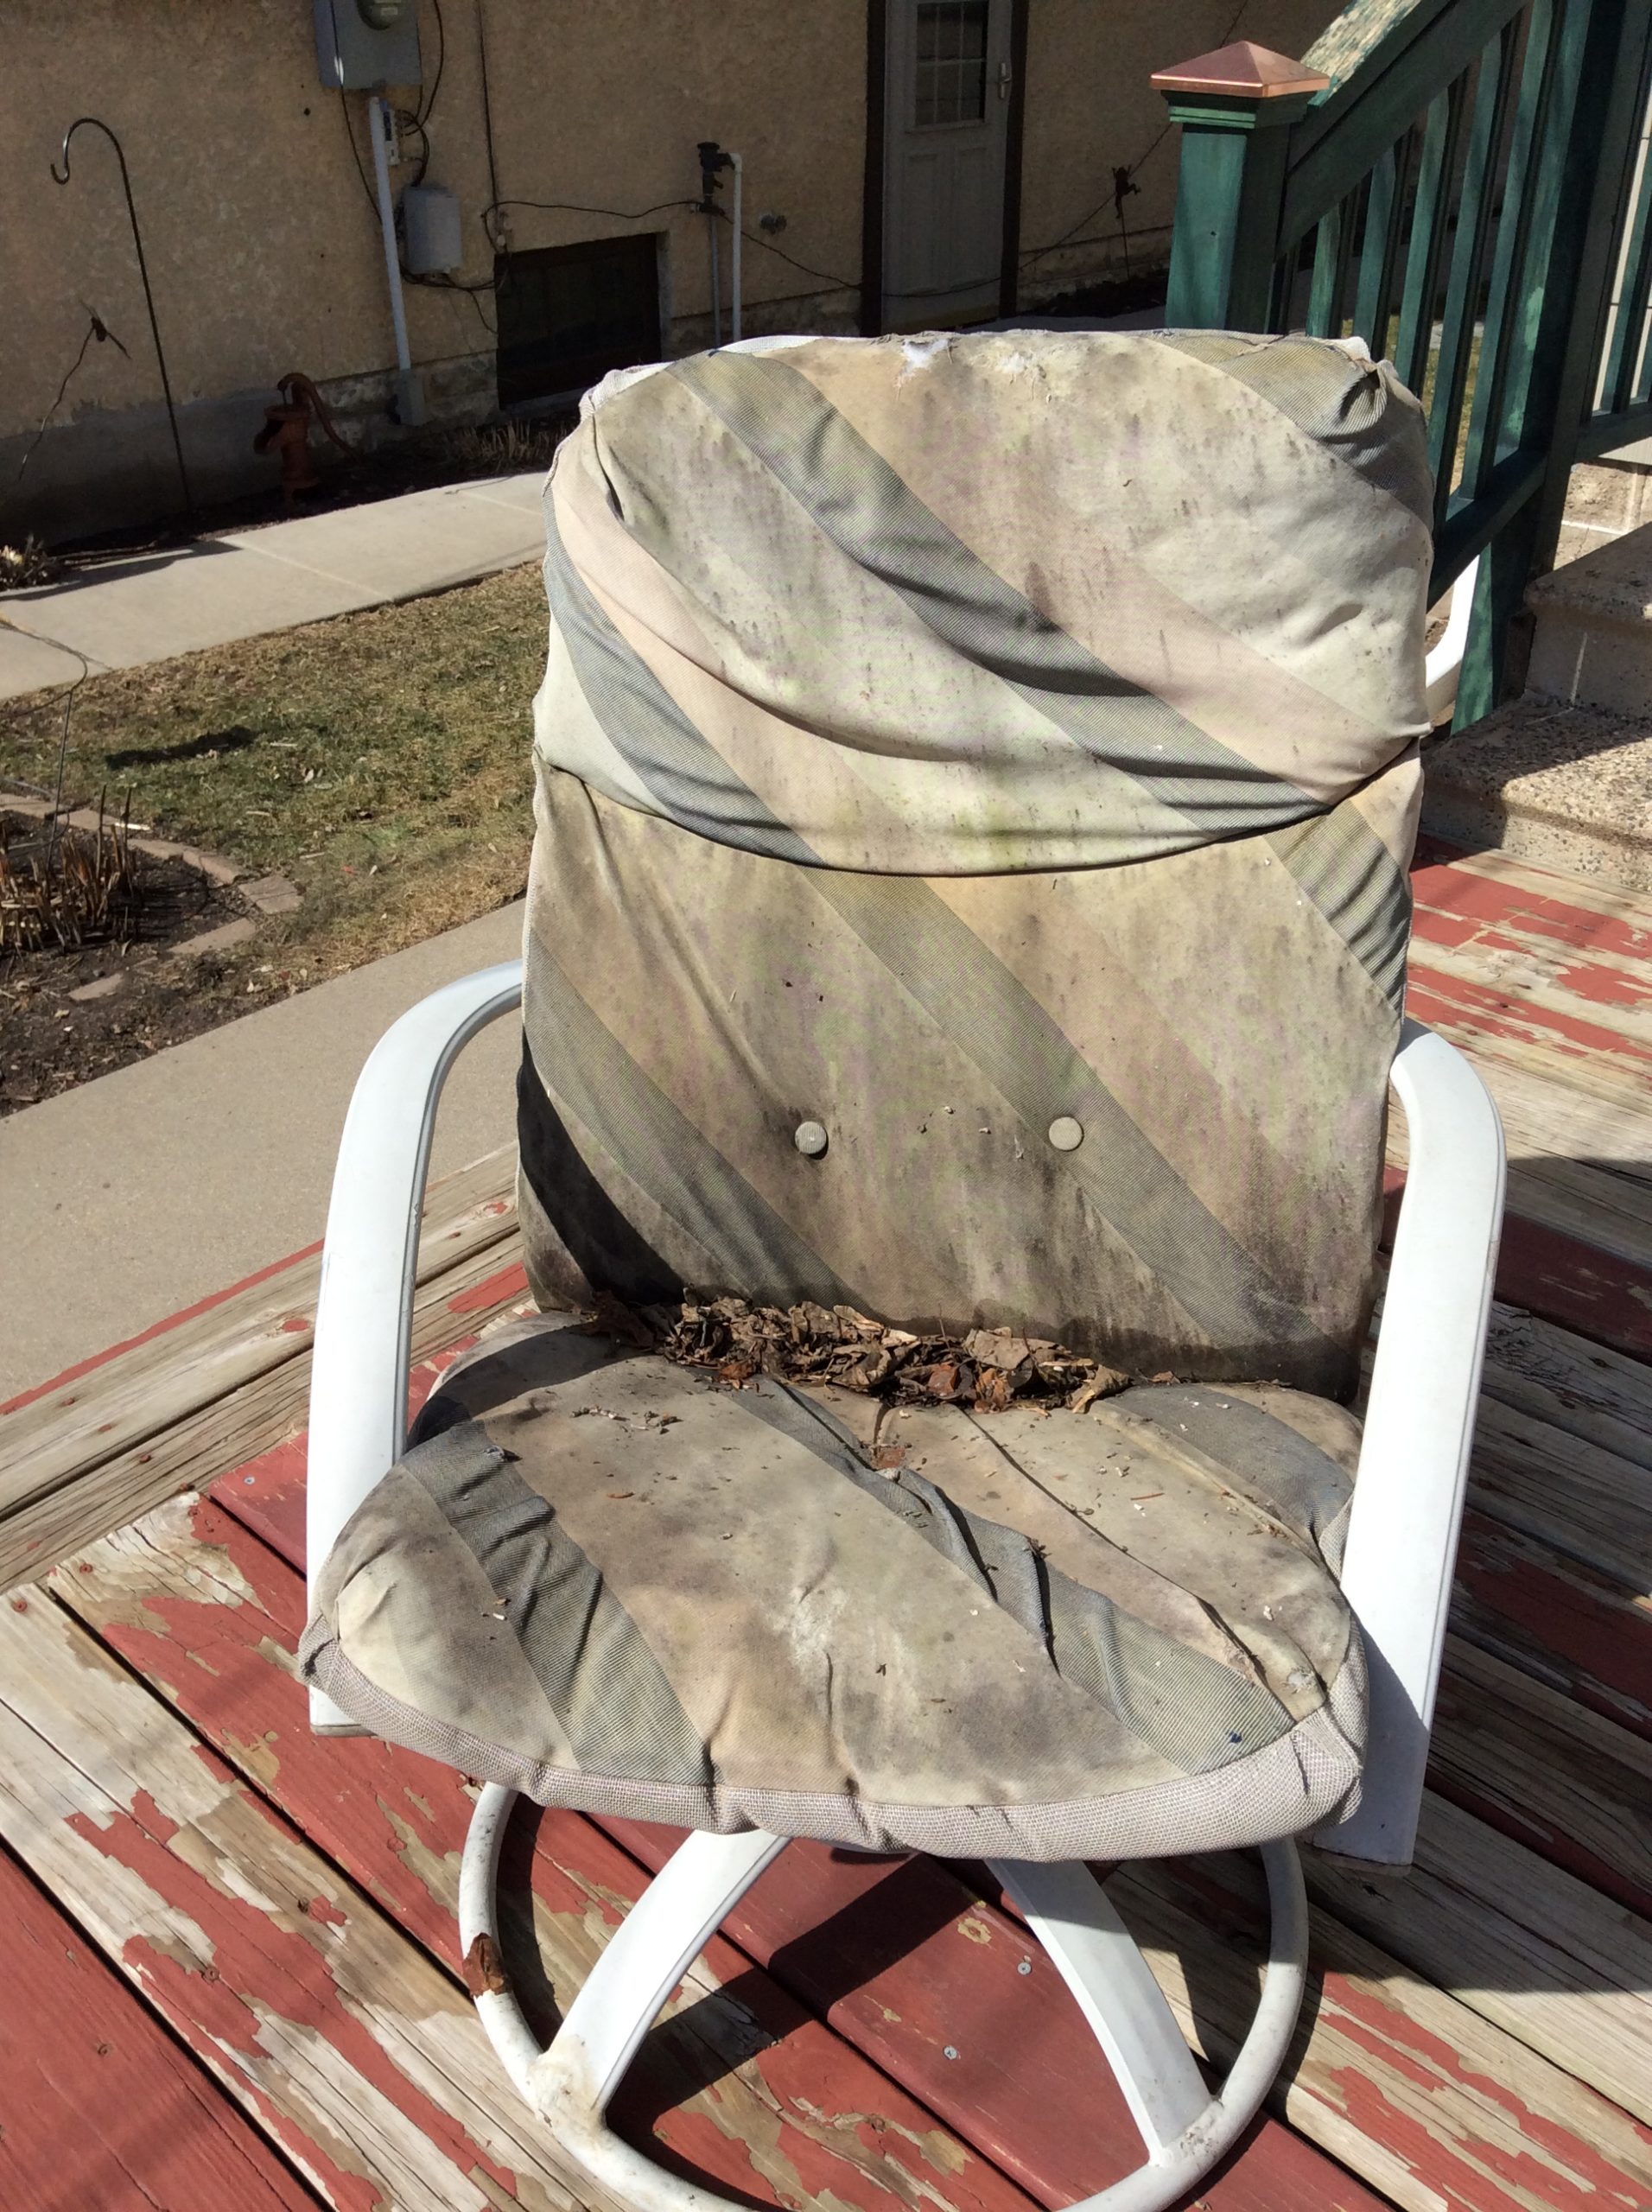
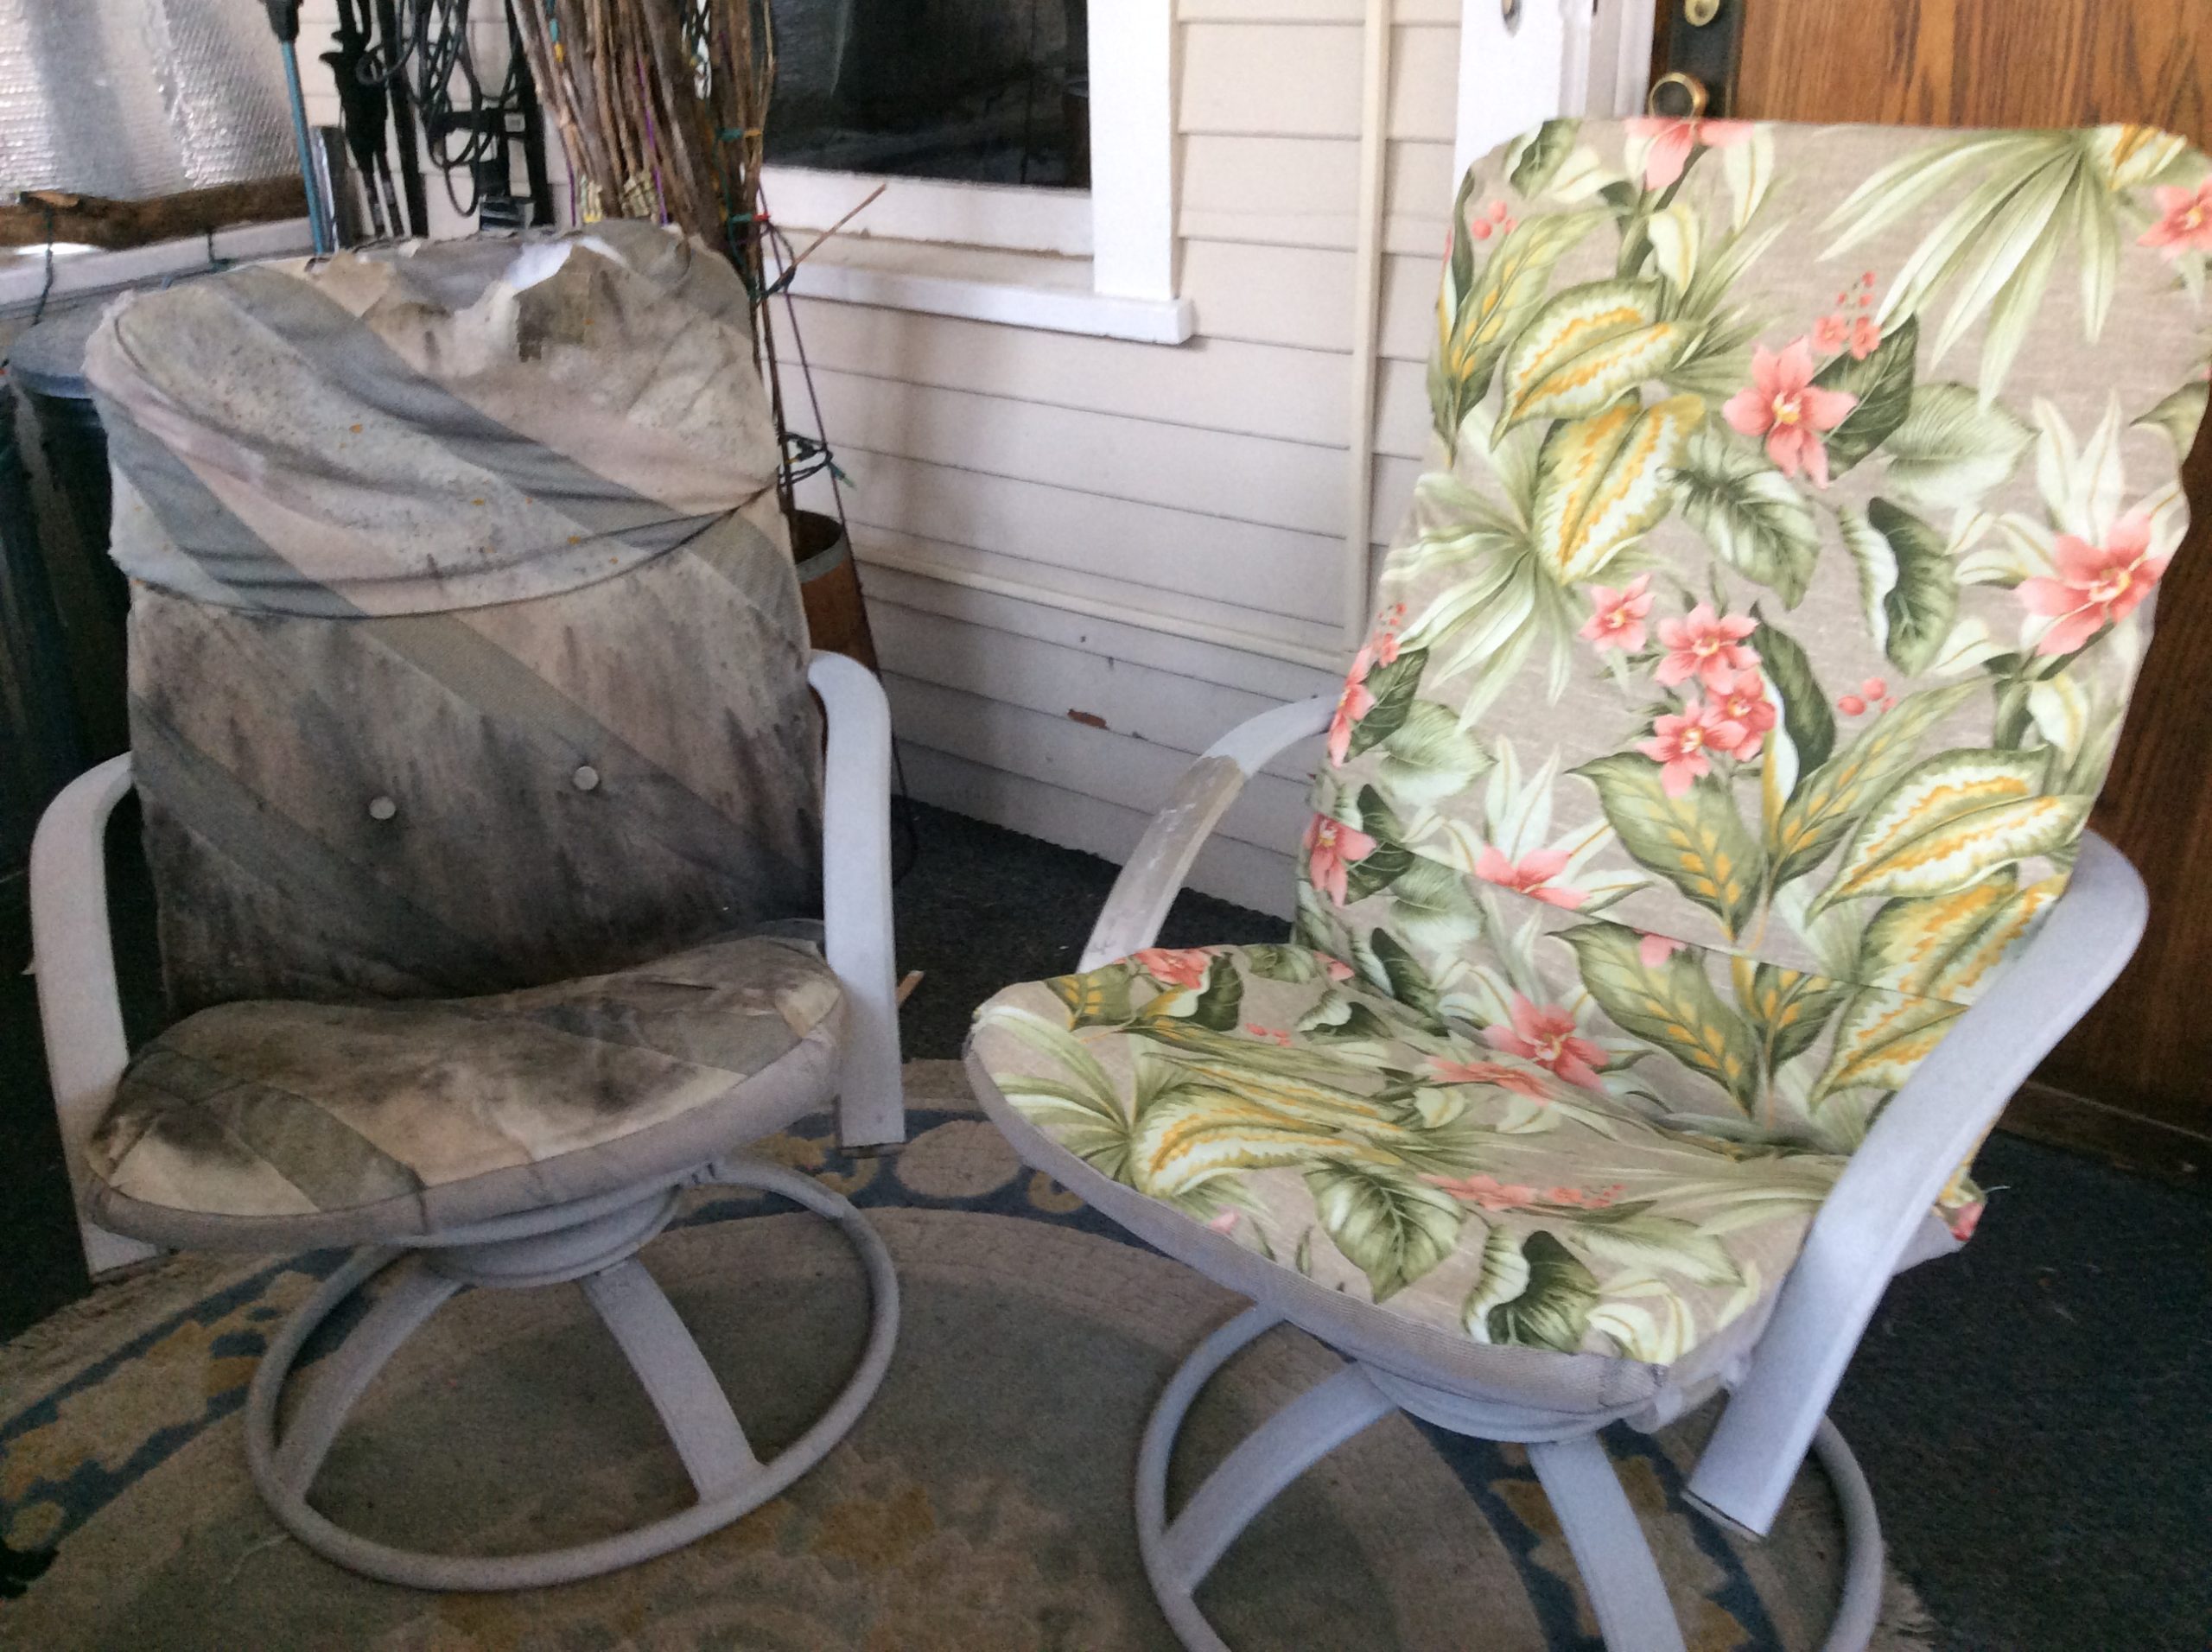
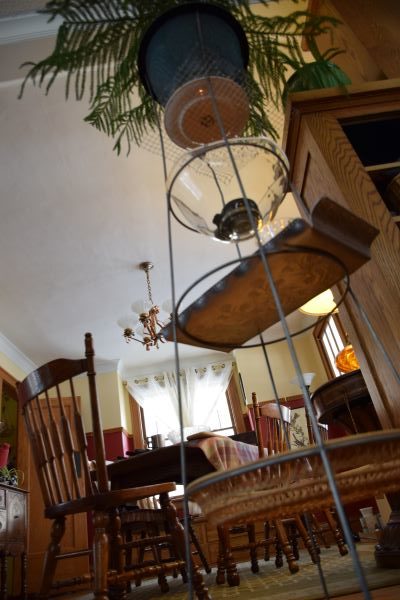
When my neighbor cleaned out her garage, she gave me an aluminum lawn chair. When I turned to YouTube for the instructions on how to re-web it, I discovered that people were using macramé cord to weave new seats onto old frames. I immediately wanted more chairs.

As luck would have it, someone on FreeCycle posted a bunch of them that day. Unfortunately, it was another “curb alert,” meaning that instead of arranging for a pick-up, interested parties were to drive across town and hope for the best. I resist these offers, which is (or used to be) against the FreeCycle policy. People racing to get something only to find that the item in question is gone defeats the purpose of reducing waste. Indeed, curb alerts never go my way.

But I was desperate. At a quarter to ten, bleary-eyed and half asleep, I pleaded my case to Brian. The chairs will be gone by morning! Nevertheless, at the reasonable hour of 6 a.m., we pulled up to a stranger’s house in a strange neighborhood in the exurbs. One chair and a chaise lounge that I didn’t want were still left. I took them both.

Free Lawn Chair (Before)

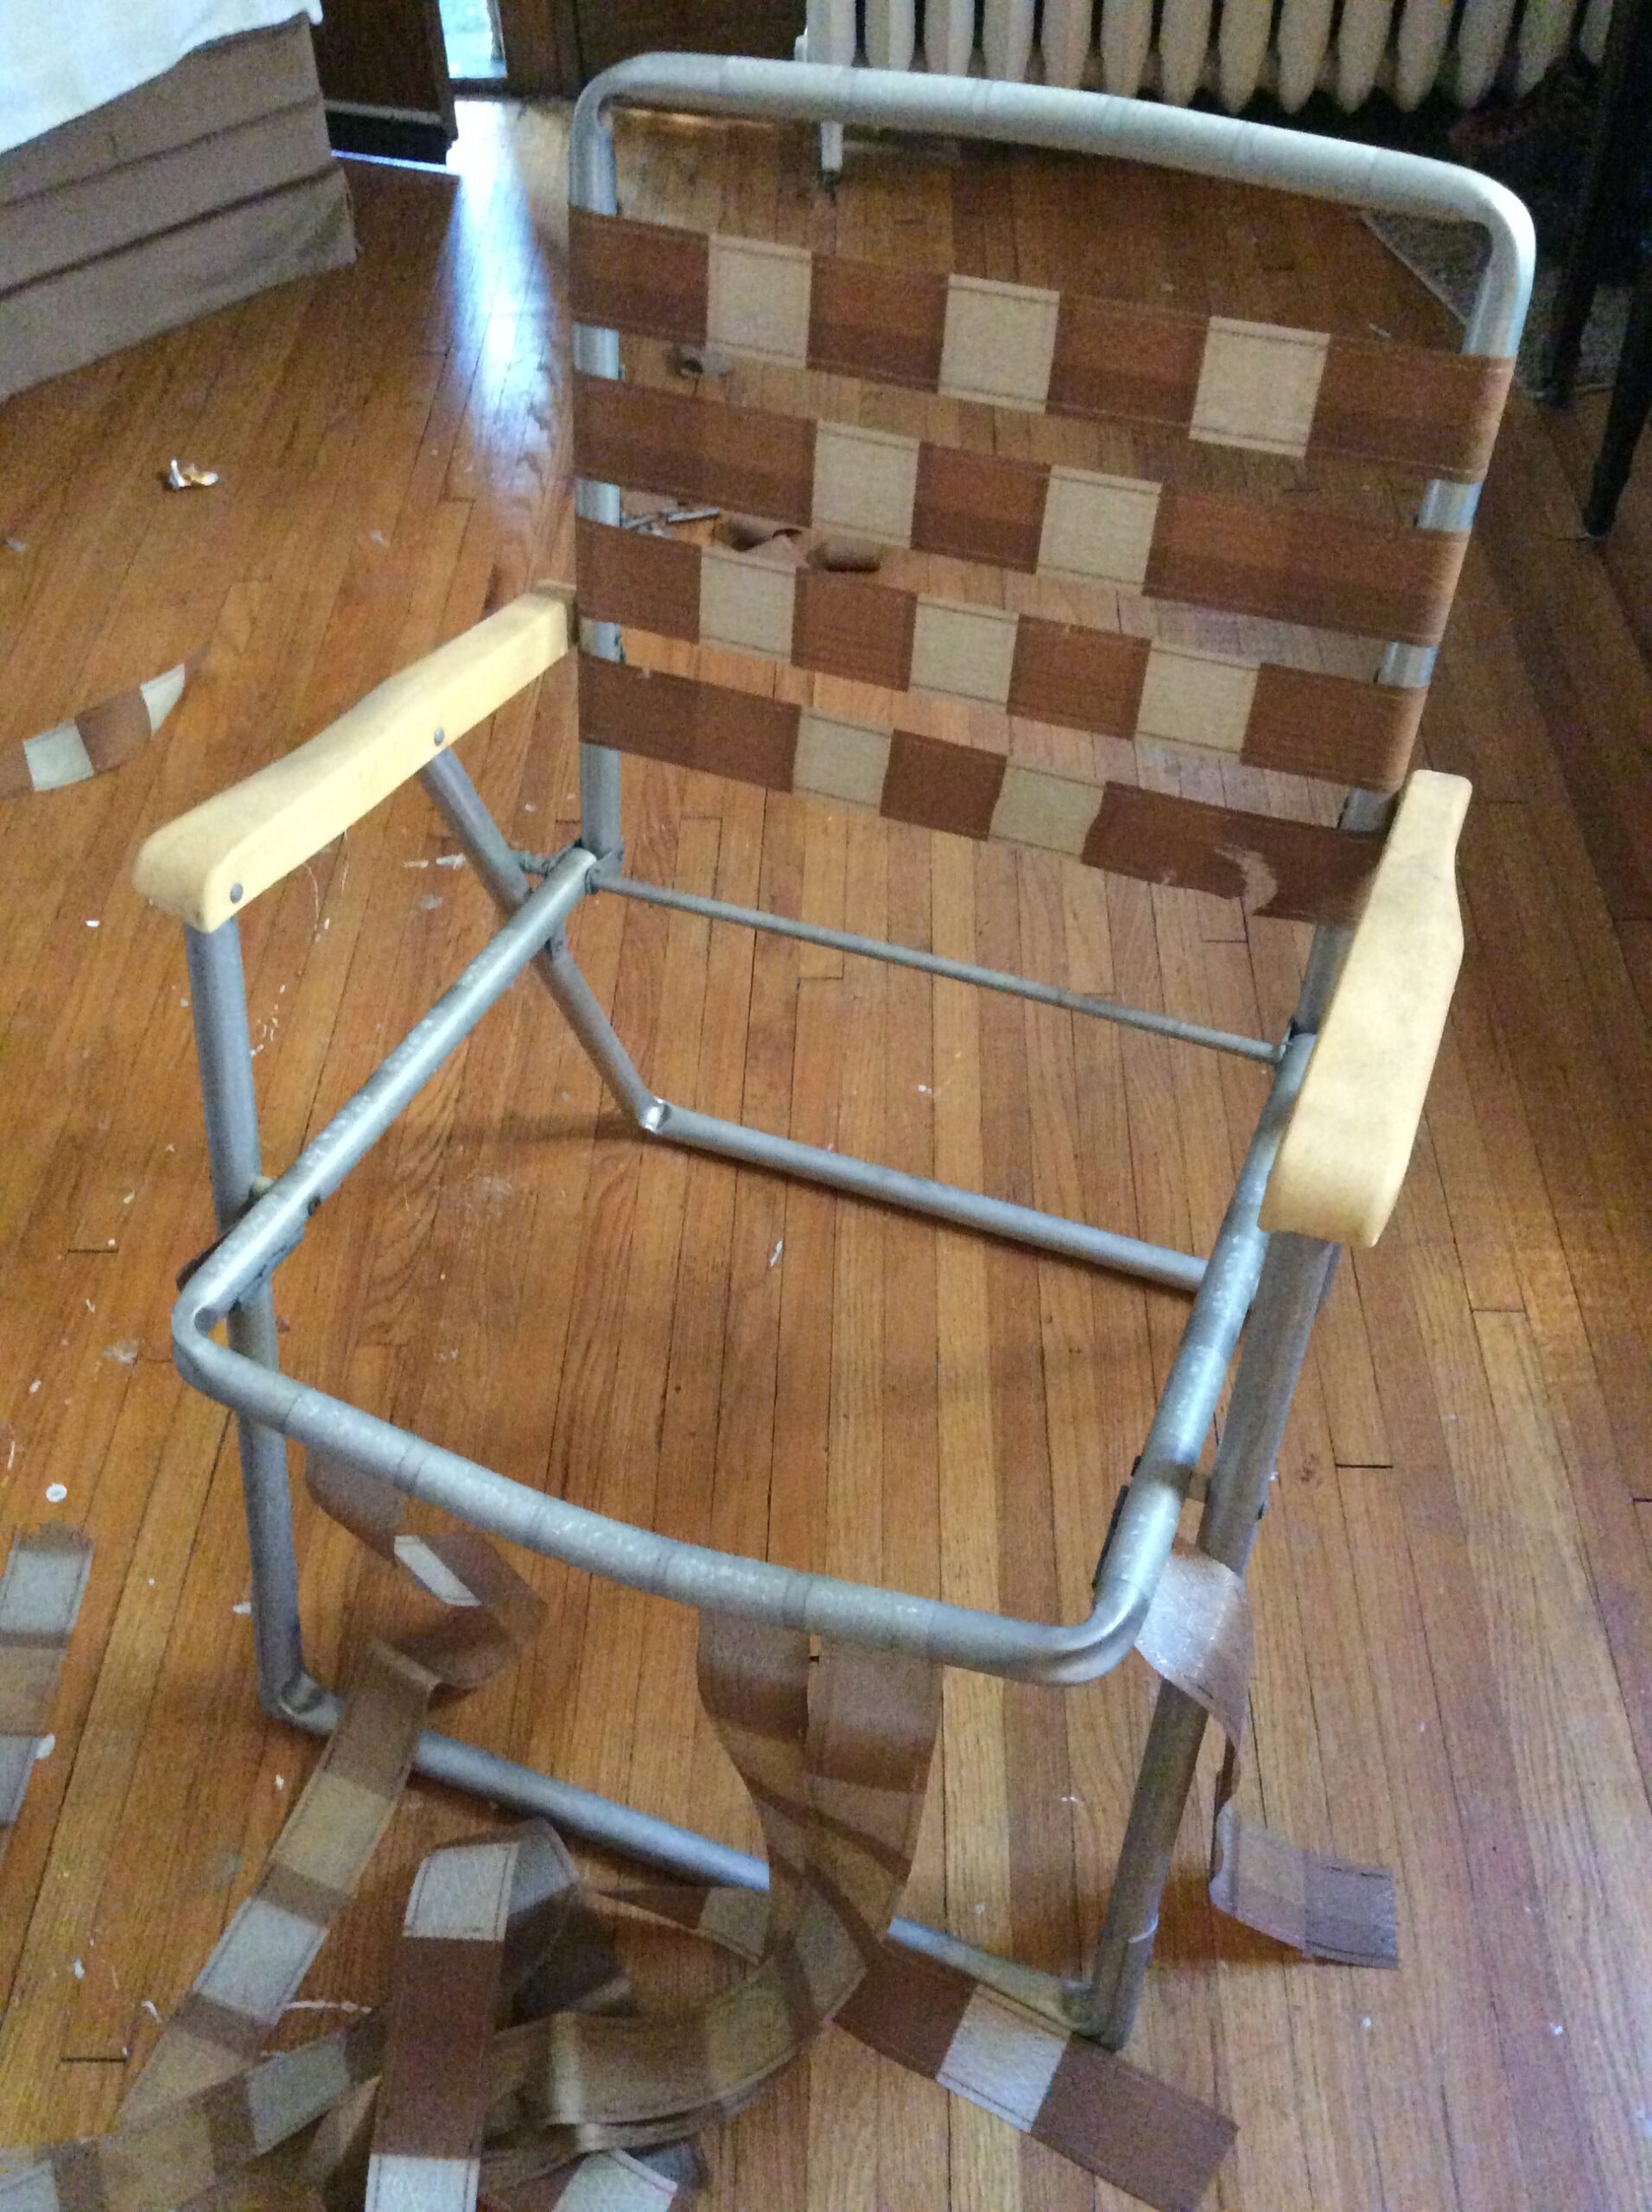
After cleaning the frame with Dawn dish-washing soap and a Scotch-Brite pad, I went over it with Krud Kutter. Then I remembered I had a buffing wheel that attaches to the drill and some polishing compound. So, I tried that too, including on the plastic arms. I’m not confident with the buffing. Most of the instructions I found were of an industrial nature (motorcycles and semi-trucks).

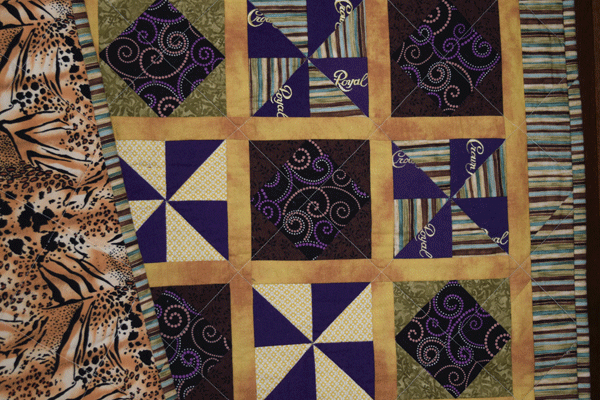
Choosing the cord was easy, as there was only black, white and tan available.

Free Lawn Chair Fixed with Macramé (After)

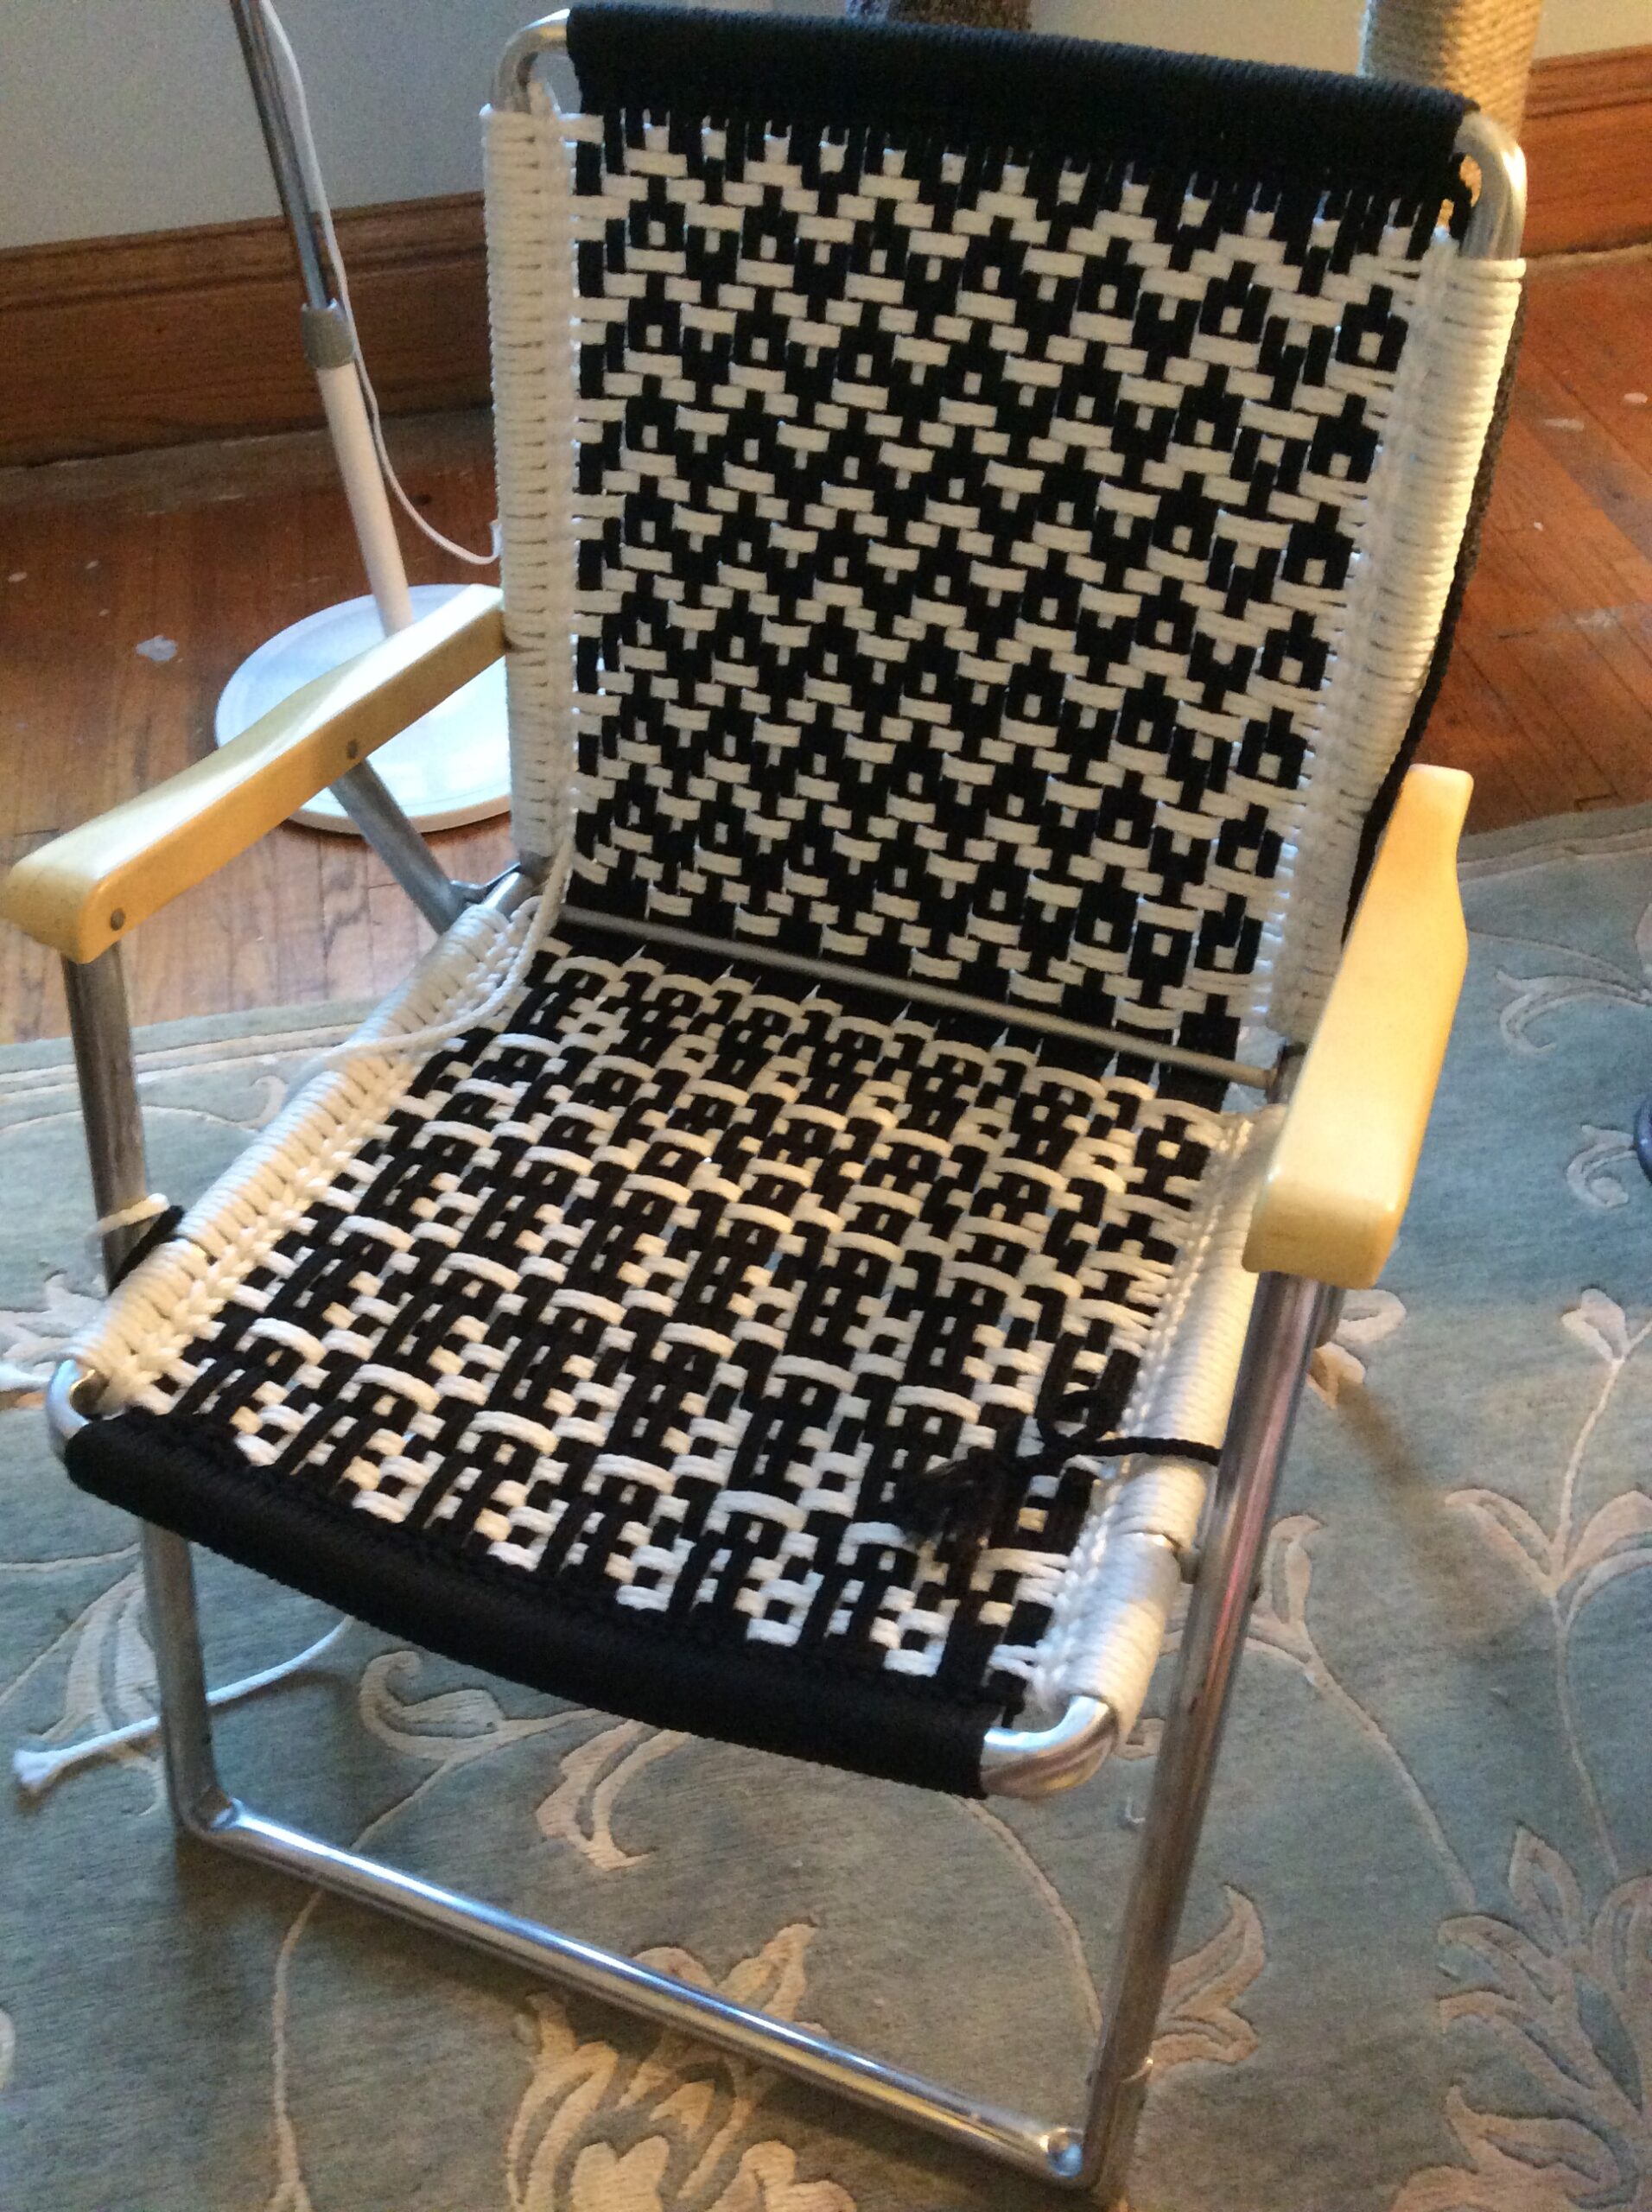
As for the pattern, I chose something I found in an old book about weaving: Weaving: A Handbook of the Fiber Arts by Shirley Held. The back of the chair is a herringbone twill:

Herringbone Twill

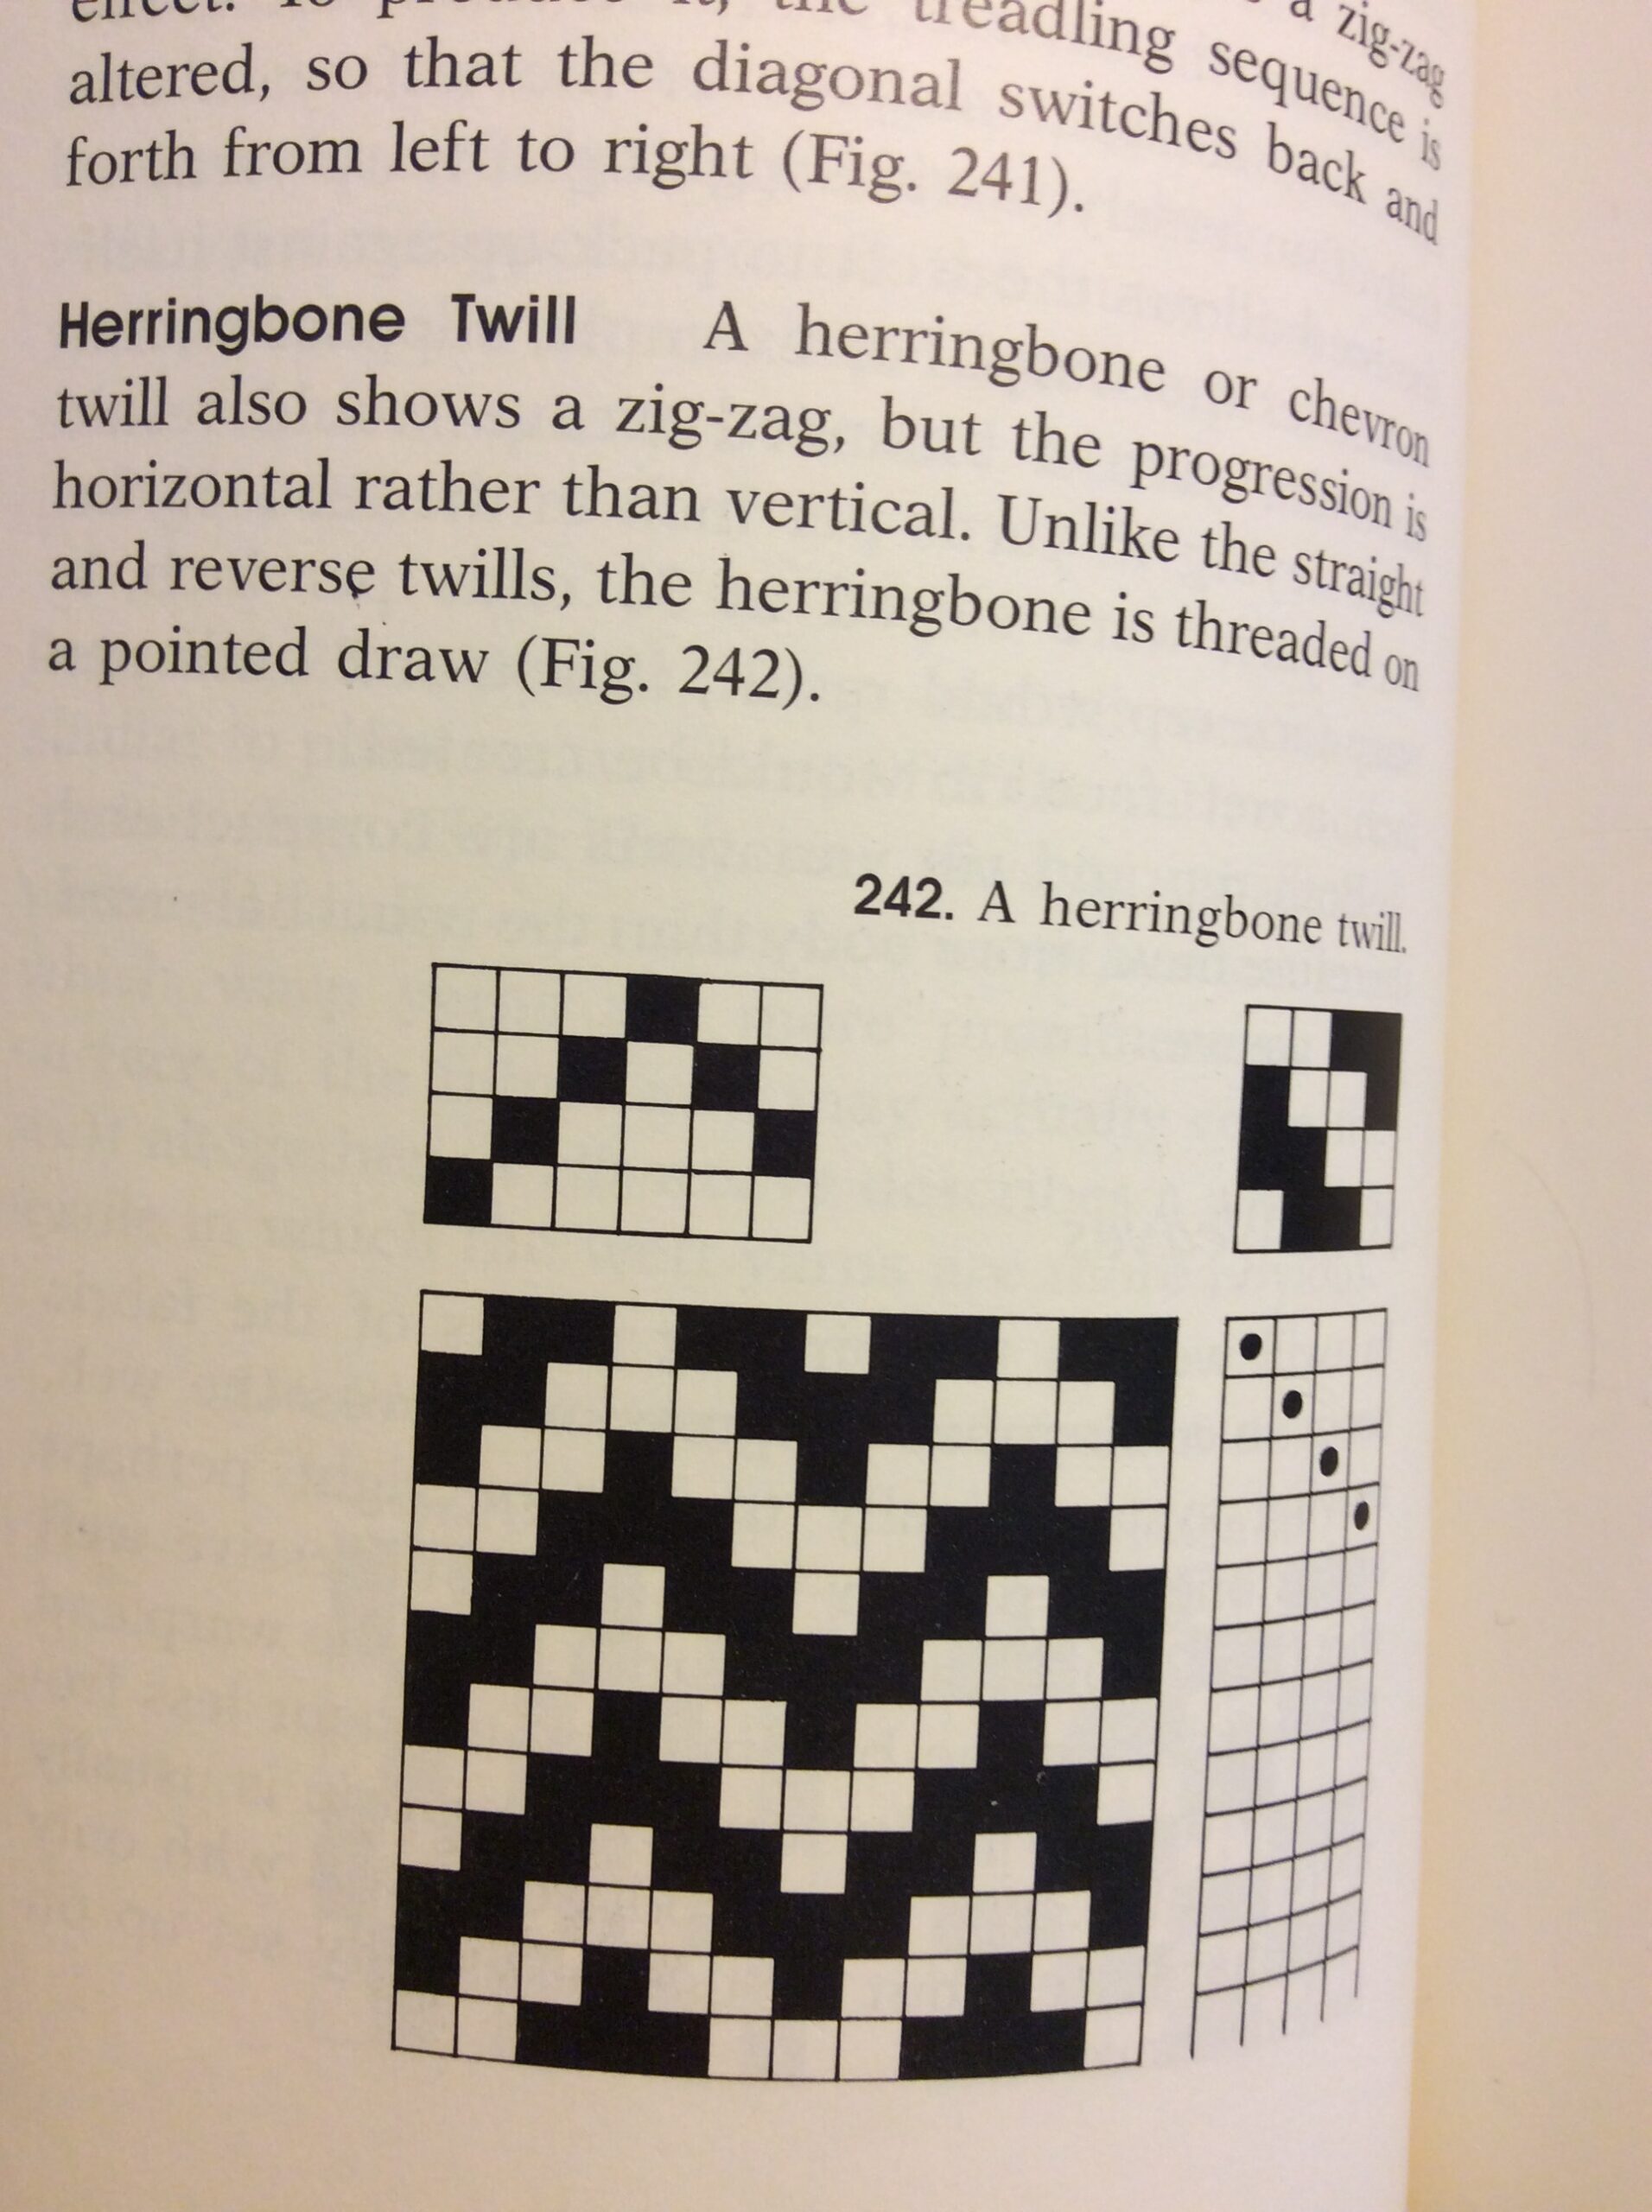
I made a cheat sheet with the pattern and kept track of rows on a separate card. This pattern is made up of four rows that repeat.

O=over, U=under

Row 1: Offset O2, then start the repeating pattern U3, O3

Row 2: Repeat U1, O2

Row 3: Offset U2, then start the repeating pattern O3, U3

Row 4: Repeat U1, O2

I worked from the bottom to the top. However, not all YouTubers agreed on this. Some went from the top down.

The seat of the chair was a pattern called a cord velveret.

Cord Velveret

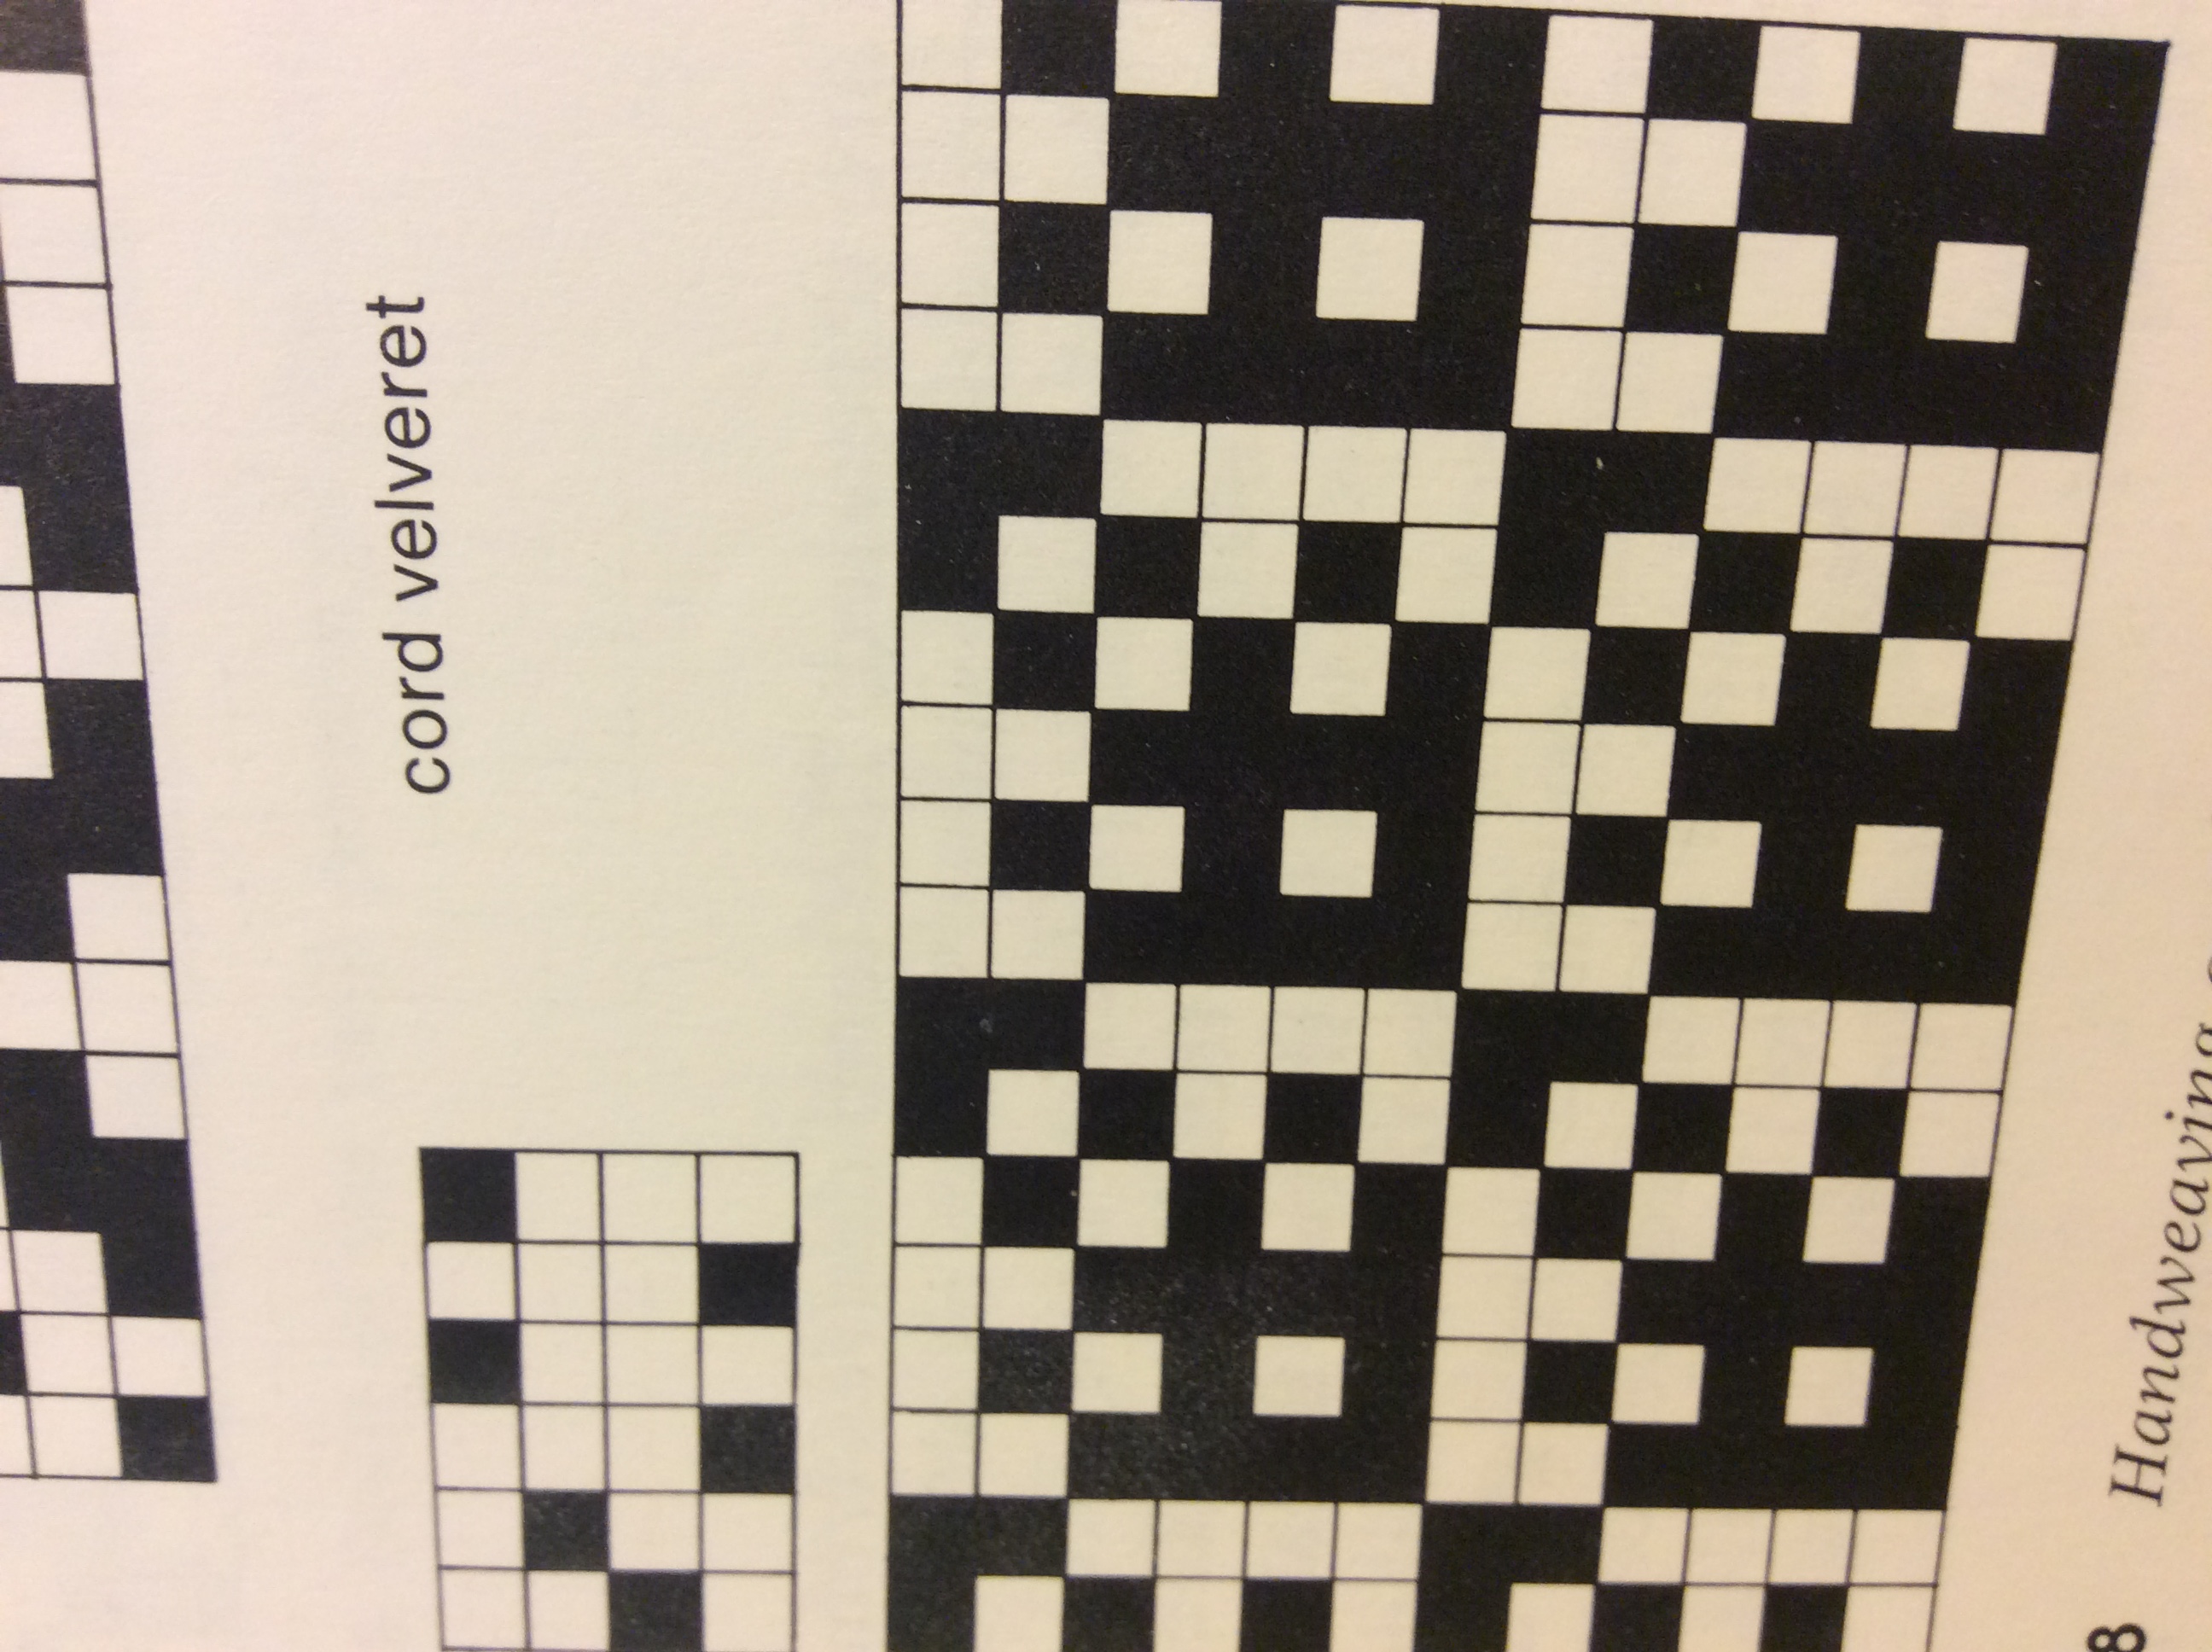
This pattern is made with six repeating rows:

Row 1: U2, O4

Row 2: O1, U1

Row 3: U1, O1

Row 4: O2, U4

Row 5: U1, O1

Row 6: O2, U4

If you look closely (or maybe not so closely), you can see that I messed up the pattern on the seat. But I made the call: Good enough. Let’s get at least one chair under my belt before the summer’s end!

I was struck by how simple these patterns were and wondered what calculation or principle was behind them. I can copy something. But could I create a repeating pattern from scratch? Learning about the circle of fifths struck me in a similar way. How did anyone ever figure out the pattern? Brian had the same reaction. As I was marveling over these weaving patterns, without my prompting, he also said that it reminded him of the circle of fifths (or the way that I marveled over that too). And then I read this in Held’s book in chapter nine about drafting weaving patterns:

“Drafting has often been compared to musical notation, and in some ways the analogy is accurate. However, unlike the symbols used in music, the shorthand of drafting is not universal… We occasionally hear of great singers or other musicians who cannot read music. Similarly, many experienced weavers can neither read nor write drafts, preferring to design on the loom….”

While this doesn’t quite get at my amazement of how patterns work, the music analogy was close enough to make me think that I was onto something. I just don’t have the words for it. It also makes me wonder if a weaving pattern could be translated into music. What does a reverse twill sound like? Or the other way around. What is Für Elise as a chair? I once saw novels being depicted as colors based on sentence length. It reminds me of that. Unfortunately, I can’t find an example of it.

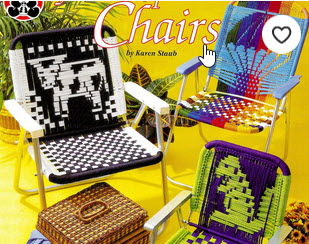
There are some really cute macramé lawn chair patterns out there. I even saw one with a cow that would be perfect for my mother.

Macramé Lawn Chair Patterns

As for my first chair, I don’t have a good answer to the the question “How long did it take?” Should I count the learning? The redoing? The tears?

I exaggerate. There were no tears. No swearing. Still, while appreciating the free instructions that will get you started on a macramé chair, many gloss over the tricky parts. More than once, my crochet hook went flying across the room with deadly force because I was doing something (I don’t know what) wrong. And despite the claim, the warp (the vertical strings) and the weft (horizontal) are attached differently. It’s not enough to say “It’s just like what you did before.” It isn’t. Many of the instructors I encountered seemed to have forgotten what it’s like to be a beginner. Could it be that some have never actually observed anyone trying to follow their instructions? To be fair, there are the good ones too. And there’s not a room in my house that hasn’t benefited from a DIYer on YouTube. In any case, it took a few different tutorials, all incomplete in their own way, to get a full picture of the steps to weave a macramé lawn chair. Even then, I had to figure out some stuff on my own, like how to deal with a big crochet hook in the corners of the seat. Road signs would have helped. These are the clues you need to check your work. For example:

As you are weaving, you know that you’re ready to start a new row when you see the tail of your string draped over the frame like this:

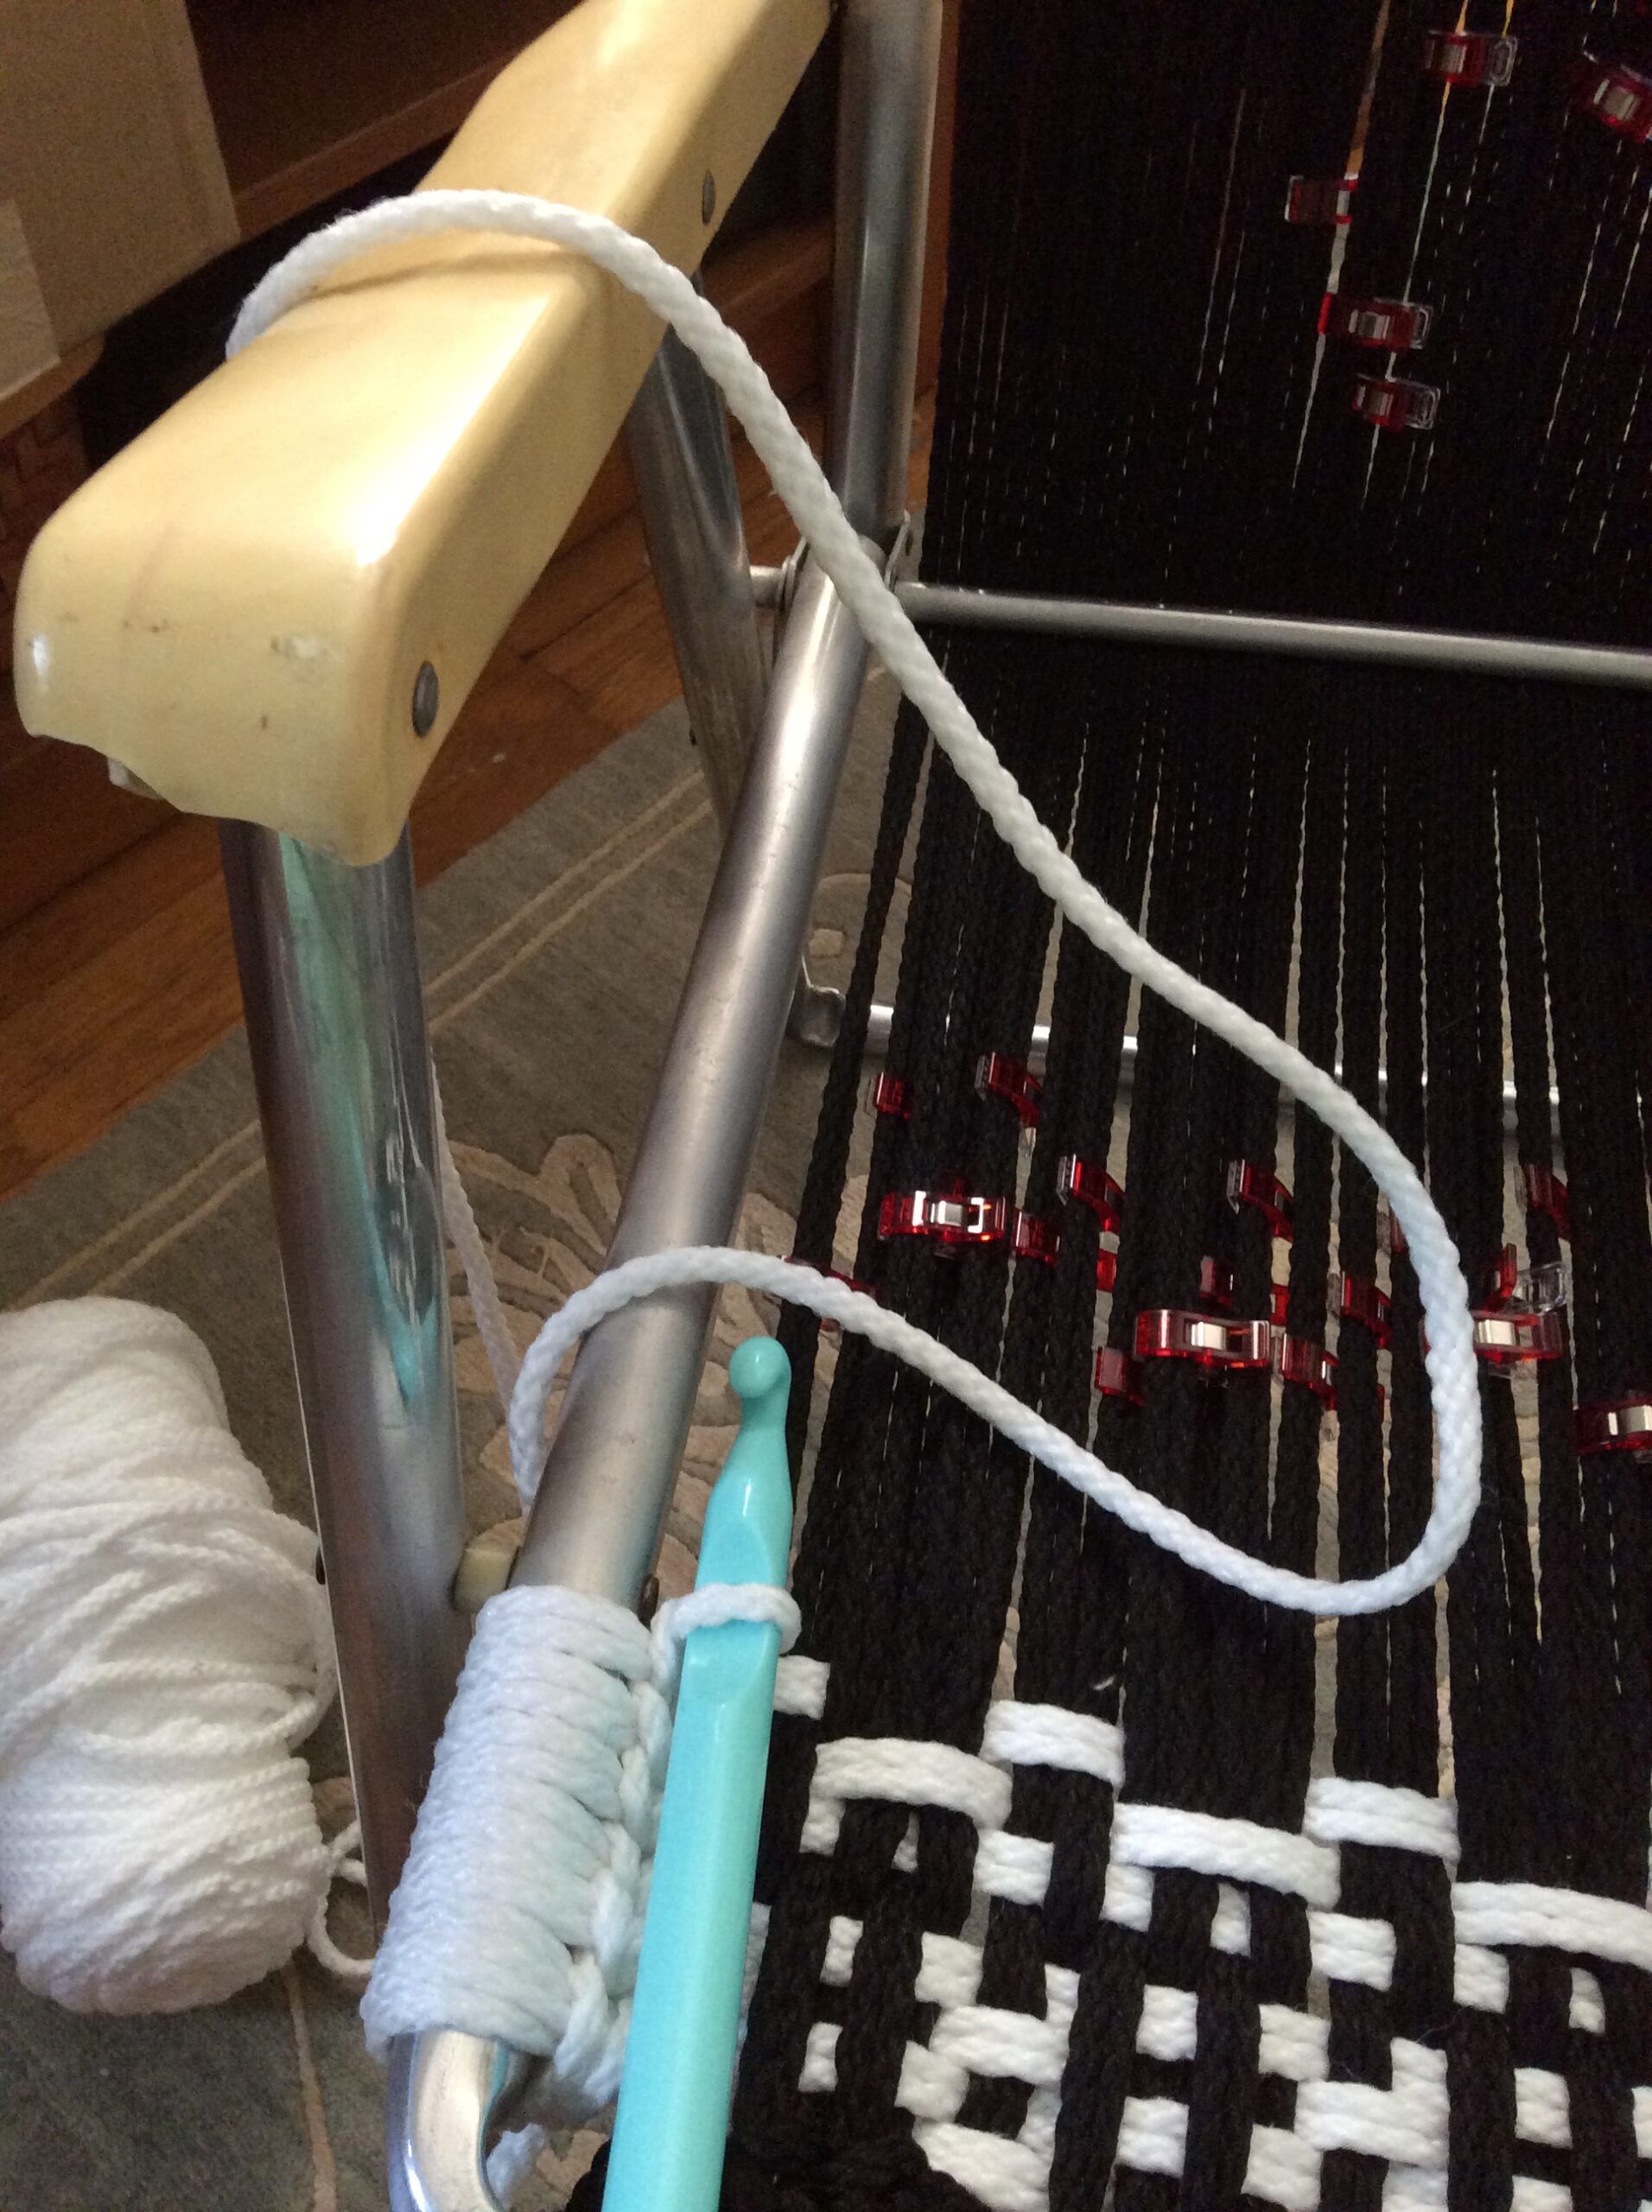
Note the skein of cord is on the ground and feeds over the arm of the chair. However you set it up, it should remain the same throughout the weaving. Otherwise, it’s a clue that you messed up somewhere (which I did many times!). Compare the above to this:

The cord has yet to be looped over the frame and crocheted in place.

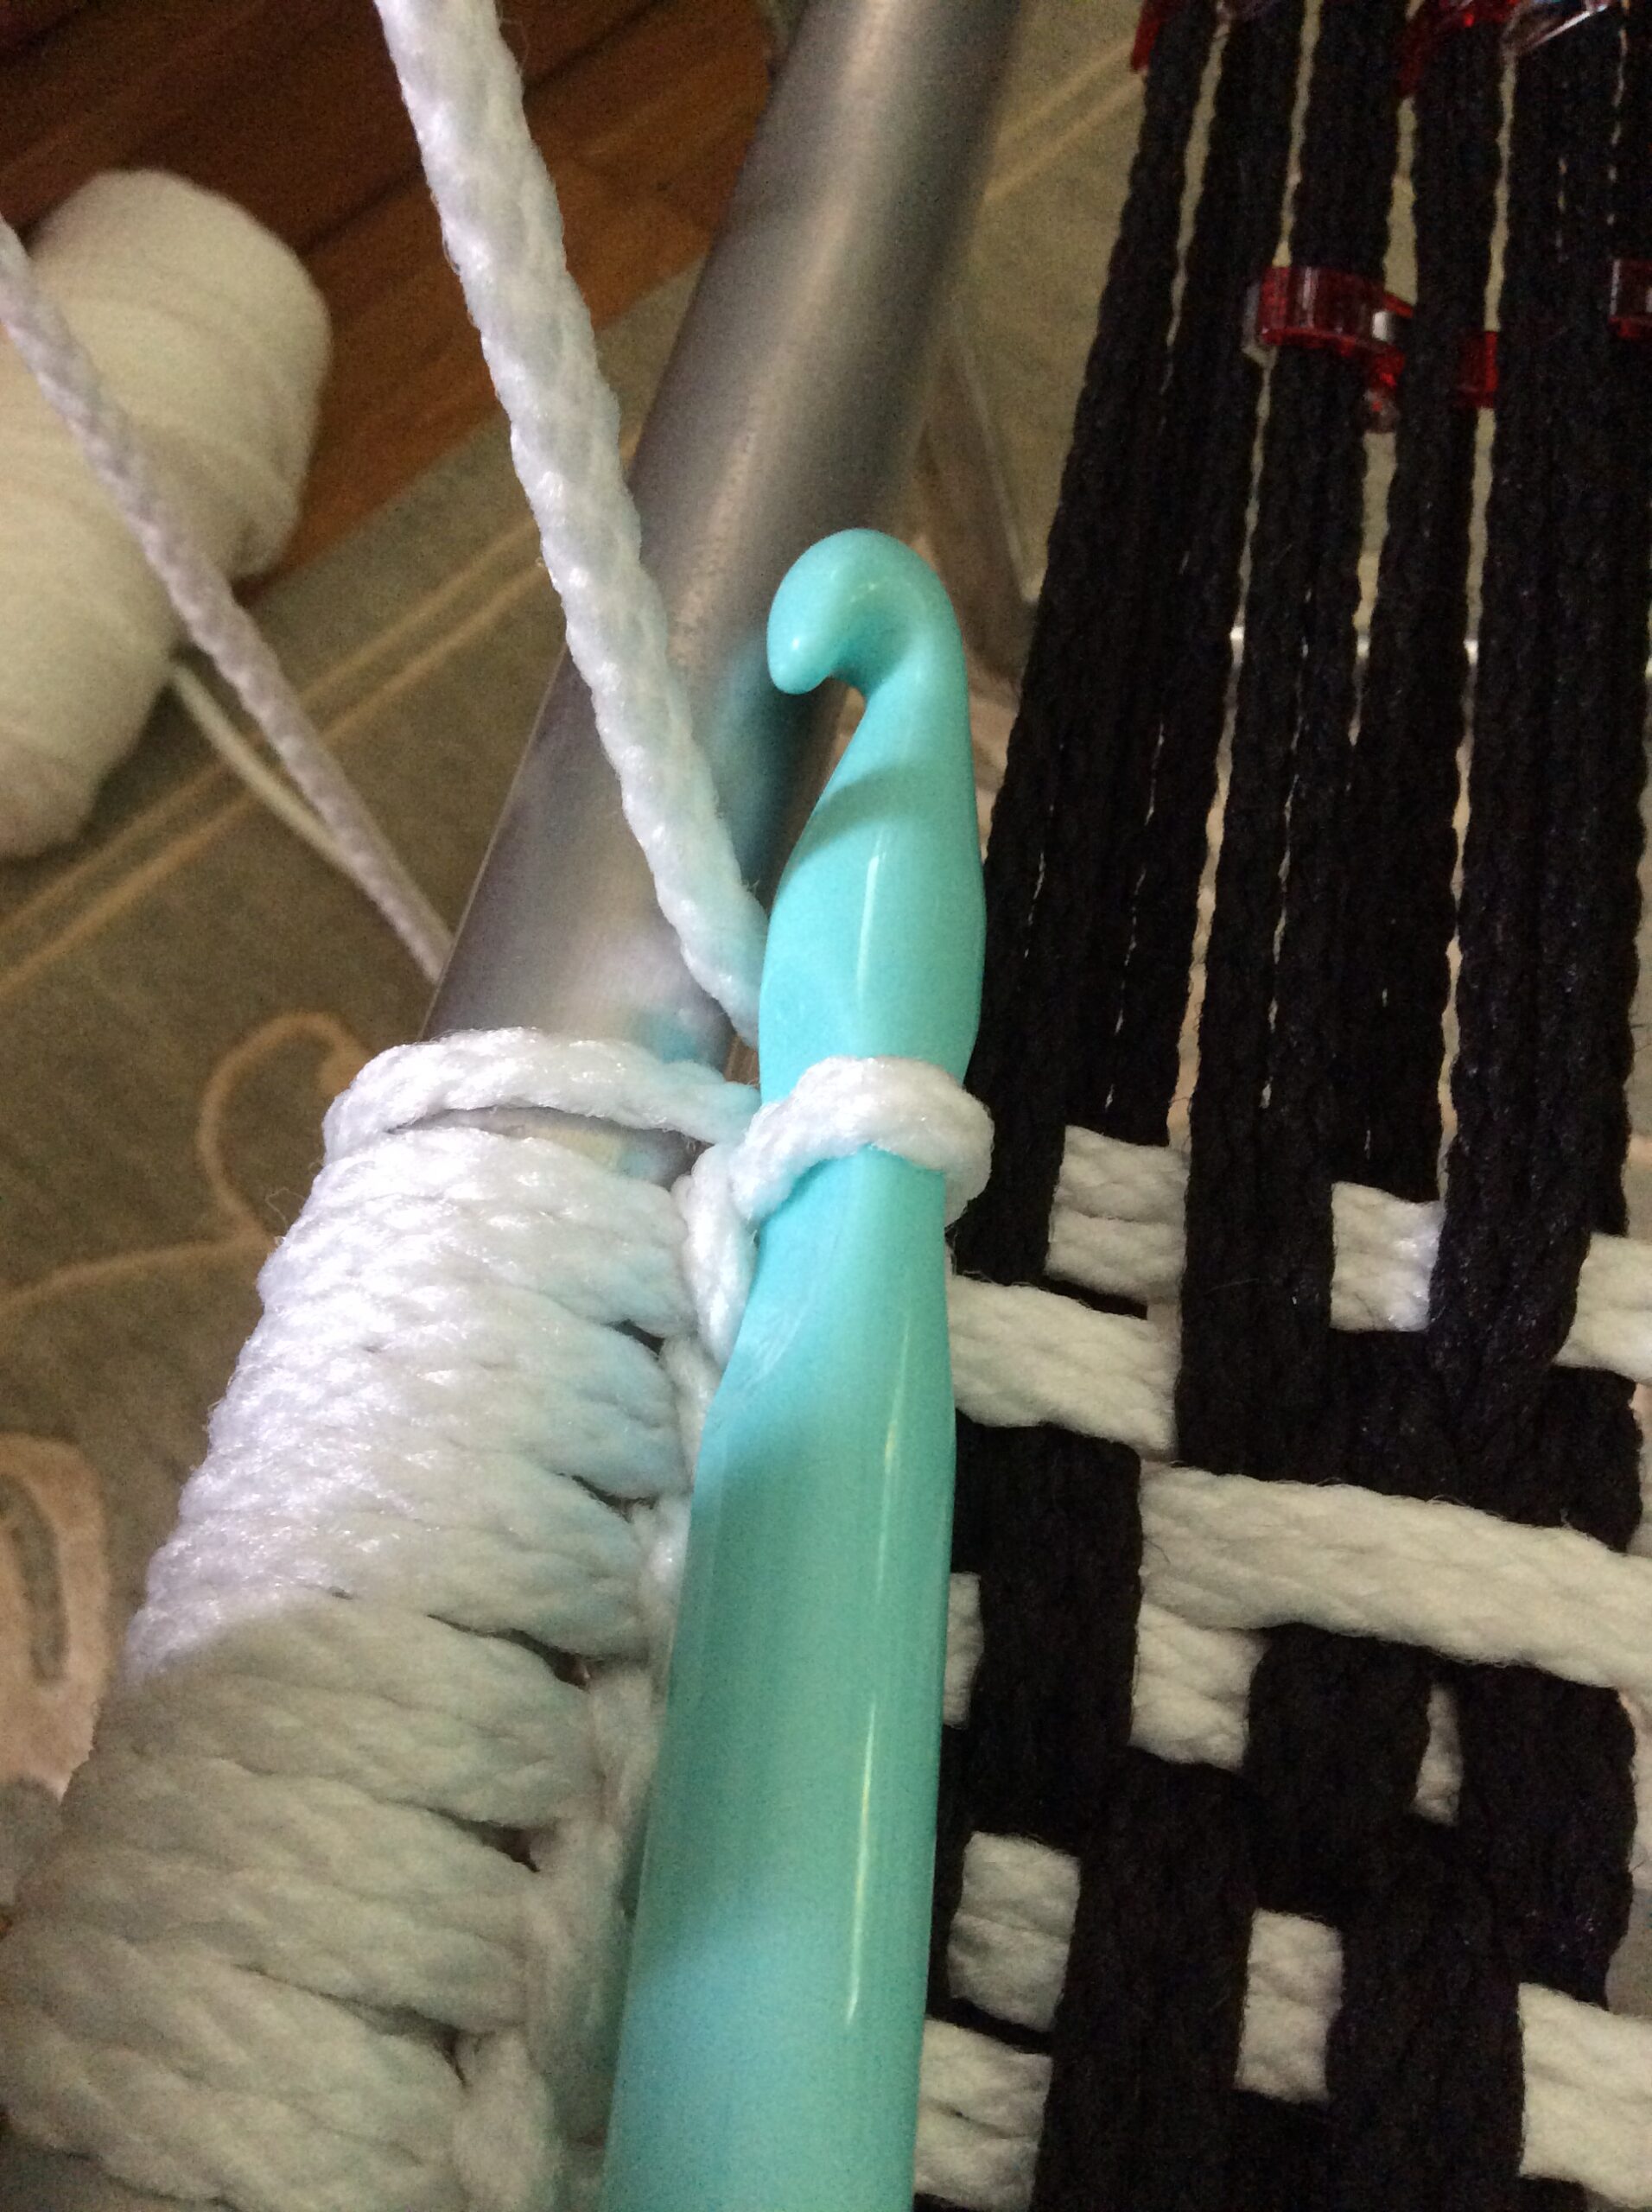
Here we can see the stitch has yet to be complete because it’s pointed away from the center of the chair and it isn’t draped over the top of the frame.

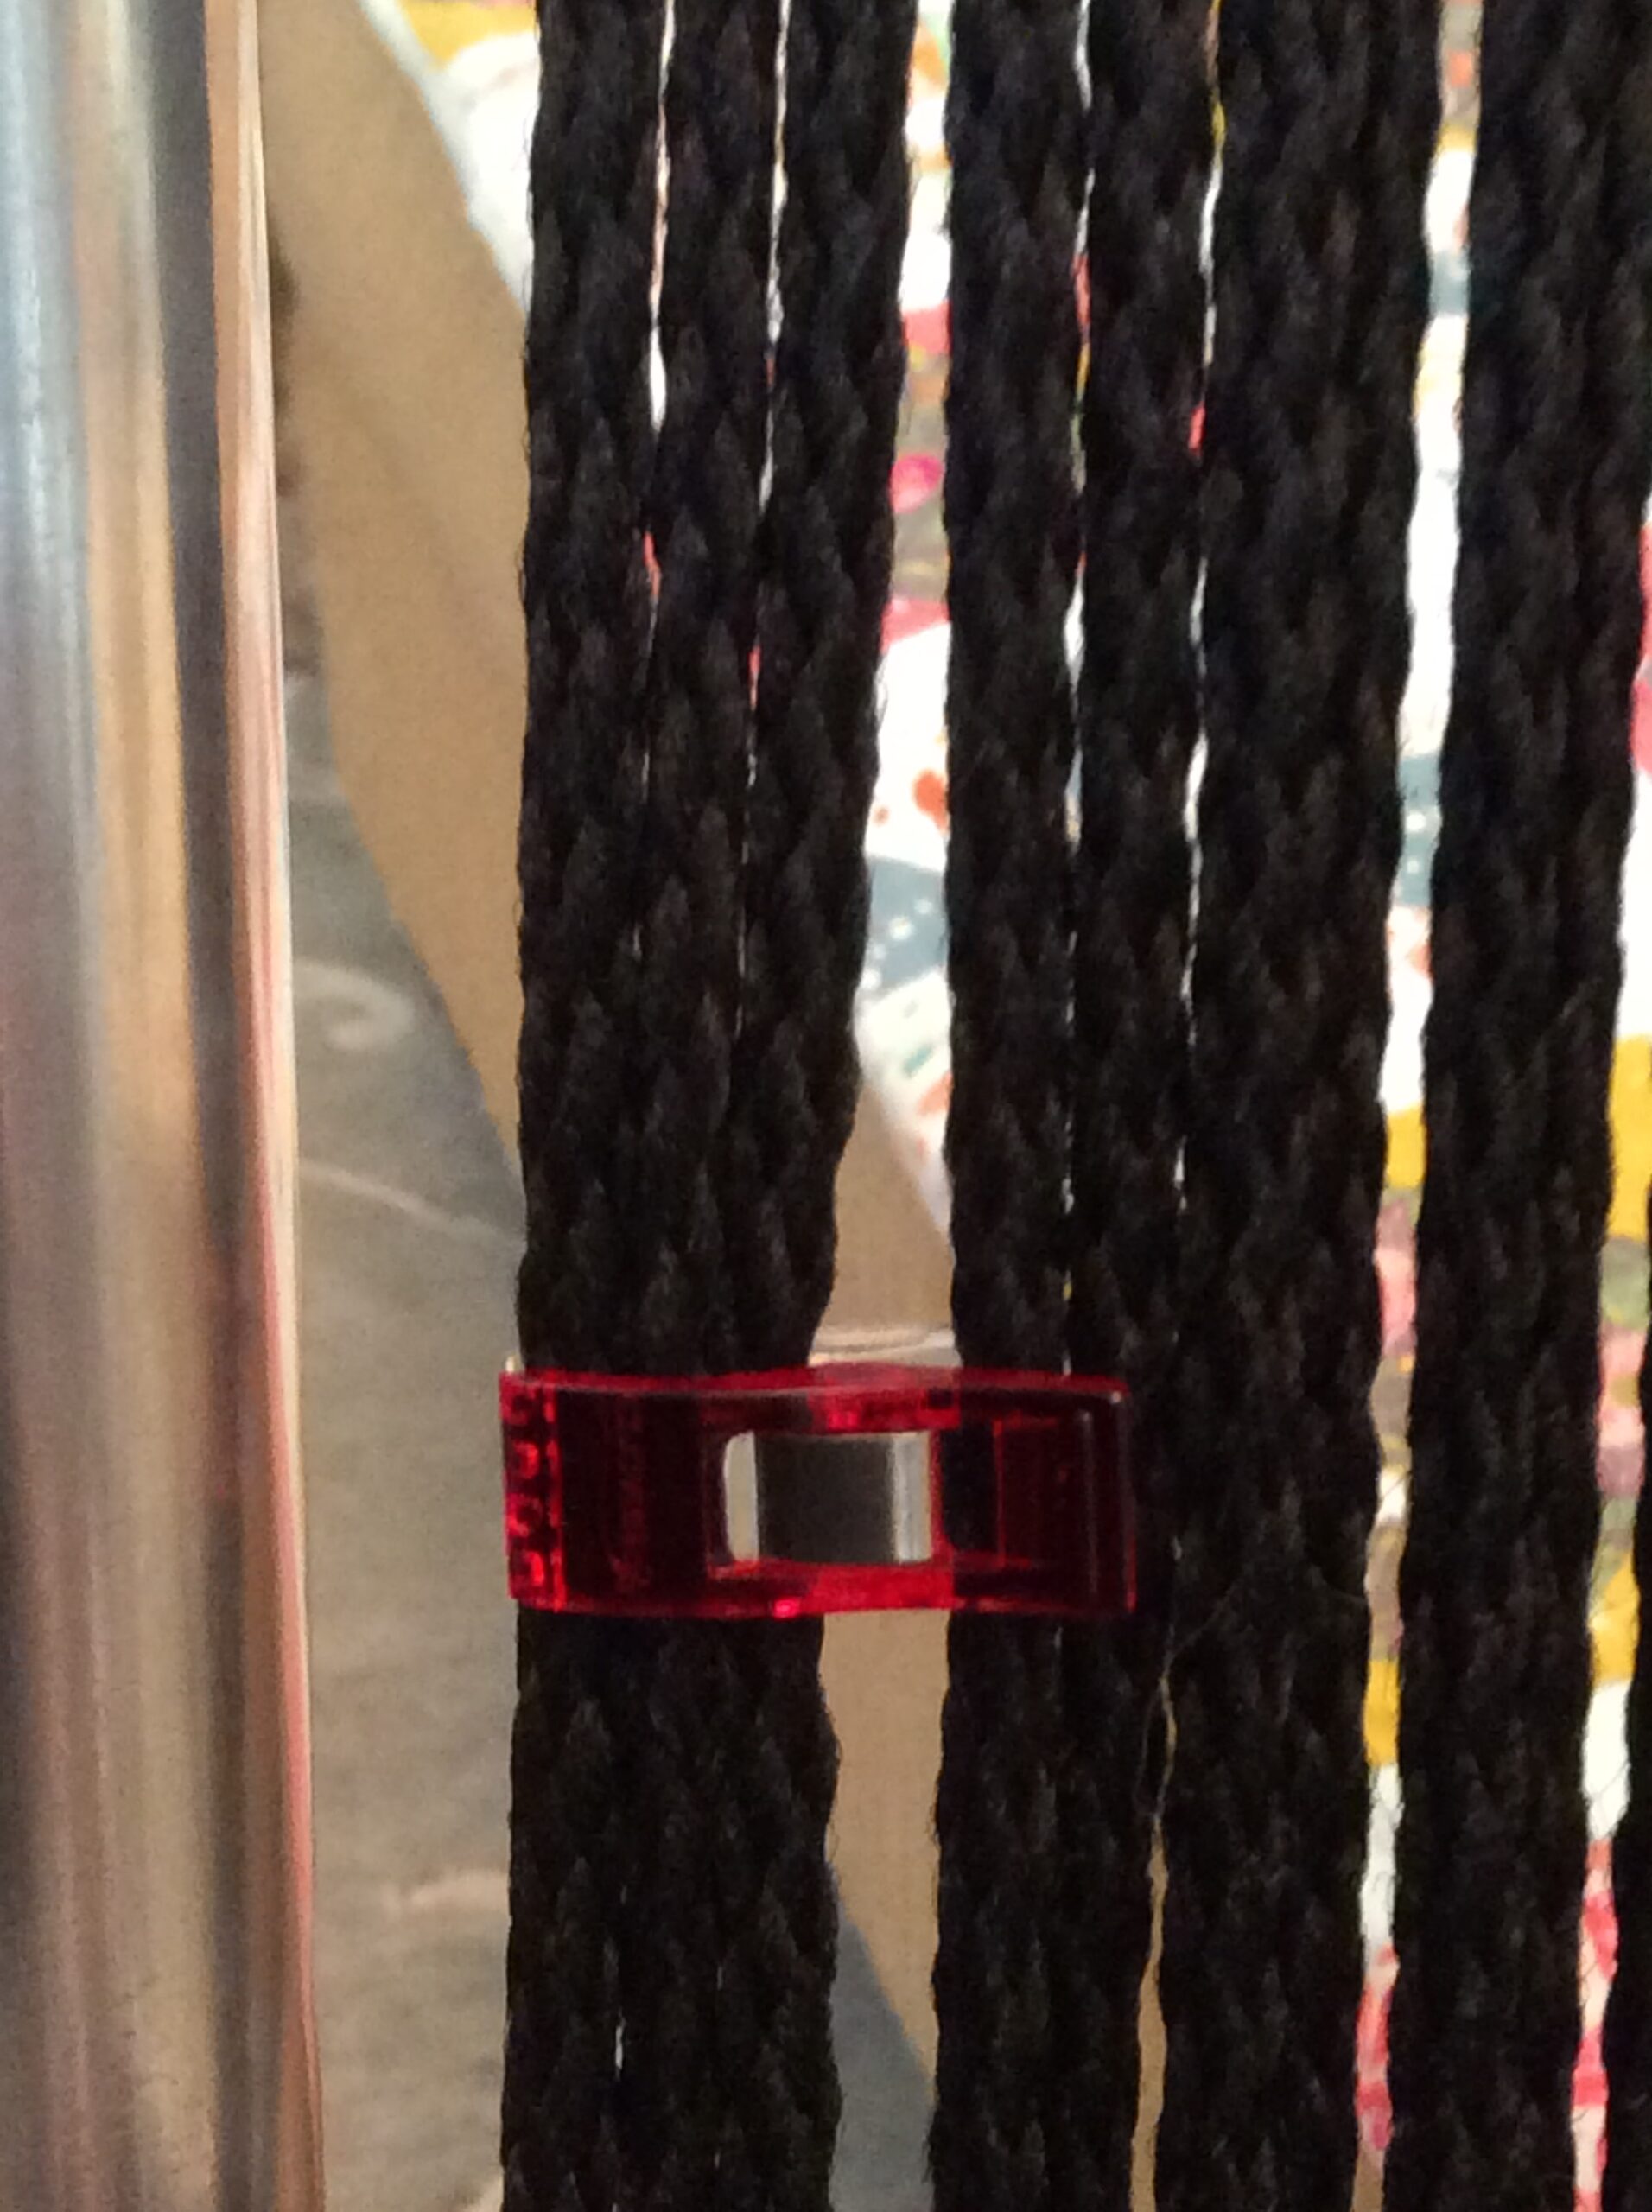
The wonder clips you see were used to pair the threads (2 per knot). For me, it made it easier to count… 1 over, 2 under, etc. And yes. You’re counting sets as opposed to individual threads.

Use Wonder Clips to group string pairs for easier counting

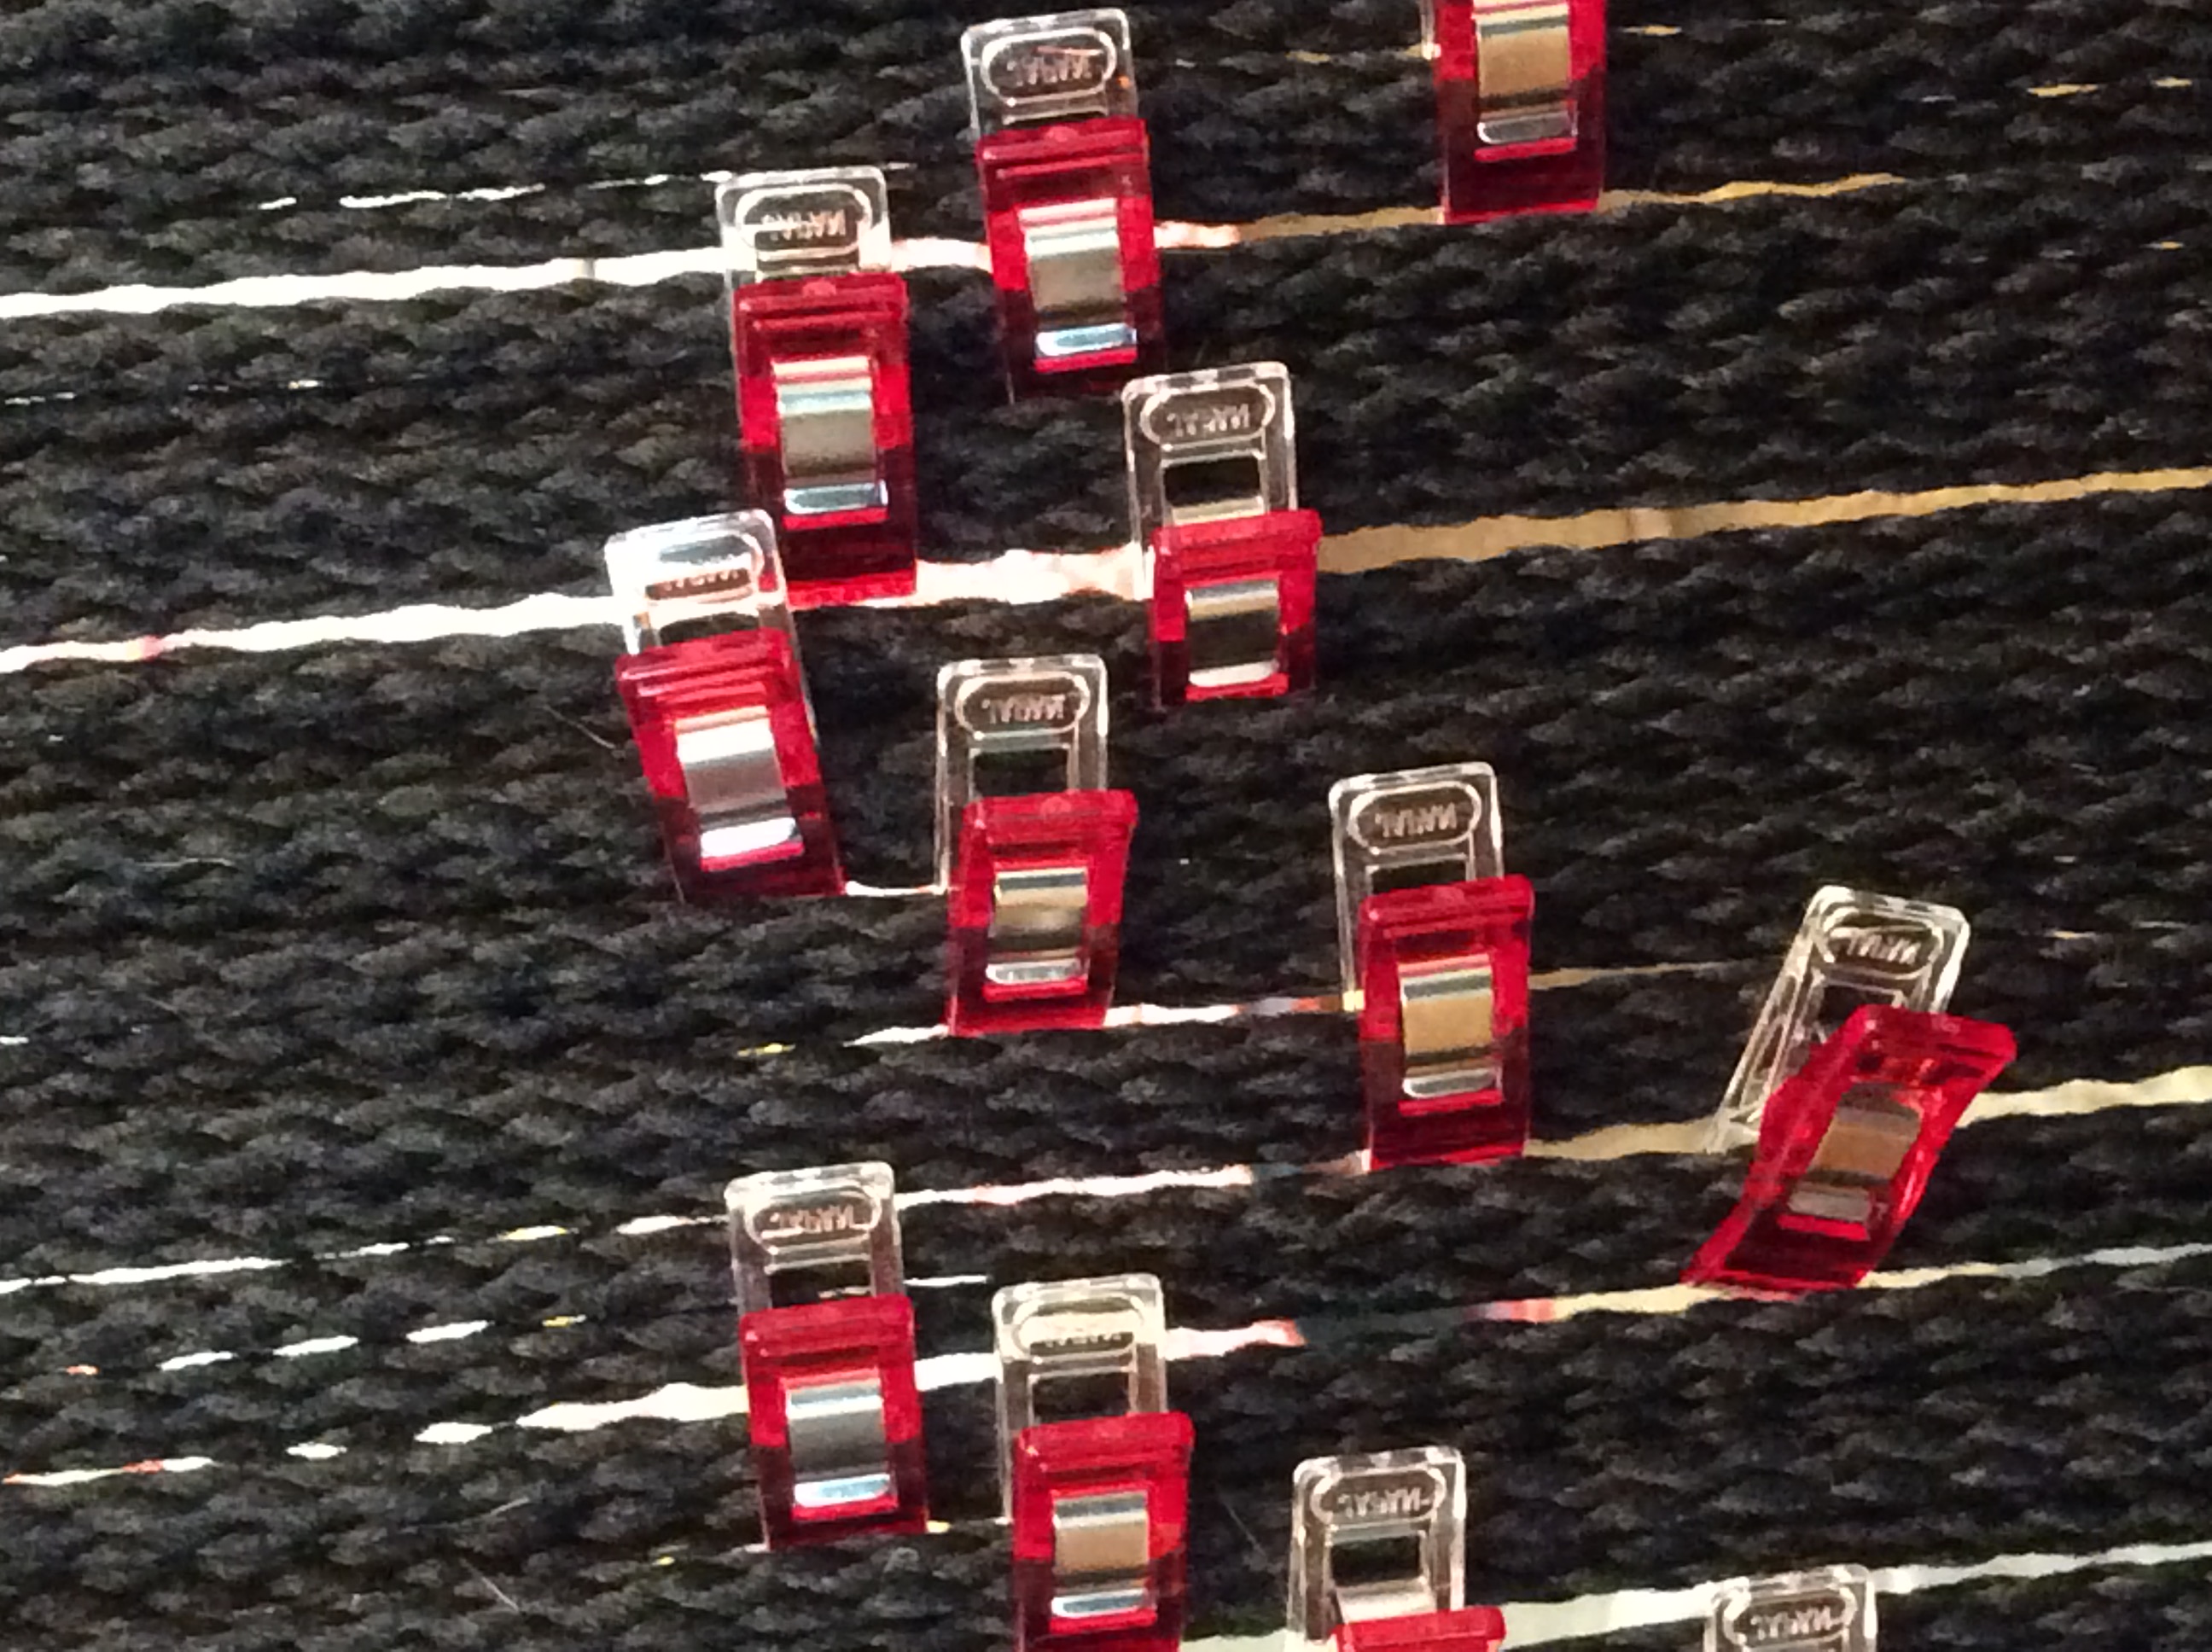
It would’ve also been useful if someone had pointed out that the first set of strings will have three threads per knot instead of two. The confusion caused me to unnecessarily start over. But even after I figured out that this was to be expected, I forgot to account for it when I started my under/over pattern. Half the seat was done before I realized that I’d need to start over. Again, marking this with a Wonder clip eliminated confusion.

Note the knots that have three threads and treat them as a set.

In all of the macramé lawn chair videos that I saw (as opposed to the ones on Danish cord weaving), the chair is finished by cutting the loose ends of the strings short and melting the ends to stop them from fraying. This is a reasonable way to do it. But I suspected that my sister Amy who crochet’s and does macramé would have a better solution and she did. I don’t have pictures of it, but she essentially pulled the loose end behind the first two to three inches of the loops around the frame, being sure to match the colors (i.e., two strings will travel along the white edge and the others along the black). As opposed to letting strings — though cut short — dangle loose, she melted the end as usual and then hid it under the loops. If I do another chair (I have two requests already), I’ll take pictures that show this.

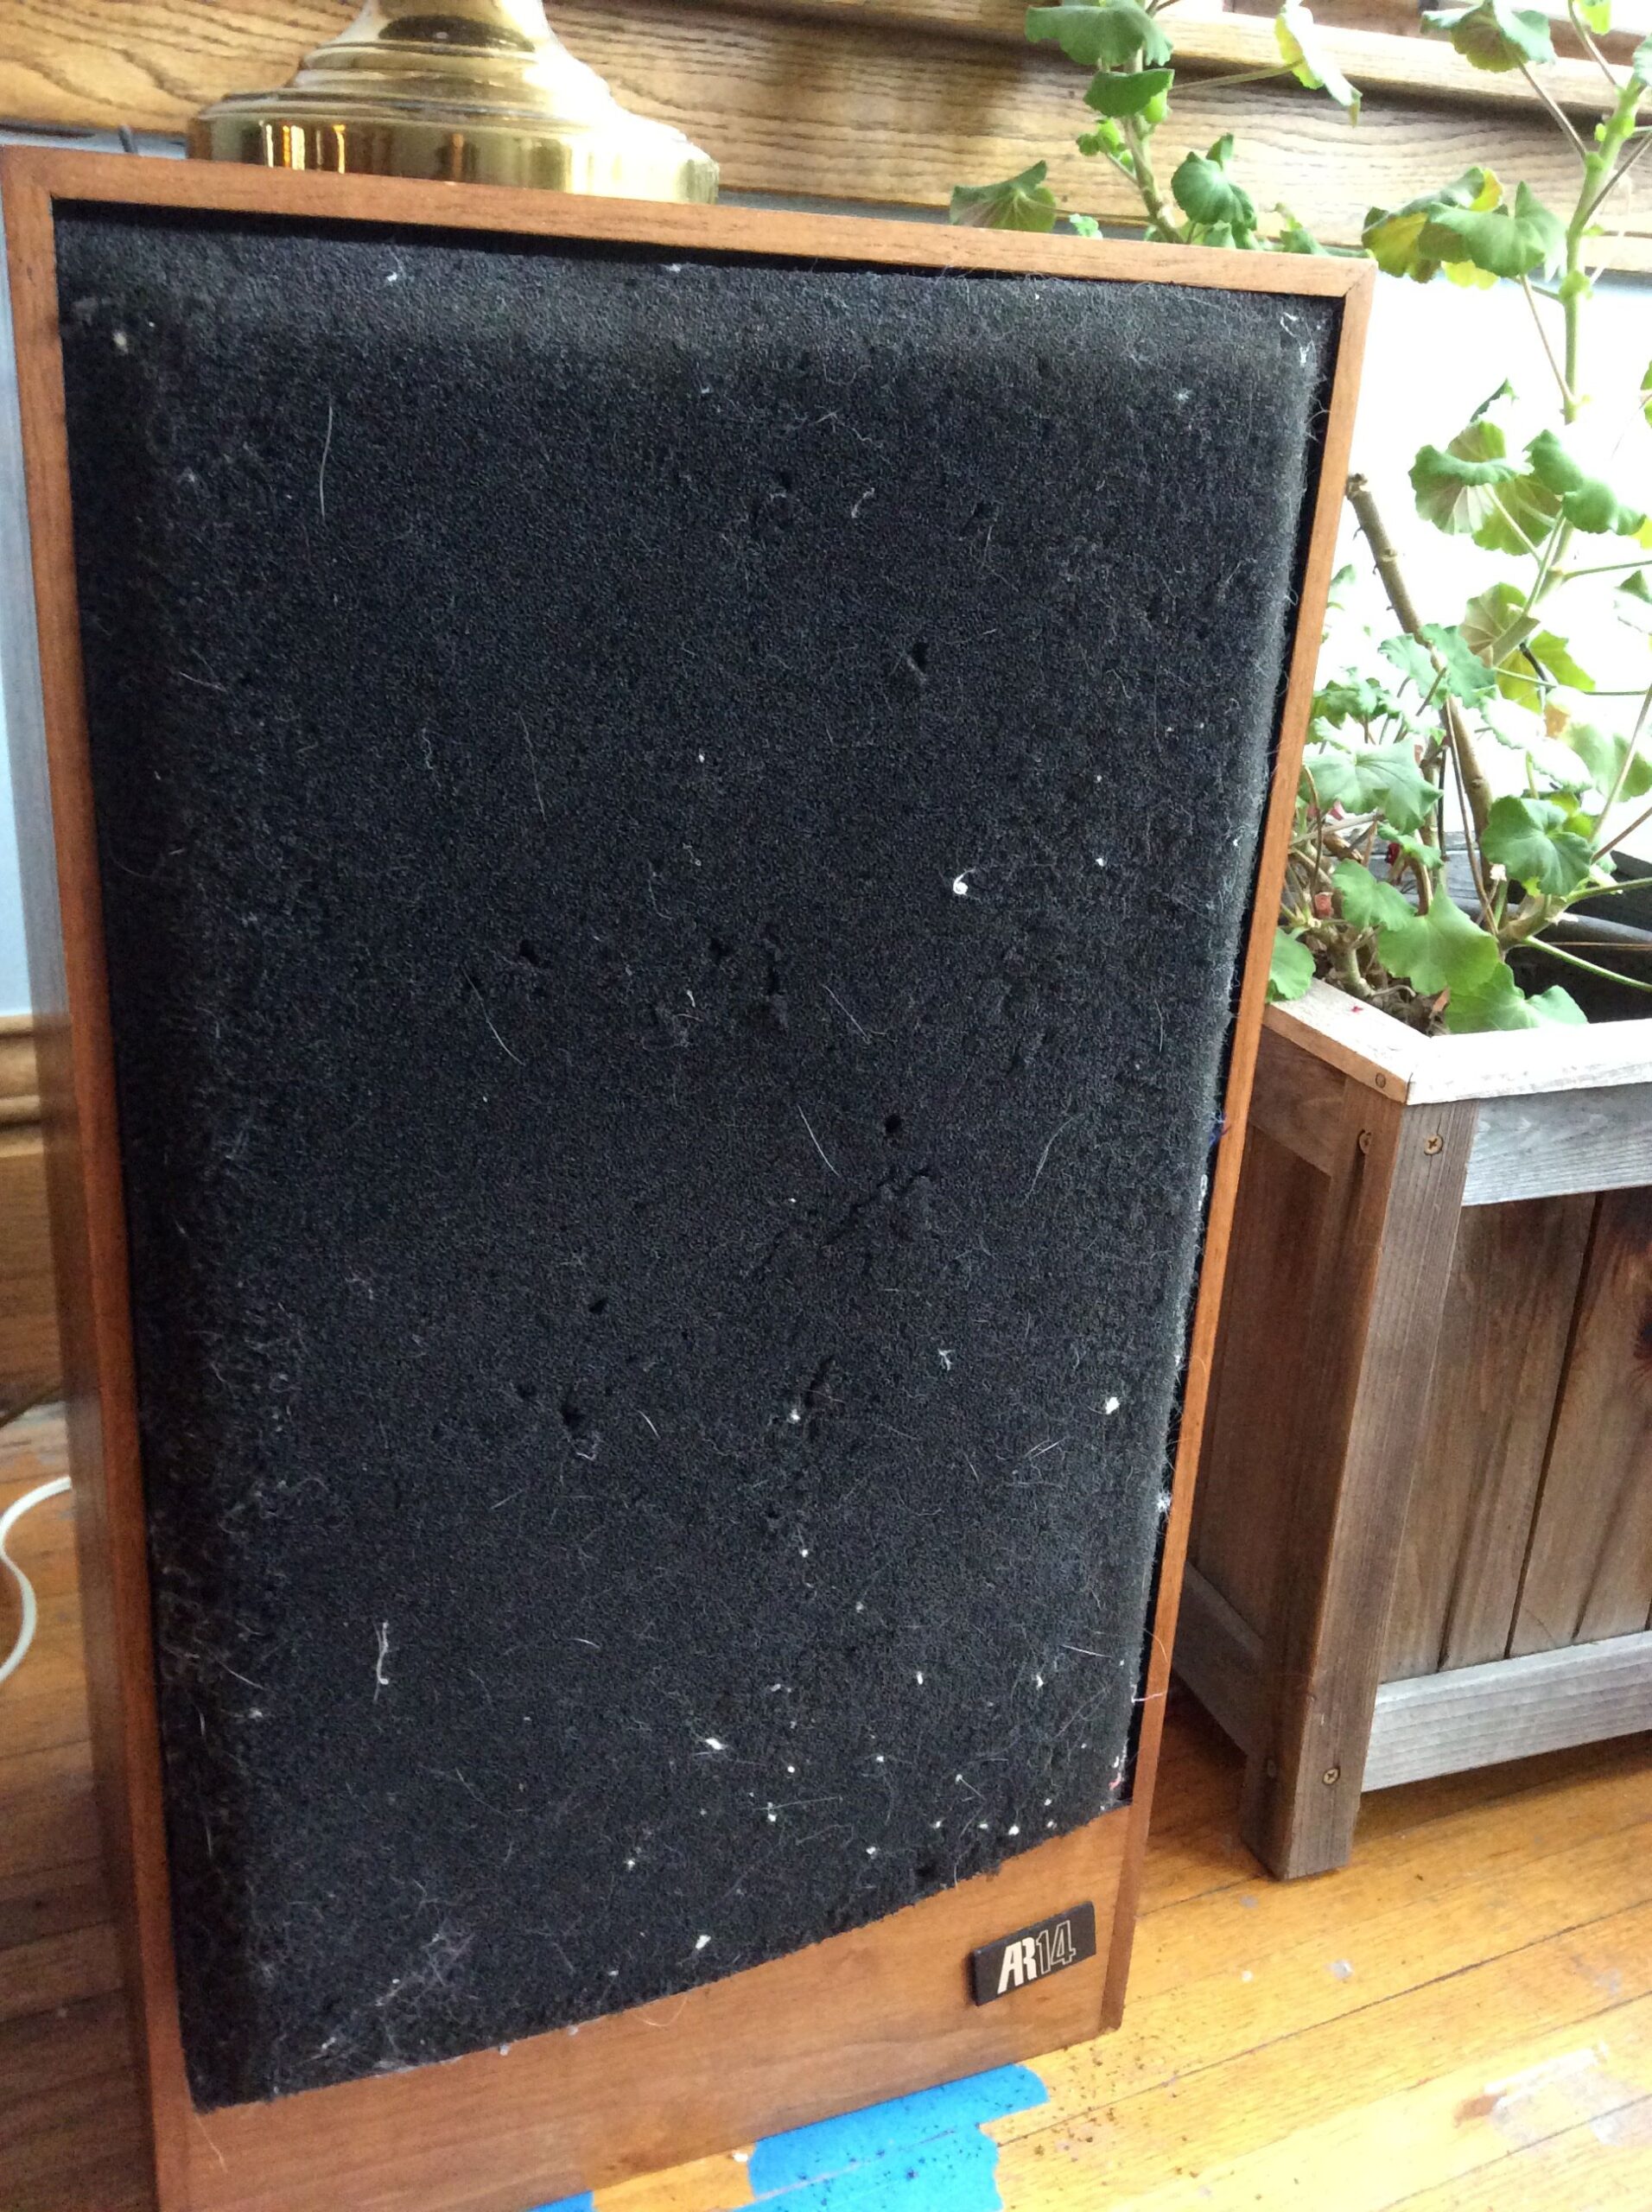
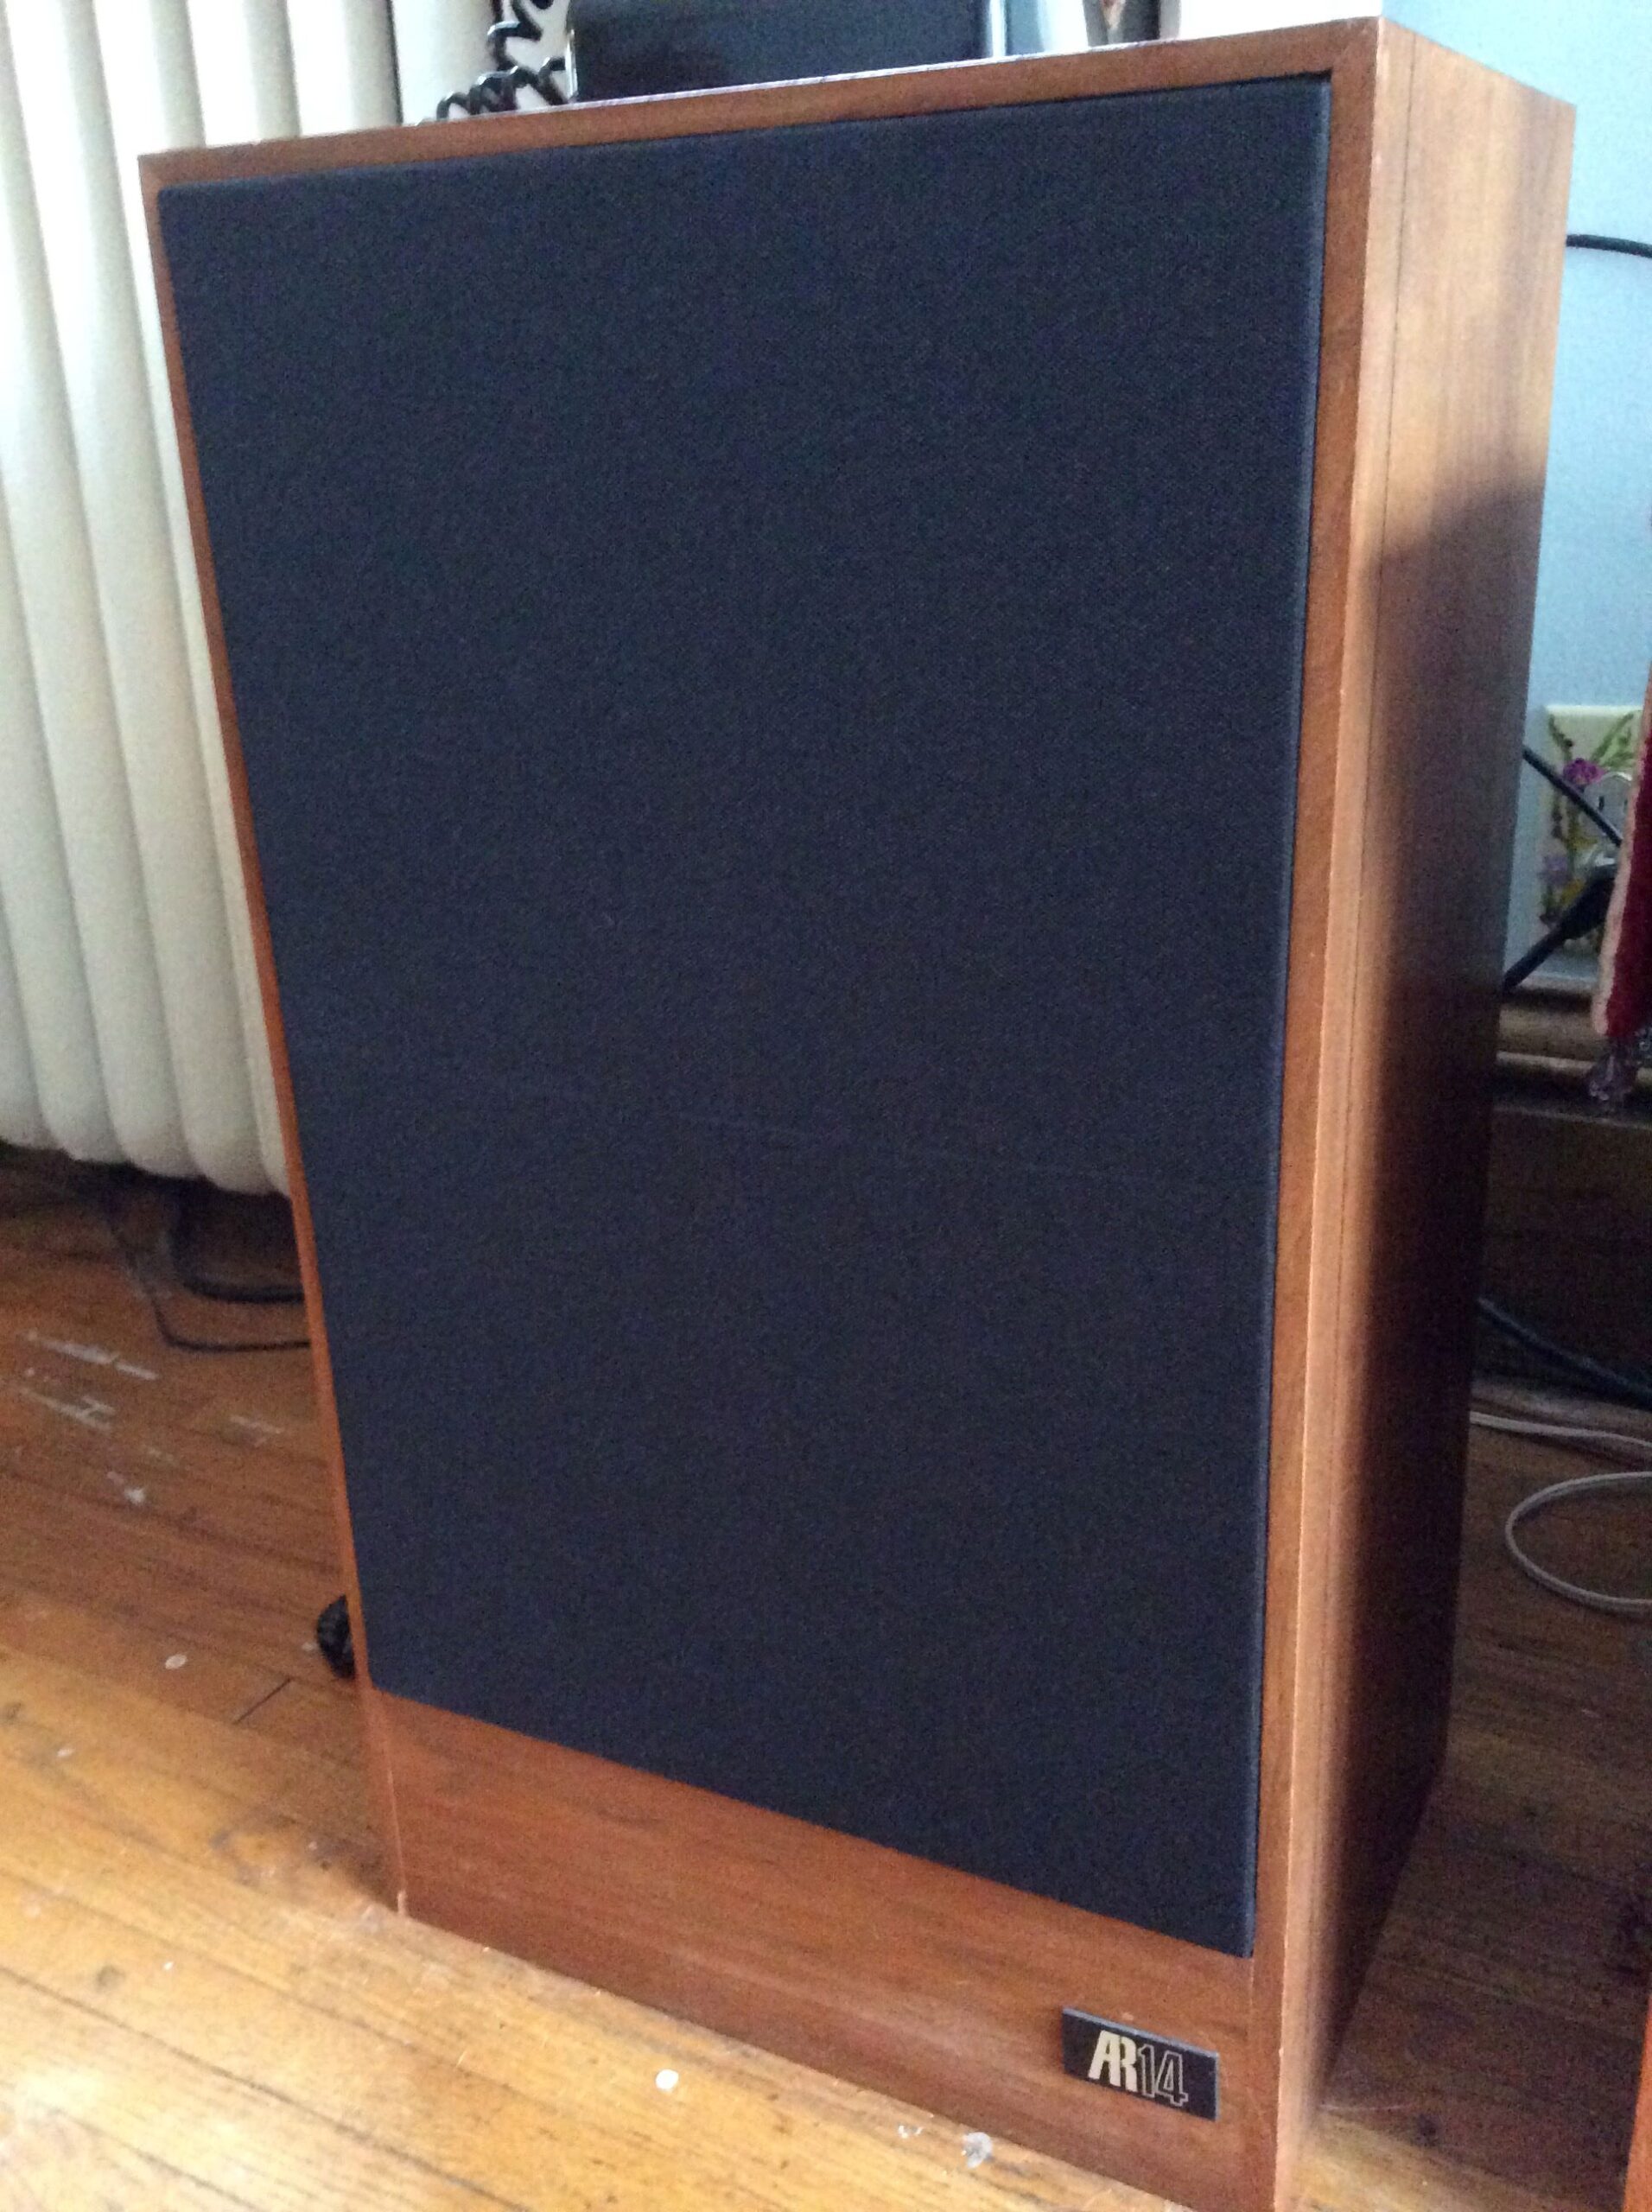
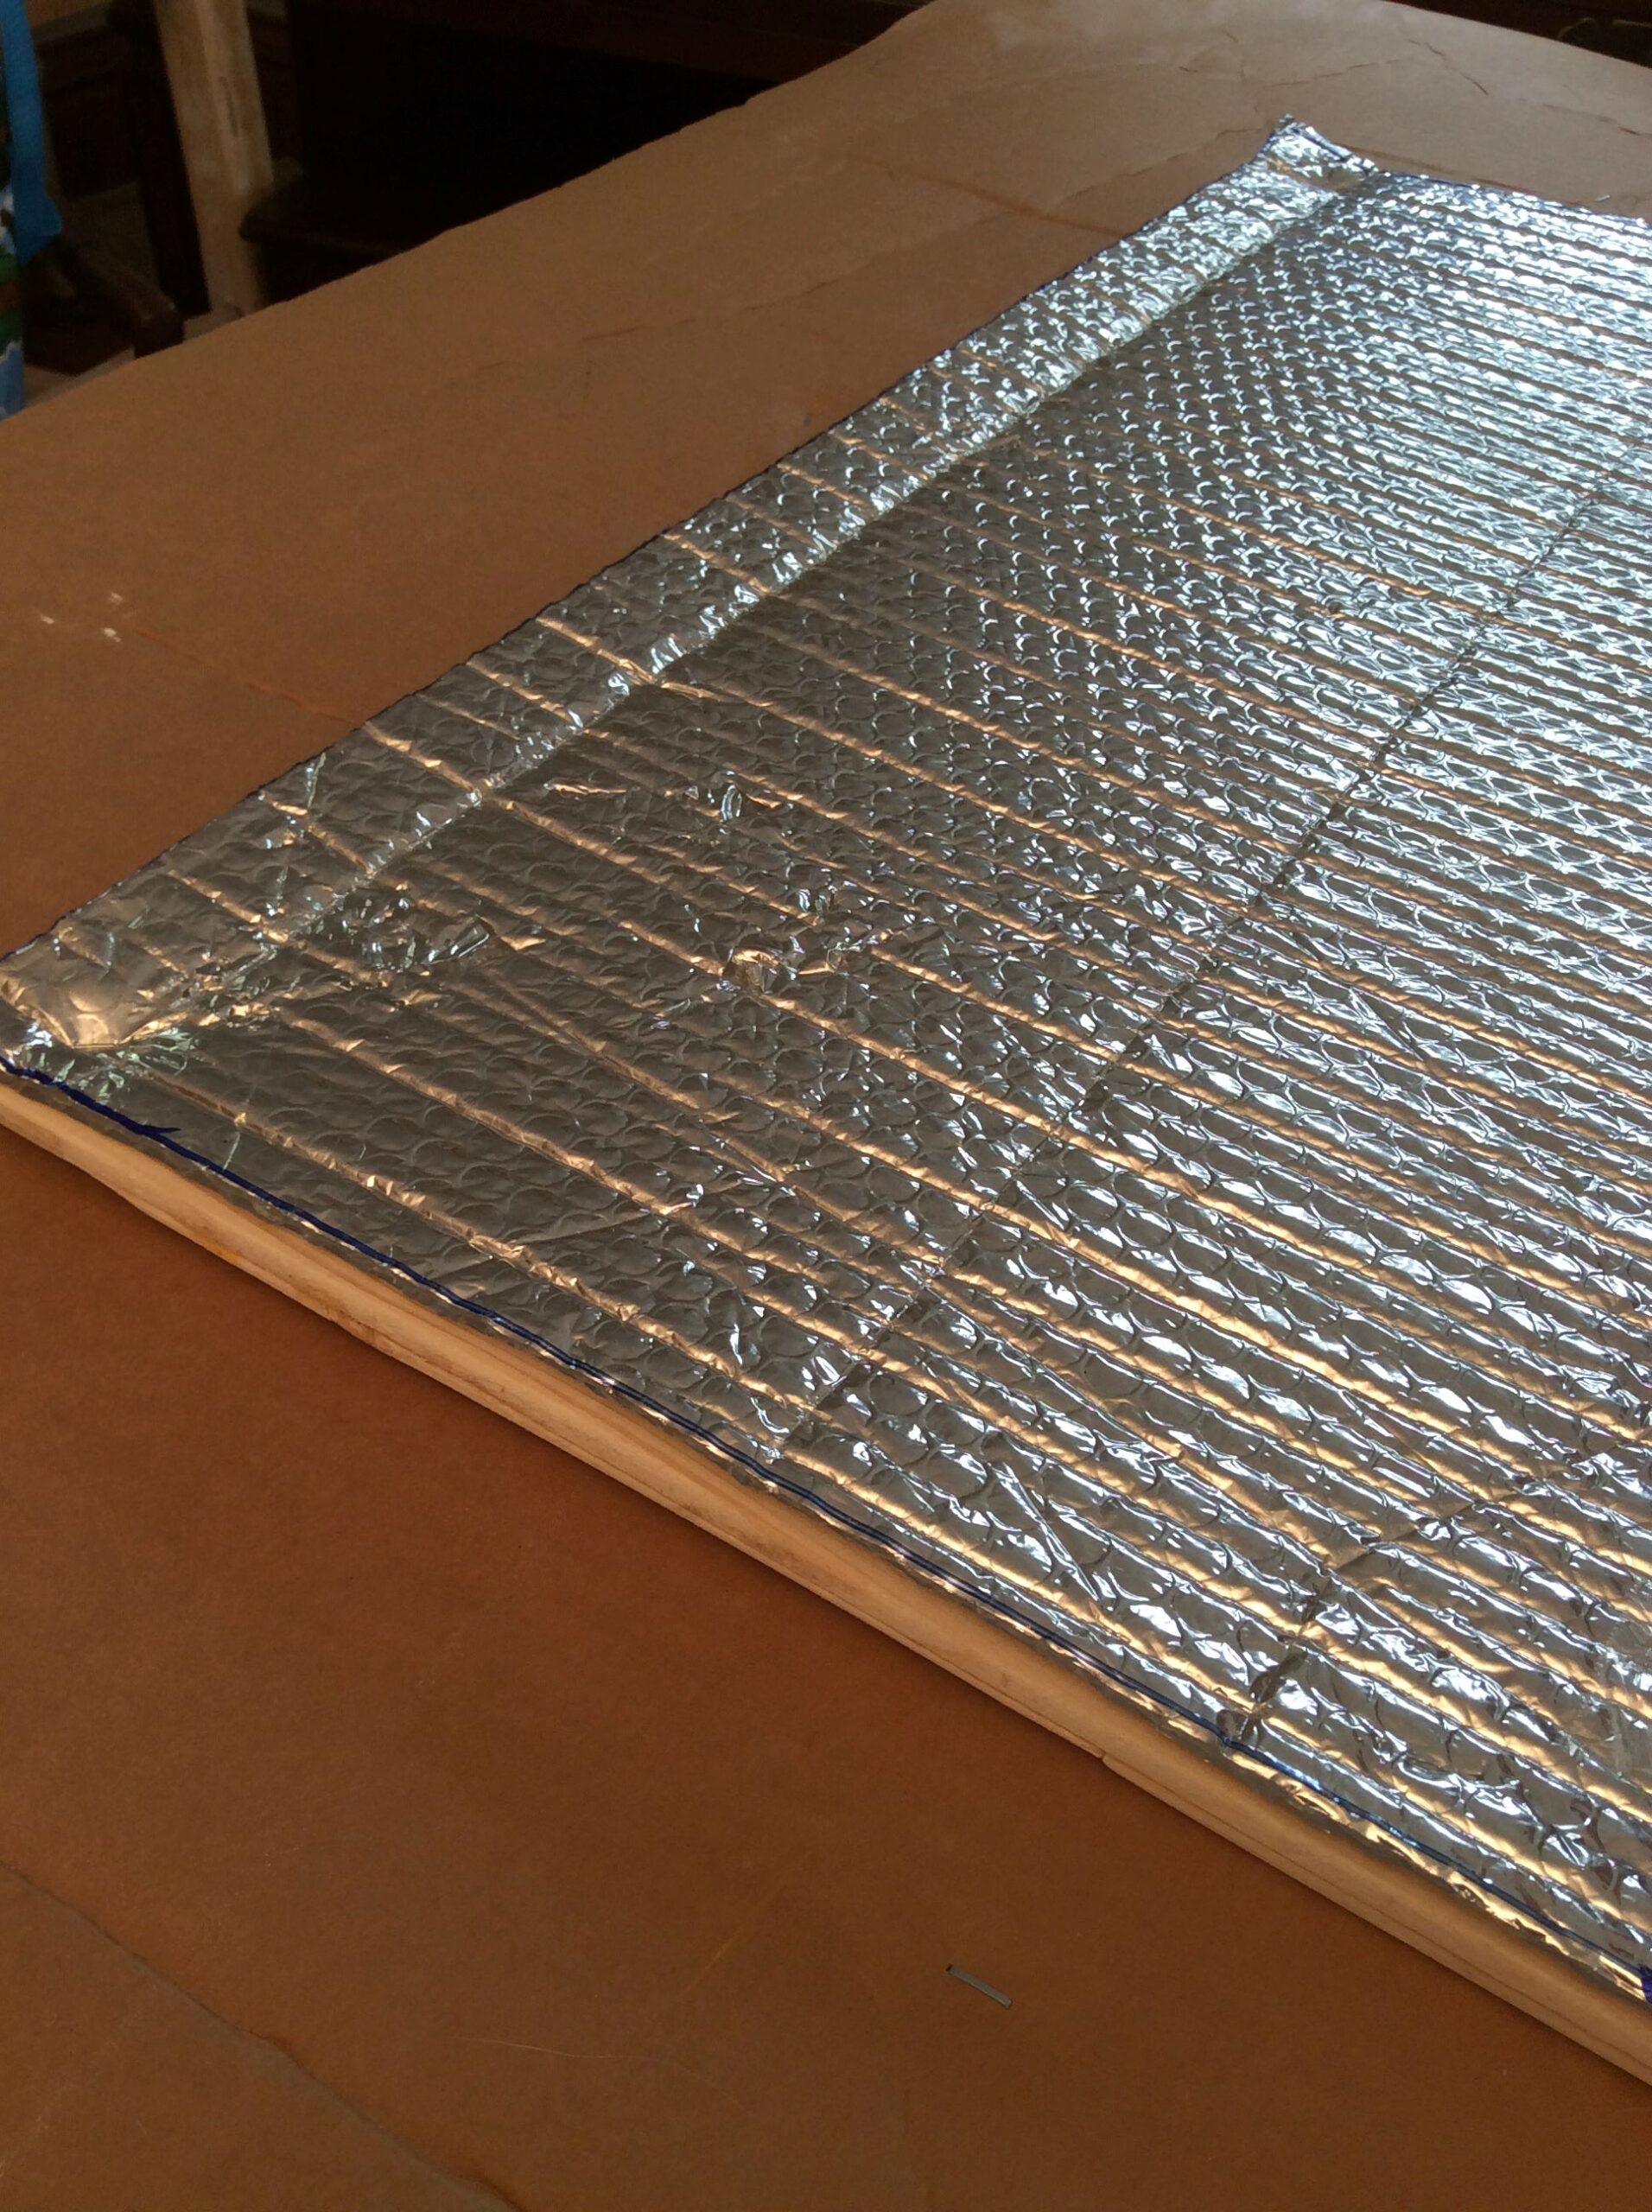
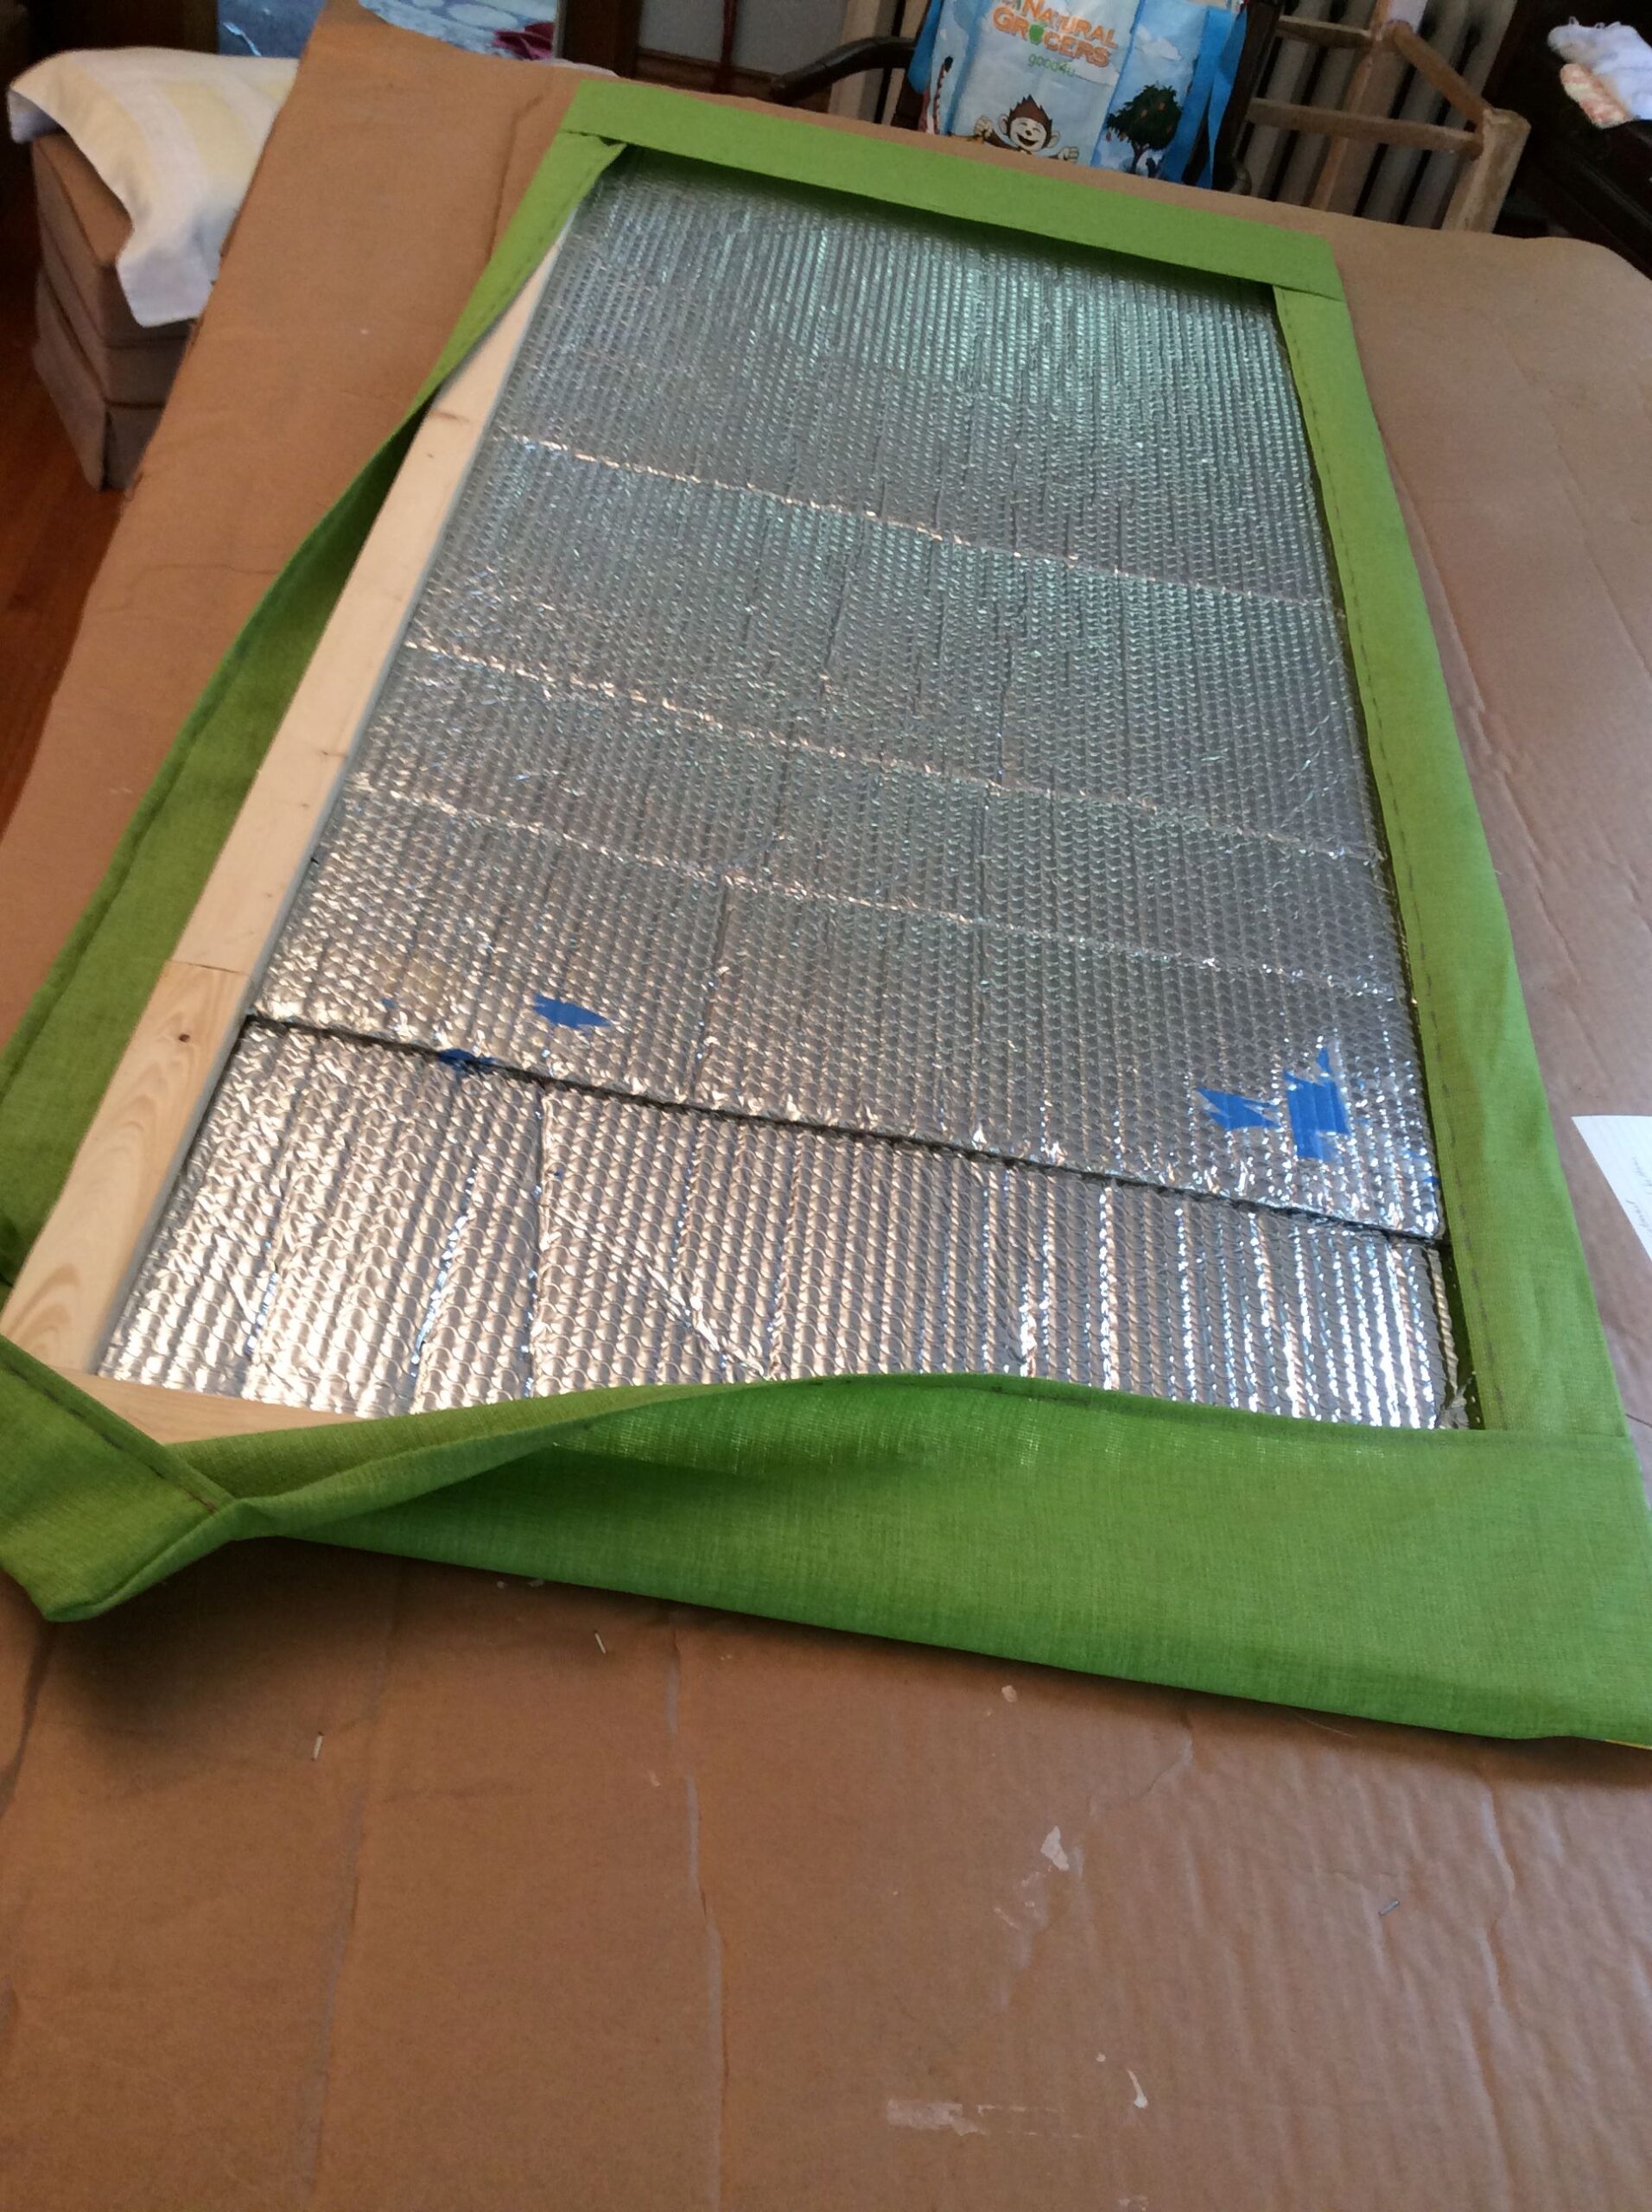
When I showed a picture of a chair to a friend who I don’t think of as being overly sentimental, she admitted to tearing up. For some reason a woven chair touched her. “It’s like bringing back an old art form,” she said. “It’s the best thing you’ve ever done.” I’m not sure about that. But I understand when she says that replacing speaker foam with a frame and some fabric is not as exciting.

I wondered if the chair was good enough to give away.

“Does it still fold shut like a regular lawn chair?” Brian said.

“Yes.”

He sits in it.

“It’s good enough,” he said.

I gave it to my folks, thinking they could use the seating for the July 4 festivities at their house.

French Window Treatments

When I painted the living room I took down the honeycomb blinds that covered the four French windows there and I never put them back. While I contemplated a better solution for these south-facing windows, I used reflective insulation to block the summer heat. It worked great, though it looked terrible. However, once the coverings were removed after the hottest part of the day had passed, the unadorned windows made for a beautiful view.

The windows need cleaning but you get the idea.

After a few seasons of this, I finally got around to covering the insulation with fabric to make them look nicer from the inside. After a few failed attempts, I figured out that my best option would be to staple the insulation to a frame before covering it.

Michael and Bert like to help.

I made similar though much smaller frames to replace the foam on some old speakers with fabric.

Old yucky speaker foam needs replacement but it’s impossible to purchase it.
The guy at the speaker store suggested making a frame and stretching speaker fabric over it. He said to use hot glue to secure it but I didn’t like that idea and wanted to use staples instead. However, the wood I used for the frames wouldn’t take a staple. So, I resorted to using the glue and it worked great.
Staple insulation to frame.

My next problem was designing a washable cover. After some trial and error that made me feel like a monkey involved in some kind of an intelligence experiment (it’s difficult for me to picture things backwards, which must be a requirement of sewing without a pattern), I decided to use four pockets (top, bottom, sides) on the back of the cover to finish the edges and hold it in place.

The top and bottom pockets are deeper than the side pockets. They are placed right sides together with the cover face. One of the narrower side pockets is sewn on top of the top and bottom pockets as shown.

While I hated to resort to using upholstery staples (as they will make it harder to wash the piece), it was the best option for getting a finished look. Staples were also practical since I needed to make one corner of the cover loose in order to fit it to the frame. As for solving that problem, I tried a few different options, including buttons that could be undone to give enough room to stretch all four corners of the cover over the frame.

The second narrow side pocket is sewn to the inside of the bottom pocket: Fold the bottom pocket down and sew the side pocket along the edges.
Stretch the cover over the frame and staple in place.
The “odd” corner that was sewn with the bottom flap open is tucked, folded up and stapled. I wish this were more elegant but it’s the cleanest look I could figure out. The buttonhole you see is left over from a previous idea about how to do this.
When not in use, the covers can be stored behind the radiator. Given some wire, they could also be hung on the wall.
Place the covers inside the windows.

Back when I was using the plain foil insulation to cover the windows, I used blue painter’s tape to secure them. It took me a while to realize that putting the insulation behind the glass eliminated the need for it.

Though the same size, each panel is somewhat different because it took me a few tries to figure out what worked the best. That was a happy day. When I stumbled upon a solution, I felt relieved. It made me realize that while exploring and learning can be fun, it can also be fatiguing to be in the dark for too long. After all of this work, will I have anything I can use?

I like the effect of a big painting at the end of the room. While I like the fabric I chose for this project just fine, I don’t recall choosing it. What was I thinking? In any case, it makes the room feel cool (literally – yes – but I mean psychologically) which will be nice when it gets hot. And now that I have a pattern, changing the fabric should be straight forward. It helps that I documented what I did (e.g,, what fabric, what thread, machine settings, seam allowances, etc.).

This started with a paint job years ago when I couldn’t bring myself to put back the honeycomb blinds that never seemed quite right for these windows. One thing led to another and now here we are. Of course, now I’m thinking, why not curtains?

Window coverings from the outside.

Now that this project is done, I’ve started to do a “reset” and have taken the worktable back out to the garage.

Not Bored but Maybe Boring

Brian groaned when he realized the purpose of our post-lunch errand. Nevertheless, he was relieved to find out that my haul would fit into a grocery bag. In other words, it wasn’t another chair.

I love my recent acquisitions, two paintings I found on FreeCycle. The first is a sunset – or a sunrise? – that I see as I turn around to face the hallway at the top of the stairs.

The second is a place that feels familiar, though I’ve never been there.

If you ask me what I’ve been up to, this is what I’ll tell you. I hung up two paintings the same day I got them. If there’s time and you seem interested, we could talk about how something as simple as a free painting can lift a person’s spirits or how these random paintings about which I felt lukewarm belong here. For the person who gave them away, these paintings were clutter or reminiscent of a time best forgotten or just ugly. Or maybe it was painful to give away her mother’s art that was collected over the span of a childhood? But she’s moving to Denver. Starting over after a messy divorce. No room. Downsize, like it or not. Or maybe she read Marie Kondo’s book and said, “These colors don’t spark joy! Get them out!”

Maybe.

Maybe.

Maybe.

Or I might tell you about how I’ve been replacing the boards on my deck and how being done with hauling 16-footers on top of my car (after hours of picking through them at the warehouse, ugh!) is a cause for celebration, even though there’s still more to do.

Or – being of limited skills in the way of needle arts – how I cannot believe that I managed to recover four patio chairs using my consumer-end sewing machine. It was tricky but not as hard as sewing a patch on some old jeans.

It’s an out-of-body experience to look at a finished product (mostly finished, I might add some buttons but I’m counting it as not to despair). It’s the same feeling I get whenever I see the door at the top of the stairs. It was caked with layers of brittle paint and it was a huge job to repaint it. The ceiling in the dining room. The office I’m sitting in right now used to be Pepto Bismol pink. These are good things to remember when you’re in the middle of a never-ending project like when there are still boards to cut, clamp and screw down to the framing of the deck. With every swing of the hammer, I wonder “Am I about to ruin my house?”

“I’m not bored but I might be boring.”

That’s what I told my mother when we were catching up this morning. She called just as she was sitting down with a fresh cup of coffee and just as I was about to do the same.

Boring is no badge of honor anymore than eschewing television makes you better than me. I would welcome adventure. But it’s still cool to take pleasure in second-hand art and to think, “Perfect! I love it.” And then to put away the drill that has a place because you’ve already done the boring task of organizing your tools, which didn’t bore you at all.

Bert claiming the materials to make the seat cushions. He loved the plastic mesh that I was able to reuse after reinforcing it with fabric.
“You’re not going to throw out these filthy cushions are you?”

I did document the patio chair project and keep meaning to post some tips, if not for the random person who might find it useful (Spoiler alert: pockets, as in shams, instead of zippers), then for me. Because it’s already starting to feel like someone else must have done it and I’m not sure I could do it again.

It’s just sewing.

In the past, whenever someone came over to visit and we sat on the deck, I’d throw an old sheet over one of the patio chairs that have seen better days. This was going to be the year to address the problem. We should have replaced the cushions a long time ago when Steve offered to make them at cost. He wanted to return a favor, if you can call being patient a favor.

We first met Steve Cone when we hired him to reupholster the old chair that Brian had inherited forty years ago during his time at Rural Sociology at the U of M. While it was supposed to take weeks to fix the chair, due to extenuating circumstances, the initial deadline was blown by several months. We didn’t care. As long as our dusty chair with its springs that dragged on the floor sat in Steve’s shop, it wasn’t in the living room. Mission accomplished, as far as I was concerned. There was no favor to return. But Steve insisted on giving us the deal.

“It’s just sewing,” he said.

It made me think that a person in his line of work must be accustomed to fussing or downright difficult clients.

Steve was a rock star in the world of upholstery and I feel lucky to have crossed paths with him when I had the chance. Recently, when a salesperson at A-1 Foam recommended his book, Singer Upholstery Basics Plus: Complete Step-by-Step Photo Guide, she said “People have started businesses based on what they learned in that book.” I couldn’t help myself and had to make it known that we too had met the man and knew of his greatness. What I didn’t say was that I have good memories of how easy it was to chat with Steve and I feel strangely proud that he felt the same way about me.

Maybe he made everyone feel that way, which would have been another testament to his greatness.

As he went over the numbers for the patio chairs, Steve said that he could reuse the fabric on the back of the cushion, which was this light gray plastic weave that’s used for sling chairs. I wasn’t so sure I liked that idea. I was sick of these awful cushions and I wanted something new. Wasn’t that the point? Whatever we decided, before he could do the job, Steve would need some time to give his hands a chance to rest. In a couple of months, I was supposed to call him to get on the schedule. Then time got away from me, as it always seems to do. When the Christmas card I sent to Steve was returned in the mail, I had a sinking feeling that too much time had slipped away. And I was right. At the age of 71, Steve had a heart attack and died.

He missed the first pandemic shutdown by just a month or so. He also would have missed the last party we had before the coronavirus took over the world. If only we had invited him…

It was a stupid calculation. On the one hand, I could see him at the table. On the other hand, it was early on in the dinner party experiments that Brian and I were planning for the year… So, maybe we should stick with people who we knew would roll with it regardless of whether a silly little game worked as planned or whether anyone had anything insightful to say about the topic at hand or whether the evening went south in some other unexpected way. We would invite Steve once we figured out what could help keep things interesting yet comfortable enough amongst a group that didn’t necessarily know each other very well. In the meantime, there’s no need to torture anyone or to look foolish so early on in what I had hoped would become a friendship. Had I to do it over again… would’ve, could’ve, should’ve… I should’ve trusted that Steve could’ve rolled with it and it would’ve been fine.

So, back to square one with the chairs. “Send photos!” a handful of upholsterers said.

We bought this secondhand patio set fourteen years ago. That pattern strikes me as 80’s but I’m not sure.

So far, there has been one response, not counting a prompt response from Repair Lair that doesn’t do upholstery even though It’s just sewing.:

Rebekah,

These cushions are pretty complicated and definitely beyond my sewing skills….

S*

At another place, we were warned to be prepared for how expensive cushions can be: “The stuff made in the factory is cheap. So, when you have them custom made, they’re going to cost you more than what you paid for the entire set.” In addition to that, a backlog of work meant that it would take weeks just to get an estimate.

Next stop: A big box store where they stock bolts of fabric so that a person can walk out with a yard. Probably inspired by watching too many YouTube videos, I would try to repair the cushions myself and I needed supplies to experiment. Whether my consumer-end sewing machine was up for the task was just “part of the discovery process,” as Brian likes to put it.

So far, so good.

Bert approves of the newly recovered chair, though he was also happy to claim the dirty naked Dacron that’s been sitting on the floor by the front door for the last few weeks.

In an upcoming post, I’ll describe what I did to deal with the worn parts of fabric that I reused on the backside of the cushion (I came to appreciate Steve’s suggestion to reuse the fabric and have noticed that upholsters in general take pride in keeping what’s salvageable), explain how I got around installing a zipper (and why I wanted to avoid it), and let you know how I ultimately finished this cushion. For now, I have discovered enough to know that what I’m trying to do is possible. As for the frames of the chairs, eventually I’ll repaint them.

In case you forgot, here’s a before and an almost-done after.

Steve has been on my mind as I’ve been working on this project. I’m on shaky ground, as I am not a sewer. Just cutting into the fabric feels scary. So, telling myself, “It’s just sewing,” can be helpful whenever I get stuck.

Steve Cone and Brian who is sitting in the newly reupholstered chair that Steve just delivered.
The chair Steve Cone recovered for us.

Box Spring Seedling Stand

My friend Santwana started a zero waste Facebook page for her neighborhood. So, when I told her about the seedling rack that I made out of a box spring, she wanted pictures to share on her page. Here’s an overview:

This twin box spring was cut in half and folded to stand freely on one end. It made natural shelf space for trays of seedlings.

If I recall correctly, some mattress warranties are dependent on using the box spring that comes with it. So, with every new mattress coming with a new box spring, how are the two ever separated? And yet orphaned box springs are a dime a dozen online.

Correction: They are free.

Taking a box spring that I didn’t need was the price of a free bed frame from FreeCycle. The people who were giving away/off-loading these items were trying to avoid a disposal fee. Since our regular trash service allows for three “large trash” pickups a year, I took the deal. I just needed to make a call and put our new box spring on the schedule. Then like magic someone would come and haul it away. Easy. And yet there it sat in the garage. Maybe someone could use it? But no one ever responded to my posts. Maybe it could be upcycled? But the votive candle holders everyone was making out of box spring springs just seemed like reshaped junk, much like a lot of pasta dishes that require varying degrees of effort.

In the meantime, I’ve been developing an interest in restoring old furniture. Knowing very little about it, I wondered if the springs some people were using to make Christmas wreaths could be used in the seat of a chair. Maybe I should open up the box spring to see what’s what. But wait! Finally, a bite. Someone actually needs a box spring sans mattress. Fine. I brought it in the house to inspect it more closely and vacuum it. False alarm. She won’t be needing the box spring after all. In the meantime, Michael and Bert – our cats – claimed it as a scratching post. And they liked napping in the perfect hammock of a box spring turned on its side.

With all of the chairs I’ve been collecting, my house was already taking on a workshop vibe. But the box spring pushed it into grunge.

So, I took it apart with the idea of reshaping it into a cat palace. A bigger better hammock with a footprint more to my liking. It would be something Michael and Bert could climb like a tree. Unfortunately, there weren’t any springs like the ones I saw on YouTube. So, there was nothing in that respect for my rescued chairs. However, the black fabric that covers the bottom of box springs is the perfect material to cover the bottom of a chair. And the padding from the box spring could be used for the seat of a chair. Having been covered in the factory with bomb-proof polyester, it was in great shape.

I’ll use the padding from the box spring and the black material that covered the bottom of it for my rescued chair projects. Instead of folding the black material, I should have rolled it to avoid causing creases that can’t be ironed.
This chair was free on Craigslist.
The first layer under the fabric is cotton. Underneath that is horsehair which can be reused.

After removing the upholstery from the box spring, I removed the center brace and cut the cross slats in half. This gave me a chance to use my fancy laser level. It let me strike a line down the center of the slats, so that I could easily cut each one in the same location. Then with Brian’s help, I folded the box spring in half lengthwise and stood it up on its end. I reattached the center brace to support the open end of the slats that had been cut. Then I attached an additional strip of wood to support the slats on the other side of the fold.

The next morning, I couldn’t see a cat tower anymore. I don’t know why but it became a tower for seedlings instead. Thankfully, Michael and Bert didn’t seem to mind, although I did wake up one morning to find a tray on the floor with teeth marks in it.

I started with making trays that fit seven pots and it worked. But I decided to go with shorter trays so that everything was contained within the frame.

Since I needed trays of a specific size, I made them using foil insulation. To make them, I cut an 8 x 21″ piece of insulation then pinched each corner and secured it with a rubber band. To add support and to more uniformly hold up the sides, I added a rubber band around each end of the tray.

There are fourteen shelves – seven on each side of the fold – that hold trays with six pots each.

Yes, those pots are made out of newspaper and a dab of tape. I’ve used them in the past and they work great. Here’s the YouTube video where I learned how to make them. Or if you do a search for newspaper seedling pots, you’ll find other methods that do not require any tape.

While I really like the look of my seedling tower (I don’t get an old mattress vibe at all. I think it’s really cool!), I figured that it would be a pain to water. But for me, it’s fine. A little water in the bottom of the tray and a couple of squirts with a spray bottle seems to work fine. In case I wanted to make adjustments to maximize the sun exposure, I put the seedling tower on a rug so that it’s easy to slide on the wood floors.

I saw a YouTube video where someone made a display rack for a store with the same idea of using these built-in shelves. In that case, they did not fold the box spring in half. They also added wheels. I can see where that might make a nice seedling rack too.

To maximize light, I’m thinking about adding more foil insulation so that it can close around the structure at night and open and reflect light back to the tower during the day. There’s probably an optimal way of doing this, but I don’t know what it is.

I’m playing around with the idea of adding foil insulation that could be closed around the structure at night and opened to reflect light back onto the structure during the day.

Somewhere I have lights I could potentially add.

We’ll see how this works. In the past, I’ve just had luck putting seedlings in a tray by the window and keeping them moist. As I learn more about it, I can see there are some best practices that might yield even better results. In the meantime, I’m also trying winter sowing. My friend Santwana mentioned that she was doing this, which is what prompted me to do seedlings this year. It’s funny how life is a circle that way.

If you wanted to try this, I’m sure you could make someone’s day by taking an old box spring off of their hands.

Let me know if you have ideas for improvements.

Upcycled Oven Mitt

Today our friend Faith stopped by for our regular Saturday coffee hour. When she mentioned that she needed some mousetraps, I was happy to save her a trip to the store. Her visit was timely, as I’ve been in a decluttering mode. While extreme examples of hoarding make me feel sick to my stomach, even more repulsive is how easily we throw things away, wherever that is. A-W-A-Y. It sounds more like paradise than a landfill or an incinerator. Or it could be a prison: He’s going away for a long time.

The language around acquiring and discarding stuff is interesting. I feel sorry for the artificial Christmas tree that’s posted on Craig’s List or FreeCycle with a note that says: “We need to get rid of it by Sunday.” After twenty years of service, this is how it ends. They just “get rid” of you, as if treating a case of lice. It feels disrespectful. On the other end of the spectrum there’s “rehome.” That’s a little precious. “I would be glad to rehome the working treadmill that you’re not using.” Of course, up top, I’ve already said “upcycle” and “declutter”, two words that spellcheck doesn’t like, though it’s notable that “spellcheck” is just fine. If you can’t beat ’em, join ’em.

Staring into my kitchen drawer, I wonder how many oven mitts a person can use at once. It’s a maximum of two, right? One of the mitts has a hole in it, something I discovered months ago when I burned myself on a baking sheet. And yet, there it is. Un-re-homable. I’ll have to throw it away or let these things pile up until pictures of them are posted on the Estate Sale app next to my teddy bear.

This is where YouTube comes in. Somewhere along the line, YouTube decided that I might be interested in learning how to reupholster furniture. One thing leads to another, and now I’m learning how to make box cushions. That’s why I saw a drink cozy as I looked at this useless mitt. While my sewing skills are limited, I could picture it. So, I tried to make one.

Being careful not to tap the soda can with the sharp scissors, cut the stained worn out top from the bottom that doesn’t wear out as fast. Take out one seam on the sides of each of the two pieces and open them up in a single flat layer.
Trace a soda can on the top part of the open mitten. Then trace a bigger circle around that. If I did this again, I would use the measurement from the cup I used for the outer circle and use a compass to make a pattern.
Wrap the bottom part of the mitt – finished side up – around the can. Move it so the top of the can extends past it enough to drink from it. Use a pin to mark the fabric where the bottom of the can is. Trim off the bottom from the pin plus a 1/2 inch or so for the seam allowance. Secure the binding on the top, if needed. Add more binding to each side. I used part of an old sheet (the red strip). Cut out the circle for the bottom. Mine didn’t look so great, so I topped it with denim from some old jeans. I covered the inside of the bottom with the red sheet, but didn’t do anything with the sides on the inside.

Once the two pieces were ready, I sewed the side piece to bottom, using what I learned from the YouTube videos about making box cushions. A better sewer could whip out a much nicer version of this in no time. Other than starting with a perfect circle, if I did this again, I would consider adding a button hole to the top edge of the overlapping side. I don’t think I can do that now that everything is assembled.

The good news is that there’s less to throw away. The not so good news is that we’ve never used cozy’s. We have friends who use them and that’s what gave me the idea. In fact, I have a foam cozy that was a freebie at an event and it was my intention to give this thing to my cozy-loving friends. Now, instead having one cozy that we never use, we have two of them!

At least I didn’t make a wind chime out of old CDs.

In the spirit of giving old things a new life, I gave my new cozy an honest try. I could appreciate the appeal of it. When Brian saw it he laughed and immediately recognized his old oven mitt. He had to admit that it was convenient to put down his drink without being tethered to a coaster.

After I’m dead, people are going to come to my estate sale and they’re going to find this cozy on a table full of kitchenware and possibly, unless a relative feels some attachment to it, a bear.

DIY Plant Stand for a Rescue Case

We were going to a show. So, after he came home from work, it wasn’t surprising to see Brian parking on the street in front of the house instead of in the garage. But something was up. He unlocks the front door. Then back to the car. What’s he doing? He probably stopped for groceries. I should help bring them in, but I don’t feel like it. I am a terrible wife.

Then I see it. He finally brought it home after weeks of preparing me for the possibility. There was this plant that Brian adopted after it had been abandoned during the most recent reorganization at work. It wasn’t doing so well. It used to be by a window, but because of the construction now it isn’t and now it’s sadly in decline. It needs sun. Brian is fine. Don’t worry about him. He can get up and take a walk. He assured me of this. But that plant! It’s just stuck there in this artificial light. Maybe he’ll bring it home. He never does.

…until he does. Another branch shriveled? Did too many needles fall? Did they pile up on January and refuse to be casually brushed aside? And now Charlie Brown over there is unloading this thing that is cramped in the back of his car, because while a grown man could sit relatively comfortably in the back of a Prius, this giant plant with its sprawling limbs is too big.

I’m always trying to stop things from coming into the house. I enjoy a good estate sale and am always imagining my own. When homes are disassembled and stripped of life, a whimsical collection of birds taken out of context and arranged on rented banquet tables, or a certain type of glass or enough pencils to last a hundred years can seem more like a window into the mind of a crazy person than anything beautiful or useful. It’s hard to win this battle – keeping our heads above the stuff – when you’re fighting against someone who has bonded with a tree. But I honestly cannot imagine where we are going to put this thing. A spare corner eases my mind and I was just beginning the enjoy the fruits of my labor. But what are the options? I fear the plant is going to bring the room’s energy down, like so many of those plants we saw in the photos of those houses for sale when we were in the market. Searching real estate sites, Brian and I used to laugh about how sometimes we weren’t really looking at a house so much as we were looking at people’s stuff. Sometimes, there might be a pet in the picture. A pet! Like I’m going to get a free dog if I buy this house? If the idea is to give me the impression that this is a good place for a family, why not stick grandma in there too? In any case, I wanted a fern. There is an empty pot on top of the built-in bookshelf that awaits its arrival. But this? This is too much. Too much.

The next day, Saturday, we spent some time rummaging for something that could elevate the new plant. A column, probably out of a church, from Architectural Antiques was not an option at north of eight hundred dollars. At one furniture store where we did not expect to find anything except for maybe an idea, a salesperson offered us mimosas. Furniture is art. Light fixtures and lamps are art. Rugs. Art. It makes sense that we would causally wander the gallery with our cocktails enjoying the “movement” of a particularly sleek sectional, knowing that it would never fit into our living room. I really just wanted to look at junk, parts with which to do something. I say this as if I were handy, as if I know how to weld stuff, as if I had the tools to make uniform cuts to make uniform slabs of wood. This is a dream. But we can dream. I still like to scrounge and imagine what could be done, if only…. if only.

We fail to find anything. We run out of ideas about where to look. I had just been to the Goodwill. I doubt there’s anything there. I’m kind of tired, but I want to “party on”, as I like to say to Brian whenever I’m feeling restless. I suggest we go to The Lab, a brewery near our house. There you can pour your own beer and pay for it by the ounce, which is perfect because I just want a taste.

As we walk into the place, a pair of queens are running a game of Bingo. A woman, part of a foursome at the next table, tells me that it’s free to play. She must have been disappointed when I did not leap up to fetch a card and a plastic cup full of Bingo chips. At one point between games, the queens start to lip sync, each taking her turn. People are holding up bills. The second act is racy. After a high kick it isn’t long before she sheds the 50’s-ish sheer red polka-dotted dress that sparkles to expose a bodysuit that looks as if it had been splattered with paint. The crowd howls. She does the splits. The cheering defies the time of day, a lazy afternoon, though it is different from the canned excitement of daytime television, which I loathe. Shouldn’t we be at a night club? A man on the other side of the room from where we are sitting is waving money. But he fails to get the dancer’s attention because there’s apparently too much money to track. I am mildly stressed by this, worried that the man feels rejected and wondering if Marilyn Monroe will ever get her five dollars. The dancer approaches the foursome next to us. They are eating up this odd mix of Bingo and bachelor party where at one point, the dancer pretends to spit into her hand and briefly simulates something that I will not directly say here, but it suffices to say that it made a grown man blush in front of his friends who were roaring with laughter.

And just like that it’s back to B-12 followed by whatever joke, story, fact or memory is triggered by the number. The dirtier the better. Of course, some numbers are obvious.

Someone comes around with a free sample of some kind of “super food” that has been juiced, some kind of berry. I didn’t catch the name of it, though it was repeated a couple of times. It’s an antioxidant. What else is there to know? It’s good for you. This particular sample has been mixed with alcohol. Try it! Later I will be mad for a few minutes thinking of the ridiculousness of it, but not as mad as I was about the show we saw the night that Brian brought that plant home and the utterly pretentious discussion that followed it.

The friendly – possibly drunk by now – free-bingo-cards! woman who had first spoken to us when we arrived leans over to me with a comment every now and then. She points out the entertainment value in watching people walk through the door to find the place in stitches, helpless against a Barbara Streisand perm, clear stilettos, and a pink rectangle-of-a dress that can barely cover a snatch. She’s right! Just look at those faces. Some unsuspecting dude walks in and confusion shifts to surprise and then delight. “Web cam!” I said. I could watch that all day.

That evening at the YMCA, Brian and I are talking as we walk the track, dodging teens who are playing basketball. I had regretted that we frittered away the day looking for a lousy plant stand that probably doesn’t exist. I am certain that he would have preferred to stay home to read. But he says that life isn’t supposed to be efficient. It’s probably one of the nicest things anyone has ever said to me.

When we get home from the gym, Brian goes upstairs to start a new book. I grab the iPad and do a search for DIY plant stands. I tried something with the idea of getting a sense of how high the plant should be, what kind of footprint would work, etc. You know, a test. It turns out that I liked my prototype better than I would have expected.

Here’s the big plant that Brian brought home. It’s supported by the feet of a tomato cage that are tucked under the rim of the pot.
I found some things that fit perfectly on each tomato cage ring. Bottom: floor. Next Up: Flat basket. Then: An aluminum platter with roses. I also tried a cutting board here and that worked too. Next: Clear glass bowl with a candle and a few rocks inside. Above that is hardware cloth (that still needs to be hemmed or treated to address the rough edges) and a plate. Top: Plant.
The aluminum tray is at a good height to put a drink, assuming there is a chair nearby.
Looking down. The pot isn’t actually sitting on the plate below it. It is suspended above it.

I wish the pictures did this justice. It’s pretty sweet and didn’t cost anything on the current budget. I just used stuff I had around the place. If I stick with this idea, I’ll reinforce the connections between the tomato cage rings and legs with some lashing. Maybe I’ll paint it. Maybe I won’t. I’ll cover the bottom ring that rests on the floor with something to make it easier to slide without scratching the floor. I was thinking of using some old socks that have been cut into loops. (I could probably write a post titled “100 things to do with socks that have been cut up into loops.” Of course, first on the list would be to make a potholder using one of those potholder looms you might have had when you were a kid.)

Or maybe I will start over. Maybe this is a prototype. I’ve seen plant stands and little tables framed with copper pipes. I do have a saw and some sandpaper… stain to use up…

It’s a good thing that efficiency is overrated.

Free Crown Royal Bags

Over the years we’ve accumulated quite a few Crown Royal bags and a friend has even more to add to our pile! They are free to anyone who can use them. While they can be handy for things like storing scrabble tiles and while my mom and I made a quilt with some and my sister crocheted a rug/seat pad with others, we have more than I can ever use. For more ideas about what you can do with these bags, just do a quick Internet search. There’s a ton of ideas out there!

Quilt with Crown Royal bags.

Quilt with Crown Royal bags.

Seat pad crocheted with Crown Royal bags and other scrap fabric.

Seat pad crocheted with Crown Royal bags and other scrap fabric.

Seat pad crocheted with Crown Royal bags and other scrap fabric.

Seat pad crocheted with Crown Royal bags and other scrap fabric.

Crown Royal bags used for quilts.

Crown Royal bags used for quilts.

My sister used scraps from our quilting project to crochet this seat pad.

My sister used scraps from our quilting project to crochet this seat pad.

Crown Royal quilt in progress.

Crown Royal quilt in progress.

My mom sewing the back/front/batting together.

My mom sewing the back/front/batting together.

Me pinning the top of the quilt to the batting.

Me pinning the top of the quilt to the batting.

Brian enjoying some Christmas gifts.

Brian enjoying some Christmas gifts.