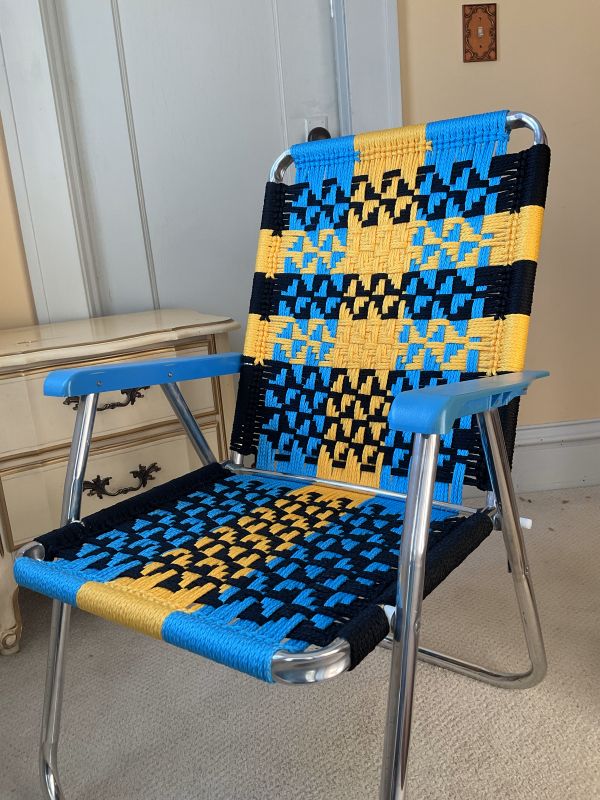
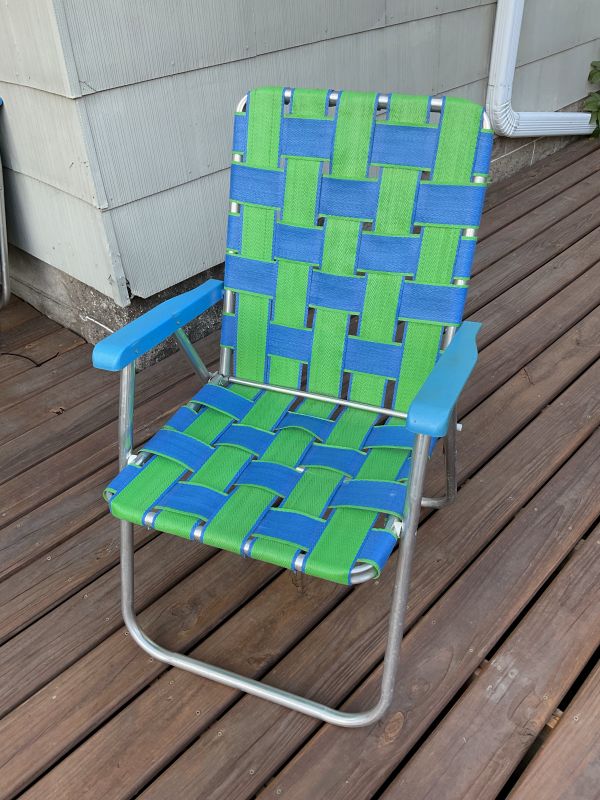
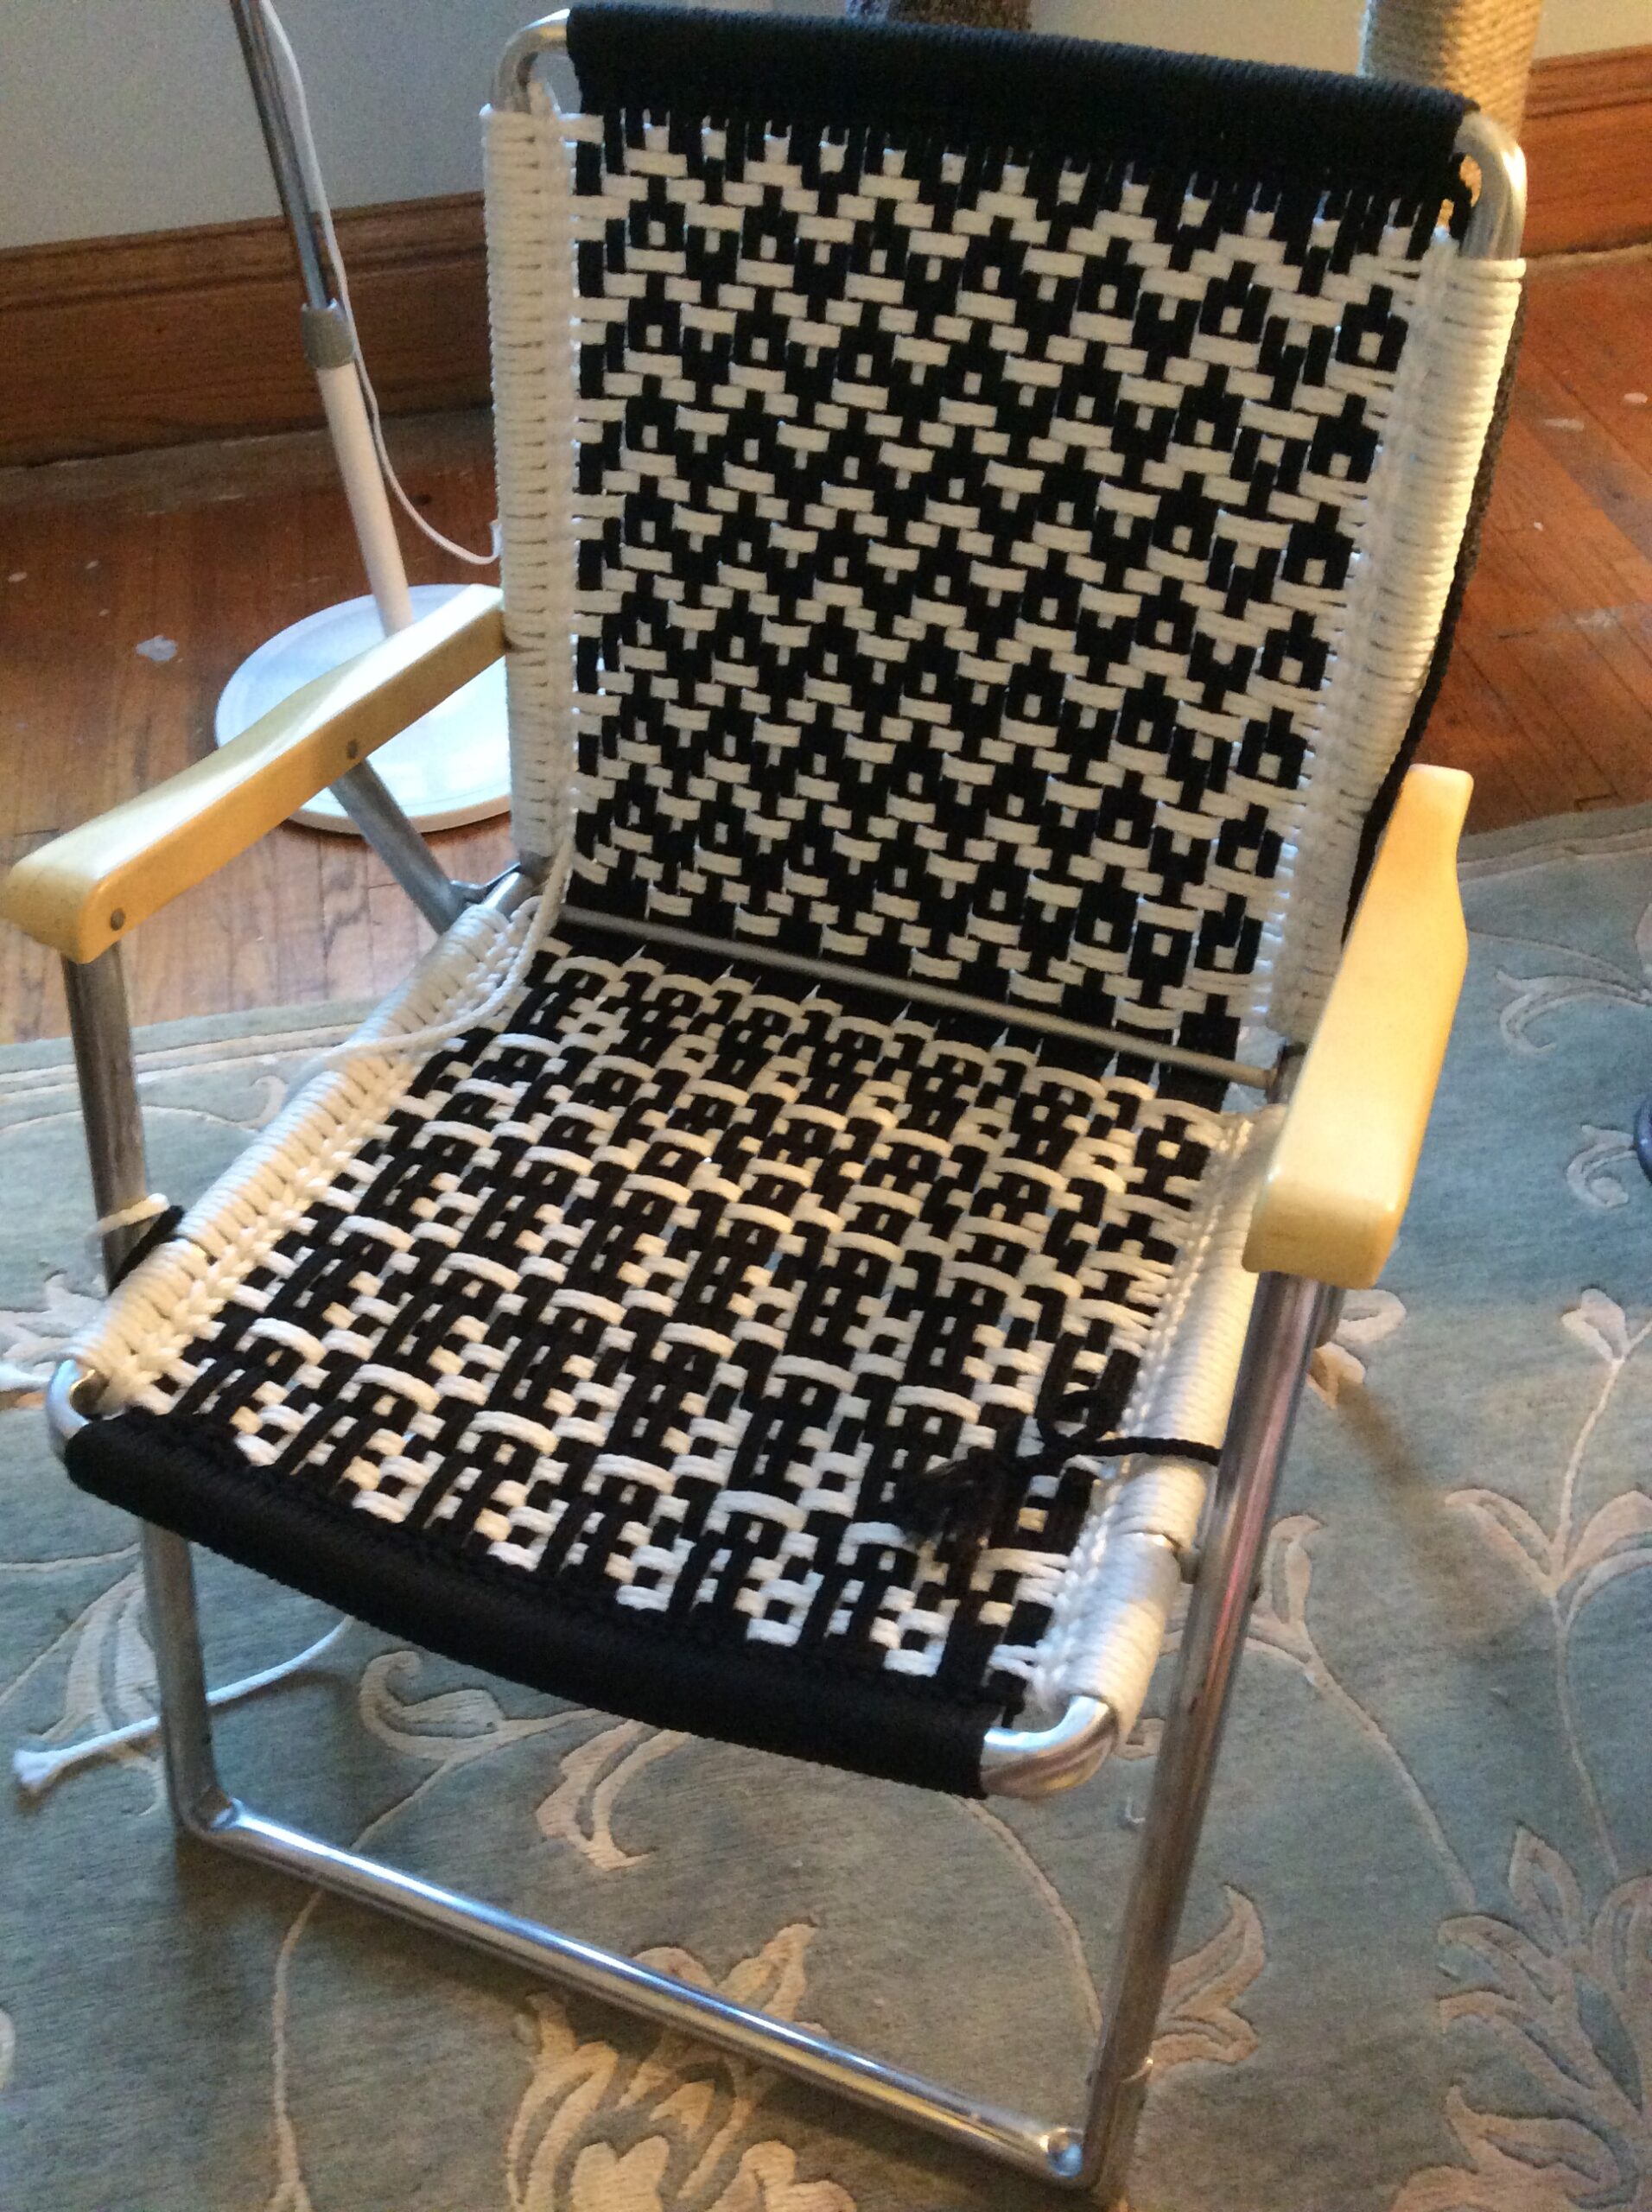
A friend pointed out that macramé is a pattern made with knots, hence the quotes. What I was doing, he said, was weaving. Here’s a chair that I made for my brother and his wife.
I wanted to weave a QR code into it, like this:
To make the pattern, I used a QR code generator. Then I transferred the image onto a spreadsheet. Because every line of code was different, it was slow and fussy work. In the end, weaving a QR code onto a lawn chair did not work, making the chair itself seem broken with its dead link. Using better contrasting colors and sticking to just two colors might have fixed the problem. But Christmas was coming and I didn’t have the time nor the patience to experiment further. For now, I’ll leave weaving QR codes to bamboo weaver Xie Shiyang.
On the bright side, starting over inspired a better way to keep track of a pattern without constantly referring to a piece of paper. First, note the pattern:
Width=6 Height=8 Identical rows: 1 & 5 Reverse Rows: 4 & 8 are the reverse of 1 & 5; 2 & 7; 3 & 6
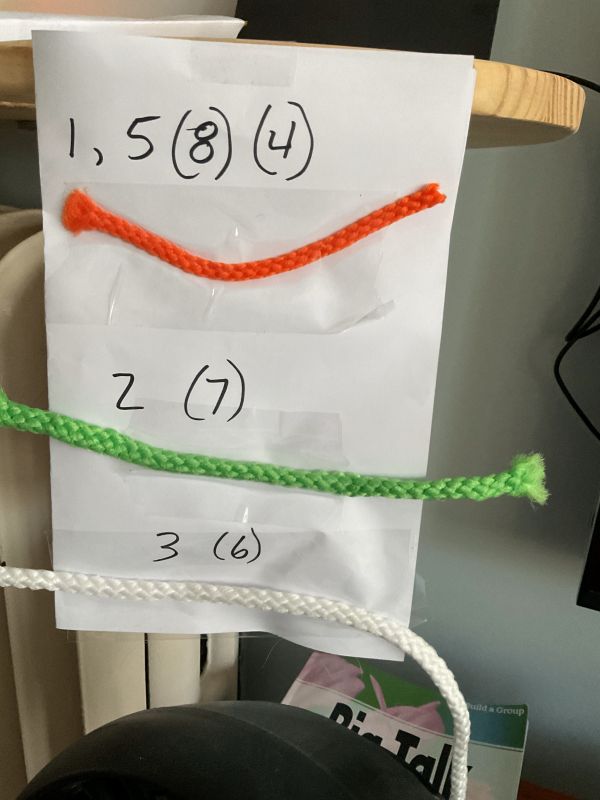
Next make a cheat sheet. R-1, R-2 and R-3 are unique. The remaining rows are either identical or the reverse of these three distinct rows. This is indicated with parenthesis on my cheat sheet.
Weaving Cheat Sheet
Another way to see this pattern is that there are two distinct rows: R-1 and R-2. The remaining rows are variations of R-1 and R-2. As an experiment, you could:
In a 6 x 8 grid, make two random rows.
For the 3rd row, shift R-2 to the left by three.
R-4 is the reverse of R-1 (or shift to the left by 3, I’m not sure if there’s a difference)
R-5 is the same as R-1
R-6 is the reverse of R-3
R-7 is the reverse of R-2
R- 8 is the reverse of R1 (and R-5)
This is what I came up with in a few minutes of playing with my spreadsheet:
Here’s what the repetition looks like:
My spreadsheet (Excel) is set up to change colors when I enter a “1” in a cell, which makes it easy to experiment.
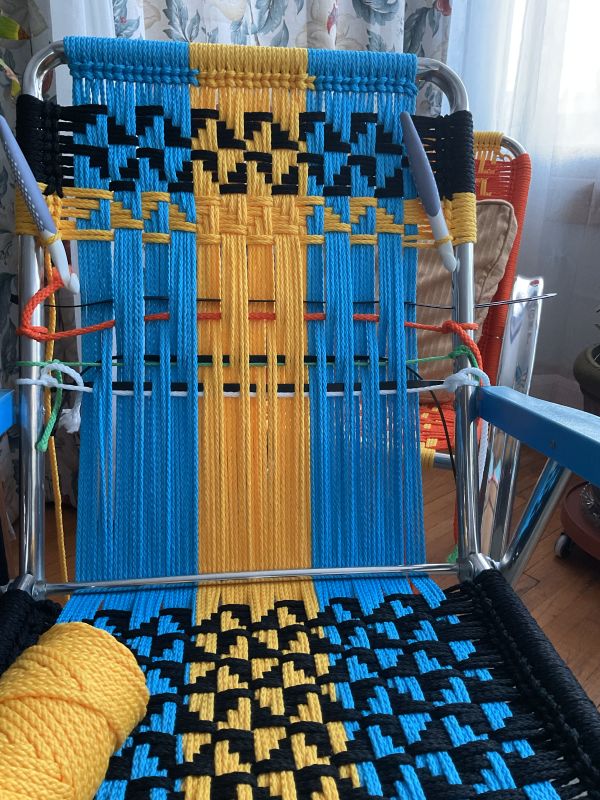
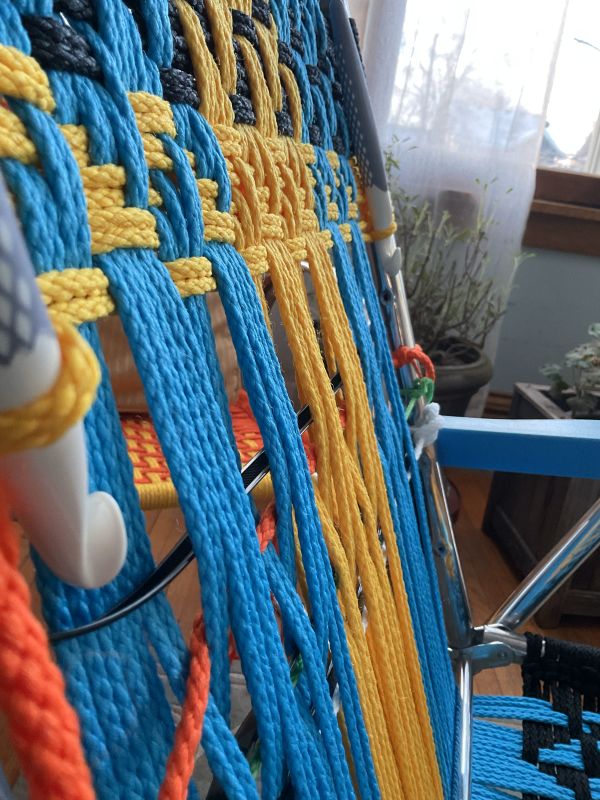
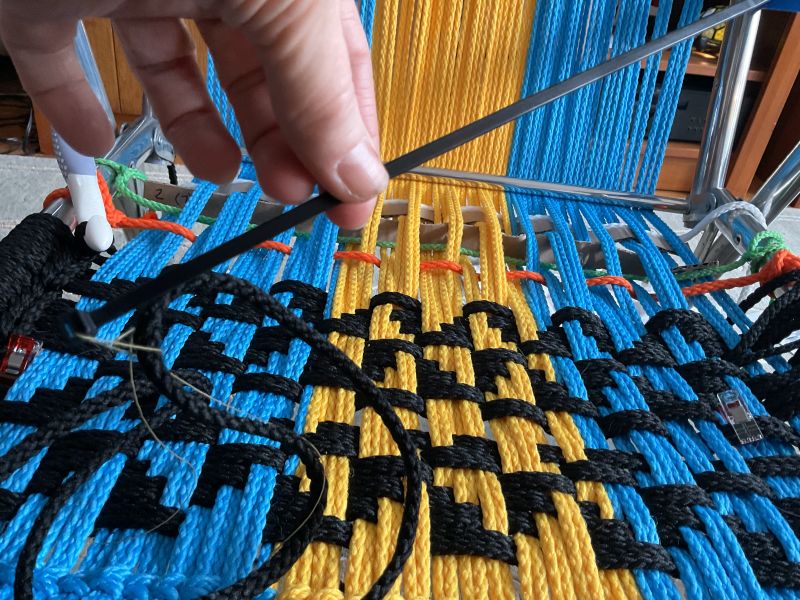
After making the cheat sheet (above), I wove in the corresponding colors into the chair. These temporary threads make it easy to weave without losing your place because you can see the pattern at a glance.
A large zip tie can be woven alongside each colored guide and twisted as needed to hold up the threads for easier weaving. Though imperfect, it’s easy to imagine an improved tool.
Zip ties can also be used as “needles” to get into tight spaces. Thread the eye of a zip tie with any string that fits and make a loop. Then thread your larger cord through the loop.
On a related note, it’s possible to correct a mistake without undoing rows of work. Depending on the issue, you can carefully untie rows, take out just the problem row, reweave it (a good use for the zip-tie-as-needle trick), and re-crochet everything back into place.
To fix a mistake, untie the rows enough to get to the problem row. Then take out just the problem row and re-weave it. Then re-crochet/tie/lock down the ends.
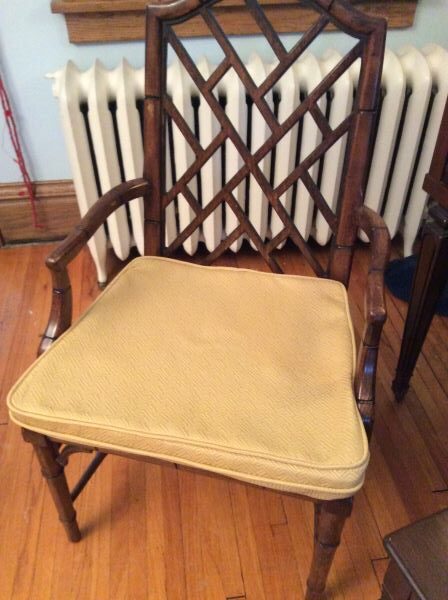
Here’s the chair before the new seat. The webbing was worn out and it was due to be replaced. As you can see, the arms of the chair were originally blue. I did not paint them, though some wondered if I had.
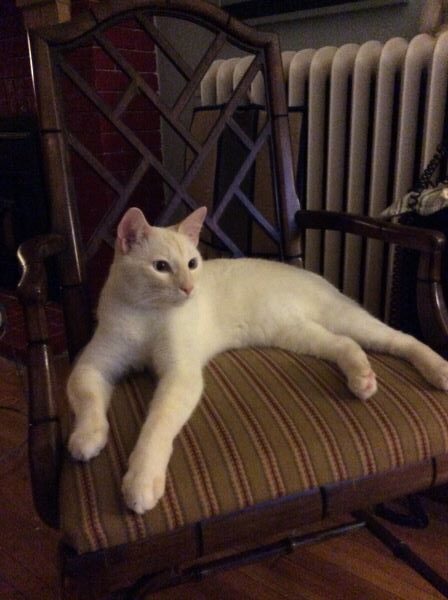
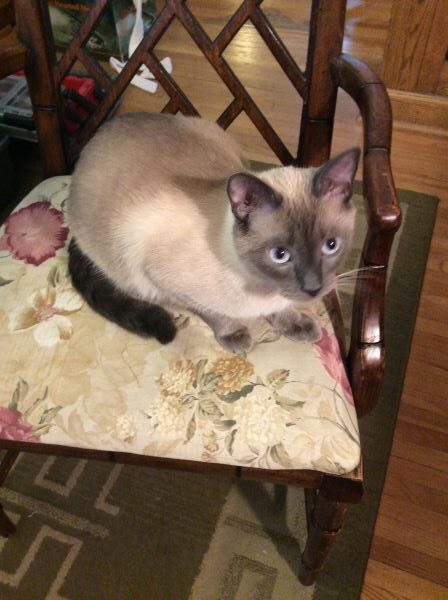
It’s predictable. Whenever I bring a new chair into the house, Bert will claim it.
Bert sitting on free chair.
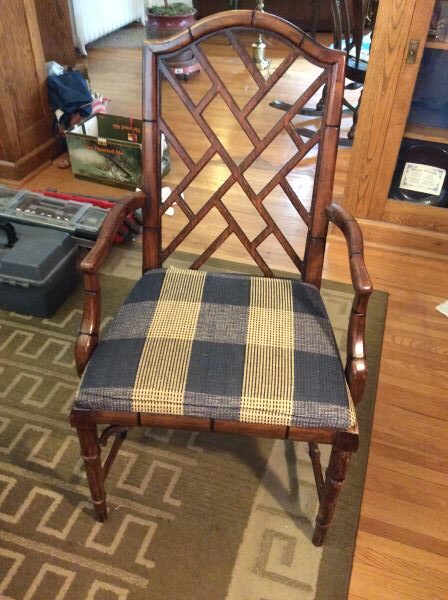
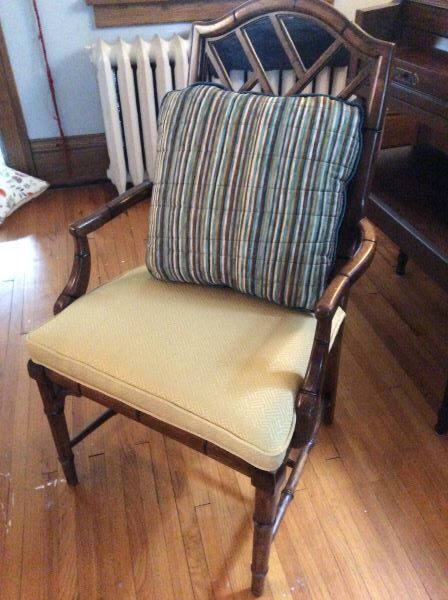
He’s grown quite a bit since I took the above picture, which is to say that it takes me a while to get around to fixing the chairs that I’ve been collecting. Several layers of fabric covered this particular one. Michael liked the floral pattern.
Michael sitting on free chair minus several covers.
However, someone else covered it with plaid.
The chair had several layers of fabric on it.
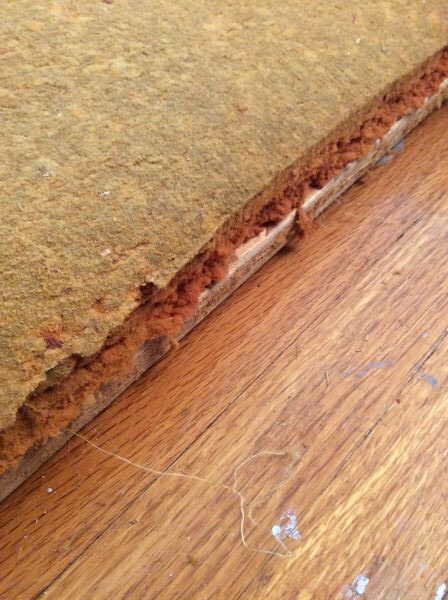
The original upholstery was gold with boxing and piping (sorry, no picture). It’s only a coincidence that I chose fabric in a similar color ($50 +) to cover the new cushion ($25) that replaced one that was gross and crumbling.
The cushion was shot.
Needing practice before cutting into my new not-free fabric, I made a pillow out of scraps. And then I used sheets to make a dummy cover that mimicked the original style, which had boxing with welting along the top and bottom.
To practice, I made a dummy cover using an old sheet. Notice the piping on the top and bottom of the cushion. This is how the original cover was.
I also made a cut pattern using Inkscape, which is a vector-based design program. I know the software just enough to muscle my way through a project like this. Apart from the inherent problems with my plan (see below), it worked great. In fact, I was so excited about this discovery that I wanted to make a tutorial in which I would explain how to draw a rectangle to represent the size of your fabric and similarly how to draw the pattern to scale. The best part was using the “transform” option to put an object at a perfect 45-degree angle for those pieces that are to be cut on the bias. Explaining such basic things is like pretending that I’m Julia Child whenever I make a grilled cheese sandwich, as if anyone needs to be told how to butter bread.
Still, making a quick video might be useful to someone and it would be good to keep up with my video editing skills. One problem. There’s no such thing as a quick video. Somehow, what was supposed to be a five-minute demonstration kept creeping over the half-hour mark. It gave me an appreciation for the preparation, talent and (ironically) time that’s needed to make succinct tutorials.
This cut pattern was made using Inkscape.
As for the problem with my cut plan, the cushion has welting/piping/cording on the top edge and the bottom edge. I understood how to attach the top part, even if I still can’t do it perfectly. However, based on how the original cover was done, and limited in experience, I came up with a rather wasteful way of attaching the bottom welting, hence the diagonal strips that are over 6″ wide in my cut plan. Because the cover is stretched and stapled to the bottom of the slip seat, I thought I would need enough fabric in the welting to accomplish this. Unless we’re talking about salt, too much is better than too little when you’re guessing. At least that was my logic.
This is the new cover without batting or the crown.
I finally worked up the courage to cut my fabric using the pinking shears that I found in my Christmas stocking last year. I was suspicious of the scissors, as they were not like the ones my mother has, the same ones my sister used to cut her hair when we were kids. My new scissors looked like something you would find in a preschool art room. There were also the YouTube videos that convinced me that a hot knife was essential. What’s the point of starting without it? I understand the contradiction. On the one hand, give me what I grew up with. On the other hand, how am I supposed to cut an accurate line without a tool that I discovered yesterday watching a Salerite video?
The pinking shears worked great. I made the cover and it fit the cushion fine. It’s pictured above with the new cushion but without the batting (FREE) that is supposed to cover the foam to give it a better shape (and make the seat more comfortable?). For that I used the cotton that I recovered from an old box spring. Because a synthetic covering protected the material, the cotton was clean and in perfect shape. However, it did contain seeds. But given that I’ve found hay and horse hair in some of these old chairs, I figured that it should be okay.
Later I was looking at Steve Cone’s book on upholstery and noticed a different method for attaching the bottom cording, as opposed to the convoluted way that I did it. It is stapled to the bottom of the seat after the cover is stapled in place. This made a lot more sense, as it seemed tricky to attach the bottom cording in exactly the right place on the boxing before it is stretched over the cushion and attached. It certainly required less fabric. It’s probably like a lot of things with upholstery. There’s more than one way to do it. Either way, I opted to undo some of my work and attach the bottom welting with staples as opposed to sewing it onto the boxing.
By accident, I discovered that the welting on the bottom needs to be reinforced with a cardboard upholstery tack strip ($16 for 20 feet). I will also need to get some black cambric to cover the bottom of the chair, which is supposed to be cheap. I thought about using scrap fabric but figured that the cambric is super lightweight for a reason. And though I do have a roll of landscape fabric that seems like it could do the job, I’m going to get the cambric.
Here’s the result, including my test pillow, which is a mess, but I like it anyway.
The mostly finished chair, with batting and the cover stapled in place.
As for forming the “crown,” (you might be able to see the curve of the cushion in the above picture), I put together scraps of polyester batting left over from other projects and placed it under the foam cushion. Absent those remnants, which I’m glad to have saved, could I have used something else? Could I use old socks? And if so, would I need to shred them to keep them from feeling too hard or lumpy underneath the cushion?
Aside from the supplies already listed, there was adhesive and enough staples to do an entire dining set (lots of doing and redoing). In addition, the stretchers on the chair needed to be glued. It’s nice to get to a point when a repair like that doesn’t require a trip to the hardware store, as I had clamps that worked. There were also spots on the legs that needed to be touched up. Again, it was cool to have the supplies on hand. I never addressed the decorative pieces at the corner of the legs, except to remove the broken ones. To make the chair right, I would either need to remove the remaining ones or replace the missing ones. Finally, I still need to screw to seat to the chair (after adding the dust cover/cambric to the bottom).
Taking a class would give me a better eye for what’s done and what needs more work. In this case, I can see the chair isn’t perfect. Some live instructions might be needed to get it closer. For now, this is good enough.
Once again, Bert has claimed the chair in its new incarnation. He still needs to be reminded not to claw on it.
I have a weakness for free chairs. Here’s a bar stool that Brian and I found while taking a walk.
I imagine a student made this chair in shop class back when there were industrial arts in high school. Or someone — a man who was born knowing how to use a table saw — took an afternoon to make the chair in his garage. It was raining that day, and he was trying to escape the house where his wife was hosting a party for a recently divorced friend. Whatever its origins, a chair like this should be part of a set but I doubt it ever was.
In the city, leaving an item on the curb is a common way to pass it on. But I still look around for permission before taking anything. “Is this broken, hideous chair that’s sitting next a toilet and a dumpster full of construction debris free? Amazing!”
Wanting to give the chair a chance, the woman I spoke to had moved it from the alley to a prominent corner. Picturing this made me think of ants who are always busy moving material of various sorts: an errant crumb, the foundation of my house. This woman and I must be some kind of recycling ants. Her job is to unearth treasures and put the bright shiny things on the main trails where other roving ants like me will see them, whereupon they will enlist a stronger ant to carry the item for several blocks back to the nest.
Upon a closer look, I might have reneged on taking the chair. But seeing how my initial interest had perked up the ant-woman who was invested by this point, my obligation was clear. Or it could have been that it was the height of the pandemic, and fixing junk replaced recording interviews for my podcast. Or maybe it was my age that compelled me to take the chair. I can still hear my neighbor who is a little older than me say, “I also went through a chair phase,” while another friend joked that I was one step away from glazing a bowl in a shop window.
As expected, my cats claimed the bar stool. We’re not keeping it. So, don’t get too attached, Bert.
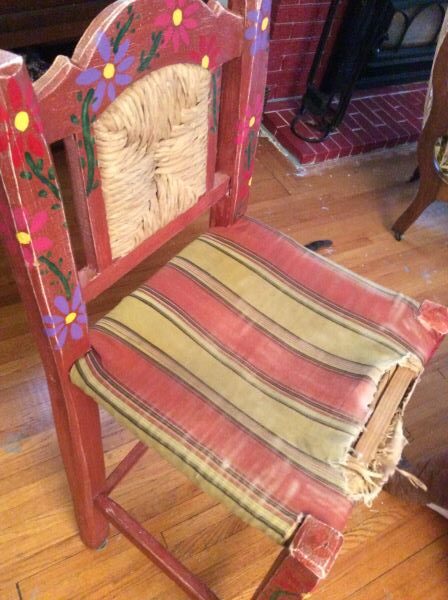
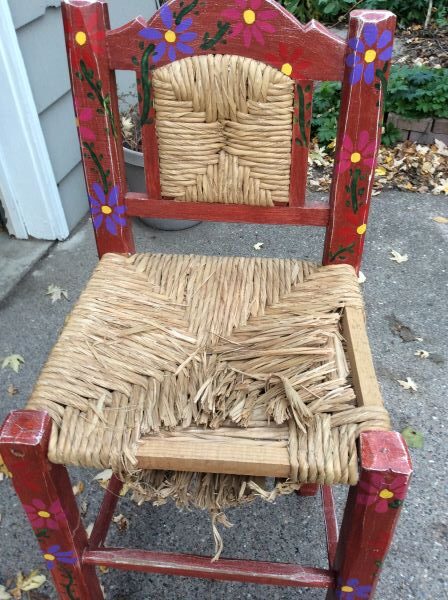
I brought the chair to the cat-free garage and started to investigate. This is the first step to fixing anything. It’s interesting to see what the ants before me did to beautify the piece. In this case, fabric covered a worn-out rush seat, proving that we do what we know how to do. In this case, someone knew how to use a staple gun. Was the fabric chosen or was it just handy? The flowers that are painted on the frame were also someone’s idea of an upgrade. They were supposed to cheer up the place or camouflage an objectionable shade of brown. Regardless, it was a job to remove it.
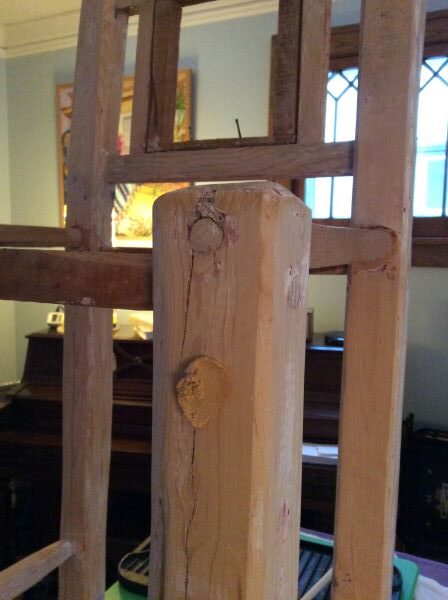
Once I stripped the chair, it became clear that whitewashing it (a technique I saw on YouTube) would not produce the desired effect. Though the joints were tight (Thank goodness! I wouldn’t need to “Take it apart and glue it back together again,” as one of my favorite YouTubers is always saying), the wood was cracked and mismatched and generally in rough shape. My neighbor suggested painting it red and that sounded good.
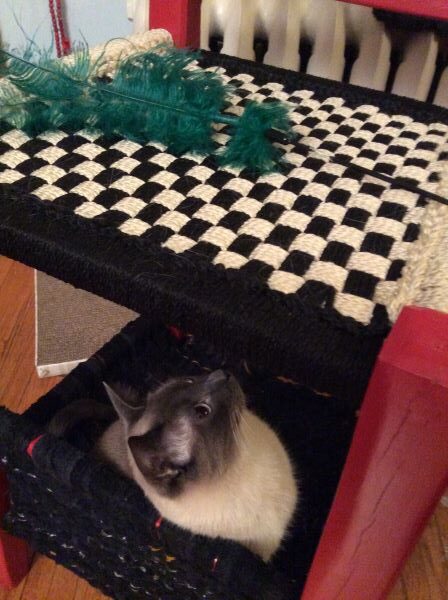
Unable to find the right shade of red, I considered black. Brian was against it, saying that a chair like this needed the advantage of a pop of color. So, I stuck with my plan, which meant watching more YouTube videos about how to weave a rush seat. Then one day I woke up thinking about a checkered pattern. When my neighbor (the same who suggested the red) independently suggested checkers for the seat, I had to try it.
The checkers could have been bigger, and the improvement might have outweighed the cost of a weaker seat. But it was hard to justify starting over. Maybe I was being lazy. But there is something to be said for being done. However, even though I didn’t plan to keep this chair, I wanted to love it. I wanted it to be something I could sell or proudly give away. I wanted it to be state-fair-ribbon worthy. This was falling short of that fantasy.
Sometimes a project does not give a person satisfaction. Again, I wonder if I should have gone with a black frame. Again, Brian says no. Maybe finishing the back support would help? It did not. The black cross is accidental, something I’m always explaining. It reminds me of the God’s eyes we used to make in elementary school. I wouldn’t be surprised if there’s one in the things my mother returned to me — old report cards, yearbooks, etc. — some years ago.
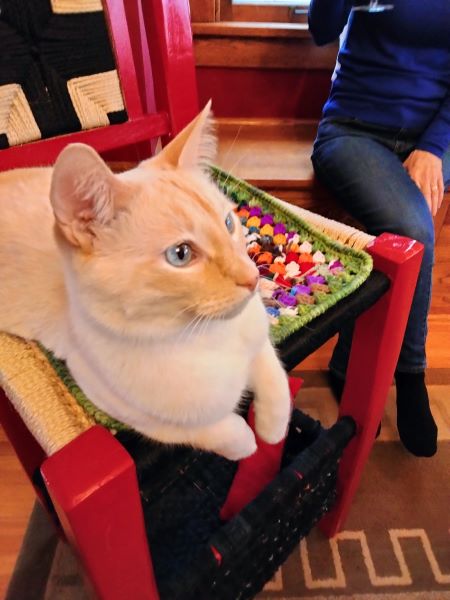
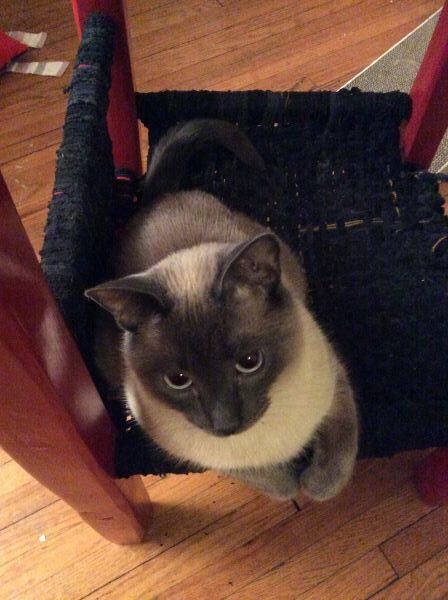
As I worked on the chair, the cats persisted in claiming it, especially Bert. So, I surrendered to the idea and eventually quit scolding him for scratching on it, which he loves to do. “At least let me take a few pictures before you destroy it, Bert.” Fully embracing the idea that this was cat furniture that I was making, I wove a box to the bottom rungs of the bar stool because Michael and Bert love a box. It was also a chance to experiment with using cut up old socks (pieces are cut into loops and woven like how many of us made potholders as kids). It would not have been suitable to support the weight of a person (Yes, I wanted to try using old socks to refurbish a lawn chair. Fortunately I’ve been convinced that it would be a waste of time.). However, the socks work great to make a box or a hammock for a cat, assuming you can tolerate the shedding (of the socks, though cats shed too).
To assure me that my efforts would be worth it, both cats would sit on the chair while I was weaving it. Michael and Bert like to be involved in projects.
Here’s Michael sitting in the finished box.
The cats do love this chair, especially when you mix it with playtime.
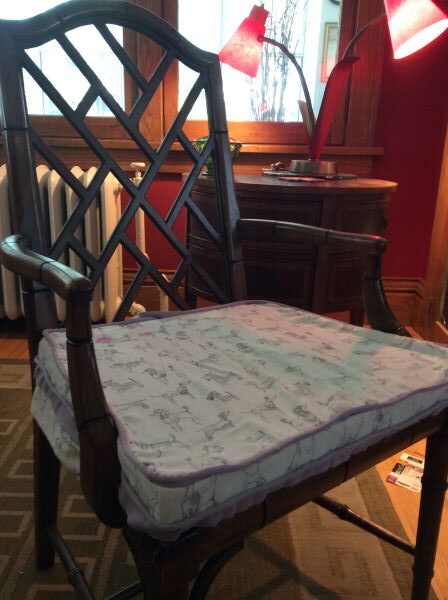
Here’s Bert on his highchair with a pad that my sister Amy crocheted using bits and bobs from her yarn closet.
Though sturdy, this chair had its limitations. Or maybe I lack the imagination and the skill to make it the best that it can be. But I liked how the project evolved. And I like that it is done. And I love how Michael and Bert have given the chair its purpose. Down the road, an ant will look at this chair and say, “That red is terrible! Was it chosen or was it just handy?” She will wonder, “Is that supposed to be a magazine rack on the bottom?” and declare, “Poor chair!” She will drag it home. Take it apart and put it back together again. And think, “Surely, we can do better than this!”
When my neighbor cleaned out her garage, she gave me an aluminum lawn chair. When I turned to YouTube for the instructions on how to re-web it, I discovered that people were using macramé cord to weave new seats onto old frames. I immediately wanted more chairs.
As luck would have it, someone on FreeCycle posted a bunch of them that day. Unfortunately, it was another “curb alert,” meaning that instead of arranging for a pick-up, interested parties were to drive across town and hope for the best. I resist these offers, which is (or used to be) against the FreeCycle policy. People racing to get something only to find that the item in question is gone defeats the purpose of reducing waste. Indeed, curb alerts never go my way.
But I was desperate. At a quarter to ten, bleary-eyed and half asleep, I pleaded my case to Brian. The chairs will be gone by morning! Nevertheless, at the reasonable hour of 6 a.m., we pulled up to a stranger’s house in a strange neighborhood in the exurbs. One chair and a chaise lounge that I didn’t want were still left. I took them both.
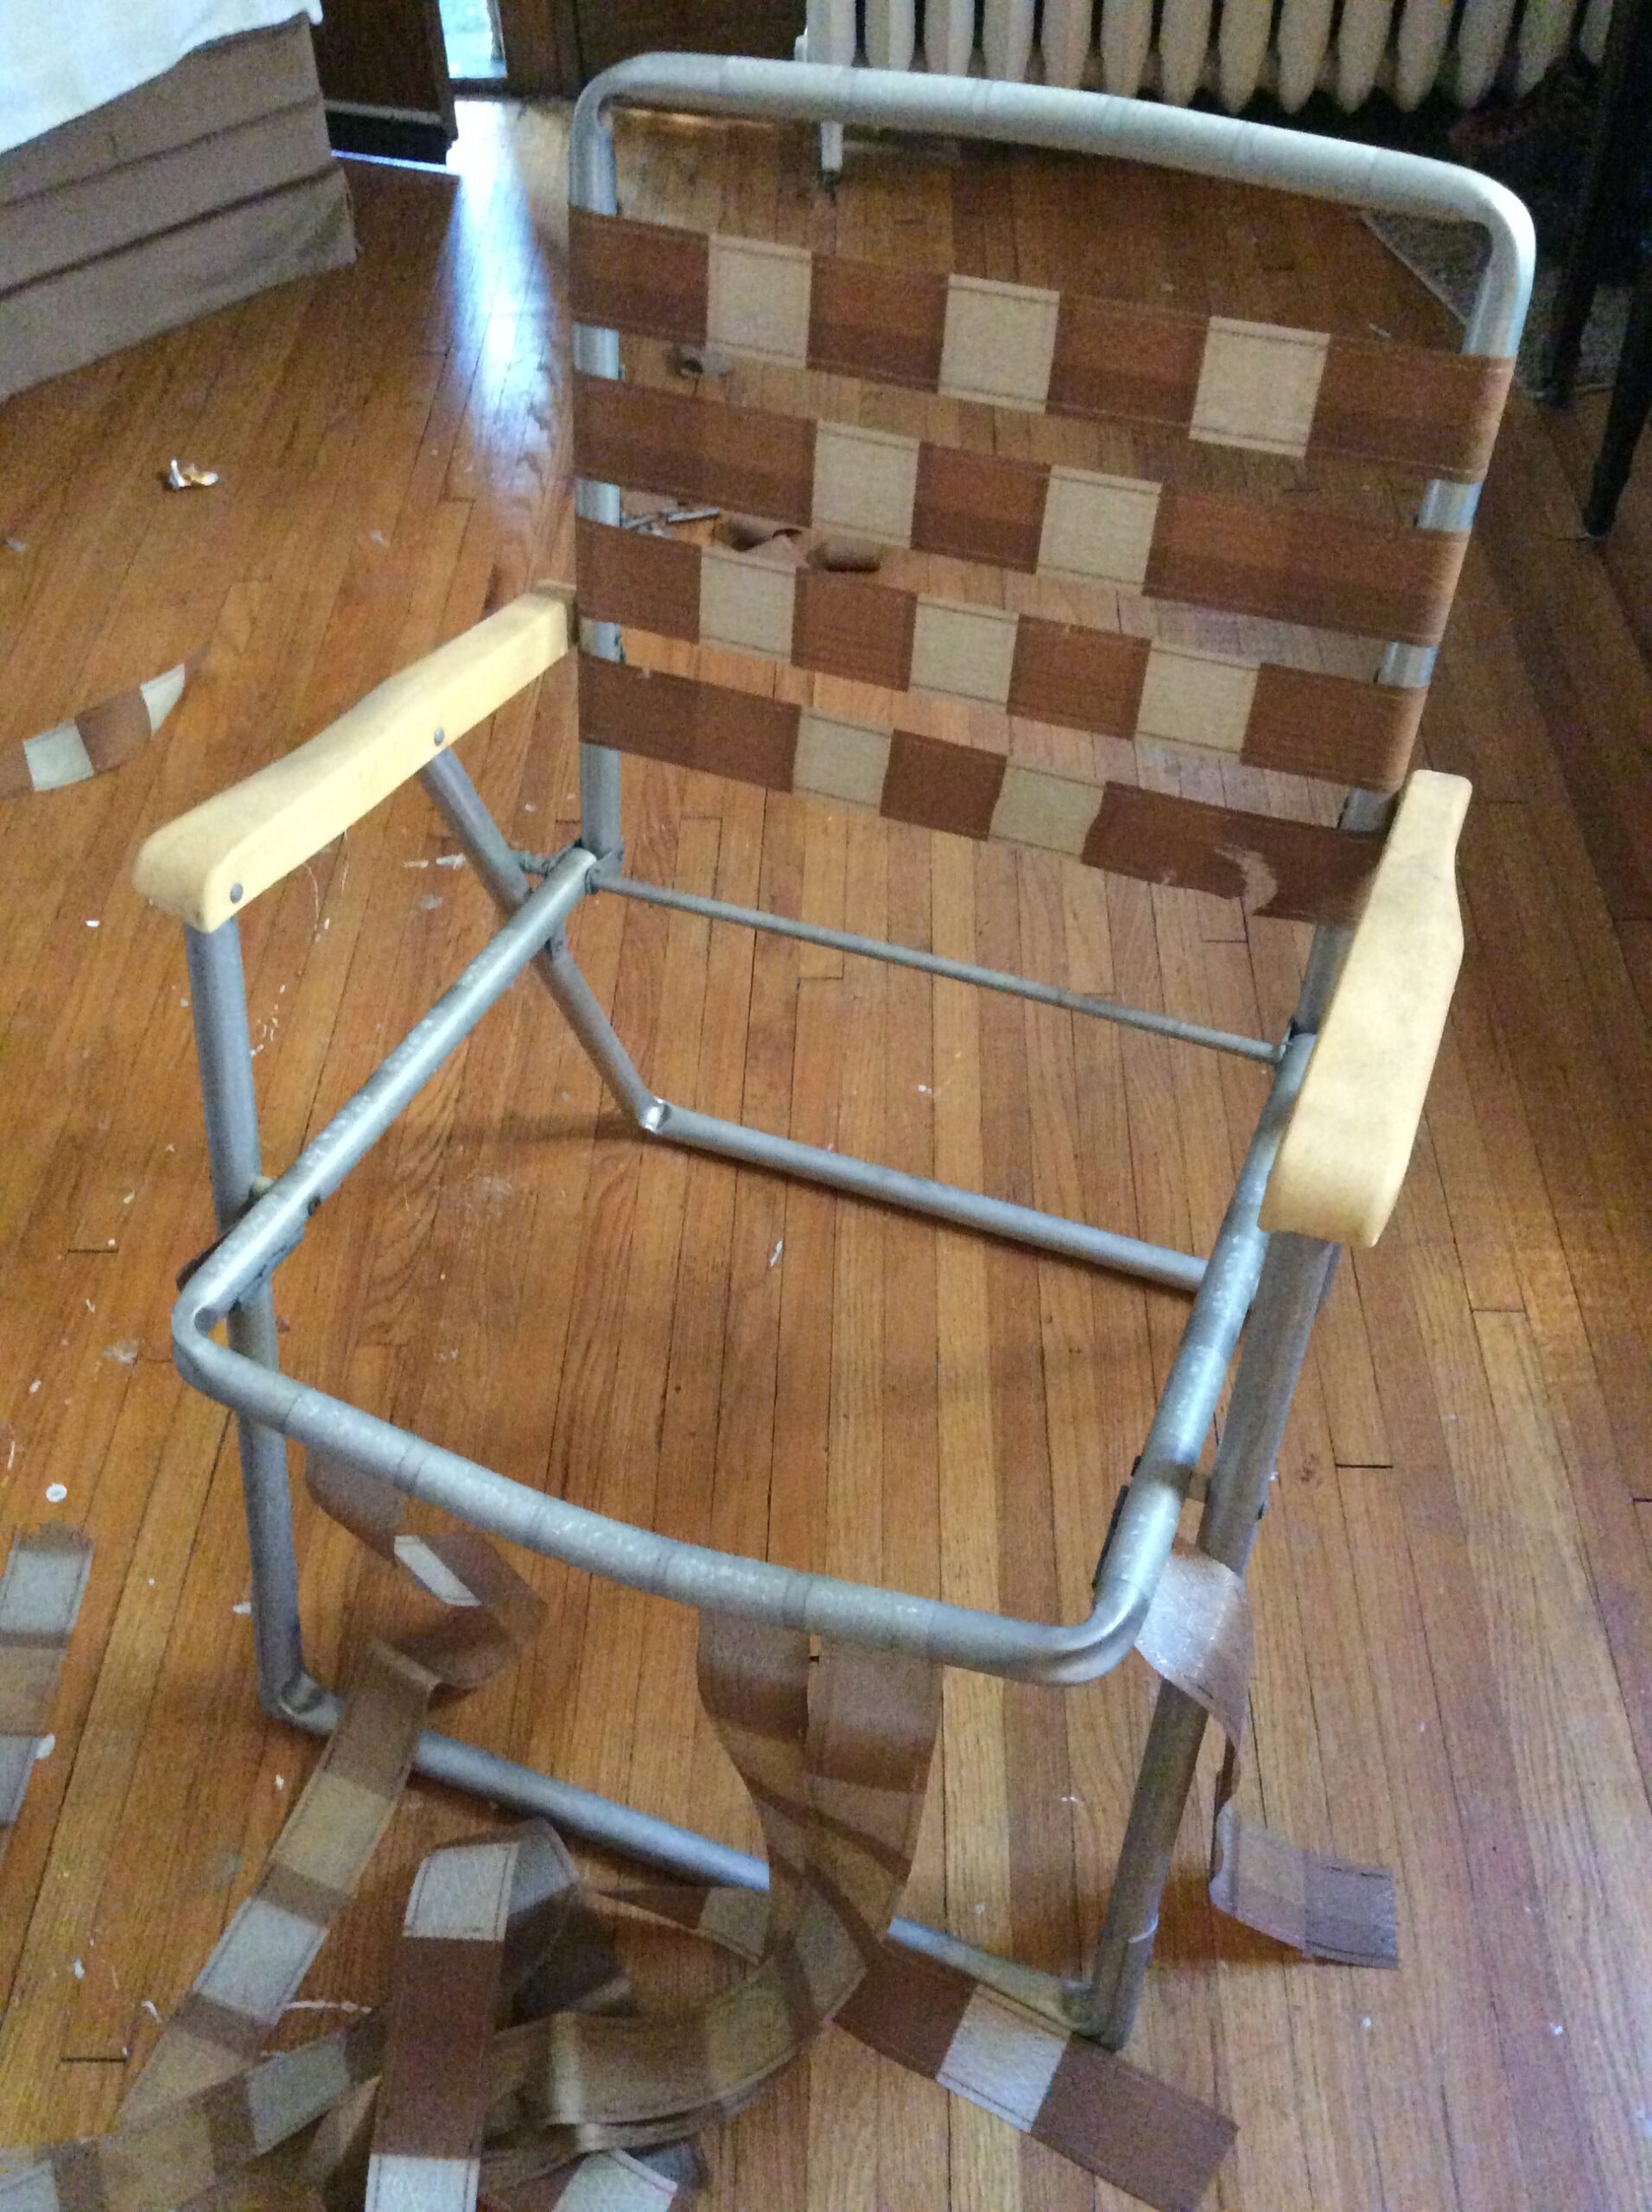
Free Lawn Chair (Before)
After cleaning the frame with Dawn dish-washing soap and a Scotch-Brite pad, I went over it with Krud Kutter. Then I remembered I had a buffing wheel that attaches to the drill and some polishing compound. So, I tried that too, including on the plastic arms. I’m not confident with the buffing. Most of the instructions I found were of an industrial nature (motorcycles and semi-trucks).
Choosing the cord was easy, as there was only black, white and tan available.
I made a cheat sheet with the pattern and kept track of rows on a separate card. This pattern is made up of four rows that repeat.
O=over, U=under
Row 1: Offset O2, then start the repeating pattern U3, O3
Row 2: Repeat U1, O2
Row 3: Offset U2, then start the repeating pattern O3, U3
Row 4: Repeat U1, O2
I worked from the bottom to the top. However, not all YouTubers agreed on this. Some went from the top down.
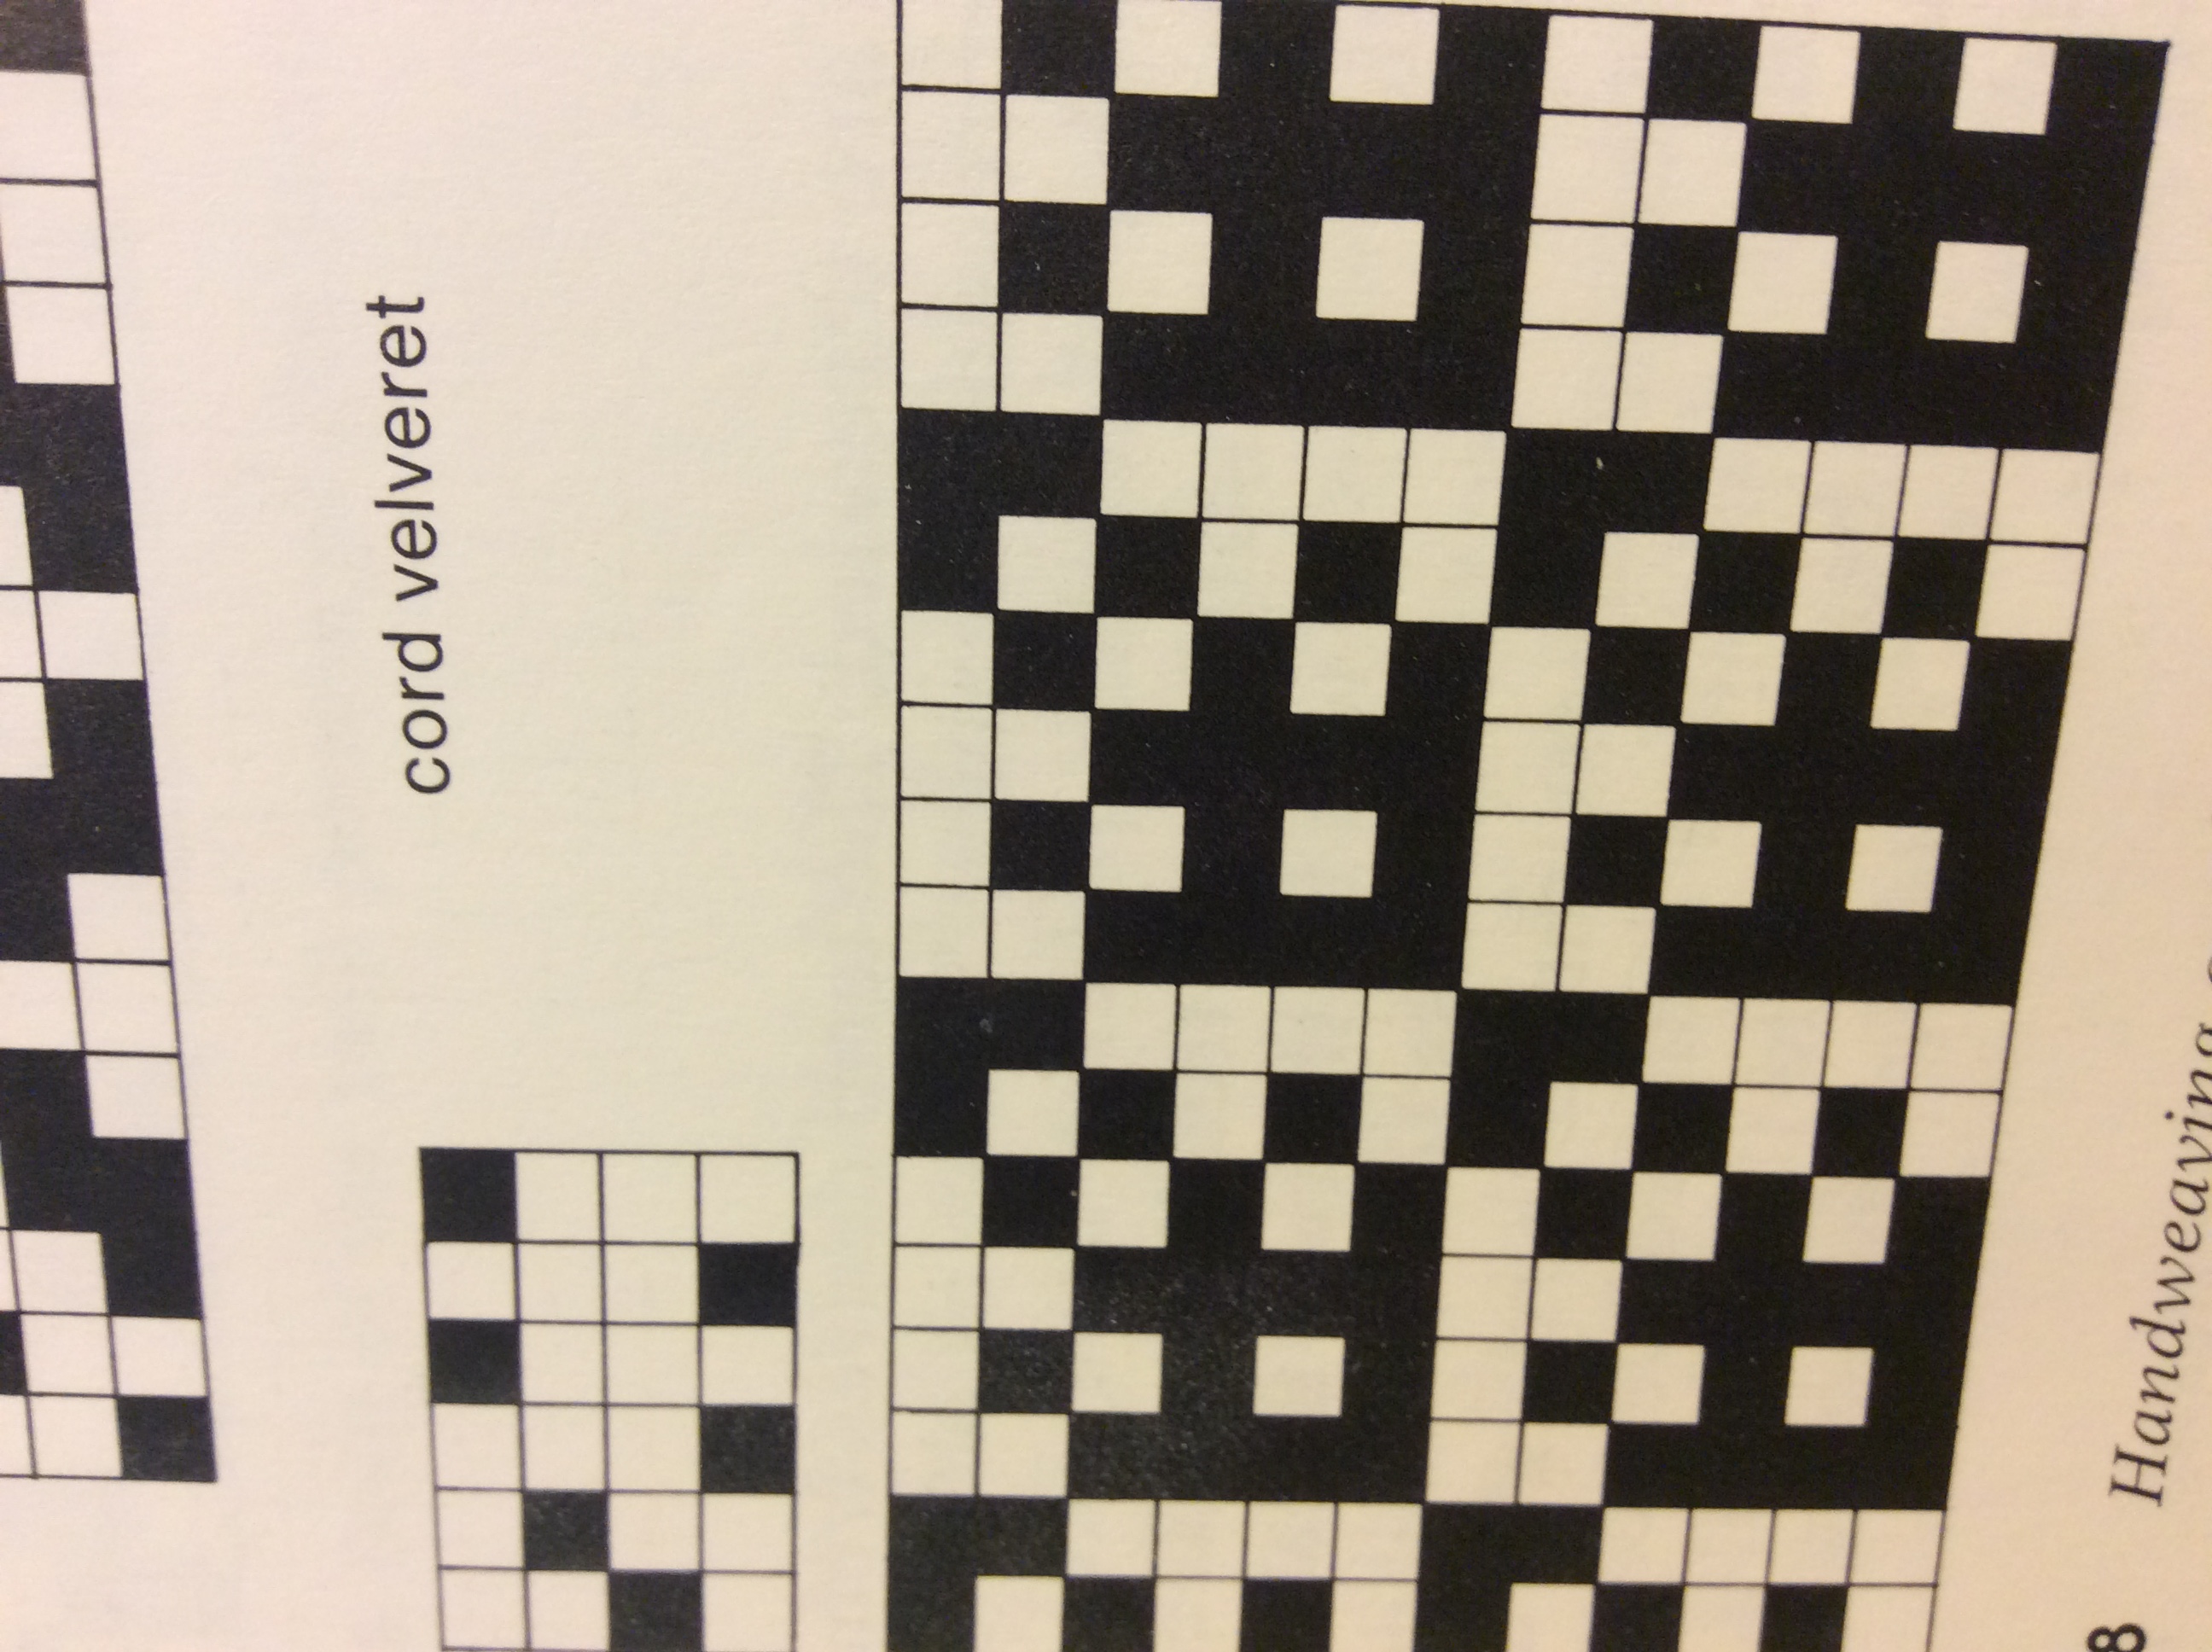
The seat of the chair was a pattern called a cord velveret.
Cord Velveret
This pattern is made with six repeating rows:
Row 1: U2, O4
Row 2: O1, U1
Row 3: U1, O1
Row 4: O2, U4
Row 5: U1, O1
Row 6: O2, U4
If you look closely (or maybe not so closely), you can see that I messed up the pattern on the seat. But I made the call: Good enough. Let’s get at least one chair under my belt before the summer’s end!
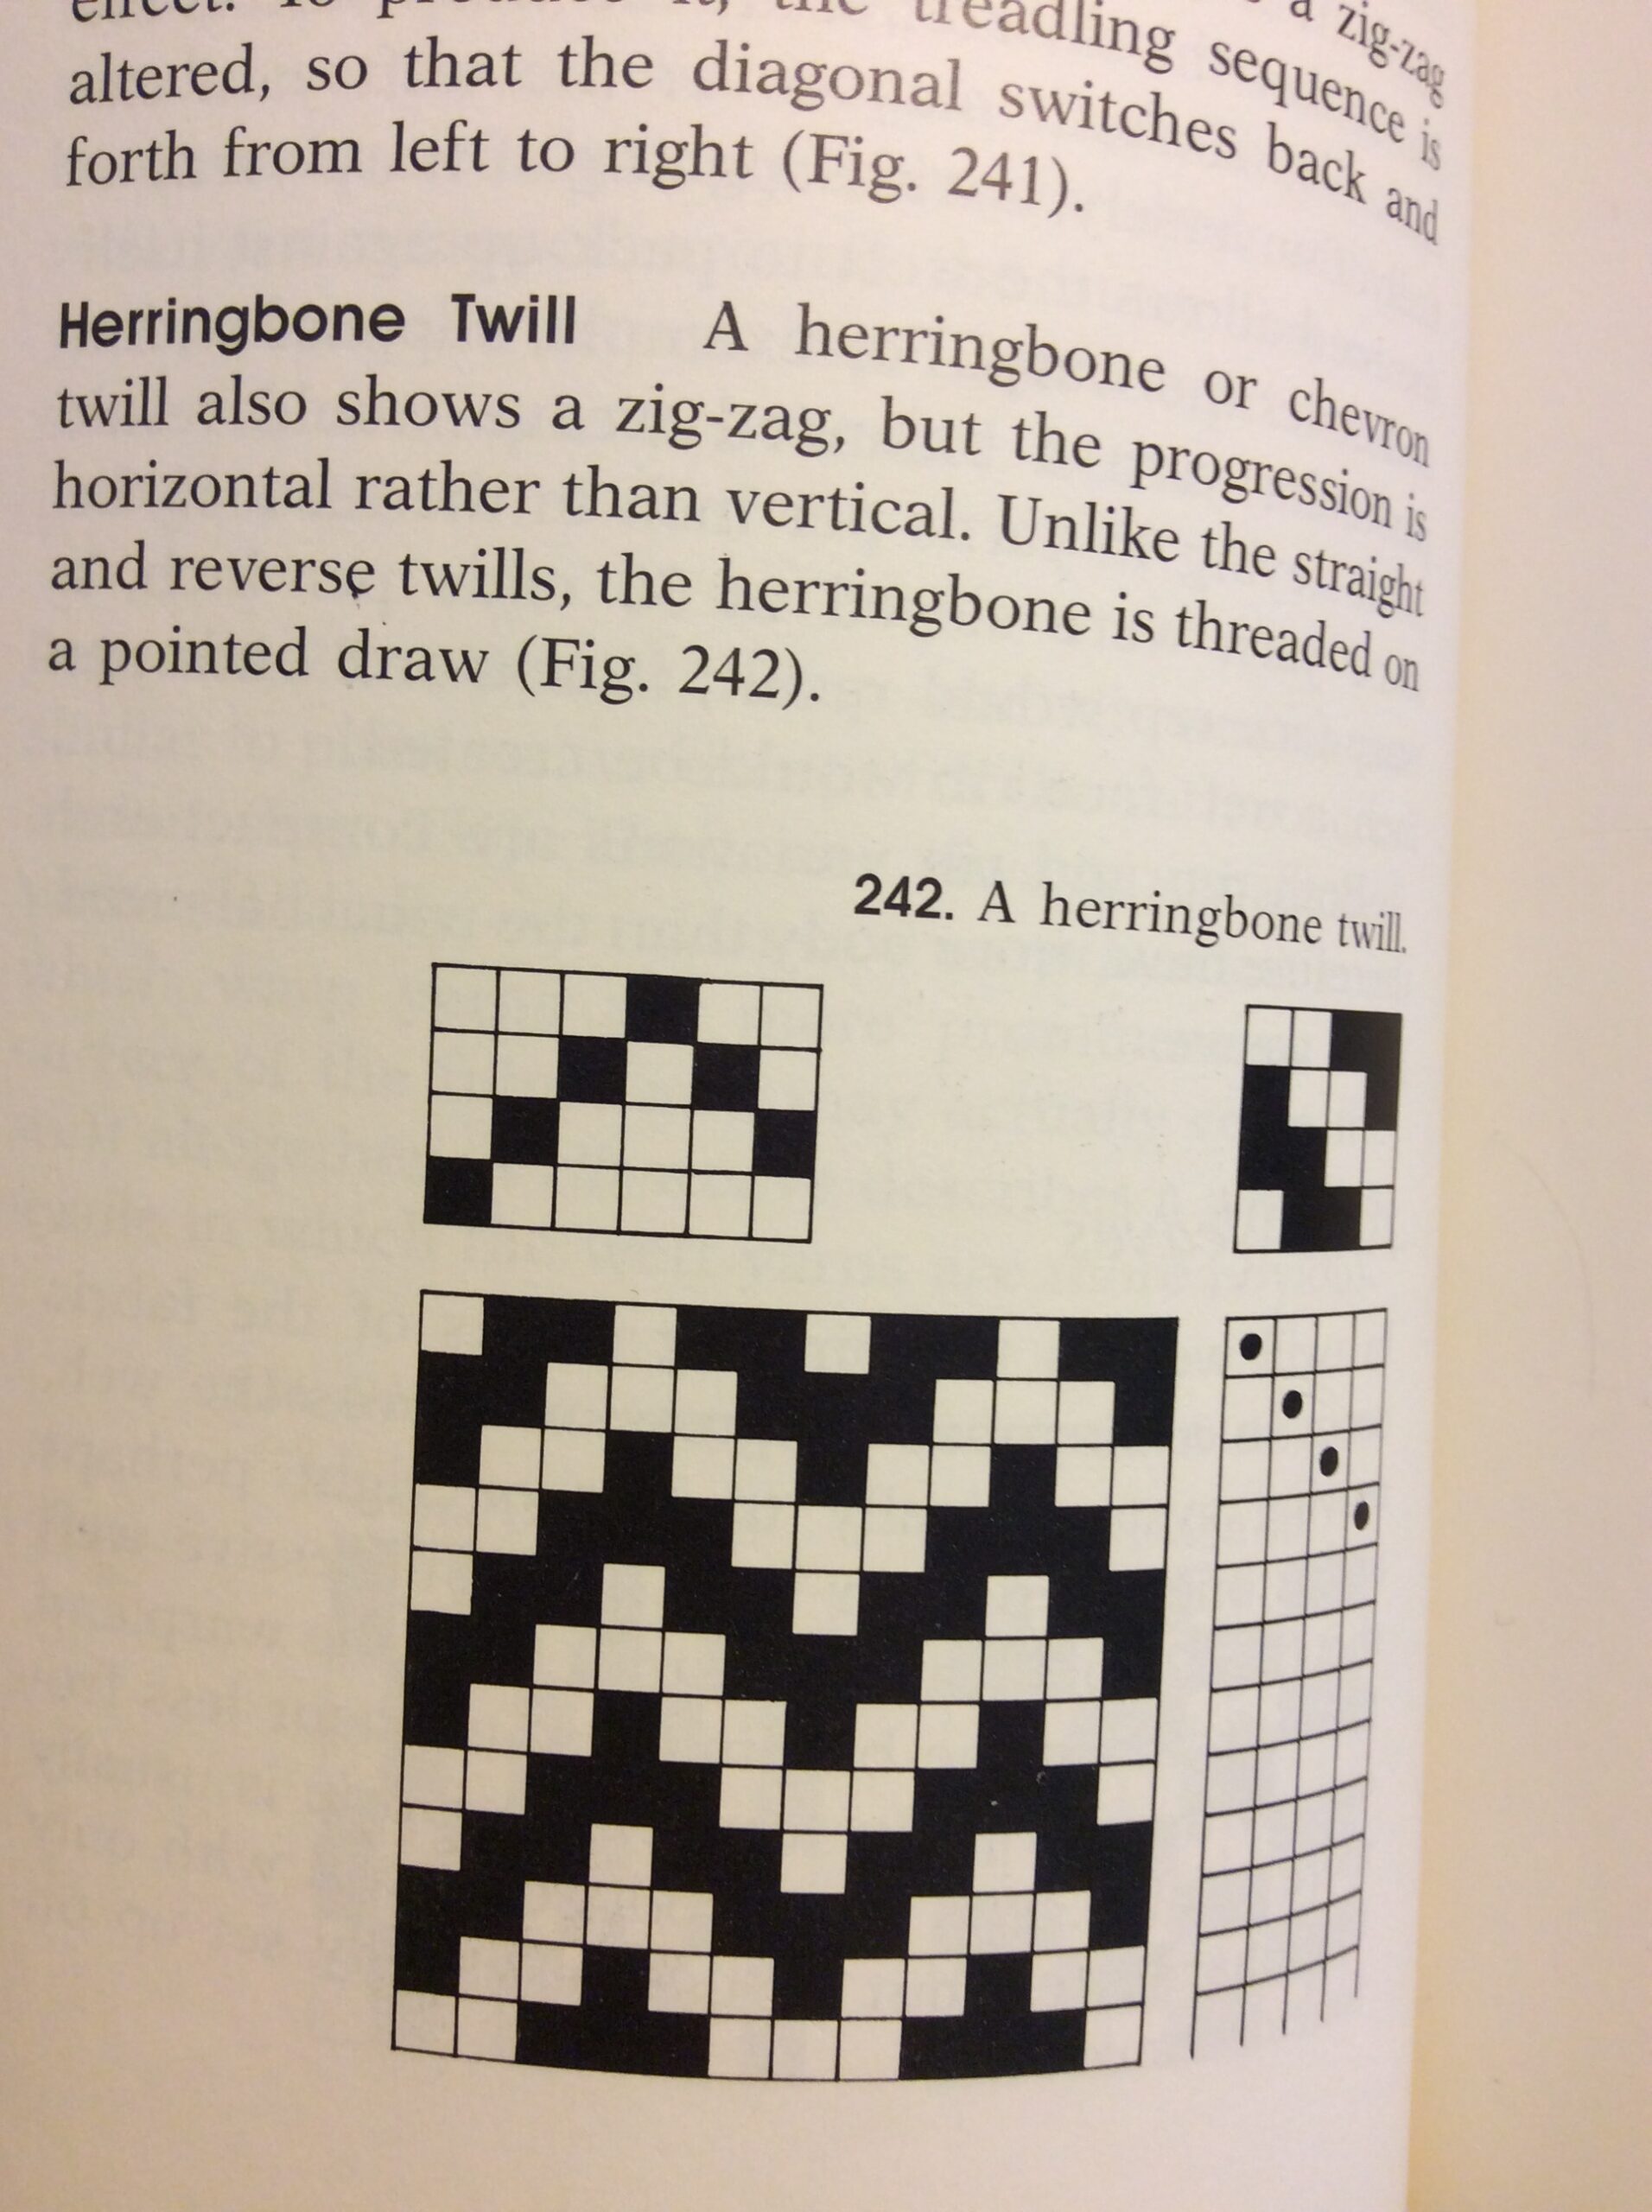
I was struck by how simple these patterns were and wondered what calculation or principle was behind them. I can copy something. But could I create a repeating pattern from scratch? Learning about the circle of fifths struck me in a similar way. How did anyone ever figure out the pattern? Brian had the same reaction. As I was marveling over these weaving patterns, without my prompting, he also said that it reminded him of the circle of fifths (or the way that I marveled over that too). And then I read this in Held’s book in chapter nine about drafting weaving patterns:
“Drafting has often been compared to musical notation, and in some ways the analogy is accurate. However, unlike the symbols used in music, the shorthand of drafting is not universal… We occasionally hear of great singers or other musicians who cannot read music. Similarly, many experienced weavers can neither read nor write drafts, preferring to design on the loom….”
While this doesn’t quite get at my amazement of how patterns work, the music analogy was close enough to make me think that I was onto something. I just don’t have the words for it. It also makes me wonder if a weaving pattern could be translated into music. What does a reverse twill sound like? Or the other way around. What is Für Elise as a chair? I once saw novels being depicted as colors based on sentence length. It reminds me of that. Unfortunately, I can’t find an example of it.
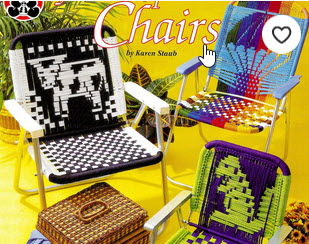
There are some really cute macramé lawn chair patterns out there. I even saw one with a cow that would be perfect for my mother.
As for my first chair, I don’t have a good answer to the the question “How long did it take?” Should I count the learning? The redoing? The tears?
I exaggerate. There were no tears. No swearing. Still, while appreciating the free instructions that will get you started on a macramé chair, many gloss over the tricky parts. More than once, my crochet hook went flying across the room with deadly force because I was doing something (I don’t know what) wrong. And despite the claim, the warp (the vertical strings) and the weft (horizontal) are attached differently. It’s not enough to say “It’s just like what you did before.” It isn’t. Many of the instructors I encountered seemed to have forgotten what it’s like to be a beginner. Could it be that some have never actually observed anyone trying to follow their instructions? To be fair, there are the good ones too. And there’s not a room in my house that hasn’t benefited from a DIYer on YouTube. In any case, it took a few different tutorials, all incomplete in their own way, to get a full picture of the steps to weave a macramé lawn chair. Even then, I had to figure out some stuff on my own, like how to deal with a big crochet hook in the corners of the seat. Road signs would have helped. These are the clues you need to check your work. For example:
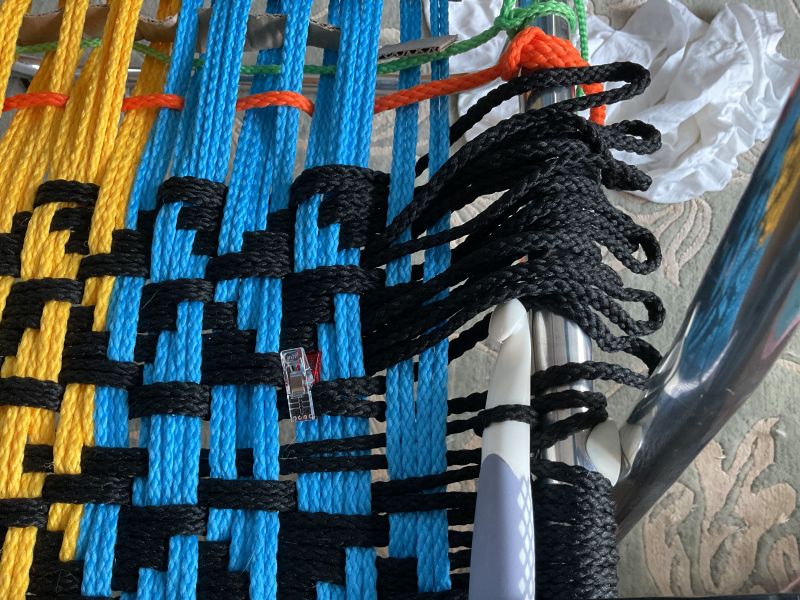
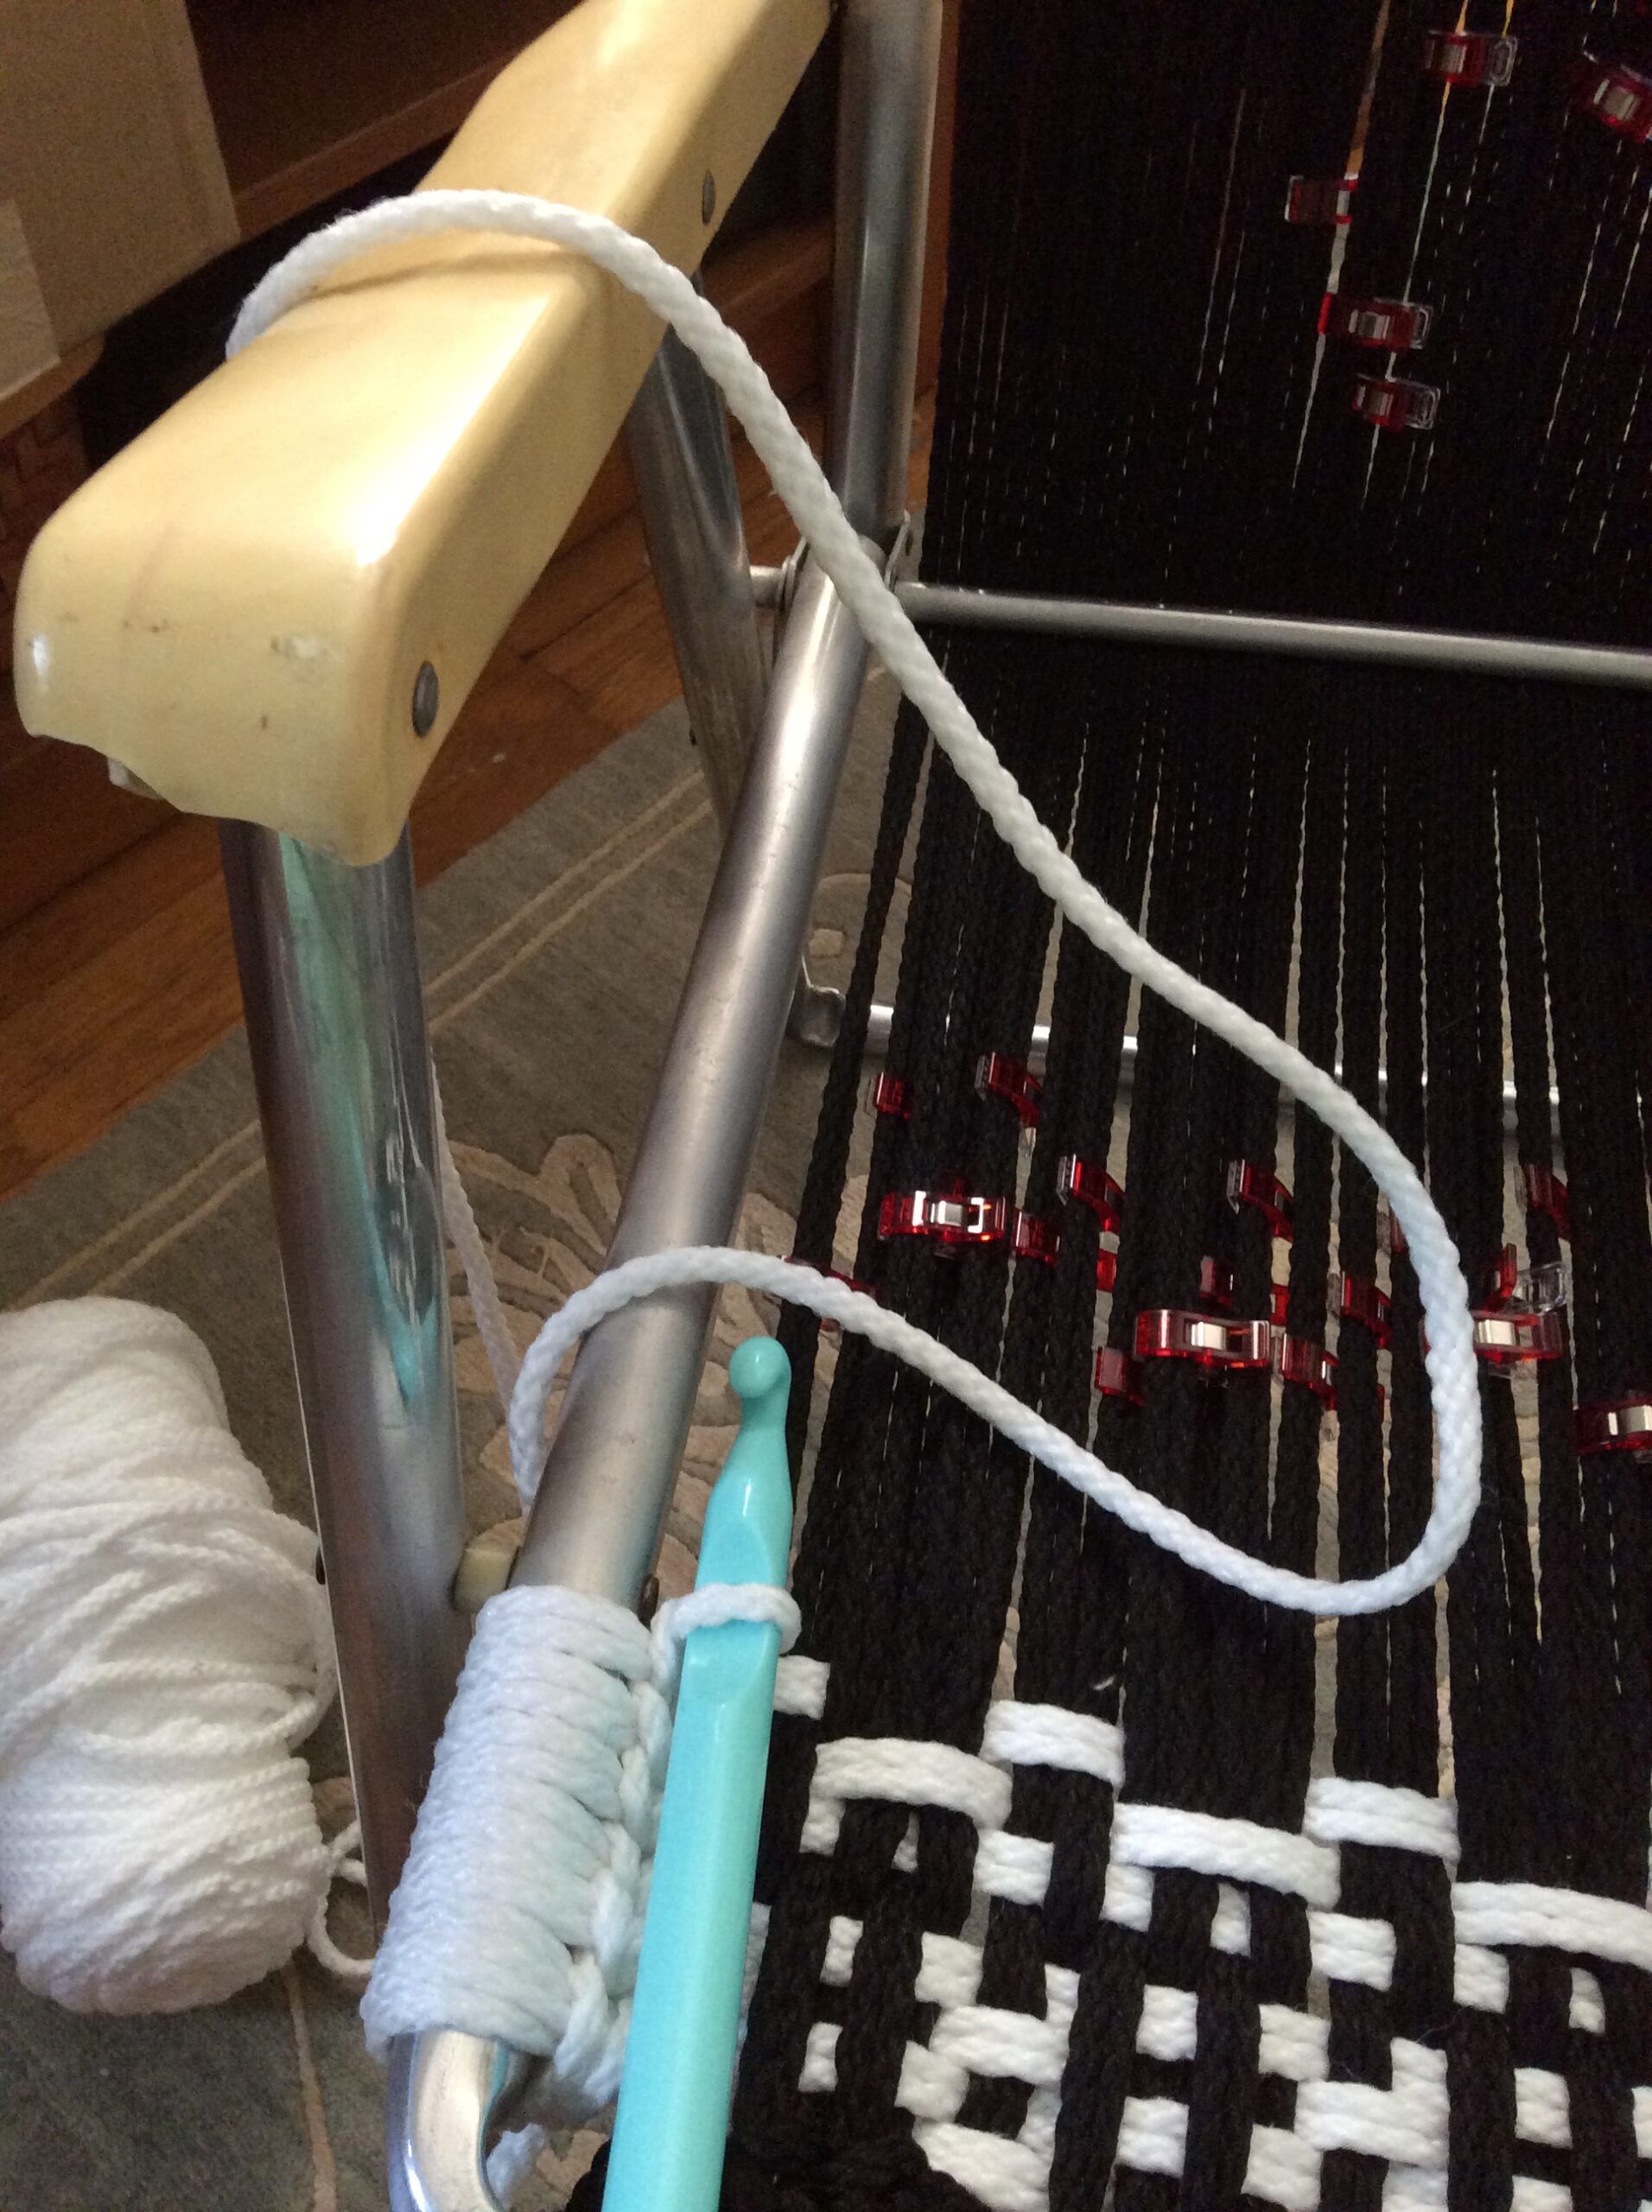
As you are weaving, you know that you’re ready to start a new row when you see the tail of your string draped over the frame like this:
Note the skein of cord is on the ground and feeds over the arm of the chair. However you set it up, it should remain the same throughout the weaving. Otherwise, it’s a clue that you messed up somewhere (which I did many times!). Compare the above to this:
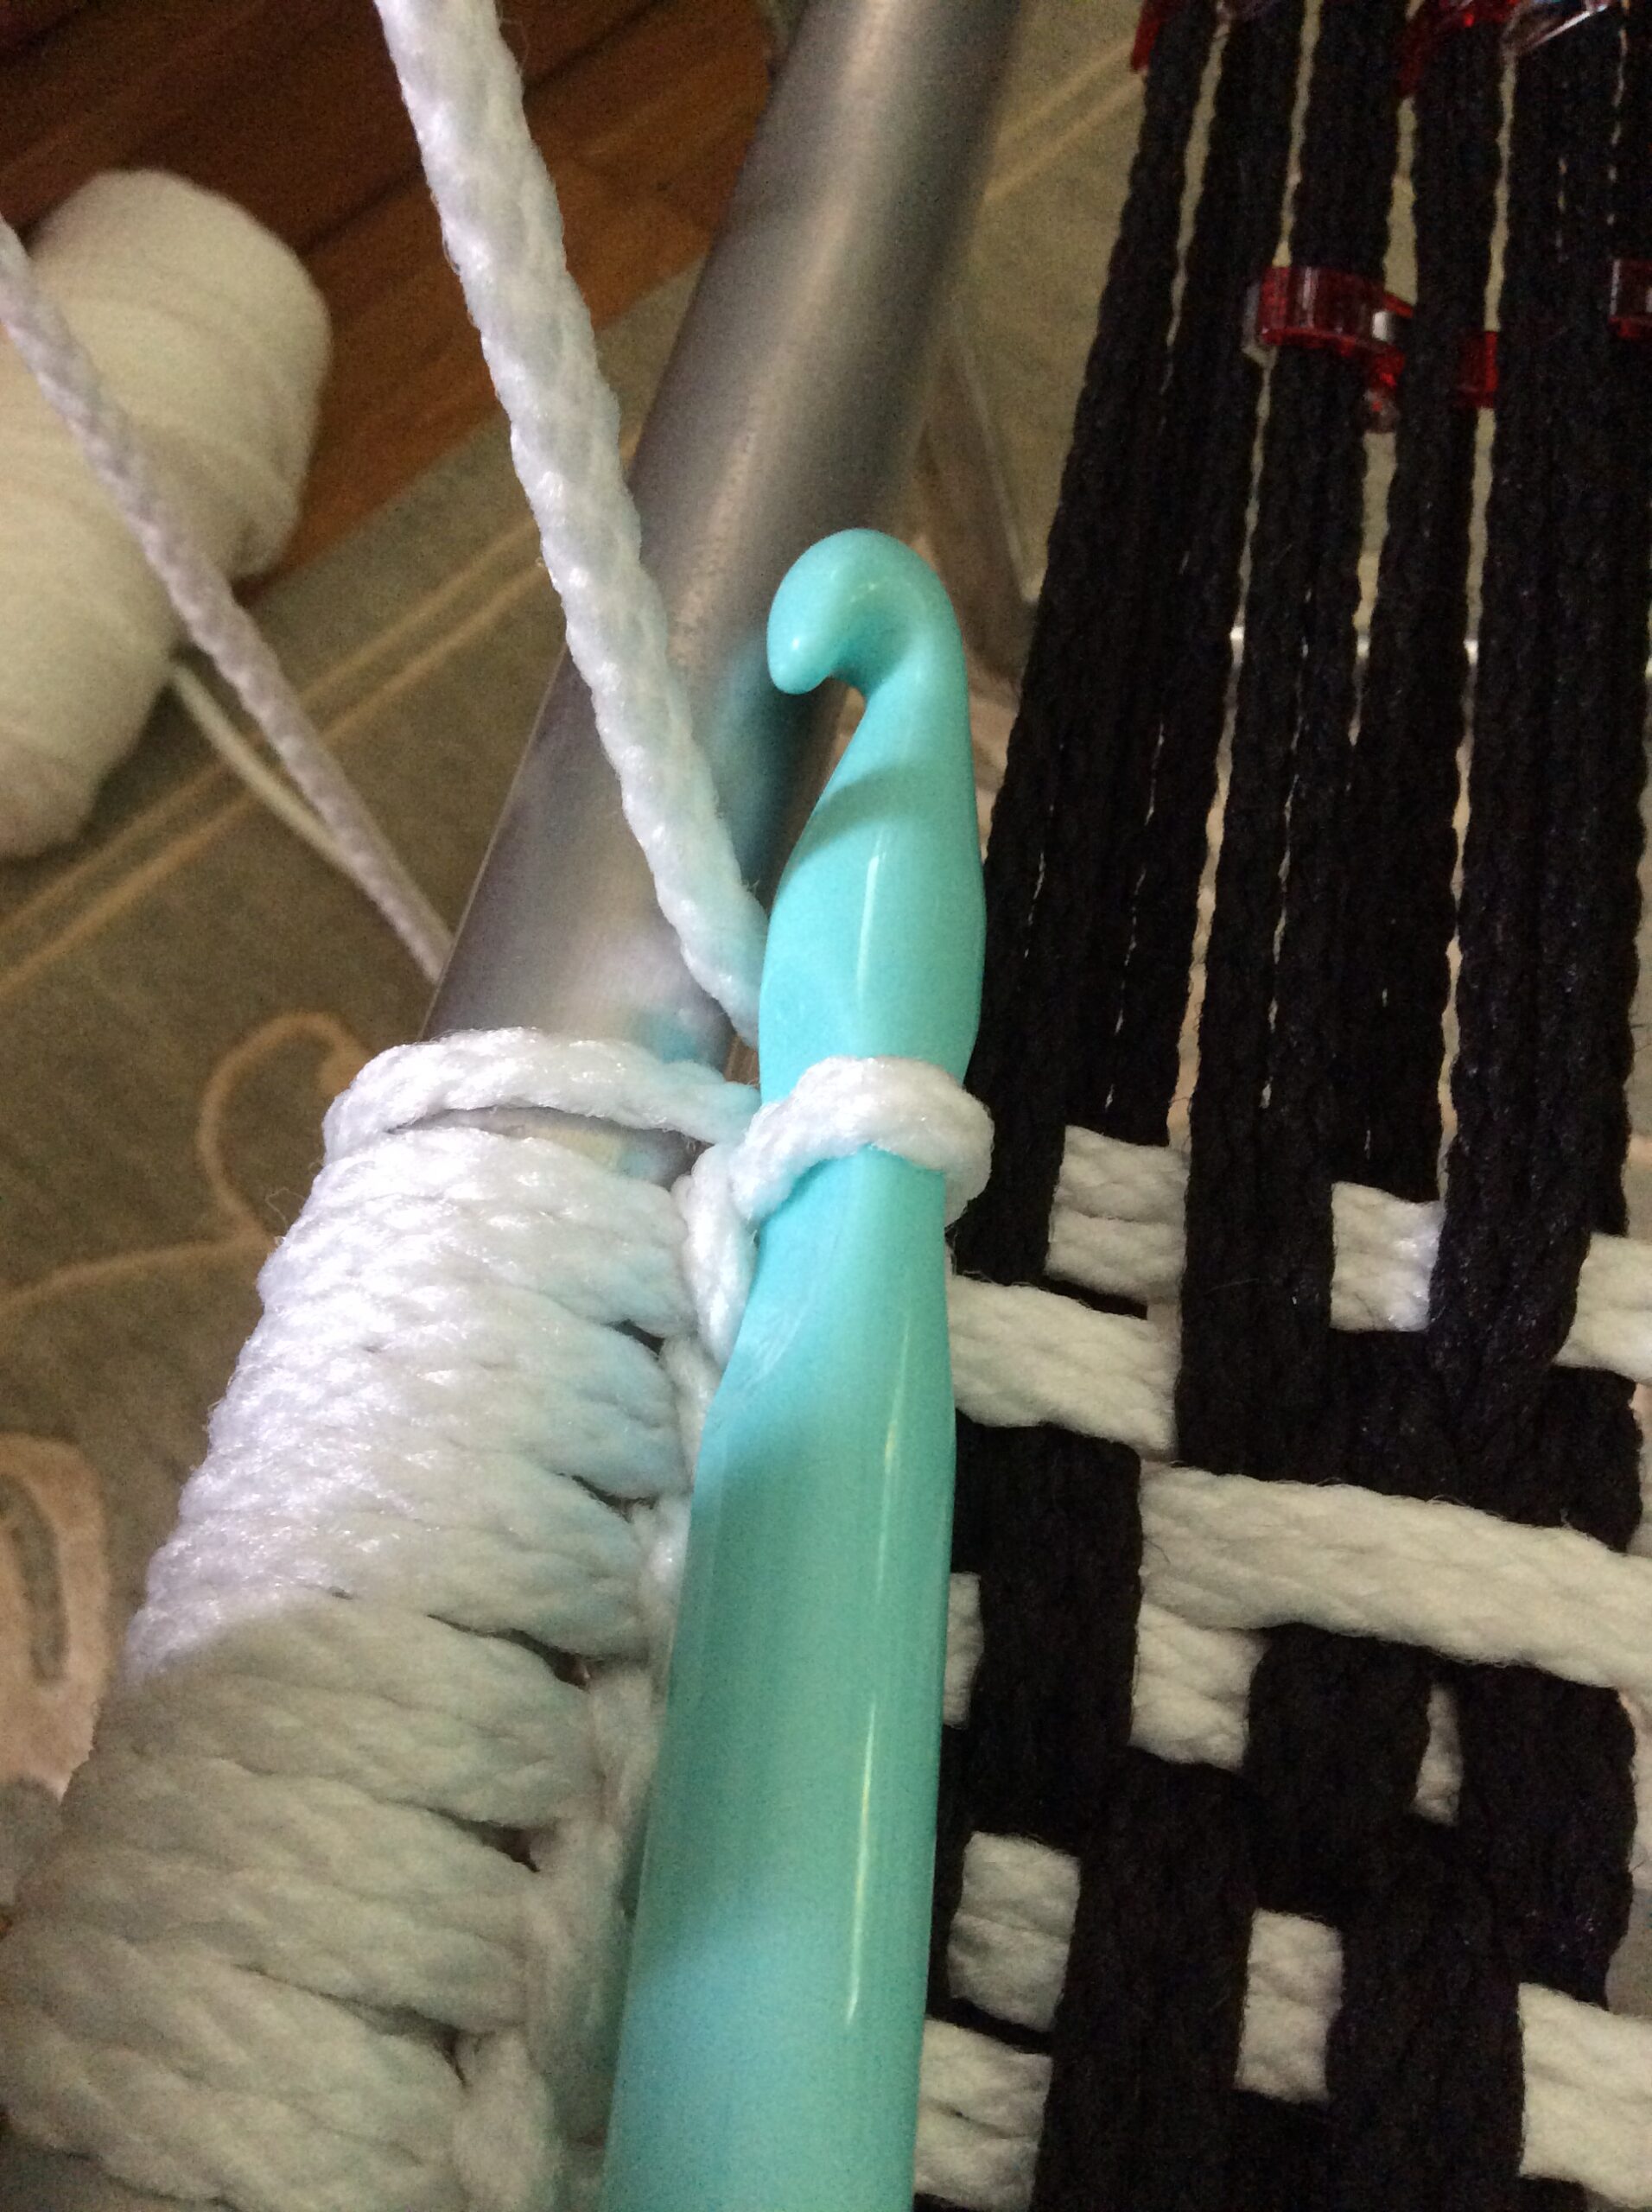
The cord has yet to be looped over the frame and crocheted in place.
Here we can see the stitch has yet to be complete because it’s pointed away from the center of the chair and it isn’t draped over the top of the frame.
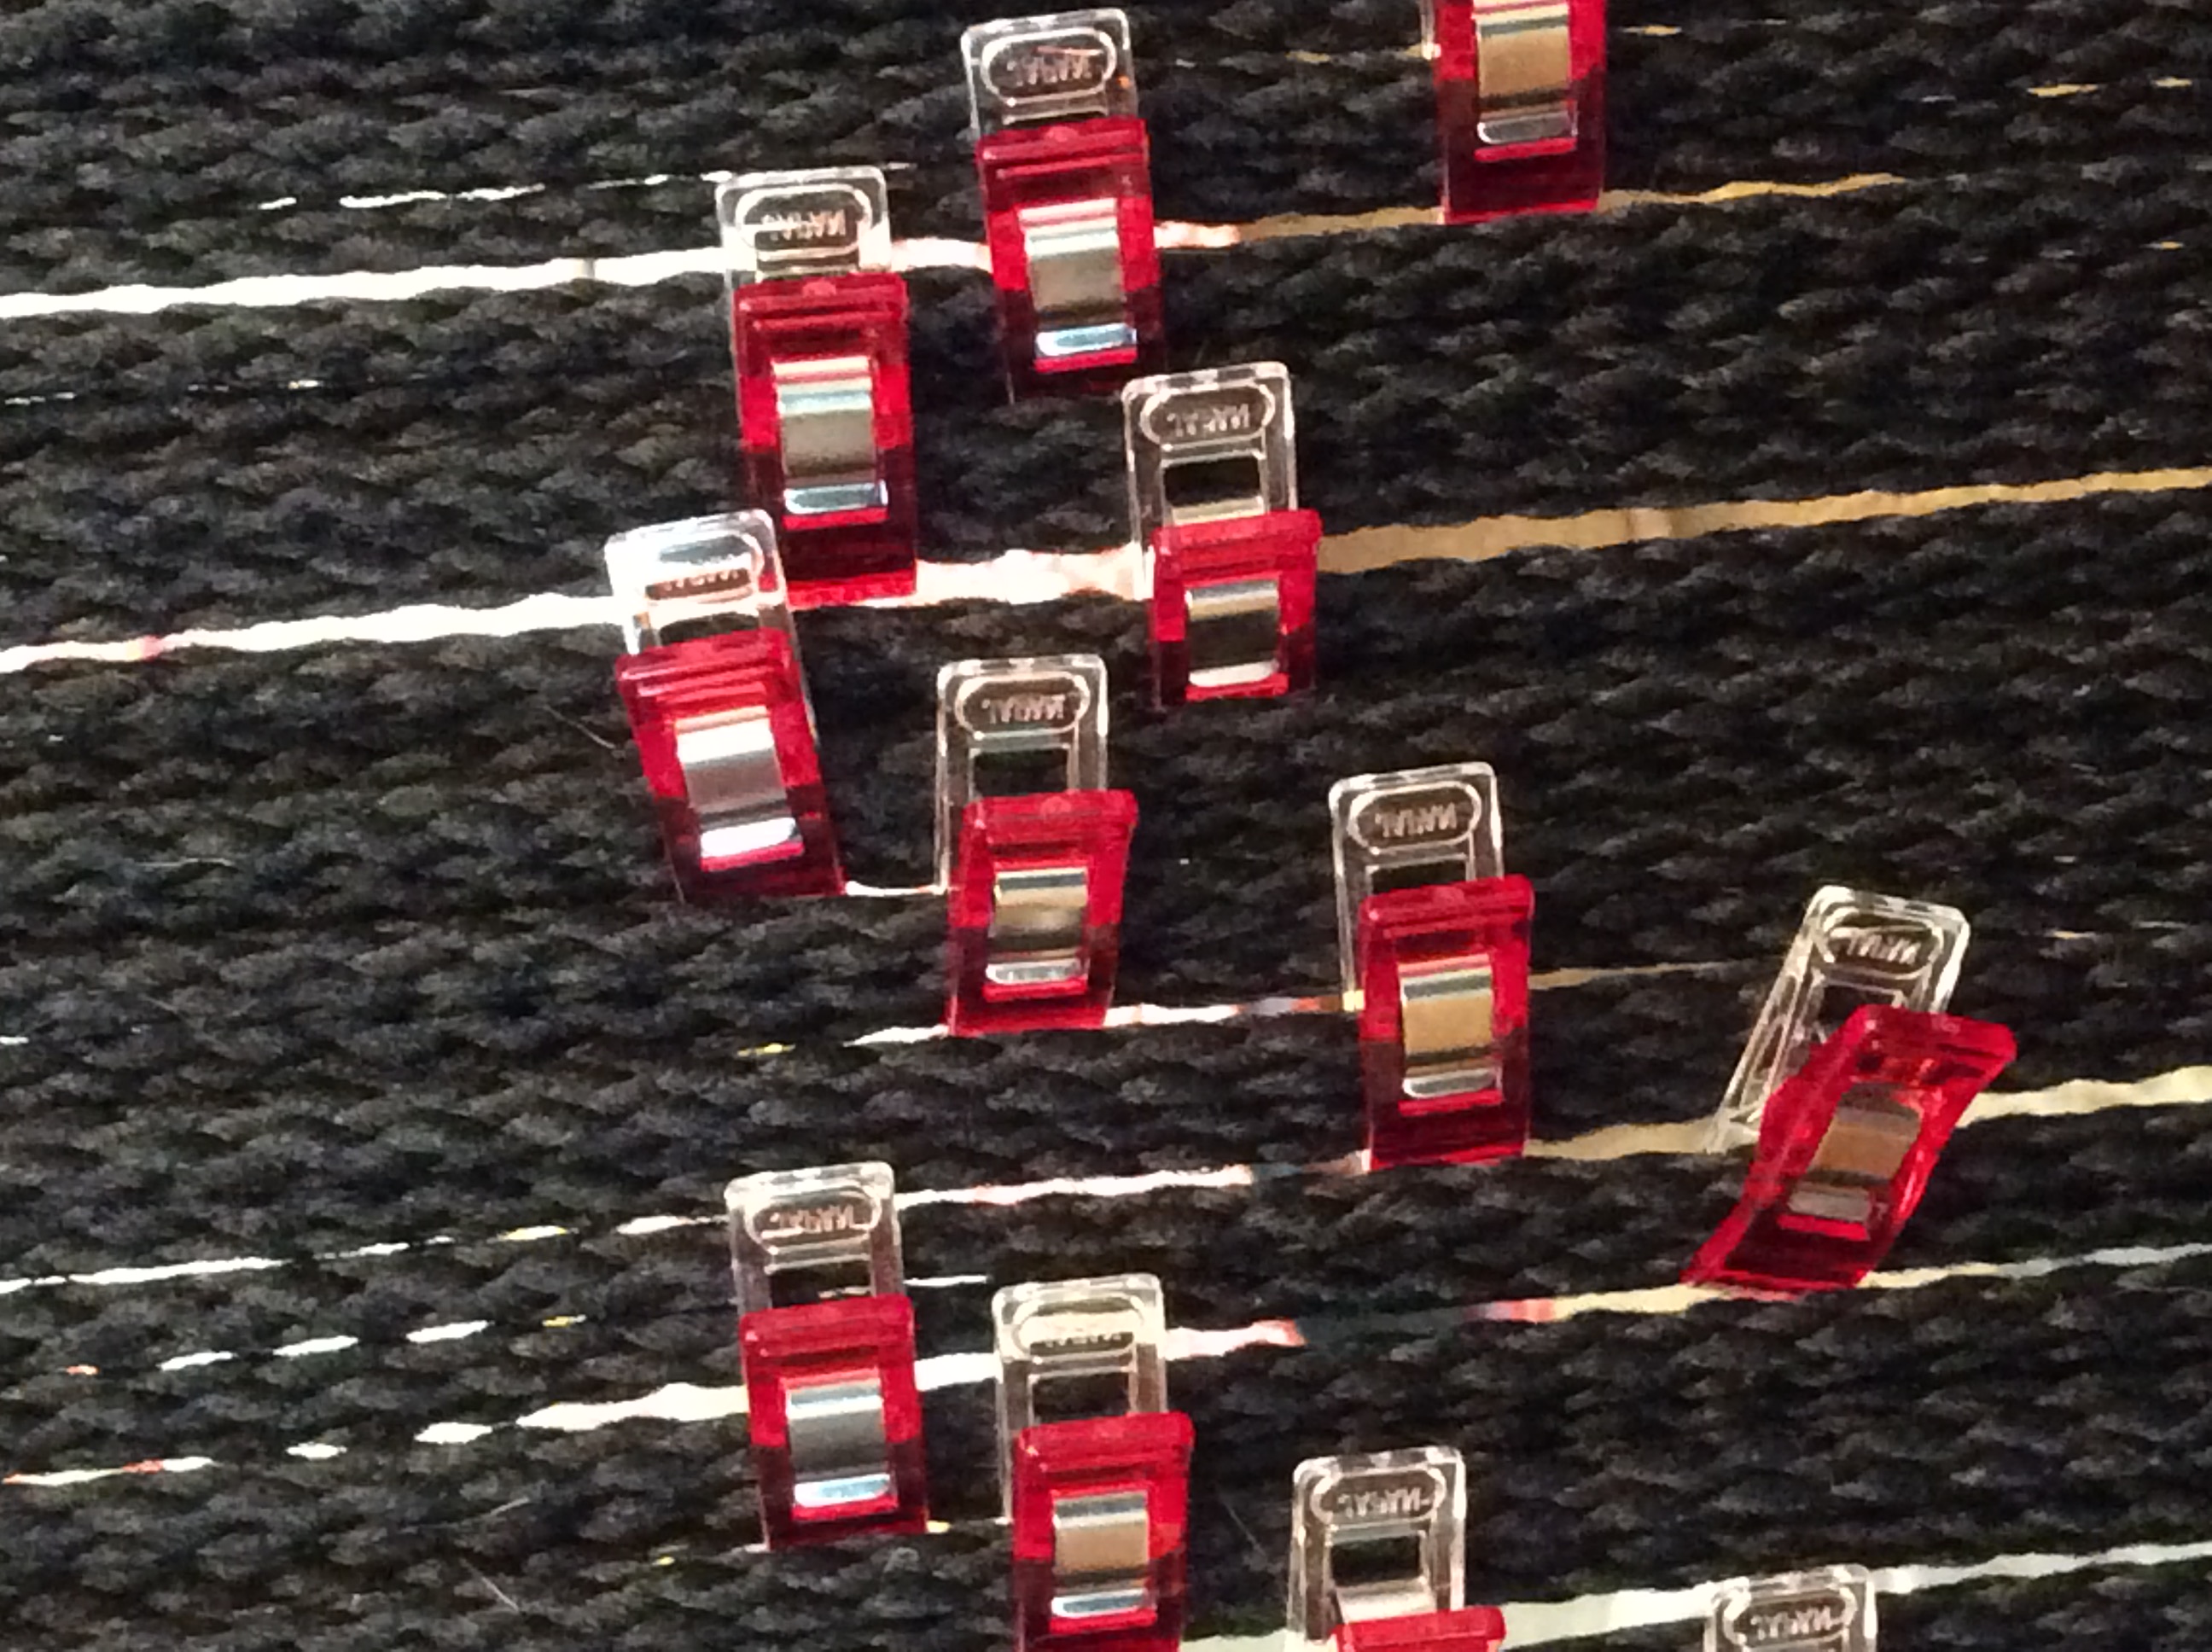
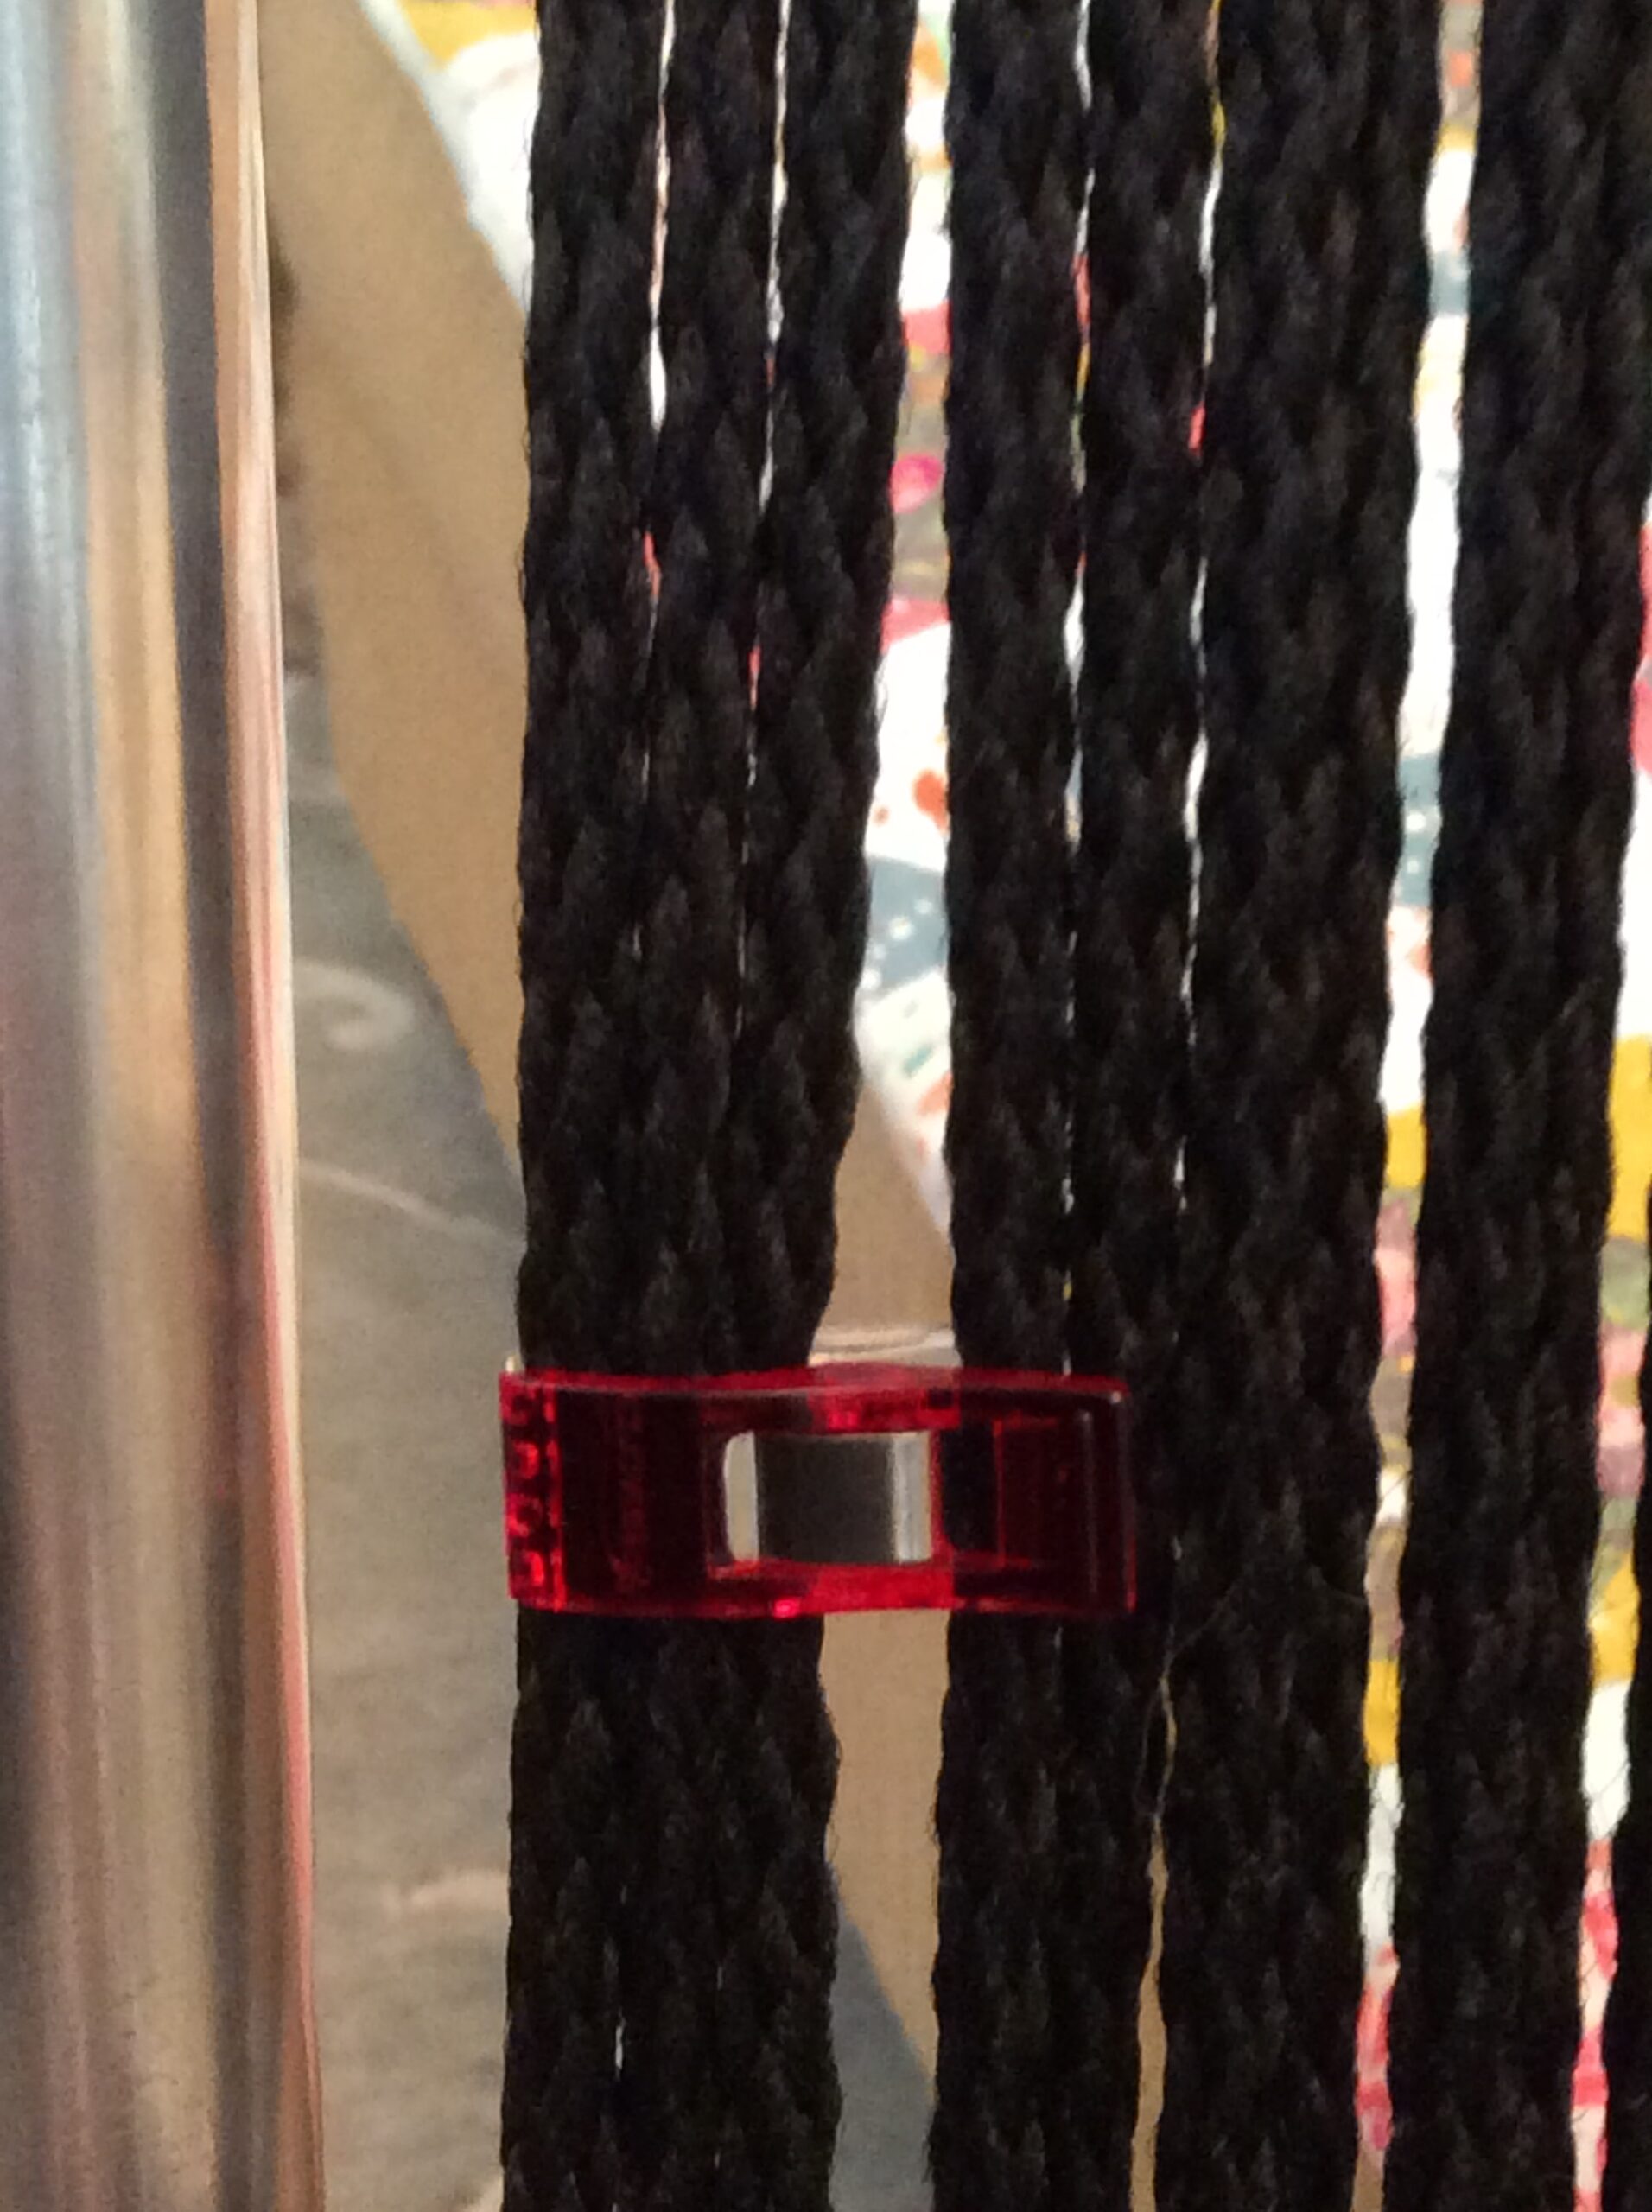
The wonder clips you see were used to pair the threads (2 per knot). For me, it made it easier to count… 1 over, 2 under, etc. And yes. You’re counting sets as opposed to individual threads.
Use Wonder Clips to group string pairs for easier counting
It would’ve also been useful if someone had pointed out that the first set of strings will have three threads per knot instead of two. The confusion caused me to unnecessarily start over. But even after I figured out that this was to be expected, I forgot to account for it when I started my under/over pattern. Half the seat was done before I realized that I’d need to start over. Again, marking this with a Wonder clip eliminated confusion.
Note the knots that have three threads and treat them as a set.
In all of the macramé lawn chair videos that I saw (as opposed to the ones on Danish cord weaving), the chair is finished by cutting the loose ends of the strings short and melting the ends to stop them from fraying. This is a reasonable way to do it. But I suspected that my sister Amy who crochet’s and does macramé would have a better solution and she did. I don’t have pictures of it, but she essentially pulled the loose end behind the first two to three inches of the loops around the frame, being sure to match the colors (i.e., two strings will travel along the white edge and the others along the black). As opposed to letting strings — though cut short — dangle loose, she melted the end as usual and then hid it under the loops. If I do another chair (I have two requests already), I’ll take pictures that show this.
When I showed a picture of a chair to a friend who I don’t think of as being overly sentimental, she admitted to tearing up. For some reason a woven chair touched her. “It’s like bringing back an old art form,” she said. “It’s the best thing you’ve ever done.” I’m not sure about that. But I understand when she says that replacing speaker foam with a frame and some fabric is not as exciting.
I wondered if the chair was good enough to give away.
“Does it still fold shut like a regular lawn chair?” Brian said.
“Yes.”
He sits in it.
“It’s good enough,” he said.
I gave it to my folks, thinking they could use the seating for the July 4 festivities at their house.
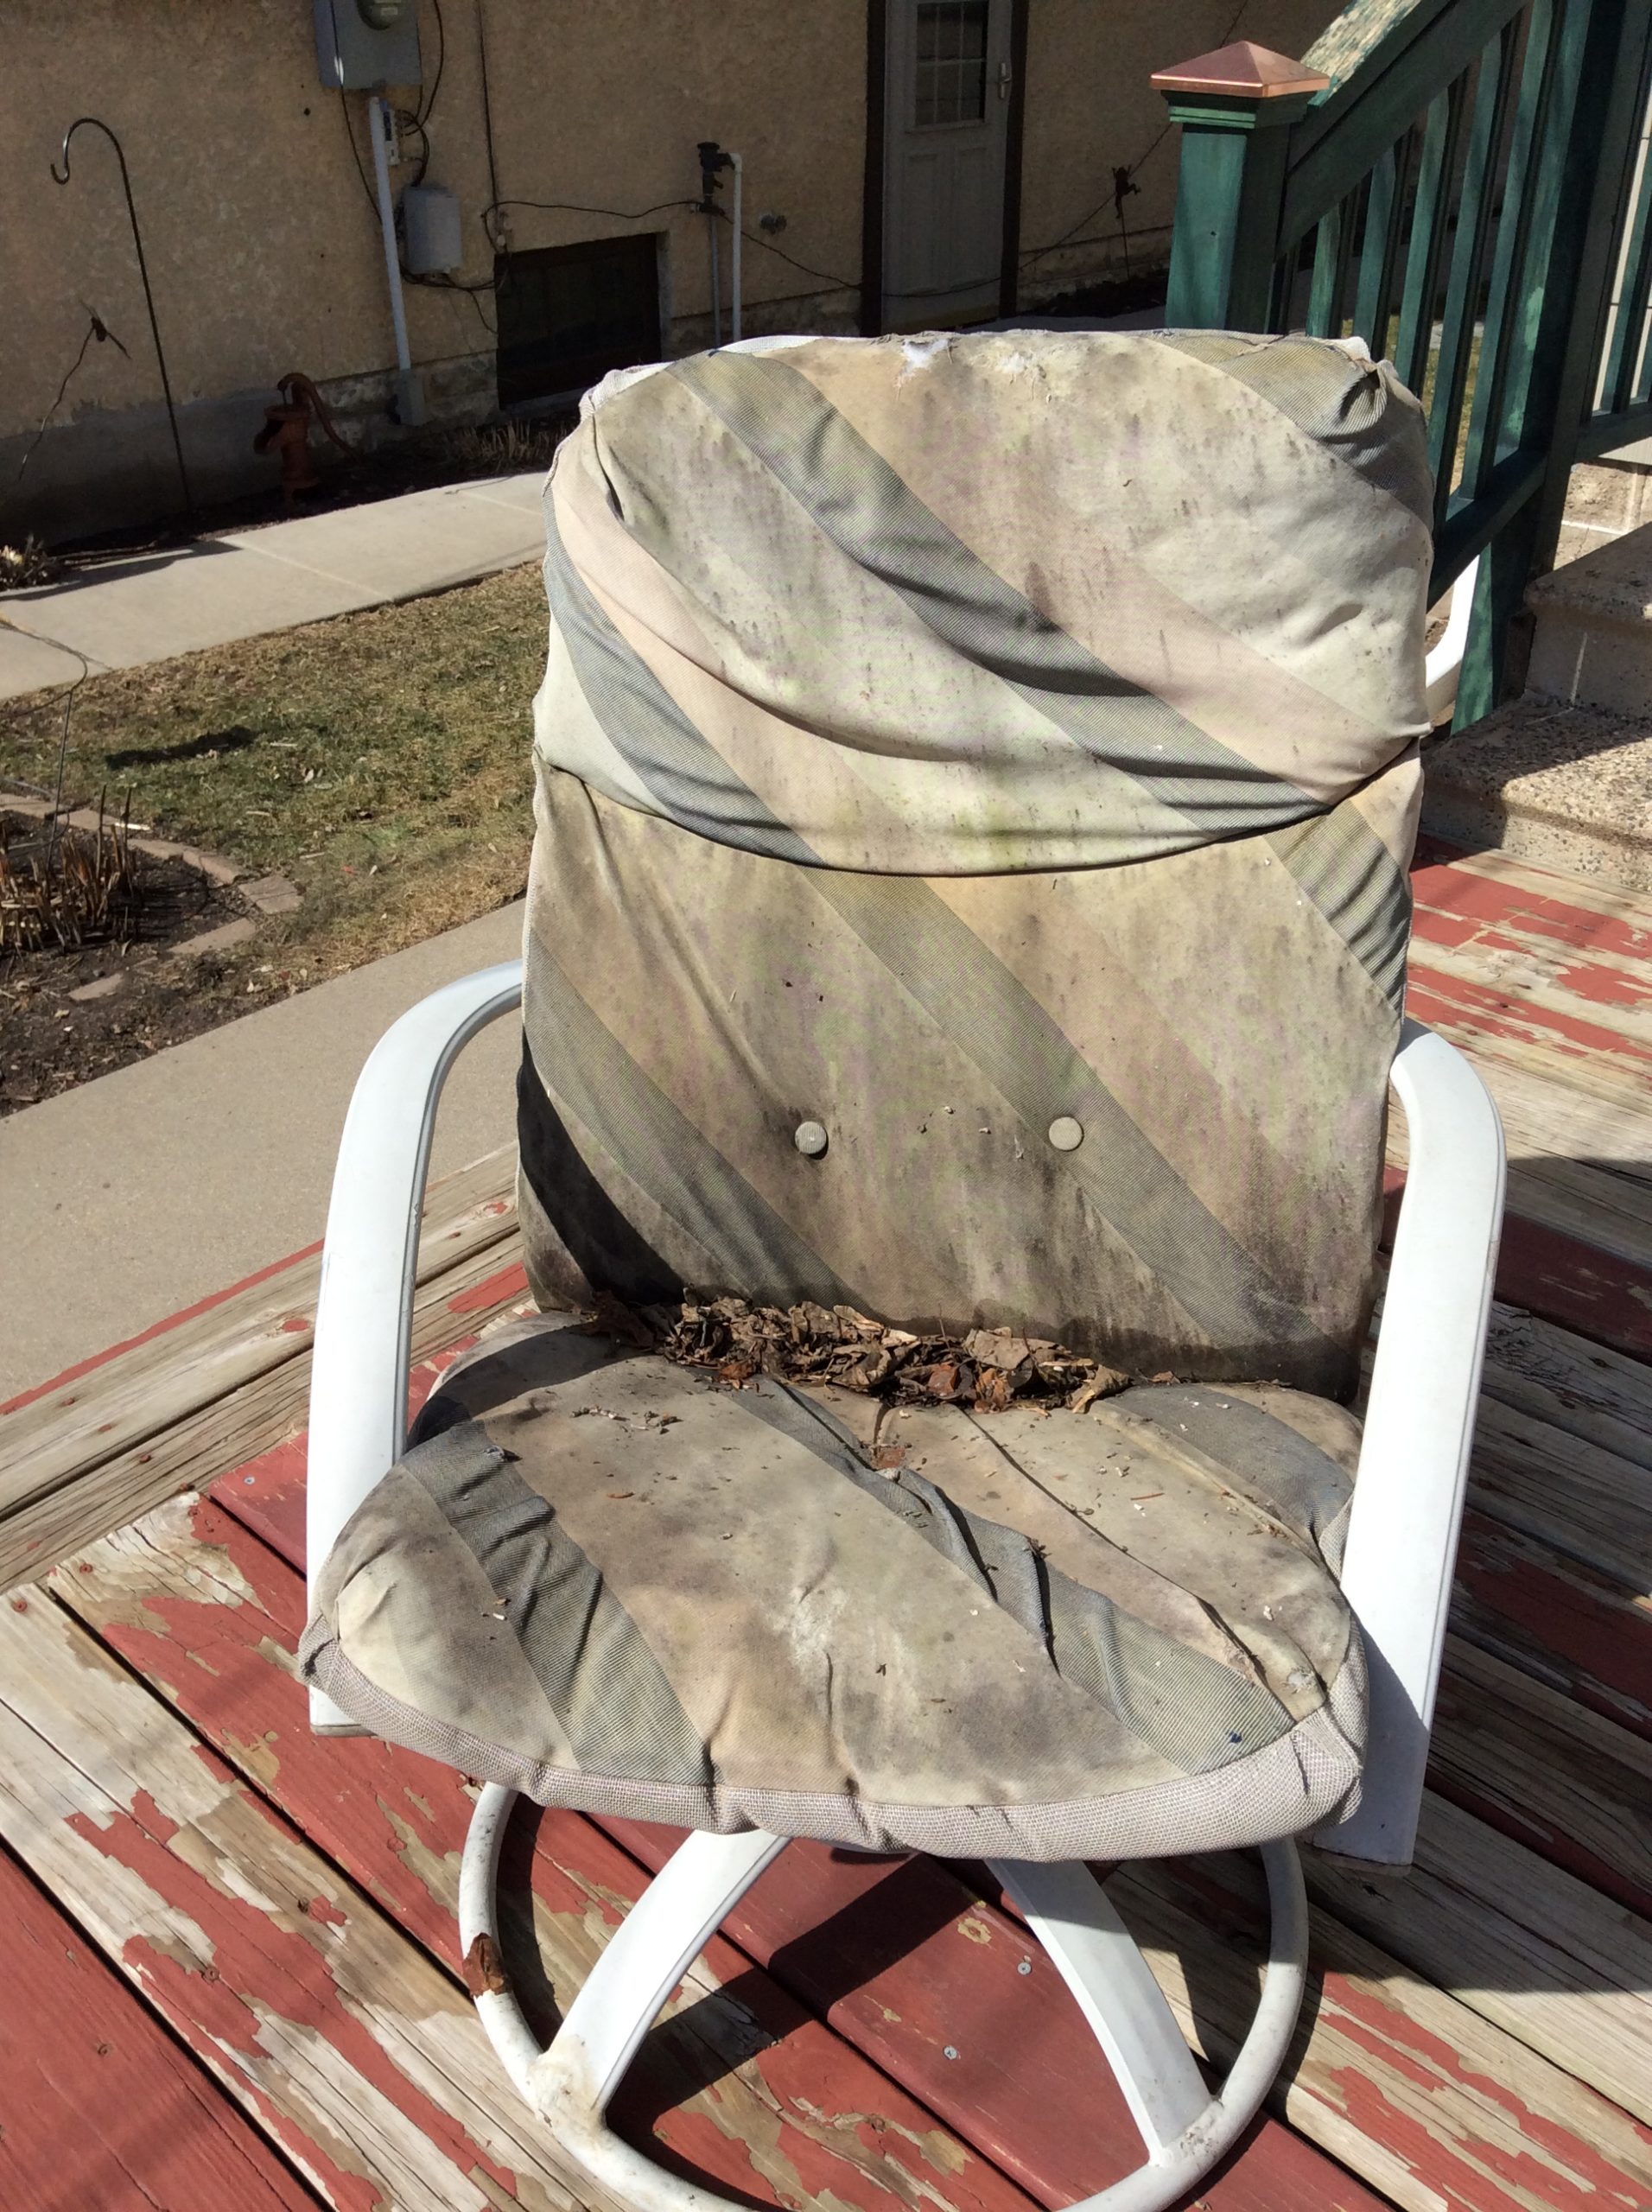
In the past, whenever someone came over to visit and we sat on the deck, I’d throw an old sheet over one of the patio chairs that have seen better days. This was going to be the year to address the problem. We should have replaced the cushions a long time ago when Steve offered to make them at cost. He wanted to return a favor, if you can call being patient a favor.
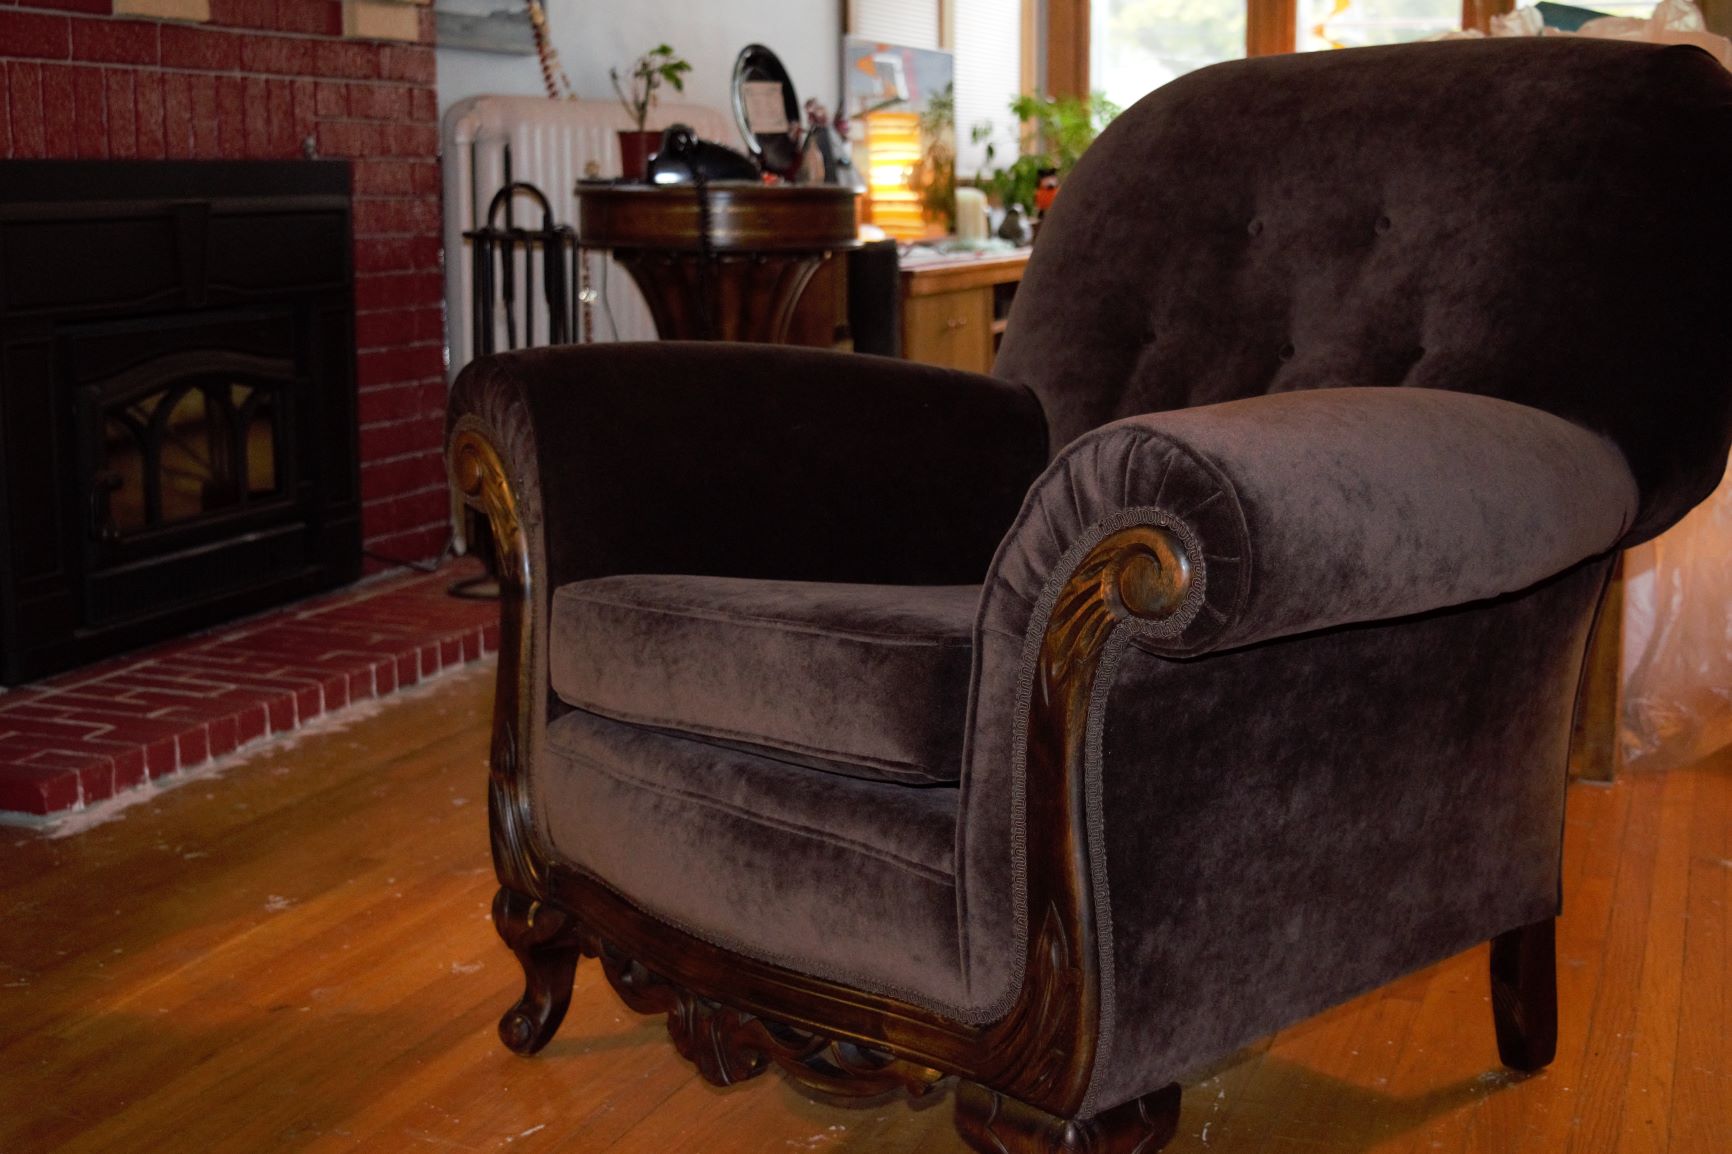
We first met Steve Cone when we hired him to reupholster the old chair that Brian had inherited forty years ago during his time at Rural Sociology at the U of M. While it was supposed to take weeks to fix the chair, due to extenuating circumstances, the initial deadline was blown by several months. We didn’t care. As long as our dusty chair with its springs that dragged on the floor sat in Steve’s shop, it wasn’t in the living room. Mission accomplished, as far as I was concerned. There was no favor to return. But Steve insisted on giving us the deal.
“It’s just sewing,” he said.
It made me think that a person in his line of work must be accustomed to fussing or downright difficult clients.
Steve was a rock star in the world of upholstery and I feel lucky to have crossed paths with him when I had the chance. Recently, when a salesperson at A-1 Foam recommended his book, Singer Upholstery Basics Plus: Complete Step-by-Step Photo Guide, she said “People have started businesses based on what they learned in that book.” I couldn’t help myself and had to make it known that we too had met the man and knew of his greatness. What I didn’t say was that I have good memories of how easy it was to chat with Steve and I feel strangely proud that he felt the same way about me.
Maybe he made everyone feel that way, which would have been another testament to his greatness.
As he went over the numbers for the patio chairs, Steve said that he could reuse the fabric on the back of the cushion, which was this light gray plastic weave that’s used for sling chairs. I wasn’t so sure I liked that idea. I was sick of these awful cushions and I wanted something new. Wasn’t that the point? Whatever we decided, before he could do the job, Steve would need some time to give his hands a chance to rest. In a couple of months, I was supposed to call him to get on the schedule. Then time got away from me, as it always seems to do. When the Christmas card I sent to Steve was returned in the mail, I had a sinking feeling that too much time had slipped away. And I was right. At the age of 71, Steve had a heart attack and died.
He missed the first pandemic shutdown by just a month or so. He also would have missed the last party we had before the coronavirus took over the world. If only we had invited him…
It was a stupid calculation. On the one hand, I could see him at the table. On the other hand, it was early on in the dinner party experiments that Brian and I were planning for the year… So, maybe we should stick with people who we knew would roll with it regardless of whether a silly little game worked as planned or whether anyone had anything insightful to say about the topic at hand or whether the evening went south in some other unexpected way. We would invite Steve once we figured out what could help keep things interesting yet comfortable enough amongst a group that didn’t necessarily know each other very well. In the meantime, there’s no need to torture anyone or to look foolish so early on in what I had hoped would become a friendship. Had I to do it over again… would’ve, could’ve, should’ve… I should’ve trusted that Steve could’ve rolled with it and it would’ve been fine.
So, back to square one with the chairs. “Send photos!” a handful of upholsterers said.
We bought this secondhand patio set fourteen years ago. That pattern strikes me as 80’s but I’m not sure.
So far, there has been one response, not counting a prompt response from Repair Lair that doesn’t do upholstery even though It’s just sewing.:
Rebekah,
These cushions are pretty complicated and definitely beyond my sewing skills….
S*
At another place, we were warned to be prepared for how expensive cushions can be: “The stuff made in the factory is cheap. So, when you have them custom made, they’re going to cost you more than what you paid for the entire set.” In addition to that, a backlog of work meant that it would take weeks just to get an estimate.
Next stop: A big box store where they stock bolts of fabric so that a person can walk out with a yard. Probably inspired by watching too many YouTube videos, I would try to repair the cushions myself and I needed supplies to experiment. Whether my consumer-end sewing machine was up for the task was just “part of the discovery process,” as Brian likes to put it.
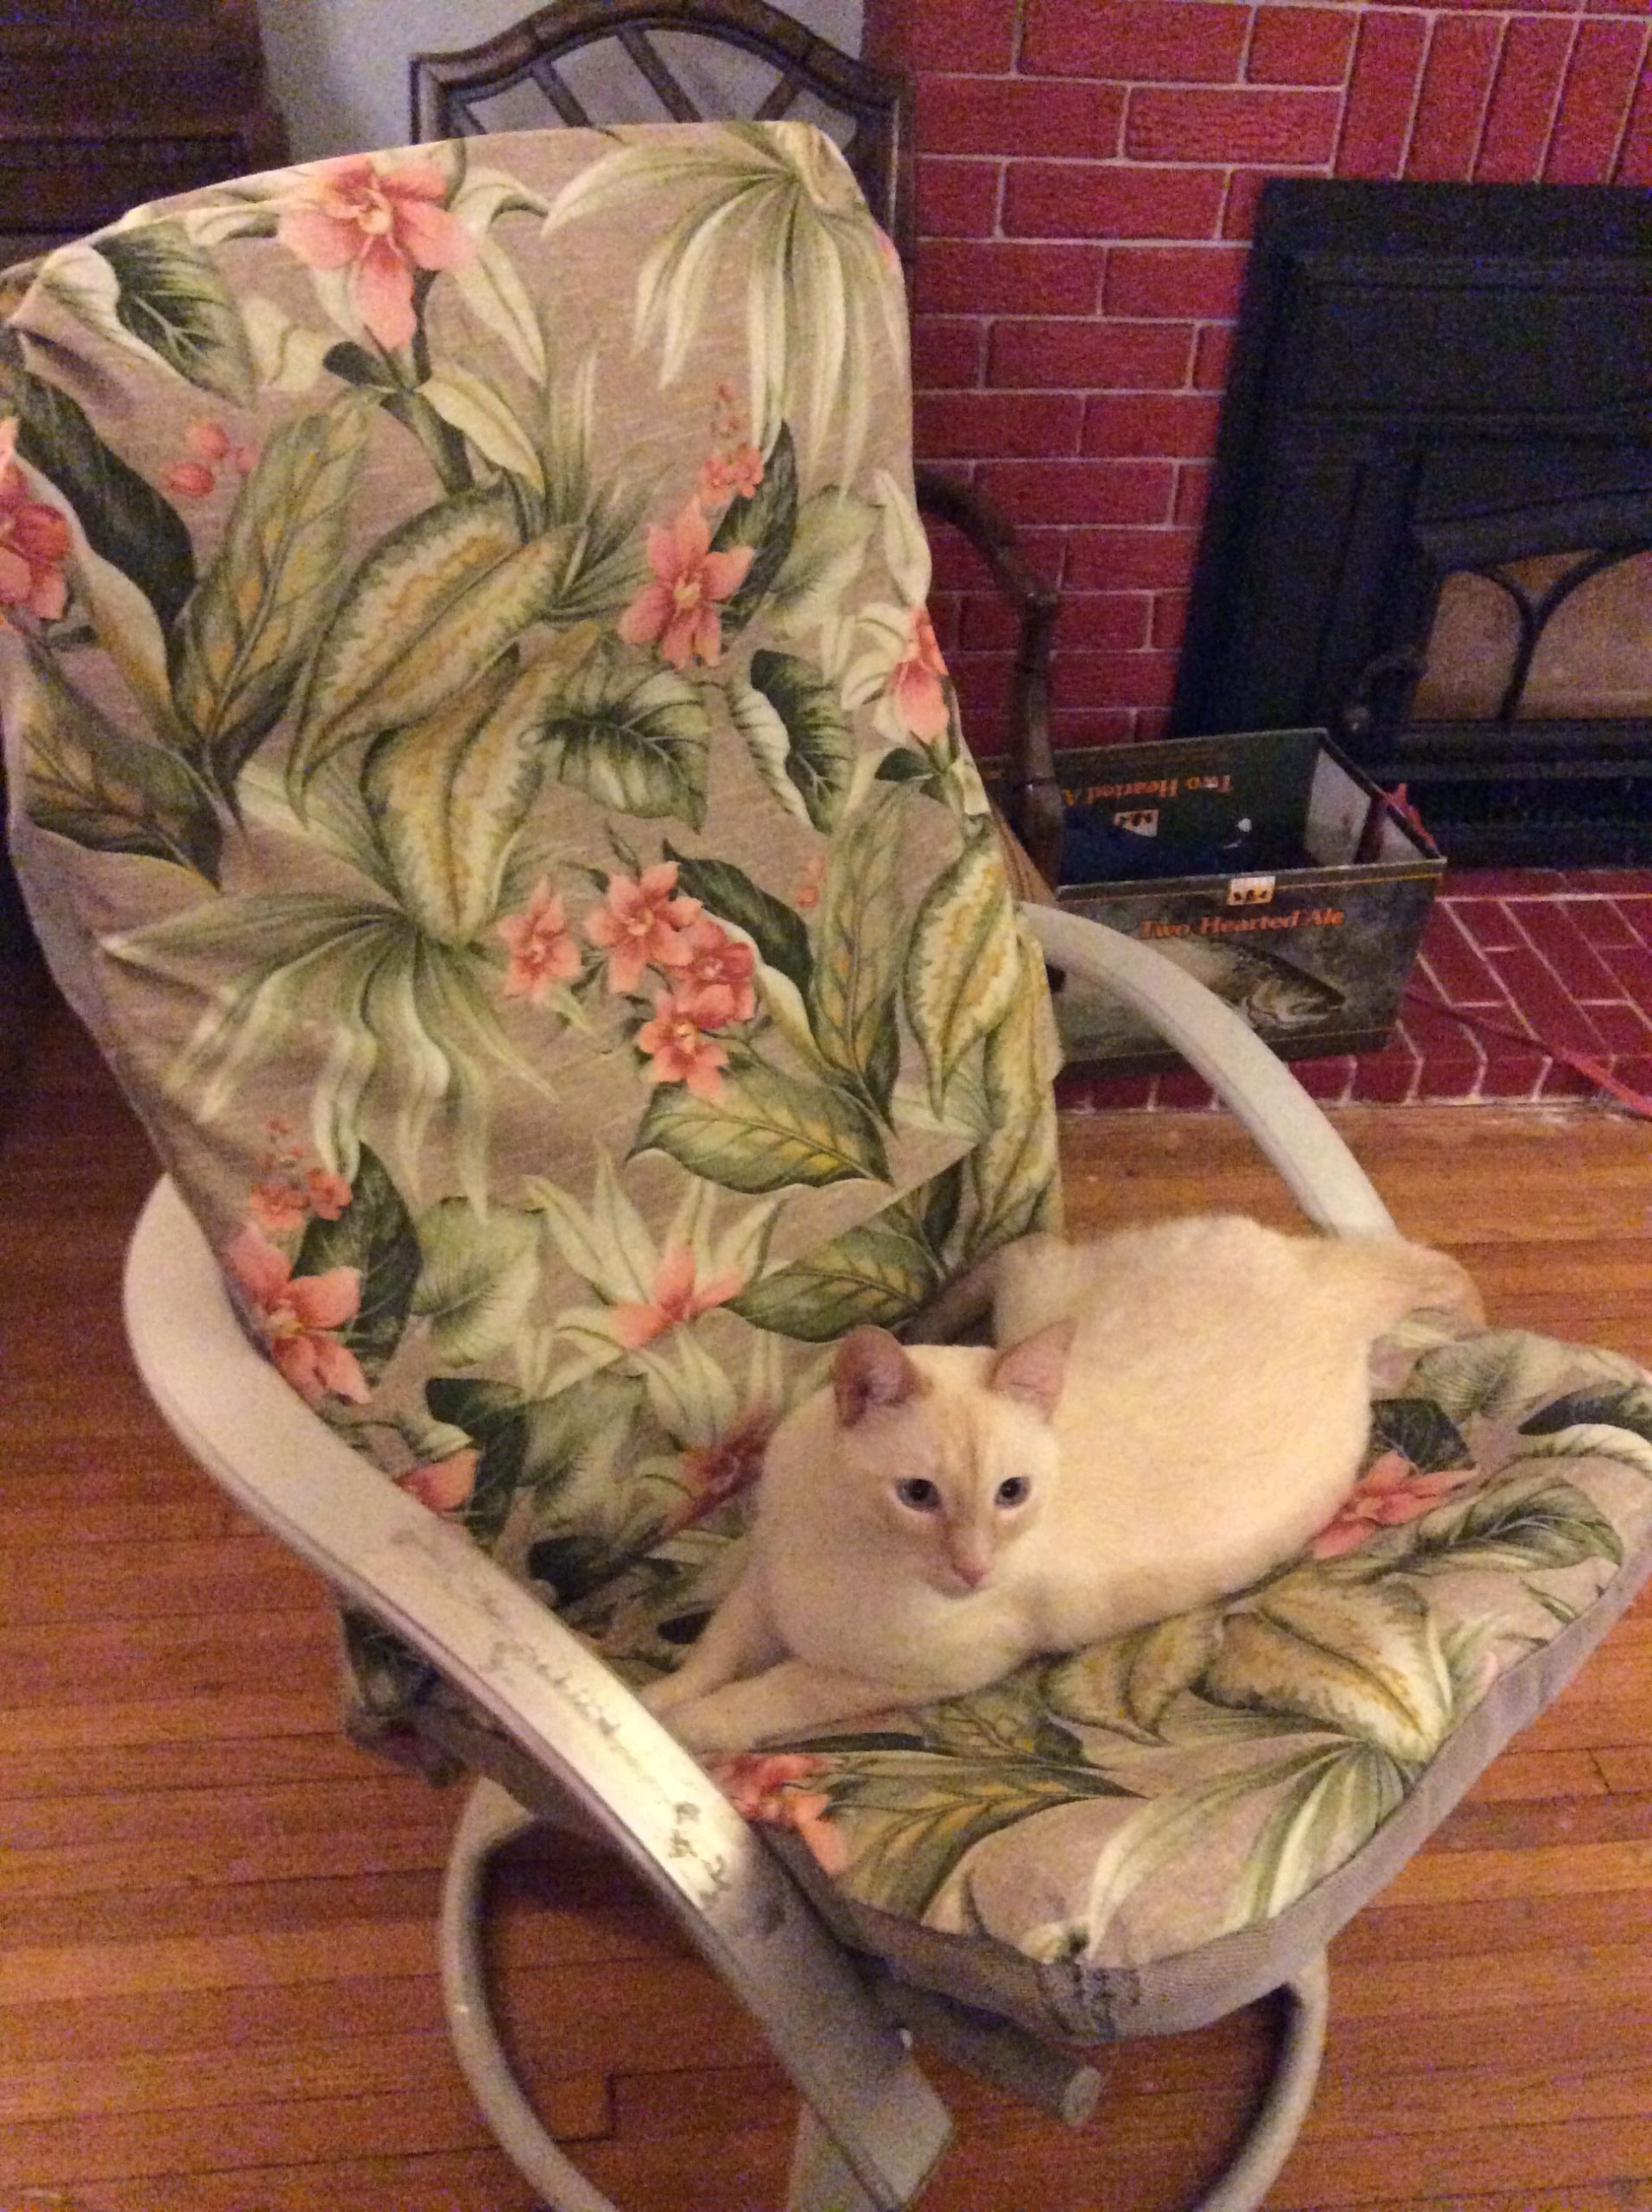
So far, so good.
Bert approves of the newly recovered chair, though he was also happy to claim the dirty naked Dacron that’s been sitting on the floor by the front door for the last few weeks.
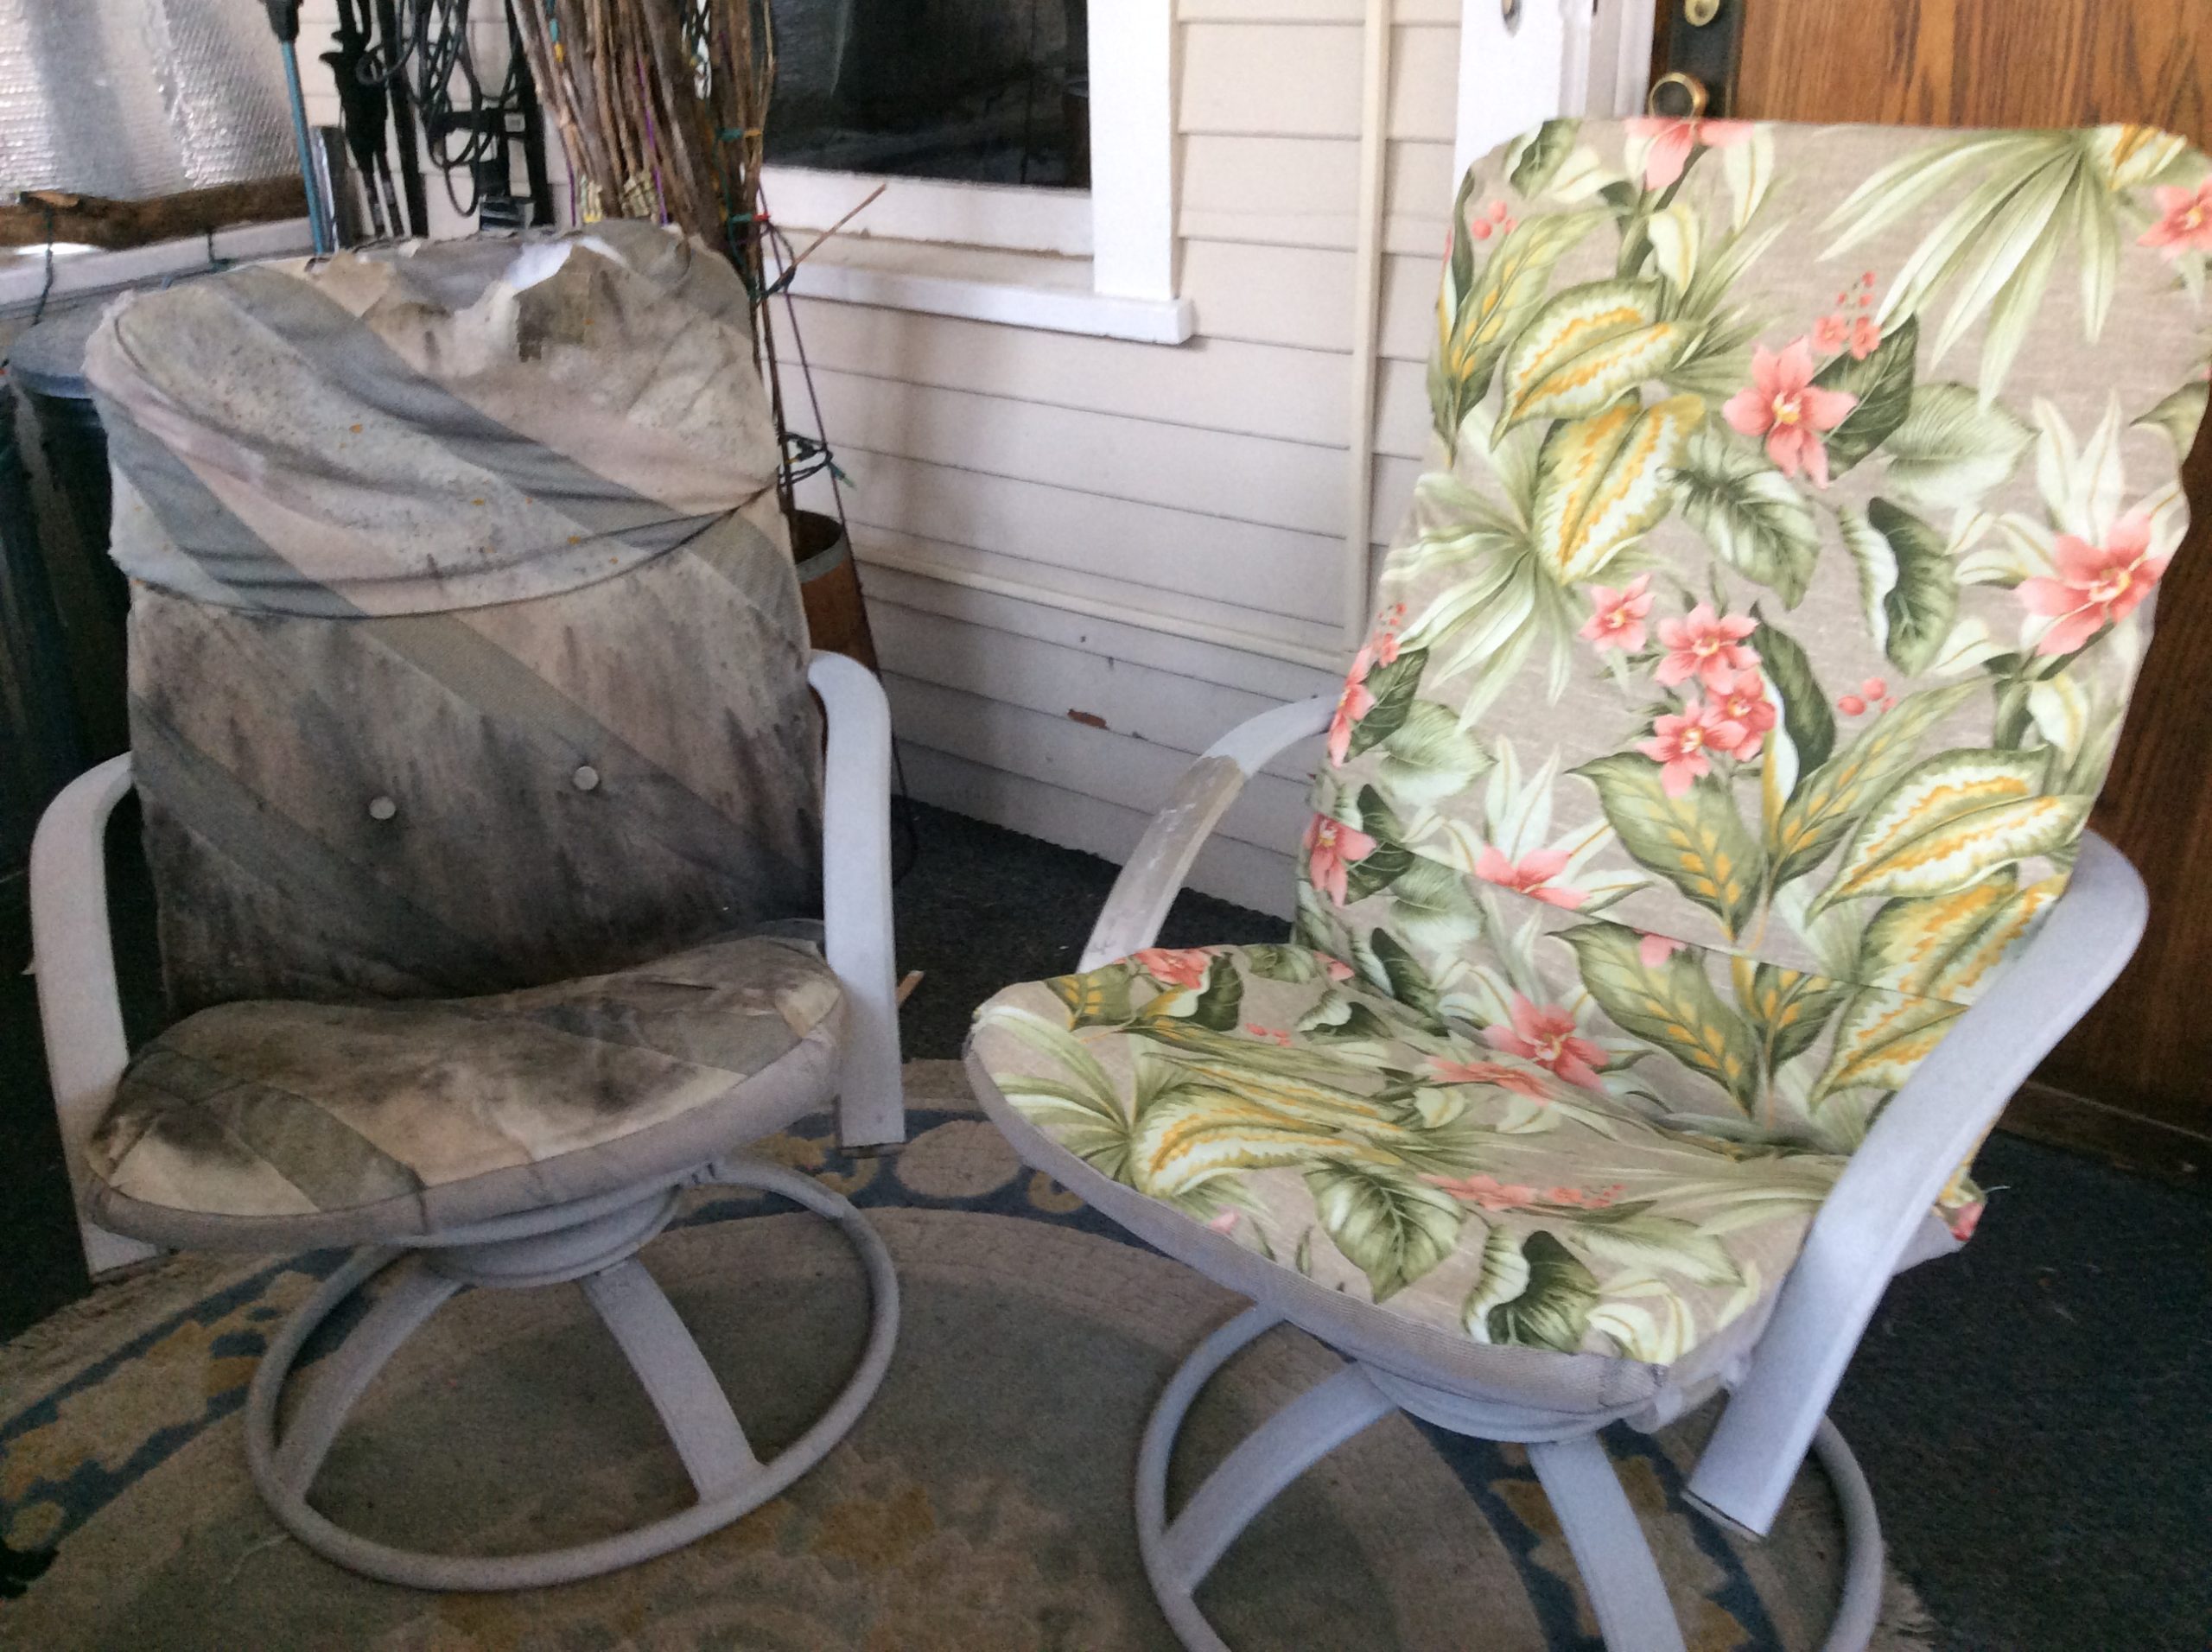
In an upcoming post, I’ll describe what I did to deal with the worn parts of fabric that I reused on the backside of the cushion (I came to appreciate Steve’s suggestion to reuse the fabric and have noticed that upholsters in general take pride in keeping what’s salvageable), explain how I got around installing a zipper (and why I wanted to avoid it), and let you know how I ultimately finished this cushion. For now, I have discovered enough to know that what I’m trying to do is possible. As for the frames of the chairs, eventually I’ll repaint them.
In case you forgot, here’s a before and an almost-done after.
Steve has been on my mind as I’ve been working on this project. I’m on shaky ground, as I am not a sewer. Just cutting into the fabric feels scary. So, telling myself, “It’s just sewing,” can be helpful whenever I get stuck.
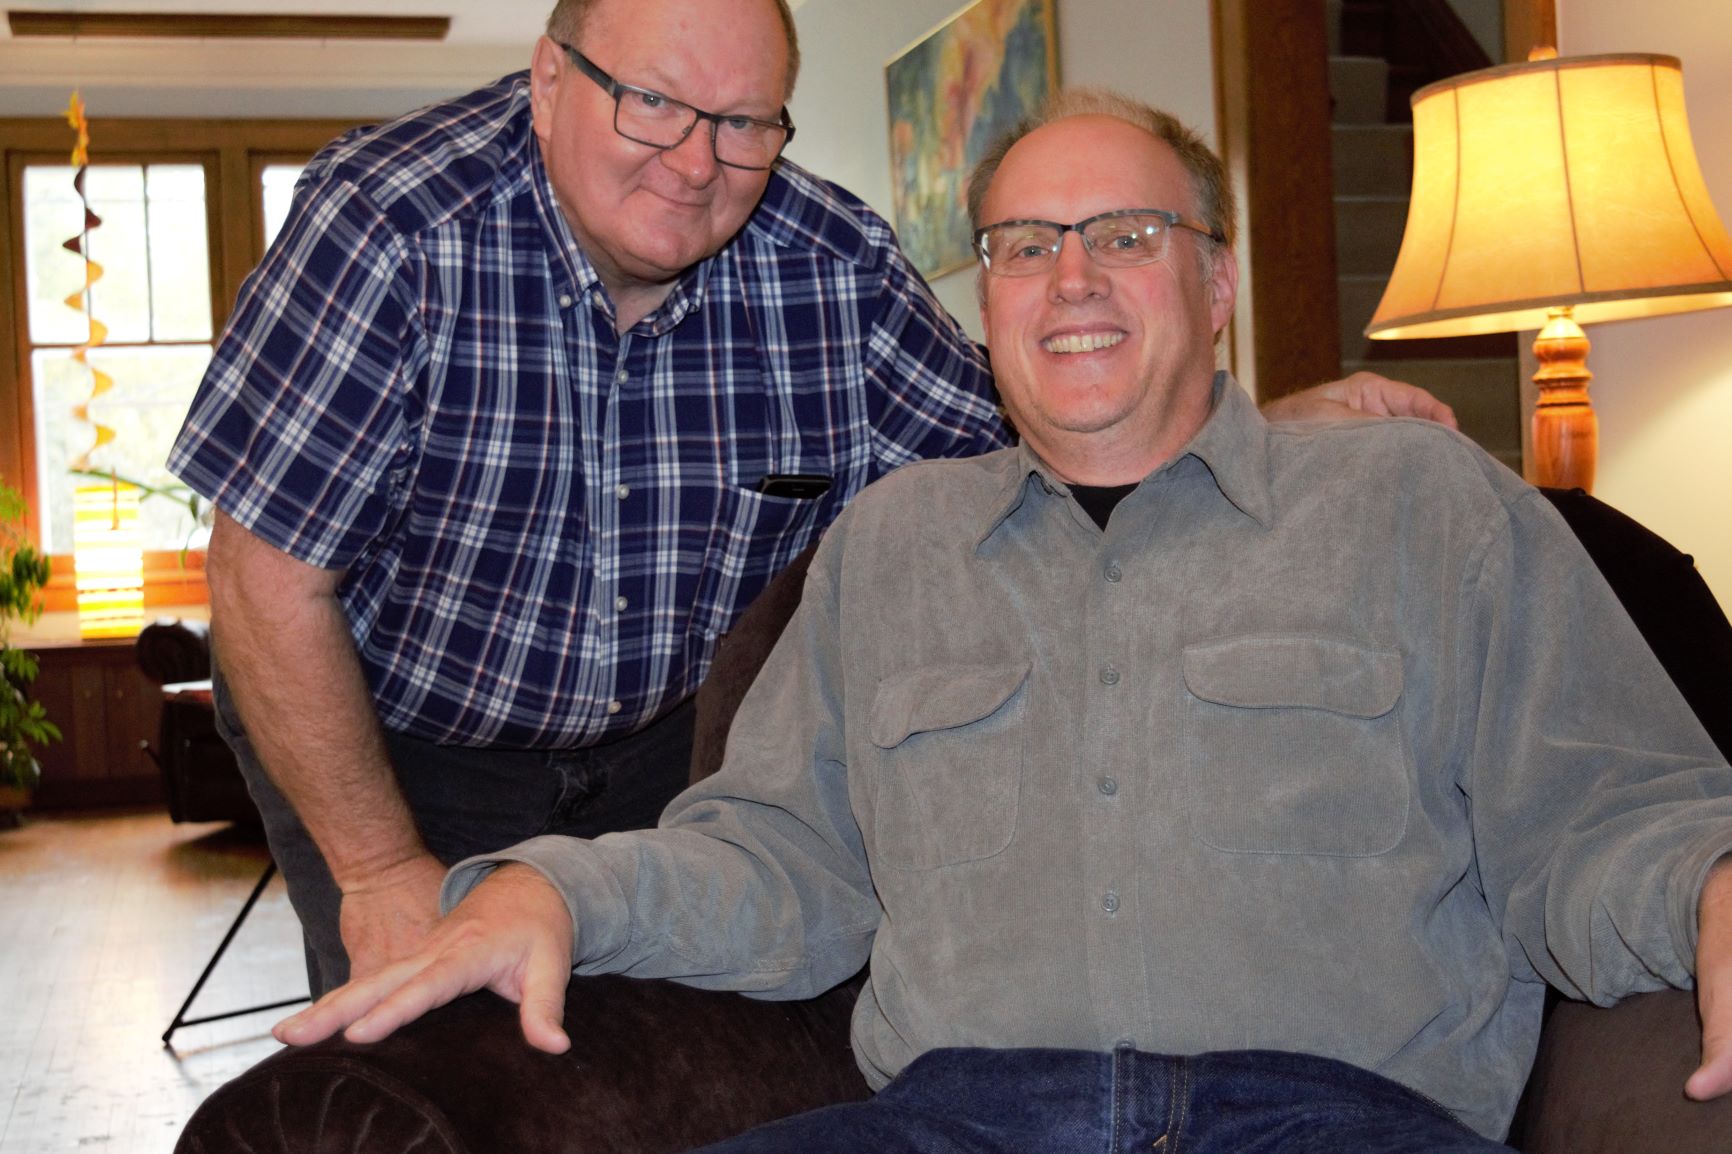
Steve Cone and Brian who is sitting in the newly reupholstered chair that Steve just delivered.The chair Steve Cone recovered for us.