Free Chairs Are Rarely Free

It’s predictable. Whenever I bring a new chair into the house, Bert will claim it.
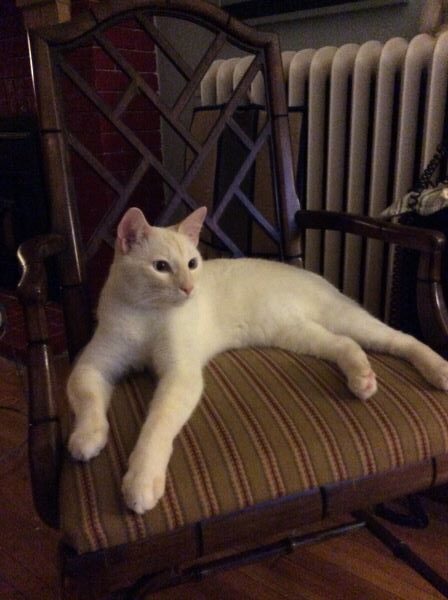
Cat sitting on dining chair.
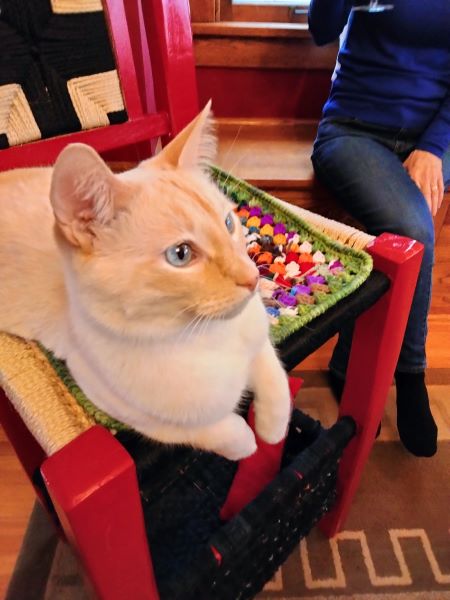
Bert sitting on free chair.

He’s grown quite a bit since I took the above picture, which is to say that it takes me a while to get around to fixing the chairs that I’ve been collecting. Several layers of fabric covered this particular one. Michael liked the floral pattern.
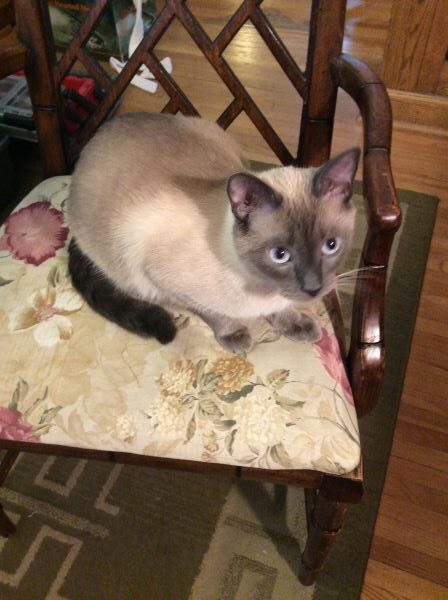
Cat sitting on dining chair.
Michael sitting on free chair minus several covers.

However, someone else covered it with plaid.
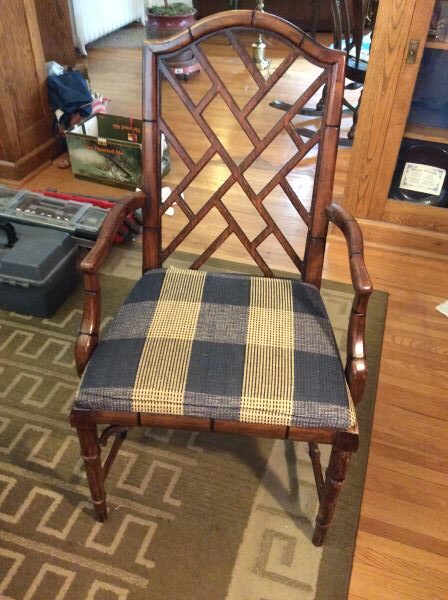
The chair had several layers of fabric on it.

The original upholstery was gold with boxing and piping (sorry, no picture). It’s only a coincidence that I chose fabric in a similar color ($50 +) to cover the new cushion ($25) that replaced one that was gross and crumbling.
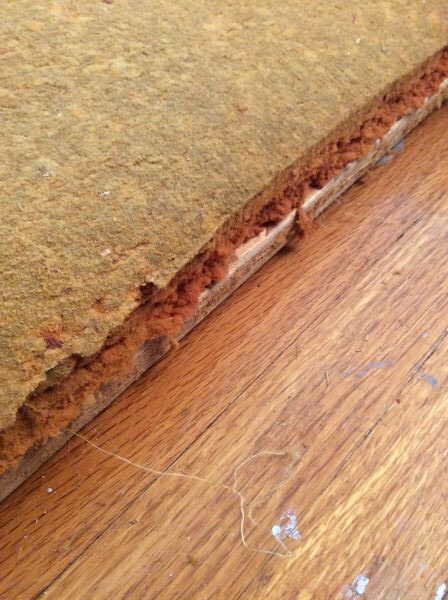
Crumbling cushion needs to be replaced.
The cushion was shot.

Needing practice before cutting into my new not-free fabric, I made a pillow out of scraps. And then I used sheets to make a dummy cover that mimicked the original style, which had boxing with welting along the top and bottom.
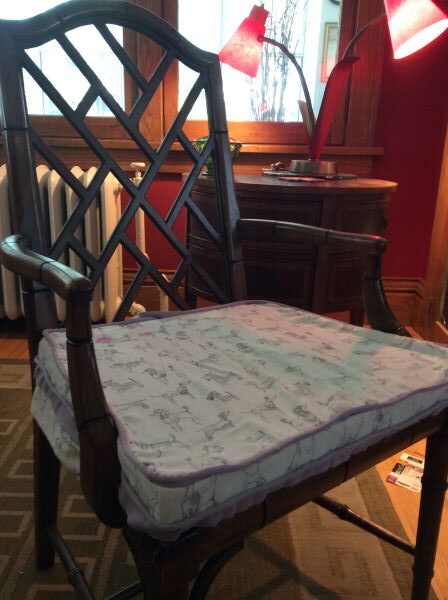
To practice, I made a dummy cover using an old sheet. Notice the piping on the top and bottom of the cushion. This is how the original cover was.

I also made a cut pattern using Inkscape, which is a vector-based design program. I know the software just enough to muscle my way through a project like this. Apart from the inherent problems with my plan (see below), it worked great. In fact, I was so excited about this discovery that I wanted to make a tutorial in which I would explain how to draw a rectangle to represent the size of your fabric and similarly how to draw the pattern to scale. The best part was using the “transform” option to put an object at a perfect 45-degree angle for those pieces that are to be cut on the bias. Explaining such basic things is like pretending that I’m Julia Child whenever I make a grilled cheese sandwich, as if anyone needs to be told how to butter bread.

Still, making a quick video might be useful to someone and it would be good to keep up with my video editing skills. One problem. There’s no such thing as a quick video. Somehow, what was supposed to be a five-minute demonstration kept creeping over the half-hour mark. It gave me an appreciation for the preparation, talent and (ironically) time that’s needed to make succinct tutorials.

Cut pattern for box seating.
This cut pattern was made using Inkscape.

As for the problem with my cut plan, the cushion has welting/piping/cording on the top edge and the bottom edge. I understood how to attach the top part, even if I still can’t do it perfectly. However, based on how the original cover was done, and limited in experience, I came up with a rather wasteful way of attaching the bottom welting, hence the diagonal strips that are over 6″ wide in my cut plan. Because the cover is stretched and stapled to the bottom of the slip seat, I thought I would need enough fabric in the welting to accomplish this. Unless we’re talking about salt, too much is better than too little when you’re guessing. At least that was my logic.
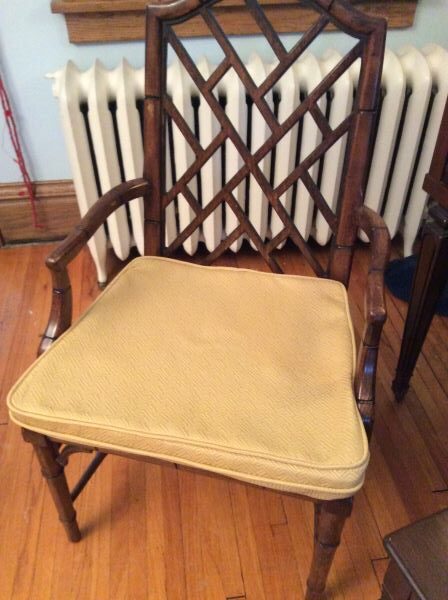
Box cushion
This is the new cover without batting or the crown.

I finally worked up the courage to cut my fabric using the pinking shears that I found in my Christmas stocking last year. I was suspicious of the scissors, as they were not like the ones my mother has, the same ones my sister used to cut her hair when we were kids. My new scissors looked like something you would find in a preschool art room. There were also the YouTube videos that convinced me that a hot knife was essential. What’s the point of starting without it? I understand the contradiction. On the one hand, give me what I grew up with. On the other hand, how am I supposed to cut an accurate line without a tool that I discovered yesterday watching a Salerite video?

The pinking shears worked great. I made the cover and it fit the cushion fine. It’s pictured above with the new cushion but without the batting (FREE) that is supposed to cover the foam to give it a better shape (and make the seat more comfortable?). For that I used the cotton that I recovered from an old box spring. Because a synthetic covering protected the material, the cotton was clean and in perfect shape. However, it did contain seeds. But given that I’ve found hay and horse hair in some of these old chairs, I figured that it should be okay.

Later I was looking at Steve Cone’s book on upholstery and noticed a different method for attaching the bottom cording, as opposed to the convoluted way that I did it. It is stapled to the bottom of the seat after the cover is stapled in place. This made a lot more sense, as it seemed tricky to attach the bottom cording in exactly the right place on the boxing before it is stretched over the cushion and attached. It certainly required less fabric. It’s probably like a lot of things with upholstery. There’s more than one way to do it. Either way, I opted to undo some of my work and attach the bottom welting with staples as opposed to sewing it onto the boxing.

By accident, I discovered that the welting on the bottom needs to be reinforced with a cardboard upholstery tack strip ($16 for 20 feet). I will also need to get some black cambric to cover the bottom of the chair, which is supposed to be cheap. I thought about using scrap fabric but figured that the cambric is super lightweight for a reason. And though I do have a roll of landscape fabric that seems like it could do the job, I’m going to get the cambric.

Here’s the result, including my test pillow, which is a mess, but I like it anyway.
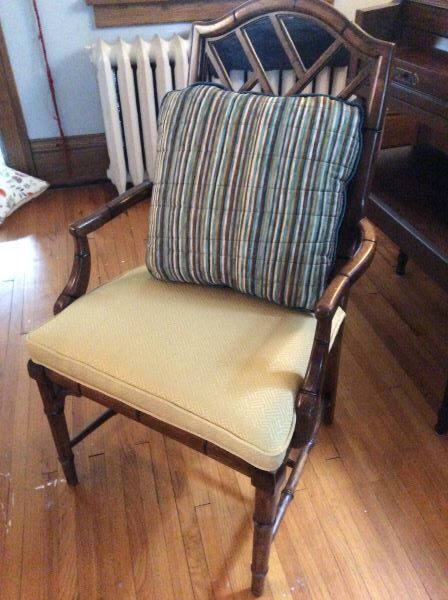
Recovered slip seat.
The mostly finished chair, with batting and the cover stapled in place.

As for forming the “crown,” (you might be able to see the curve of the cushion in the above picture), I put together scraps of polyester batting left over from other projects and placed it under the foam cushion. Absent those remnants, which I’m glad to have saved, could I have used something else? Could I use old socks? And if so, would I need to shred them to keep them from feeling too hard or lumpy underneath the cushion?

Aside from the supplies already listed, there was adhesive and enough staples to do an entire dining set (lots of doing and redoing). In addition, the stretchers on the chair needed to be glued. It’s nice to get to a point when a repair like that doesn’t require a trip to the hardware store, as I had clamps that worked. There were also spots on the legs that needed to be touched up. Again, it was cool to have the supplies on hand. I never addressed the decorative pieces at the corner of the legs, except to remove the broken ones. To make the chair right, I would either need to remove the remaining ones or replace the missing ones. Finally, I still need to screw to seat to the chair (after adding the dust cover/cambric to the bottom).

Taking a class would give me a better eye for what’s done and what needs more work. In this case, I can see the chair isn’t perfect. Some live instructions might be needed to get it closer. For now, this is good enough.

Once again, Bert has claimed the chair in its new incarnation. He still needs to be reminded not to claw on it.
How to Replace a Lost Lawn Mower Key

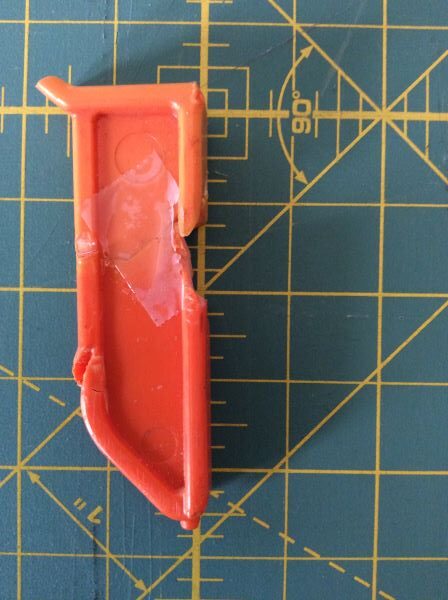
Last year Brian ran over the starter pin/key for our Remington electric lawn mower with… the lawn mower. I did not remember this until… I wanted to mow the lawn. After searching for a replacement and getting nowhere, I glued what was left of our mangled key back together.

Lawn Mower Key glued back together
I took a lot of pictures and measurements of the key that turned out to be mostly unnecessary.

Aside from wanting to keep the machine going from an environmental perspective, the mower was a housewarming gift from my parents. It was 2008 and we were so excited to have it, I made a thank you video.

As I tried to clamp the unclampable broken key, I thought of Bron Zeage of the Secret Underground Laboratory Recovery and Salvage, and I thought of Colin Knecht of WoodWorkWeb. Those guys can clamp anything. I thought about IQ tests. They should include a clamping challenge. I thought about how you have to see a lot of clamping solutions multiple times before any of them would ever naturally present themselves to you in a pinch. As such, I resorted to taping the glued joint, an idea I took from YouTube videos about fixing ceramics. It felt like giving up. But it worked.

Before trying to use my newly glued key and possibly damaging it even more, my friend Craig suggested that I document the dimensions. It was a good idea, as the key no longer easily slid into the keyhole. Ultimately, it did not work. And until I figured out why, it would be pointless to ask my neighbor to print me a new key using his 3D printer. Maybe someone already posted a design on ThingiVerse.com? No such luck. Maybe someone had one I could borrow now that Sear’s didn’t make the part anymore? My post received no bites on FreeCycle. And on FaceBook, I could not get past the various pop-up privacy statements (which I assume went something like, “Screw you!”) to post anything there. I checked eBay, CraigsList, Parts Select and came up with zip.

Alternatively, Craig suggested that it might be possible to circumvent the need for a key by adding a toggle switch. He said this like knowing how a light switch works is common knowledge, which made me think that it should be (along with being able to tie a boat to the top of a car and any number of clamping challenges). With instructions to send Craig a picture of the lawn mower so that he could further assess the problem and help me, I went out to the garage with my camera/iPad. And then, seeing the three screws that keep the “key box” together, I became hopeful that a solution would be obvious once I took the thing apart.

Nothing was obvious (including the disassembly). The screws that I removed were deep inside a channel. I worried that it would be impossible to put them back.

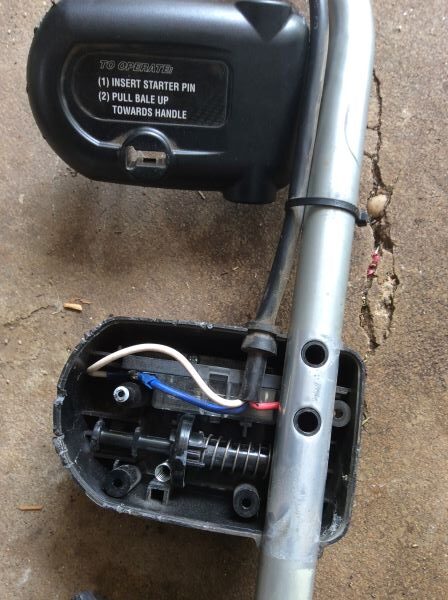
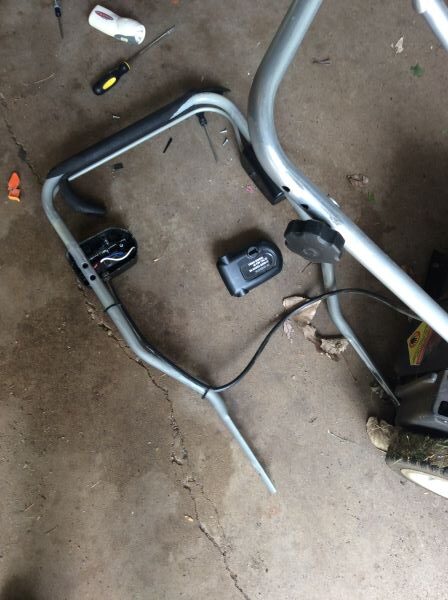
Remington lawn mower. Disassembled "key box."
Taking the “key box” apart seemed like a good idea at the time.

After discussing the mower with Brian over lunch, we decided to take it to a repair shop. We were about to load it into the back of my Mazda when inspiration struck. As I was telling Brian about how the key mechanism confused me, it dawned on me how the thing worked. This is not the first time that an answer revealed itself as I tried to explain a problem to Brian. For some reason, just his standing there while I’m fiddling with something can induce insight. Though other times, I need a ton of space to think. It’s on him to know the difference.

At first glance, I couldn’t make sense out of the key mechanism.

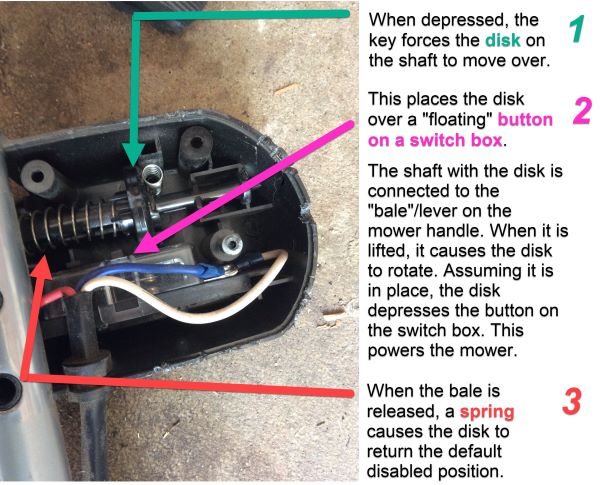
When the key is inserted, its 45° angle at the tip pushes over a disk that is on a shaft with a spring. This places the disk over a button on a switch box. When the lever on the lawn mower handle is pulled up at the same time the key is in place (and the disk is over the button), it makes the disk rotate. This depresses the button on the switch box. I will call this a “floating” button because there must be pressure on it for it to be engaged, as opposed to a button that remains depressed after pressing it. Once the mower starts, the key pops out with the force of a small spring. Sometimes the key pops out with such force that it lands on the ground and if you don’t notice, you might run over it.

Diagram of "key box" of Remington electric lawn mower showing how the starter key works.
It’s clever how the key mechanism in this lawn mower works.

This kind of ingenuity cheers me up. Marvelous, isn’t it? Likewise, the oversight is amusing. Whatever happened to a hole and some string? Why not attach the key to the mower? That way it would be unlikely that a person would ever lose or damage it.

Many of the measurements I took of the key turned out to be unnecessary. However, knowing the rough shape and size of the original key was critical. And I would need to remember that the 45° angle on the key must face the disk. This requirement probably explains the shape of the key that forces it to be inserted in the right direction. Making a new key should be simple. I thought about using wood. Ultimately, I used vinyl. Two layers of tiles with adhesive were rigid and about the perfect thickness. It was also relatively easy to cut with an X-Acto knife, making easy work of any fine tuning that would be needed.

The vinyl pieces I used came to me via FreeCycle.org. I had an idea for how I might use a case of them but then changed my mind. So, I took the tiles to ReStore, which is a second-hand building supply center affiliated with Habitat for Humanity. When I discovered that I had missed a few, it was annoying because it seemed unlikely that I could reunite the spare pieces with the larger group and they were probably useless on their own. And now they were taking up room in my garage. Who knew that I would be making a lawn mower key out of them years later? Or that it would feel like a privilege to have such junk at my disposal? It’s just too bad that it didn’t work.

Getting the disk to line up over the button on the switch box was fussy. I feared that I had messed something up when I took the thing apart (Is this a good time to mention the “spare pieces?”). So, I went inside to watch some YouTube videos about how to install a toggle switch. I had settled on a solution. I would install a big red button on the mower. Huge! And then I would put on a red plastic nose, the big shoes, striped jumpsuit, wig, the works. And then, dressed like a clown, I’d mow the lawn. We would become known as those people who rarely mow the lawn. But when they do, wow. What a show.

And then my dad called.

When my mom mentioned the key fiasco — something I must have told her about when I called to celebrate a Timberwolves victory — my dad had some suggestions. And he made me think that I should try my “vinyl key” again, even though it seemed futile. I went back to the garage. This time, instead of trying to hold things together by hand as I tested the key, I enlisted Brian’s help and took the time to screw the “key box” back together. There was no problem getting the screws back into that deep channel where it’s impossible to see. Once inside, the design forces the screw to go in straight (This was not the case with a similar design on a fan I took apart to clean. The channel wasn’t narrow enough to keep the screw straight.) When Brian pulled up on the bale, I was surprised when the mower revved up. We tested it again. Still worked. Again? Still? Brian mowed the yard. No problem. There. I fixed it.

Because the key is a tight fit, it’s permanent; the spring cannot eject it. Should I pull it apart and do some more fine tuning? Maybe. But I’m nervous about fussing with it. Let’s call it done.

Hopefully, we can get another decade out of our mower. After I re-wrap the handle with some leftover tennis racket tape, get the blade sharpened and eventually make one more repair that I’m saving for my friend Craig, it might be possible. After all, my dad is still nursing along his riding lawn mower, which he has had for 35 years.

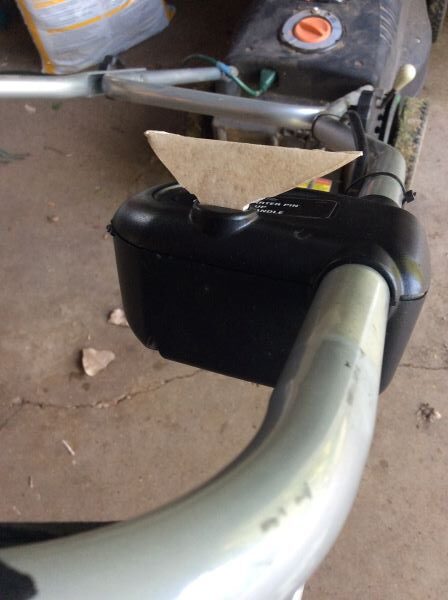
Lawn Mower with makeshift key made out of vinyl.
Had I realized that this key was going to be “the key,” I might have put a little more thought into the design.
Cat on cat furniture

Bar Stool Turned Cat Furniture

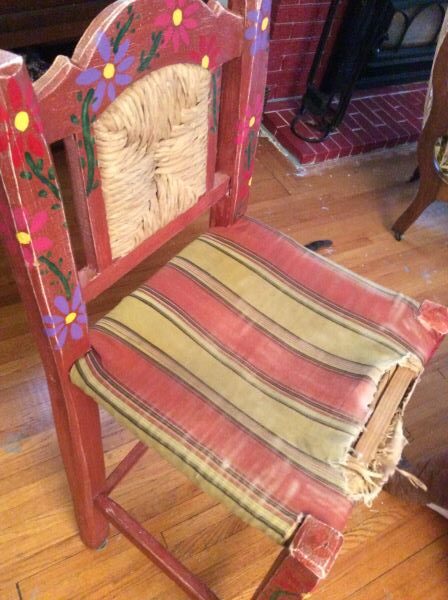
I have a weakness for free chairs. Here’s a bar stool that Brian and I found while taking a walk.

Bar stool in need of repair.

I imagine a student made this chair in shop class back when there were industrial arts in high school. Or someone — a man who was born knowing how to use a table saw — took an afternoon to make the chair in his garage. It was raining that day, and he was trying to escape the house where his wife was hosting a party for a recently divorced friend. Whatever its origins, a chair like this should be part of a set but I doubt it ever was.

In the city, leaving an item on the curb is a common way to pass it on. But I still look around for permission before taking anything. “Is this broken, hideous chair that’s sitting next a toilet and a dumpster full of construction debris free? Amazing!”

Wanting to give the chair a chance, the woman I spoke to had moved it from the alley to a prominent corner. Picturing this made me think of ants who are always busy moving material of various sorts: an errant crumb, the foundation of my house. This woman and I must be some kind of recycling ants. Her job is to unearth treasures and put the bright shiny things on the main trails where other roving ants like me will see them, whereupon they will enlist a stronger ant to carry the item for several blocks back to the nest.

Upon a closer look, I might have reneged on taking the chair. But seeing how my initial interest had perked up the ant-woman who was invested by this point, my obligation was clear. Or it could have been that it was the height of the pandemic, and fixing junk replaced recording interviews for my podcast. Or maybe it was my age that compelled me to take the chair. I can still hear my neighbor who is a little older than me say, “I also went through a chair phase,” while another friend joked that I was one step away from glazing a bowl in a shop window.

As expected, my cats claimed the bar stool. We’re not keeping it. So, don’t get too attached, Bert.

Bar stool with broken rush seat.

I brought the chair to the cat-free garage and started to investigate. This is the first step to fixing anything. It’s interesting to see what the ants before me did to beautify the piece. In this case, fabric covered a worn-out rush seat, proving that we do what we know how to do. In this case, someone knew how to use a staple gun. Was the fabric chosen or was it just handy? The flowers that are painted on the frame were also someone’s idea of an upgrade. They were supposed to cheer up the place or camouflage an objectionable shade of brown. Regardless, it was a job to remove it.

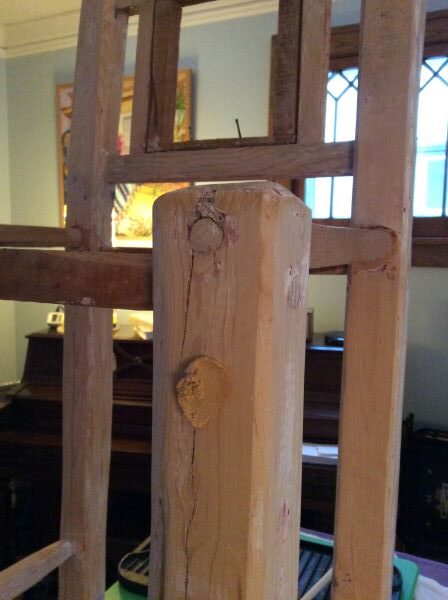
Stripped to the wood bar stool.

Once I stripped the chair, it became clear that whitewashing it (a technique I saw on YouTube) would not produce the desired effect. Though the joints were tight (Thank goodness! I wouldn’t need to “Take it apart and glue it back together again,” as one of my favorite YouTubers is always saying), the wood was cracked and mismatched and generally in rough shape. My neighbor suggested painting it red and that sounded good.

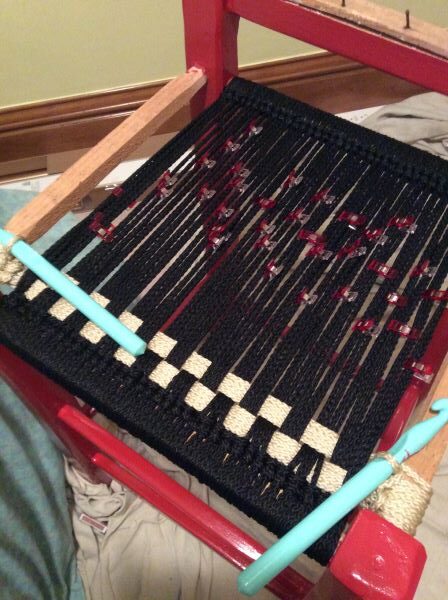
Unable to find the right shade of red, I considered black. Brian was against it, saying that a chair like this needed the advantage of a pop of color. So, I stuck with my plan, which meant watching more YouTube videos about how to weave a rush seat. Then one day I woke up thinking about a checkered pattern. When my neighbor (the same who suggested the red) independently suggested checkers for the seat, I had to try it.

Bar stool with macrame checkered seat.

The checkers could have been bigger, and the improvement might have outweighed the cost of a weaker seat. But it was hard to justify starting over. Maybe I was being lazy. But there is something to be said for being done. However, even though I didn’t plan to keep this chair, I wanted to love it. I wanted it to be something I could sell or proudly give away. I wanted it to be state-fair-ribbon worthy. This was falling short of that fantasy.

Bar stool with macrame seat.

Sometimes a project does not give a person satisfaction. Again, I wonder if I should have gone with a black frame. Again, Brian says no. Maybe finishing the back support would help? It did not. The black cross is accidental, something I’m always explaining. It reminds me of the God’s eyes we used to make in elementary school. I wouldn’t be surprised if there’s one in the things my mother returned to me — old report cards, yearbooks, etc. — some years ago.

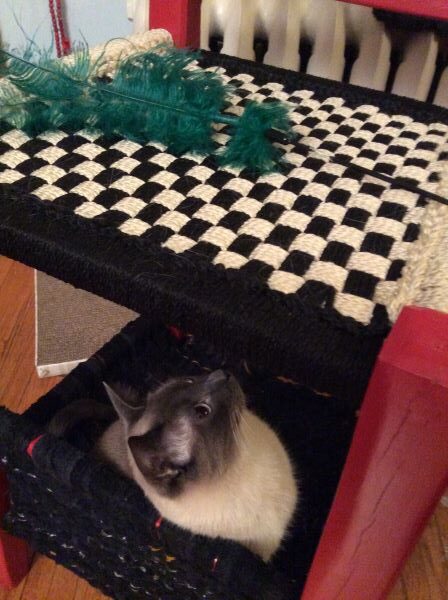
As I worked on the chair, the cats persisted in claiming it, especially Bert. So, I surrendered to the idea and eventually quit scolding him for scratching on it, which he loves to do. “At least let me take a few pictures before you destroy it, Bert.” Fully embracing the idea that this was cat furniture that I was making, I wove a box to the bottom rungs of the bar stool because Michael and Bert love a box. It was also a chance to experiment with using cut up old socks (pieces are cut into loops and woven like how many of us made potholders as kids). It would not have been suitable to support the weight of a person (Yes, I wanted to try using old socks to refurbish a lawn chair. Fortunately I’ve been convinced that it would be a waste of time.). However, the socks work great to make a box or a hammock for a cat, assuming you can tolerate the shedding (of the socks, though cats shed too).

To assure me that my efforts would be worth it, both cats would sit on the chair while I was weaving it. Michael and Bert like to be involved in projects.

A cat sitting on an unfinished woven box.

Here’s Michael sitting in the finished box.

Cat sitting in a woven hammock at the bottom of a bar stool.
Cat sitting in a hammock woven onto the bottom of a bar stool.

The cats do love this chair, especially when you mix it with playtime.

Cat playing on bar stool that has been converted into cat furniture.

Here’s Bert on his highchair with a pad that my sister Amy crocheted using bits and bobs from her yarn closet.

Though sturdy, this chair had its limitations. Or maybe I lack the imagination and the skill to make it the best that it can be. But I liked how the project evolved. And I like that it is done. And I love how Michael and Bert have given the chair its purpose. Down the road, an ant will look at this chair and say, “That red is terrible! Was it chosen or was it just handy?” She will wonder, “Is that supposed to be a magazine rack on the bottom?” and declare, “Poor chair!” She will drag it home. Take it apart and put it back together again. And think, “Surely, we can do better than this!”

macramé lawn chair

Macramé Lawn Chair

When my neighbor cleaned out her garage, she gave me an aluminum lawn chair. When I turned to YouTube for the instructions on how to re-web it, I discovered that people were using macramé cord to weave new seats onto old frames. I immediately wanted more chairs.

As luck would have it, someone on FreeCycle posted a bunch of them that day. Unfortunately, it was another “curb alert,” meaning that instead of arranging for a pick-up, interested parties were to drive across town and hope for the best. I resist these offers, which is (or used to be) against the FreeCycle policy. People racing to get something only to find that the item in question is gone defeats the purpose of reducing waste. Indeed, curb alerts never go my way.

But I was desperate. At a quarter to ten, bleary-eyed and half asleep, I pleaded my case to Brian. The chairs will be gone by morning! Nevertheless, at the reasonable hour of 6 a.m., we pulled up to a stranger’s house in a strange neighborhood in the exurbs. One chair and a chaise lounge that I didn’t want were still left. I took them both.

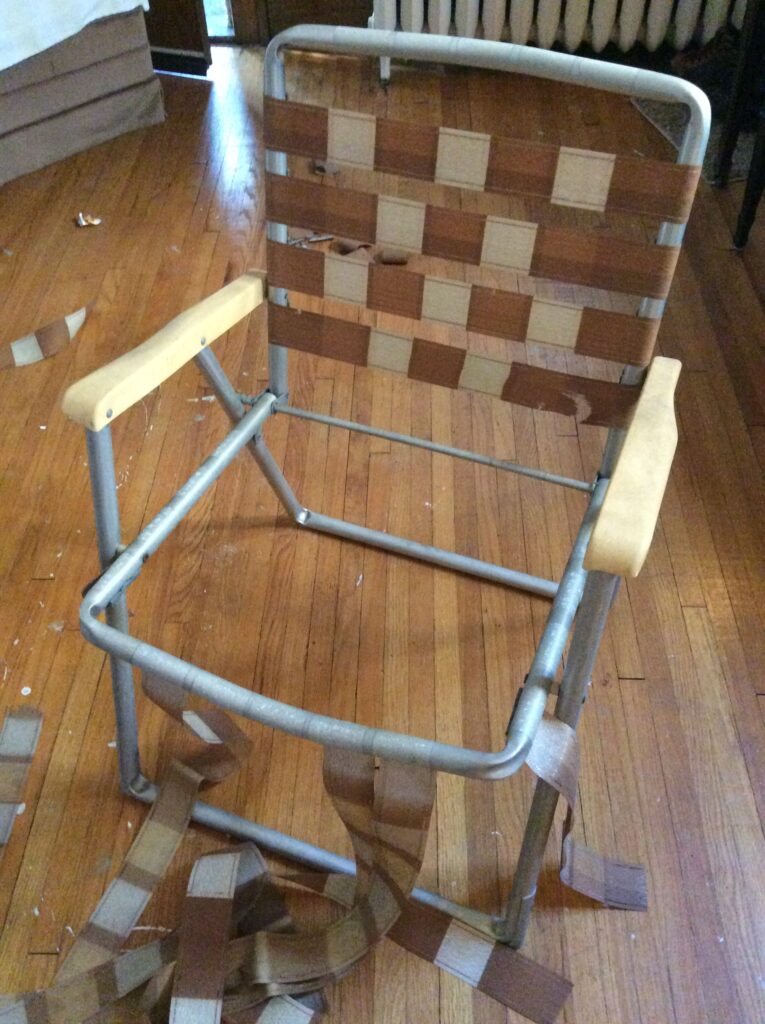
Free Lawn Chair (Before)

After cleaning the frame with Dawn dish-washing soap and a Scotch-Brite pad, I went over it with Krud Kutter. Then I remembered I had a buffing wheel that attaches to the drill and some polishing compound. So, I tried that too, including on the plastic arms. I’m not confident with the buffing. Most of the instructions I found were of an industrial nature (motorcycles and semi-trucks).

Choosing the cord was easy, as there was only black, white and tan available.

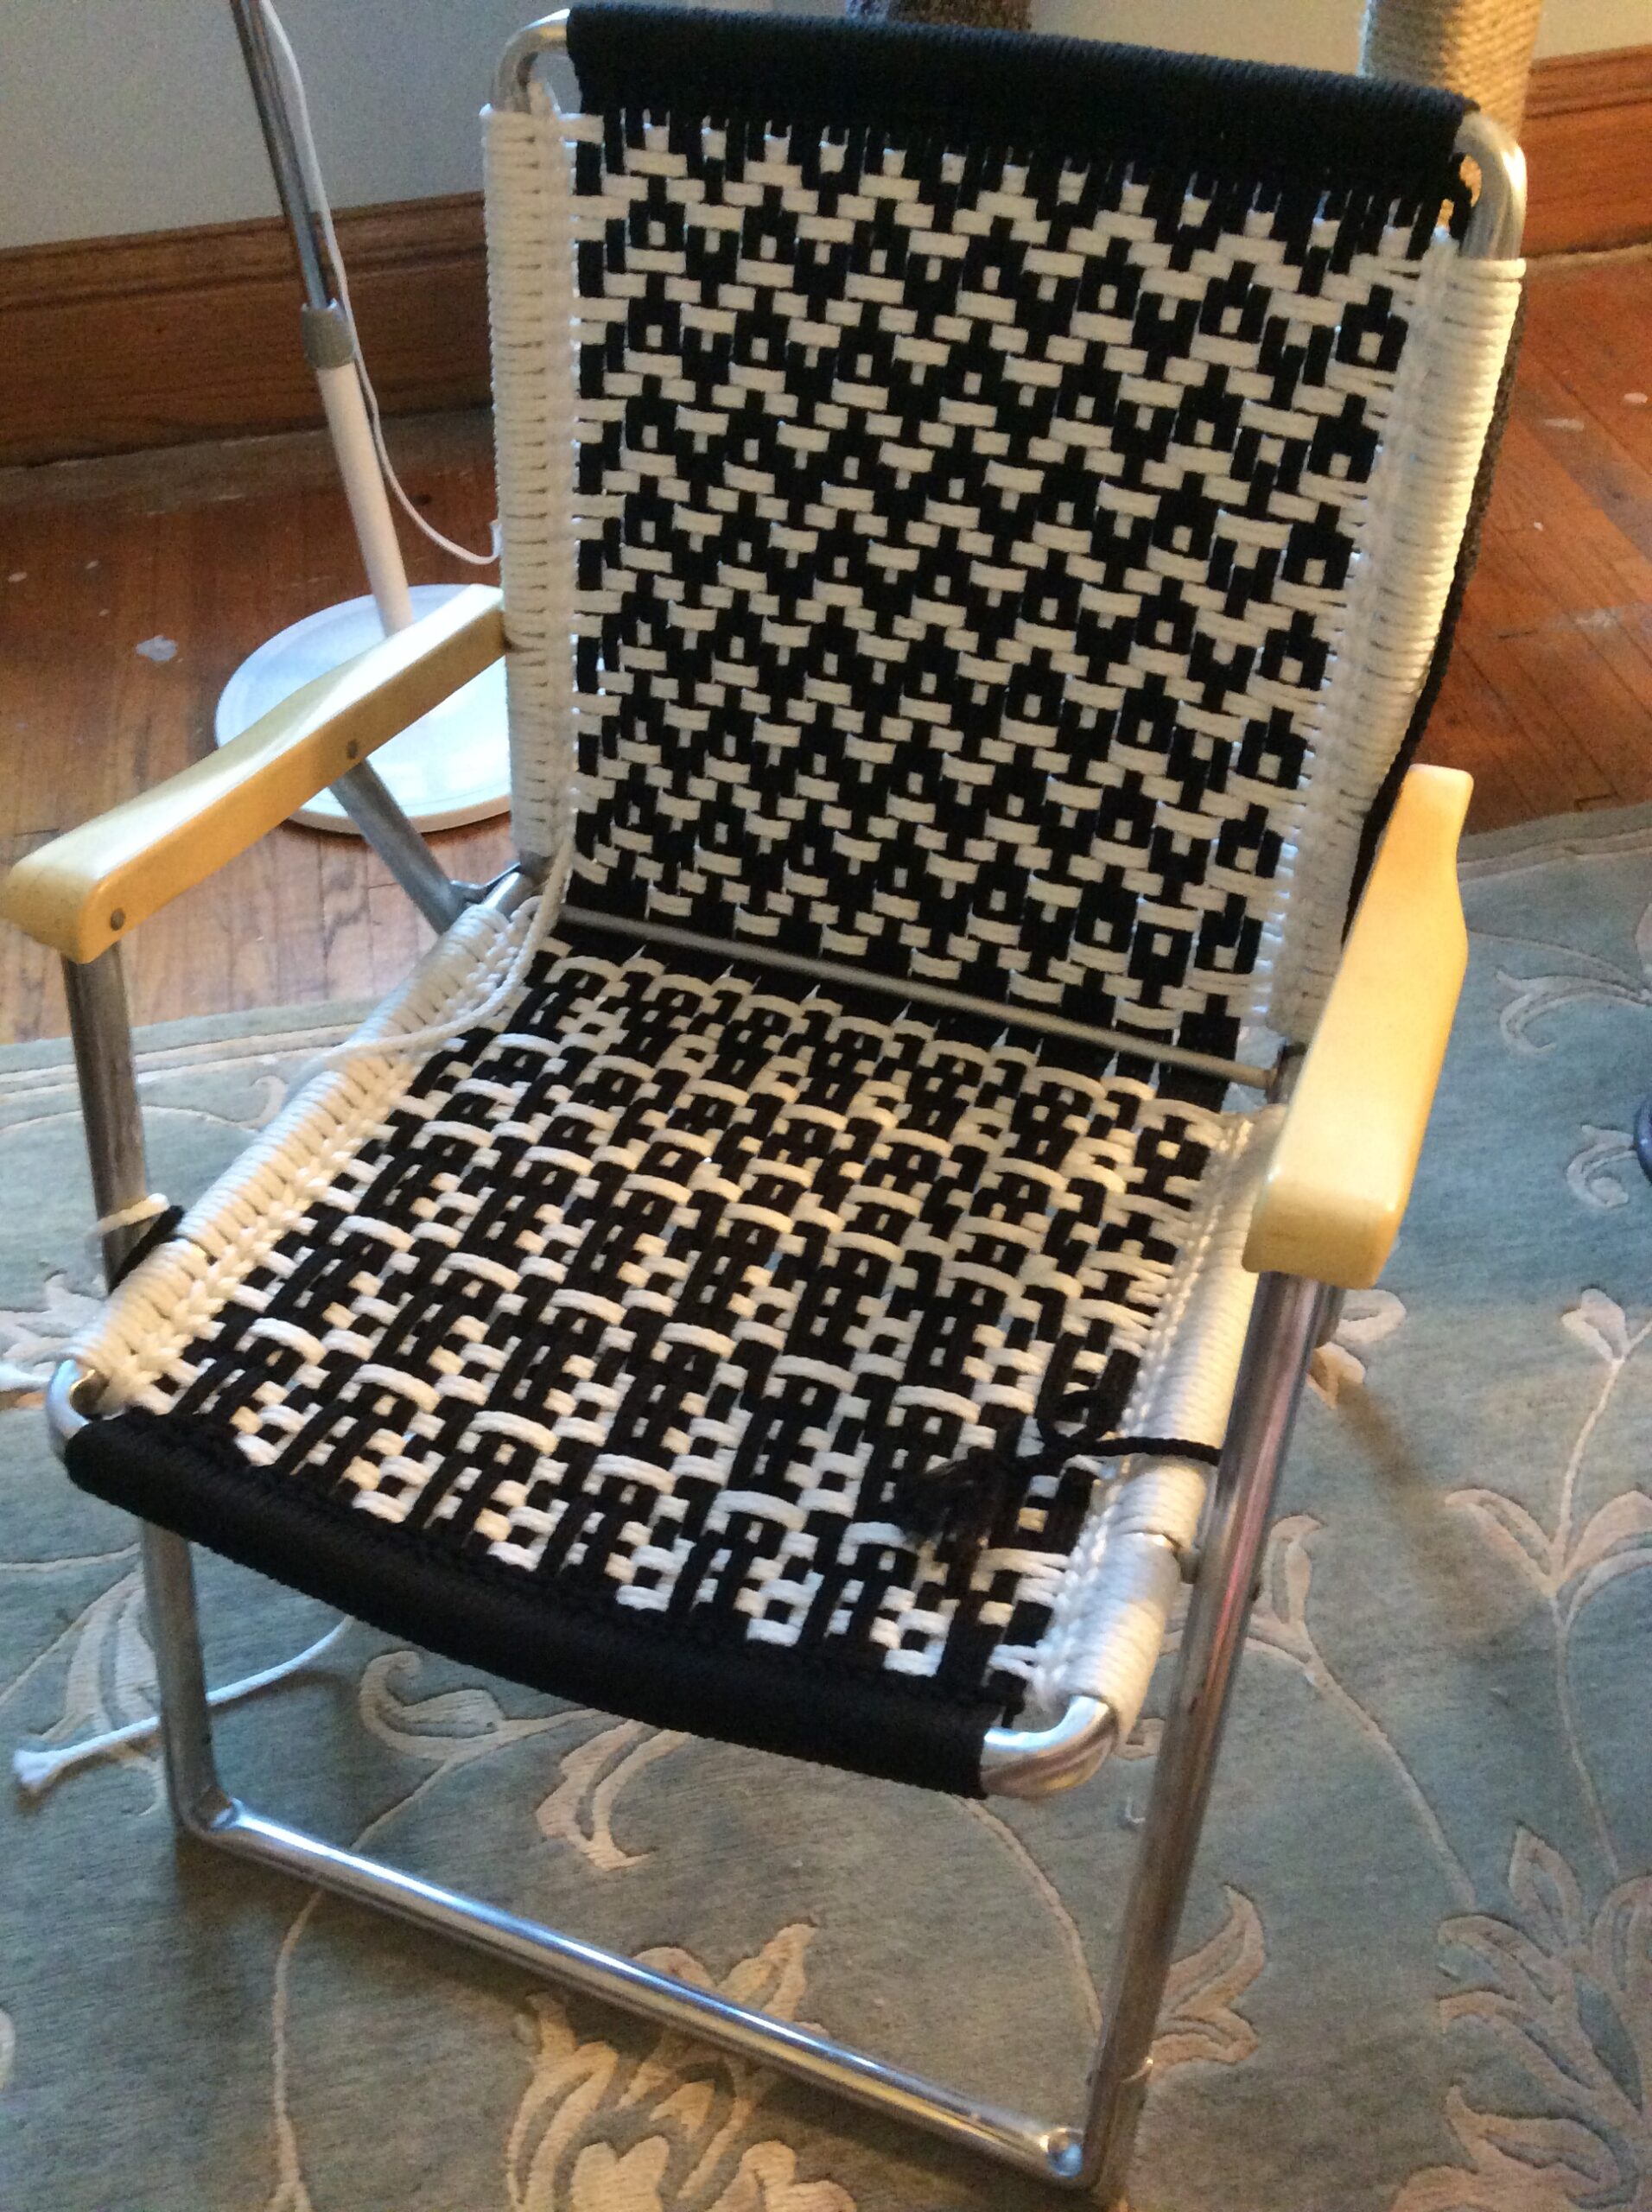
Free Lawn Chair Fixed with Macramé (After)

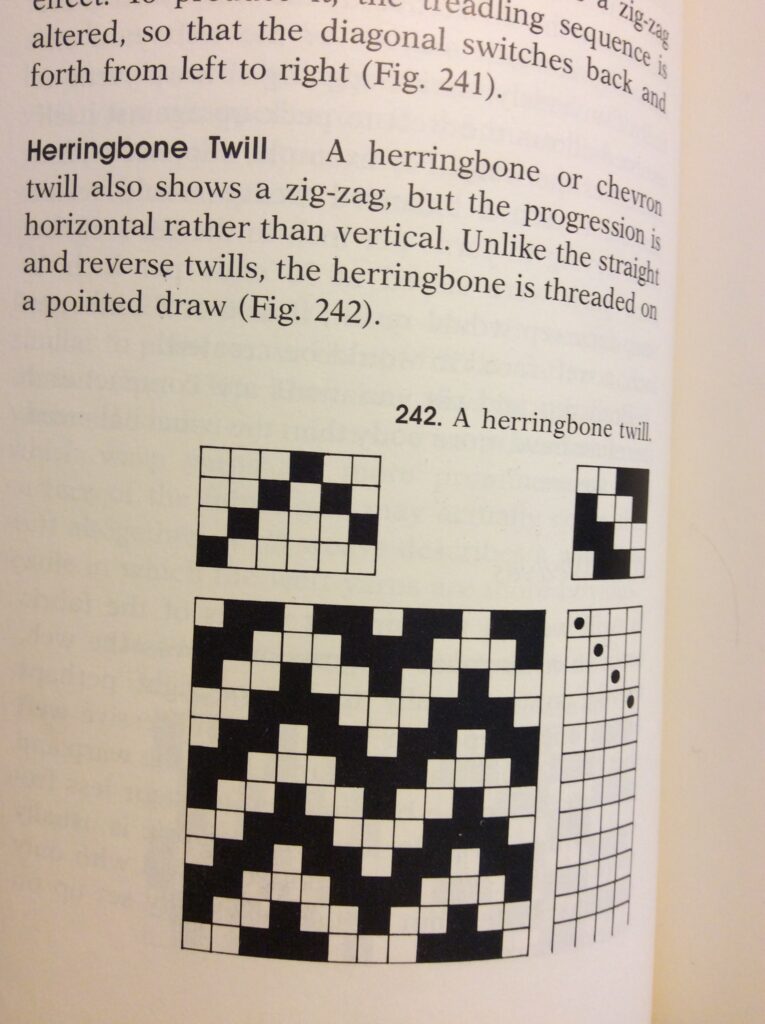
As for the pattern, I chose something I found in an old book about weaving: Weaving: A Handbook of the Fiber Arts by Shirley Held. The back of the chair is a herringbone twill:

Herringbone Twill

I made a cheat sheet with the pattern and kept track of rows on a separate card. This pattern is made up of four rows that repeat.

O=over, U=under

Row 1: Offset O2, then start the repeating pattern U3, O3

Row 2: Repeat U1, O2

Row 3: Offset U2, then start the repeating pattern O3, U3

Row 4: Repeat U1, O2

I worked from the bottom to the top. However, not all YouTubers agreed on this. Some went from the top down.

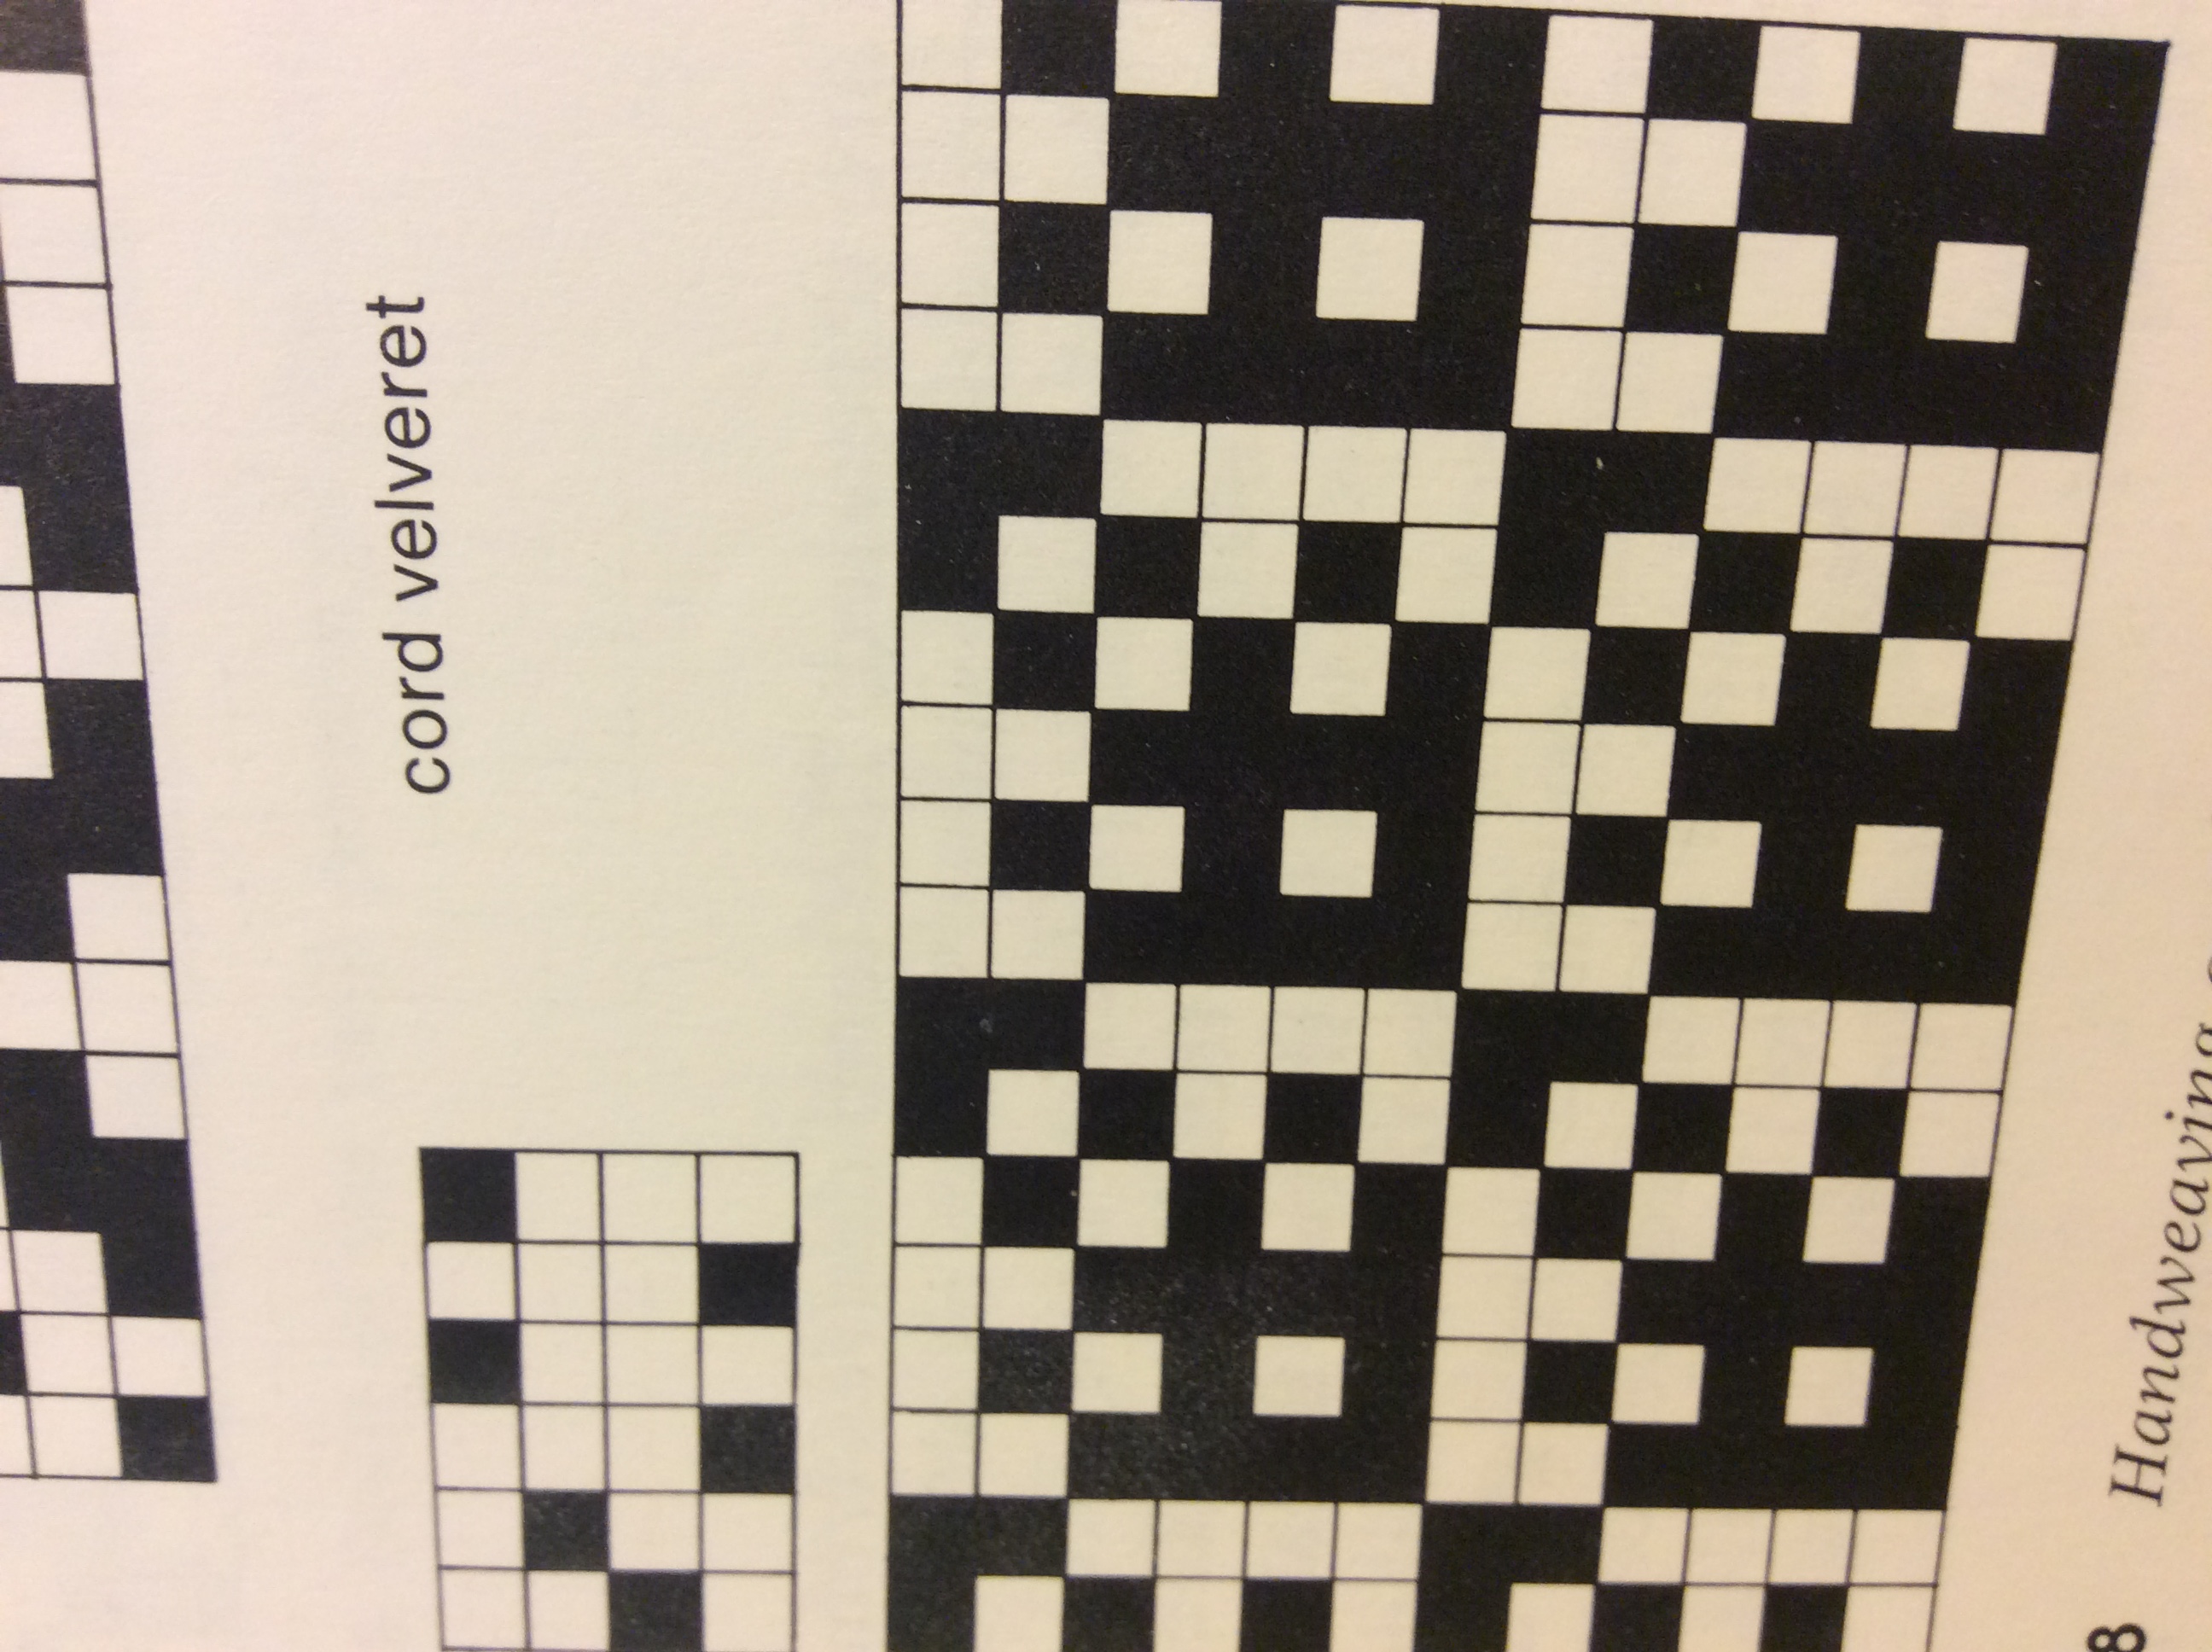
The seat of the chair was a pattern called a cord velveret.

Cord Velveret

This pattern is made with six repeating rows:

Row 1: U2, O4

Row 2: O1, U1

Row 3: U1, O1

Row 4: O2, U4

Row 5: U1, O1

Row 6: O2, U4

If you look closely (or maybe not so closely), you can see that I messed up the pattern on the seat. But I made the call: Good enough. Let’s get at least one chair under my belt before the summer’s end!

I was struck by how simple these patterns were and wondered what calculation or principle was behind them. I can copy something. But could I create a repeating pattern from scratch? Learning about the circle of fifths struck me in a similar way. How did anyone ever figure out the pattern? Brian had the same reaction. As I was marveling over these weaving patterns, without my prompting, he also said that it reminded him of the circle of fifths (or the way that I marveled over that too). And then I read this in Held’s book in chapter nine about drafting weaving patterns:

“Drafting has often been compared to musical notation, and in some ways the analogy is accurate. However, unlike the symbols used in music, the shorthand of drafting is not universal… We occasionally hear of great singers or other musicians who cannot read music. Similarly, many experienced weavers can neither read nor write drafts, preferring to design on the loom….”

While this doesn’t quite get at my amazement of how patterns work, the music analogy was close enough to make me think that I was onto something. I just don’t have the words for it. It also makes me wonder if a weaving pattern could be translated into music. What does a reverse twill sound like? Or the other way around. What is Für Elise as a chair? I once saw novels being depicted as colors based on sentence length. It reminds me of that. Unfortunately, I can’t find an example of it.

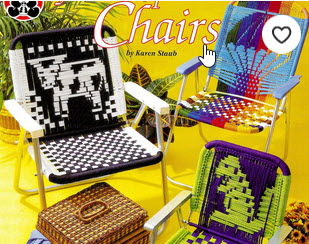
There are some really cute macramé lawn chair patterns out there. I even saw one with a cow that would be perfect for my mother.

Macramé Lawn Chair Patterns

As for my first chair, I don’t have a good answer to the the question “How long did it take?” Should I count the learning? The redoing? The tears?

I exaggerate. There were no tears. No swearing. Still, while appreciating the free instructions that will get you started on a macramé chair, many gloss over the tricky parts. More than once, my crochet hook went flying across the room with deadly force because I was doing something (I don’t know what) wrong. And despite the claim, the warp (the vertical strings) and the weft (horizontal) are attached differently. It’s not enough to say “It’s just like what you did before.” It isn’t. Many of the instructors I encountered seemed to have forgotten what it’s like to be a beginner. Could it be that some have never actually observed anyone trying to follow their instructions? To be fair, there are the good ones too. And there’s not a room in my house that hasn’t benefited from a DIYer on YouTube. In any case, it took a few different tutorials, all incomplete in their own way, to get a full picture of the steps to weave a macramé lawn chair. Even then, I had to figure out some stuff on my own, like how to deal with a big crochet hook in the corners of the seat. Road signs would have helped. These are the clues you need to check your work. For example:

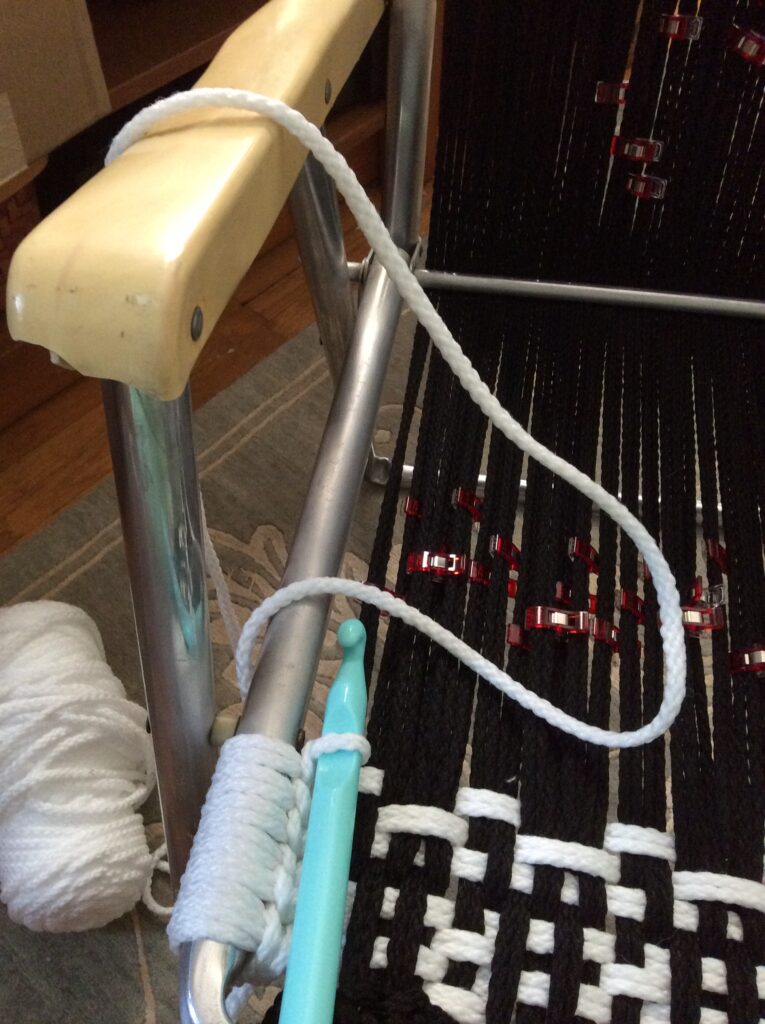
As you are weaving, you know that you’re ready to start a new row when you see the tail of your string draped over the frame like this:

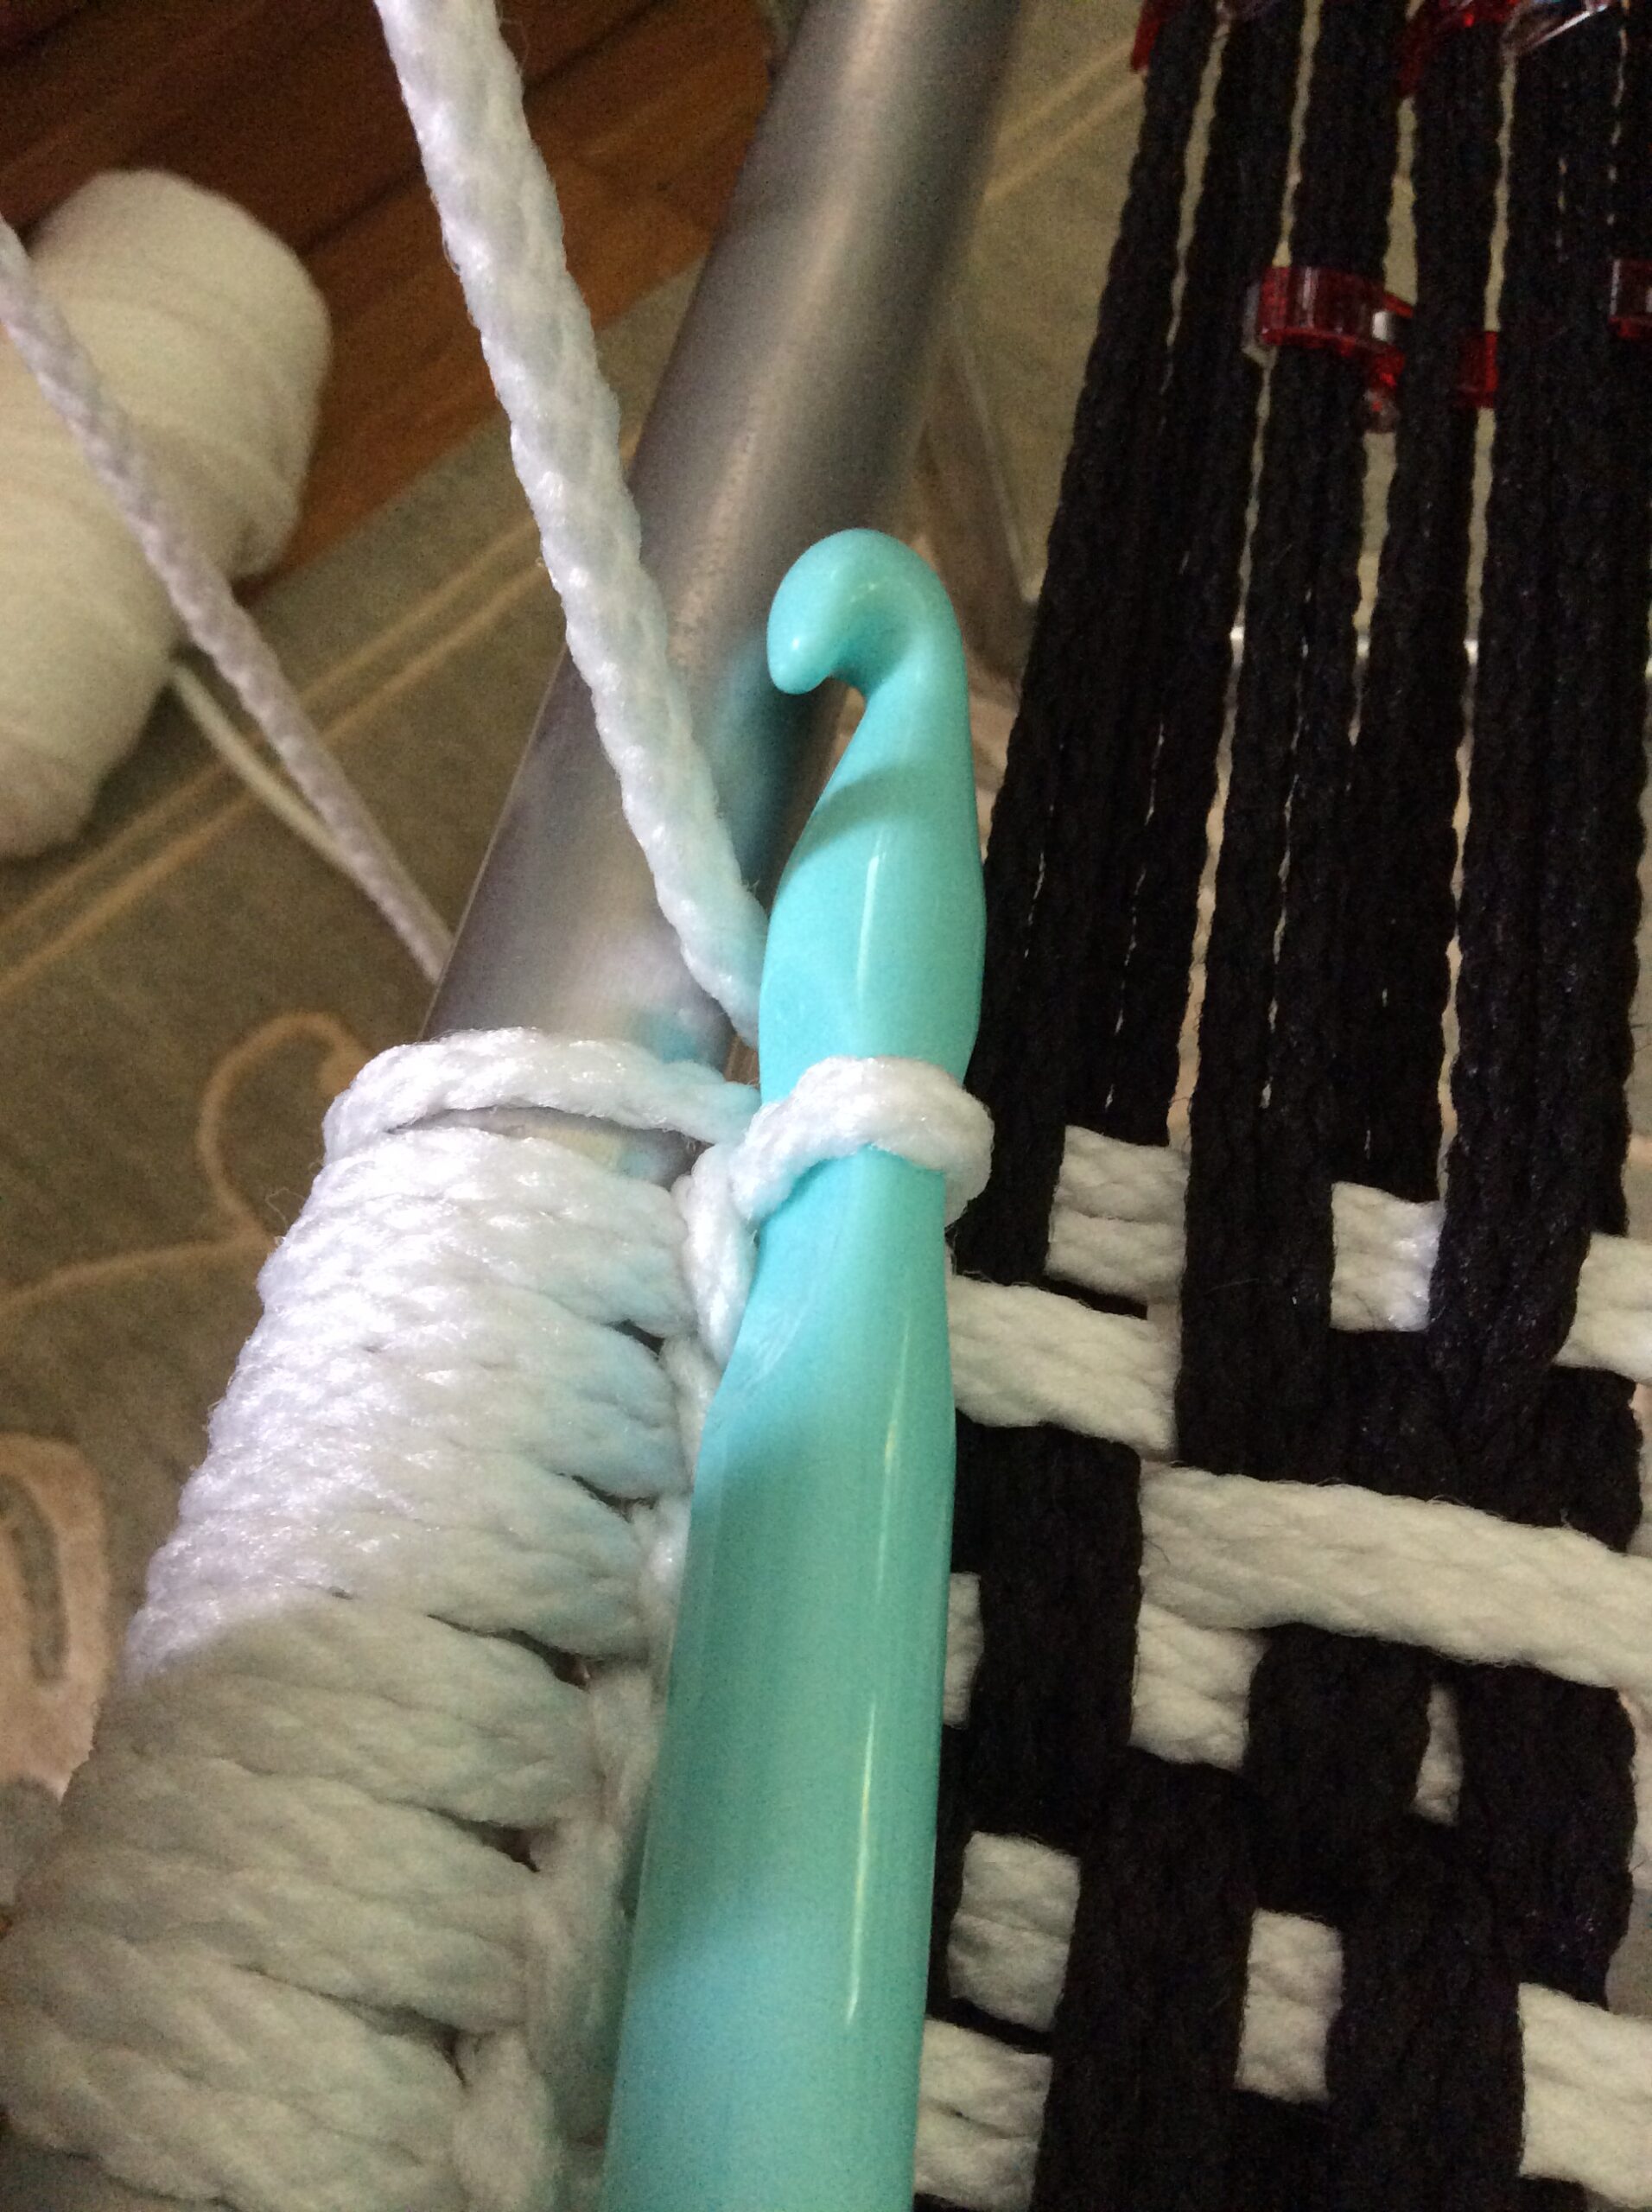
Note the skein of cord is on the ground and feeds over the arm of the chair. However you set it up, it should remain the same throughout the weaving. Otherwise, it’s a clue that you messed up somewhere (which I did many times!). Compare the above to this:

The cord has yet to be looped over the frame and crocheted in place.

Here we can see the stitch has yet to be complete because it’s pointed away from the center of the chair and it isn’t draped over the top of the frame.

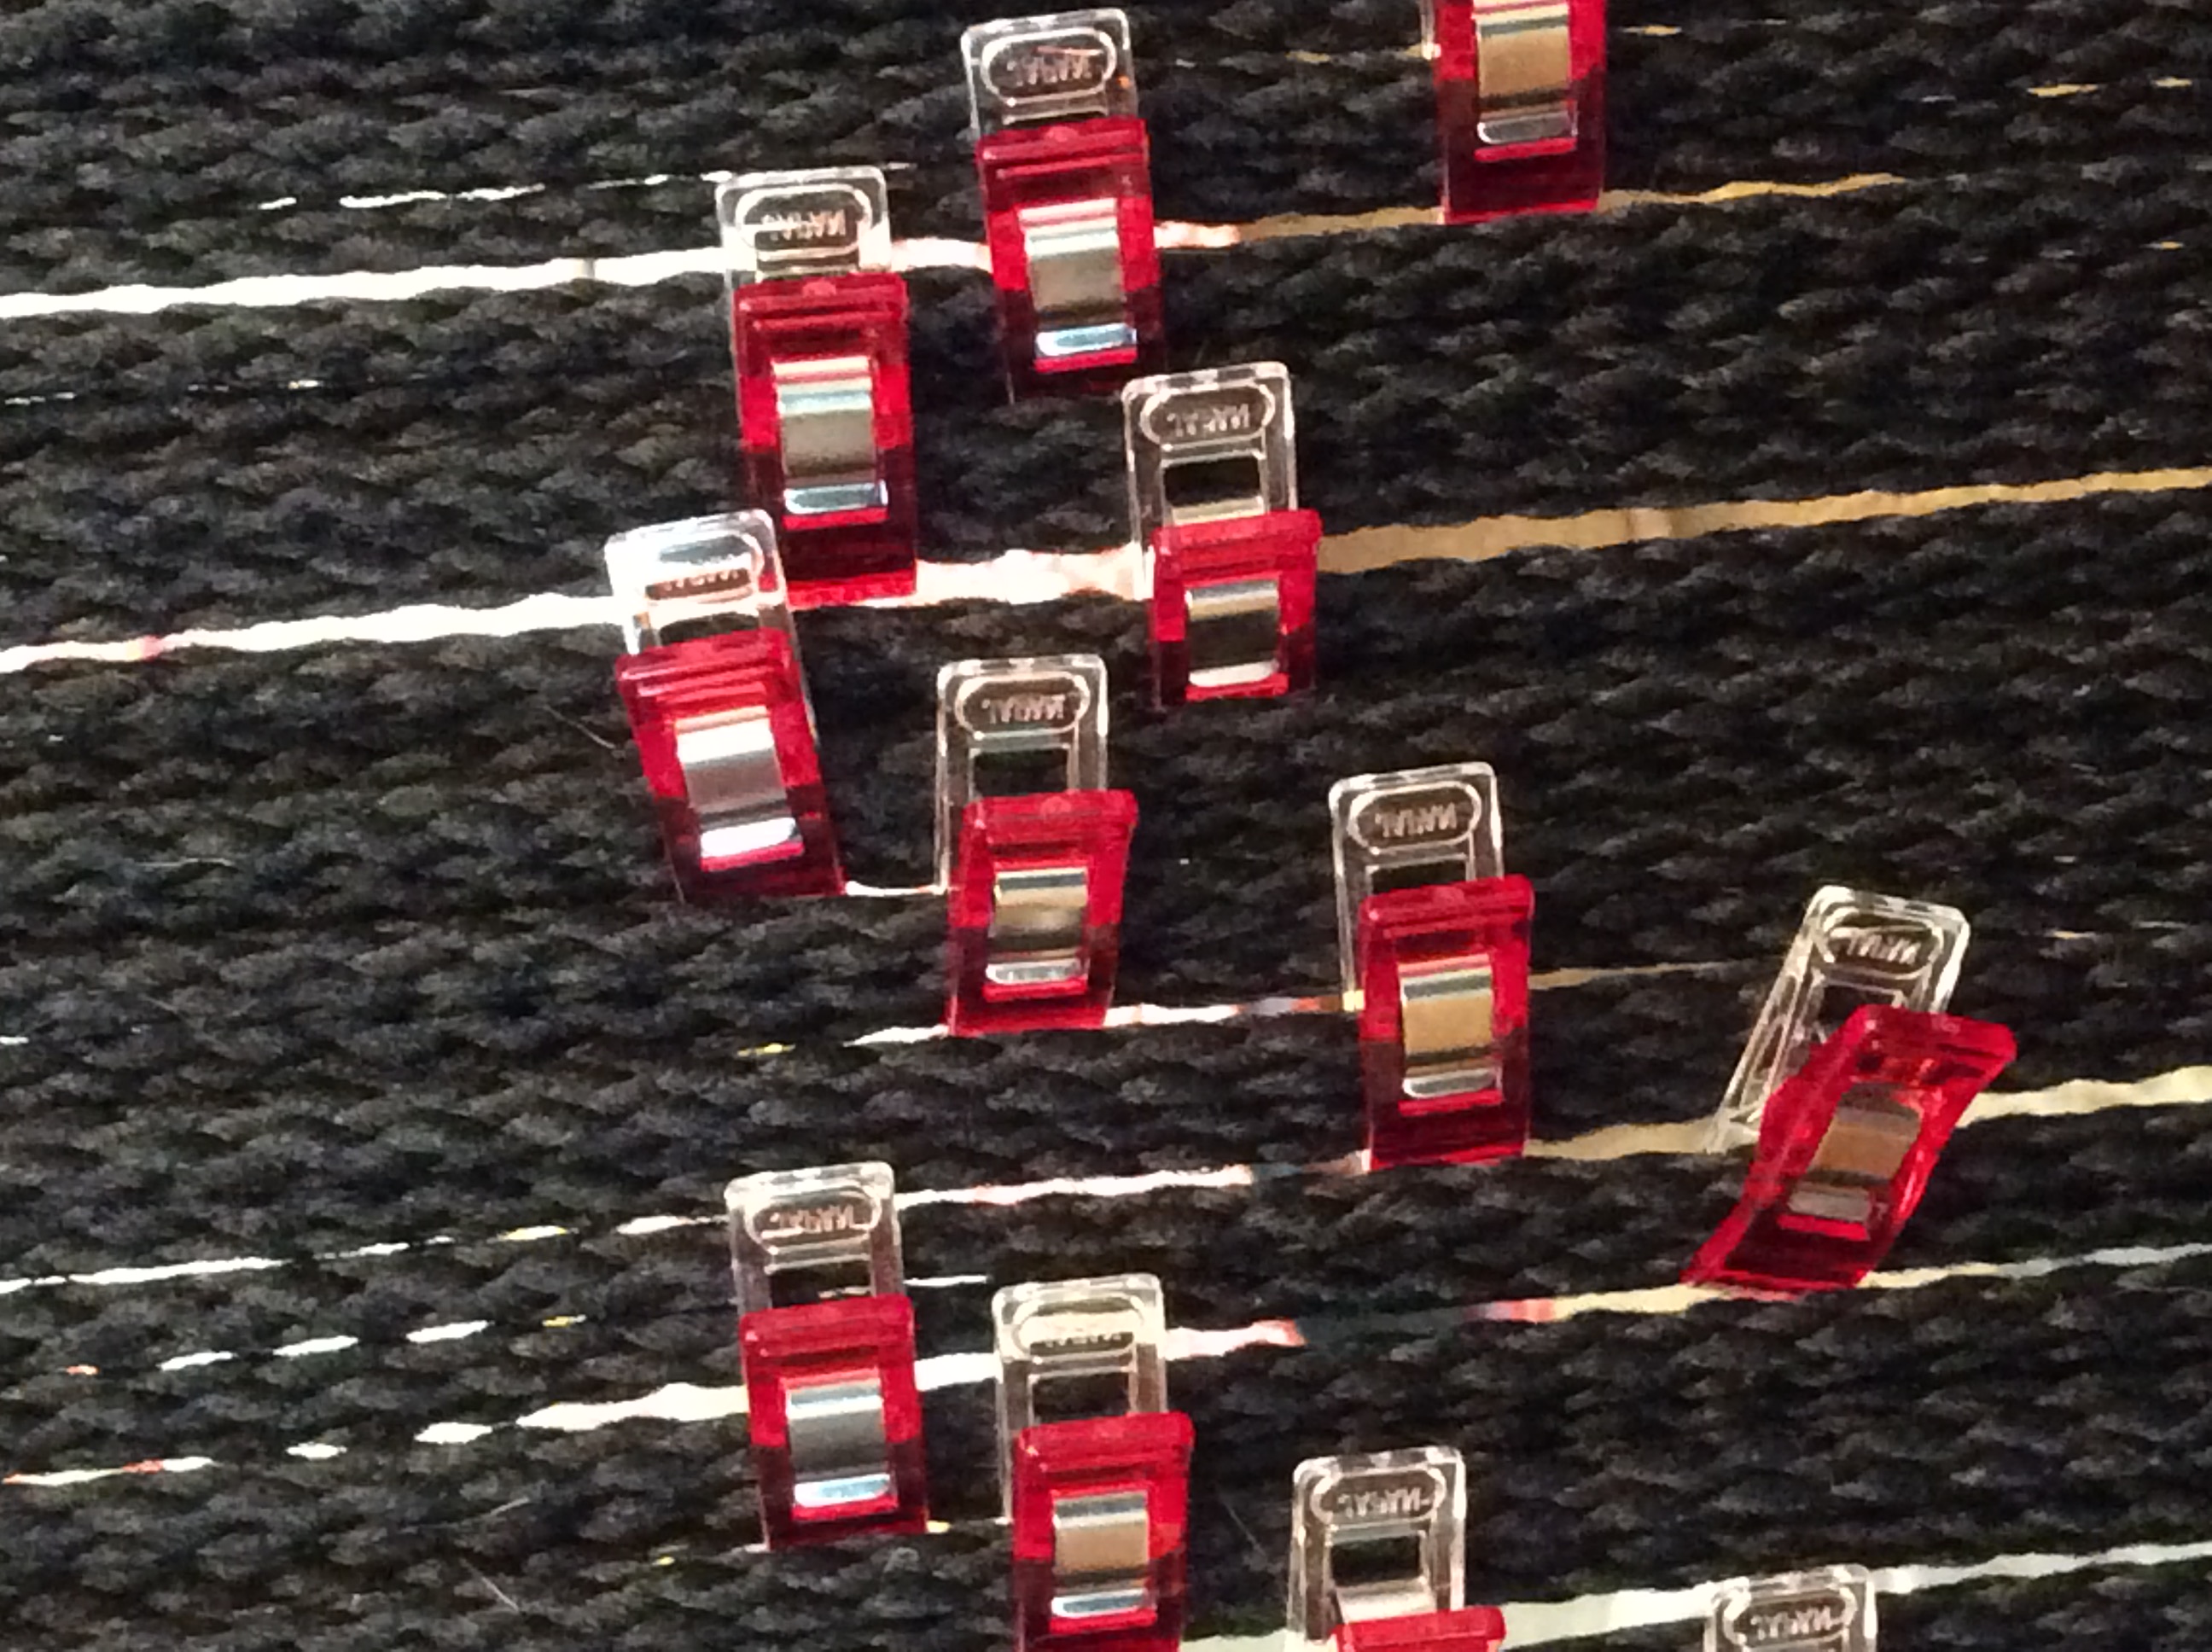
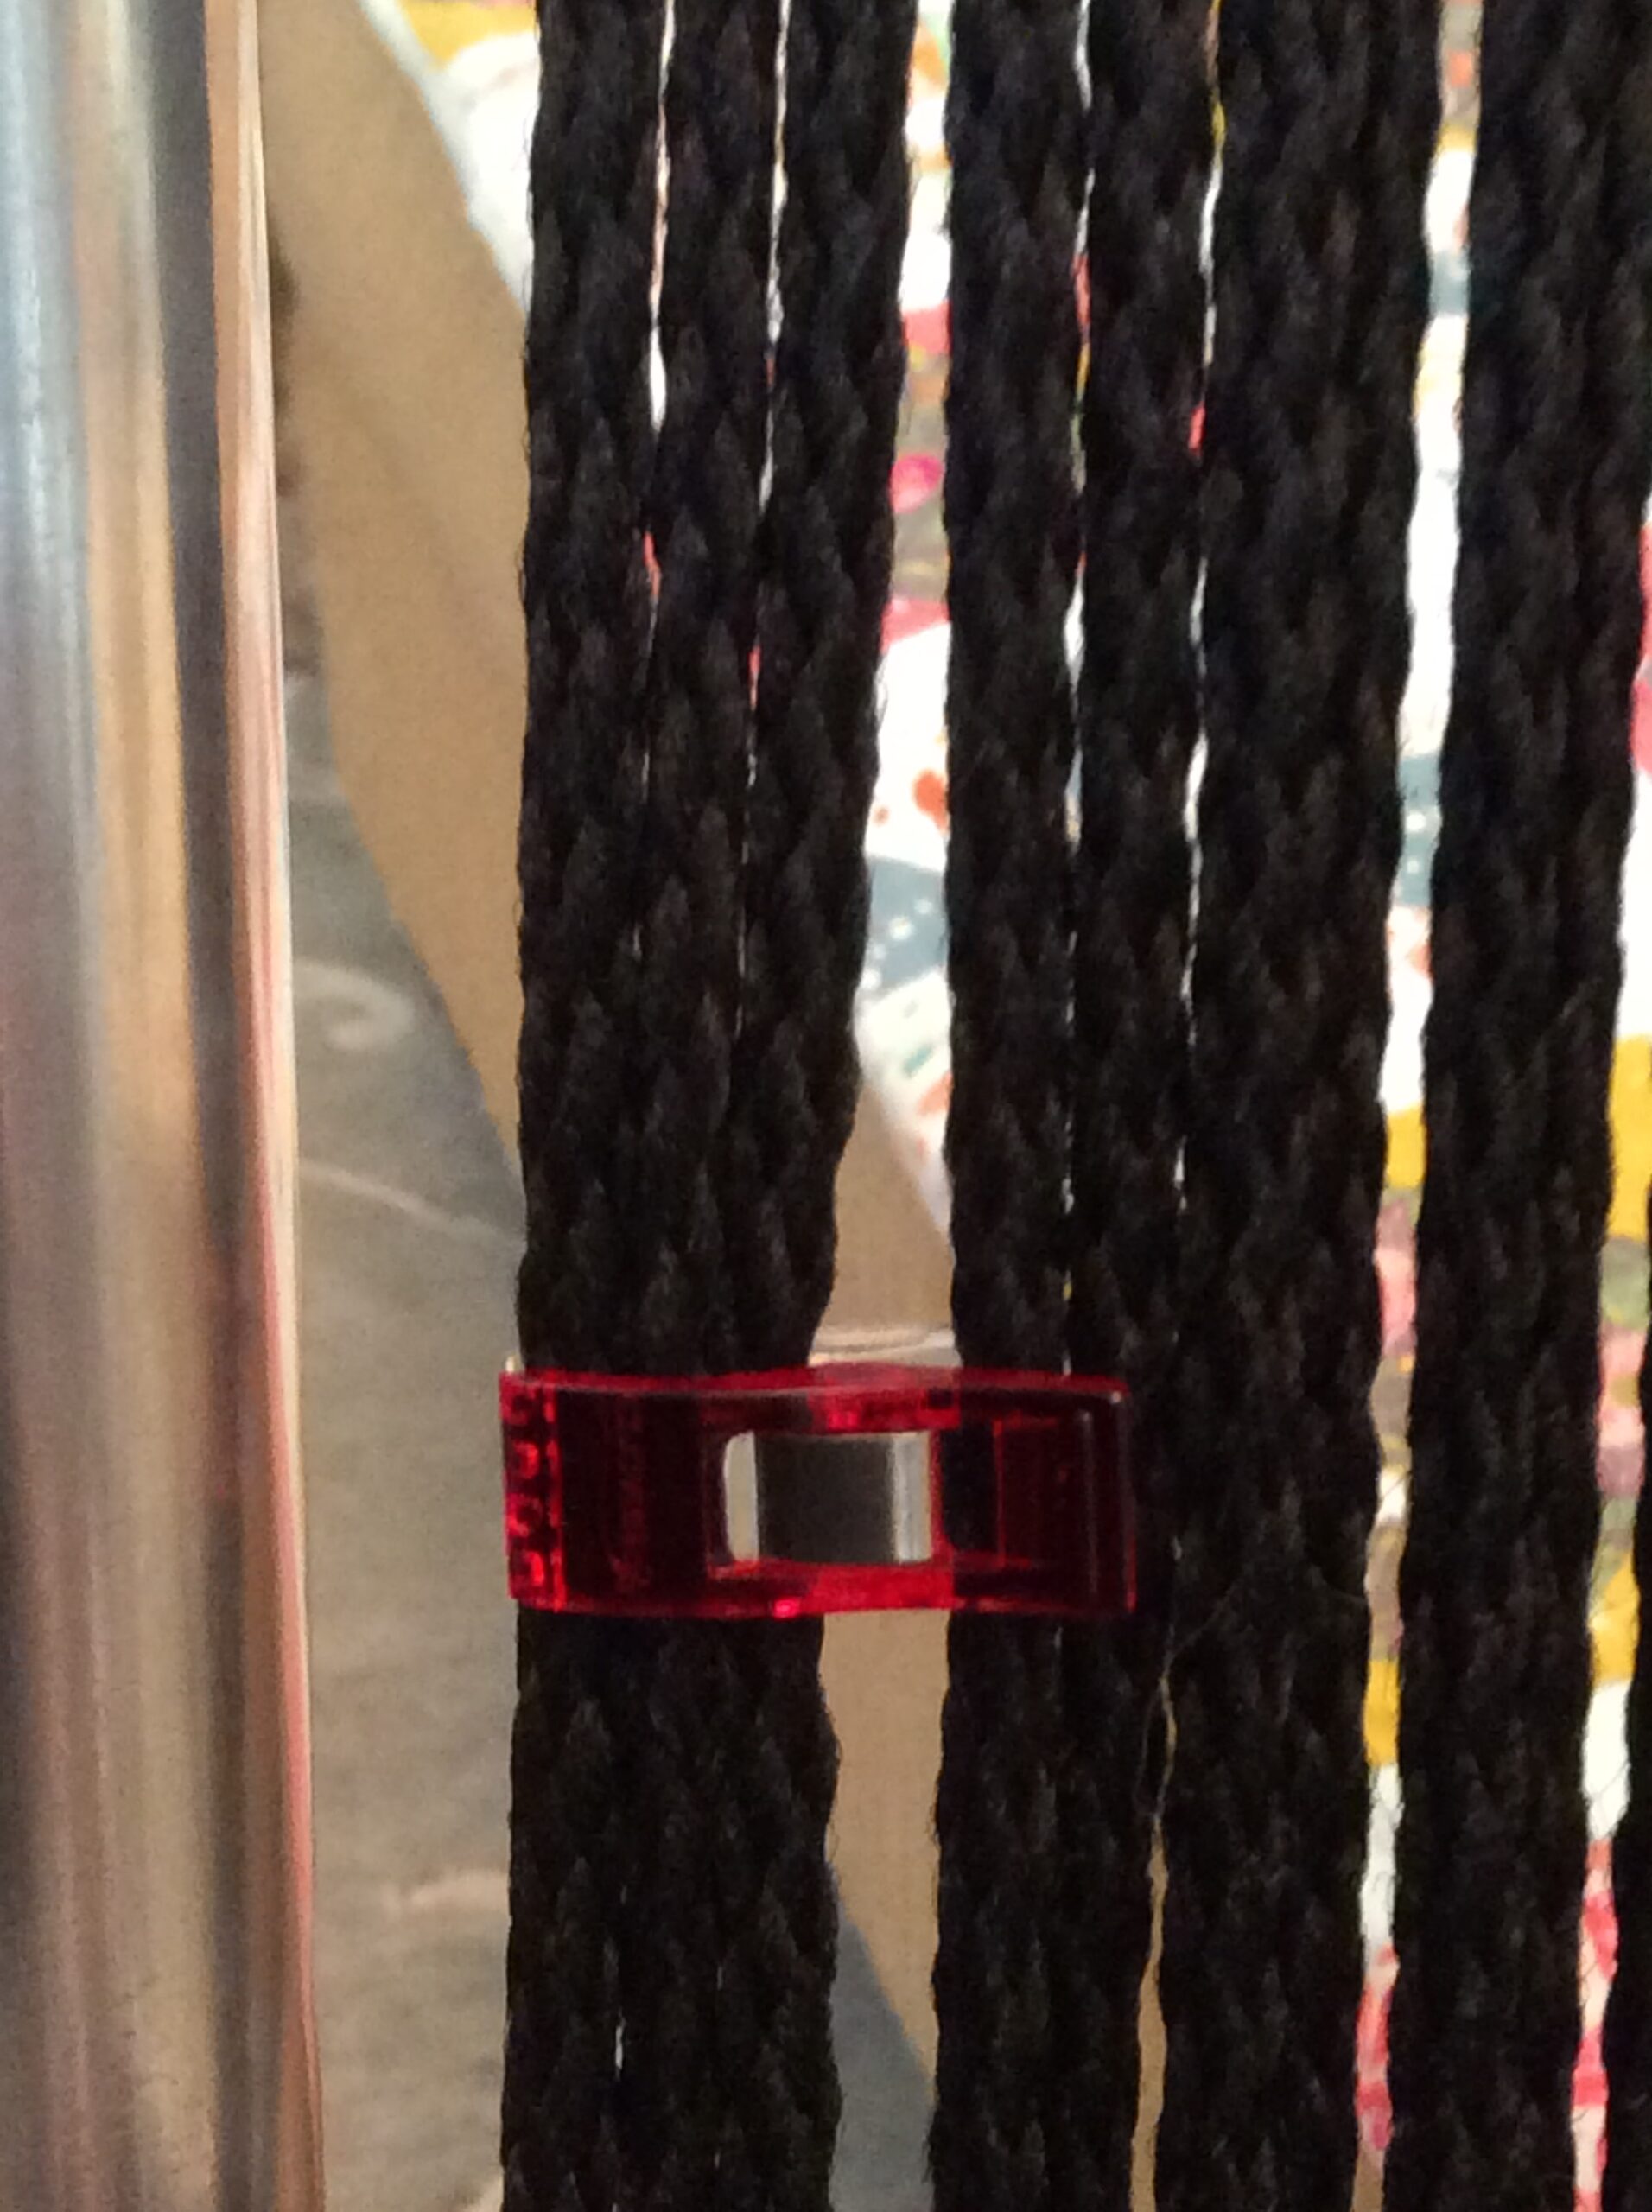
The wonder clips you see were used to pair the threads (2 per knot). For me, it made it easier to count… 1 over, 2 under, etc. And yes. You’re counting sets as opposed to individual threads.

Use Wonder Clips to group string pairs for easier counting

It would’ve also been useful if someone had pointed out that the first set of strings will have three threads per knot instead of two. The confusion caused me to unnecessarily start over. But even after I figured out that this was to be expected, I forgot to account for it when I started my under/over pattern. Half the seat was done before I realized that I’d need to start over. Again, marking this with a Wonder clip eliminated confusion.

Note the knots that have three threads and treat them as a set.

In all of the macramé lawn chair videos that I saw (as opposed to the ones on Danish cord weaving), the chair is finished by cutting the loose ends of the strings short and melting the ends to stop them from fraying. This is a reasonable way to do it. But I suspected that my sister Amy who crochet’s and does macramé would have a better solution and she did. I don’t have pictures of it, but she essentially pulled the loose end behind the first two to three inches of the loops around the frame, being sure to match the colors (i.e., two strings will travel along the white edge and the others along the black). As opposed to letting strings — though cut short — dangle loose, she melted the end as usual and then hid it under the loops. If I do another chair (I have two requests already), I’ll take pictures that show this.

When I showed a picture of a chair to a friend who I don’t think of as being overly sentimental, she admitted to tearing up. For some reason a woven chair touched her. “It’s like bringing back an old art form,” she said. “It’s the best thing you’ve ever done.” I’m not sure about that. But I understand when she says that replacing speaker foam with a frame and some fabric is not as exciting.

I wondered if the chair was good enough to give away.

“Does it still fold shut like a regular lawn chair?” Brian said.

“Yes.”

He sits in it.
“It’s good enough,” he said.

I gave it to my folks, thinking they could use the seating for the July 4 festivities at their house.

French Window Treatments

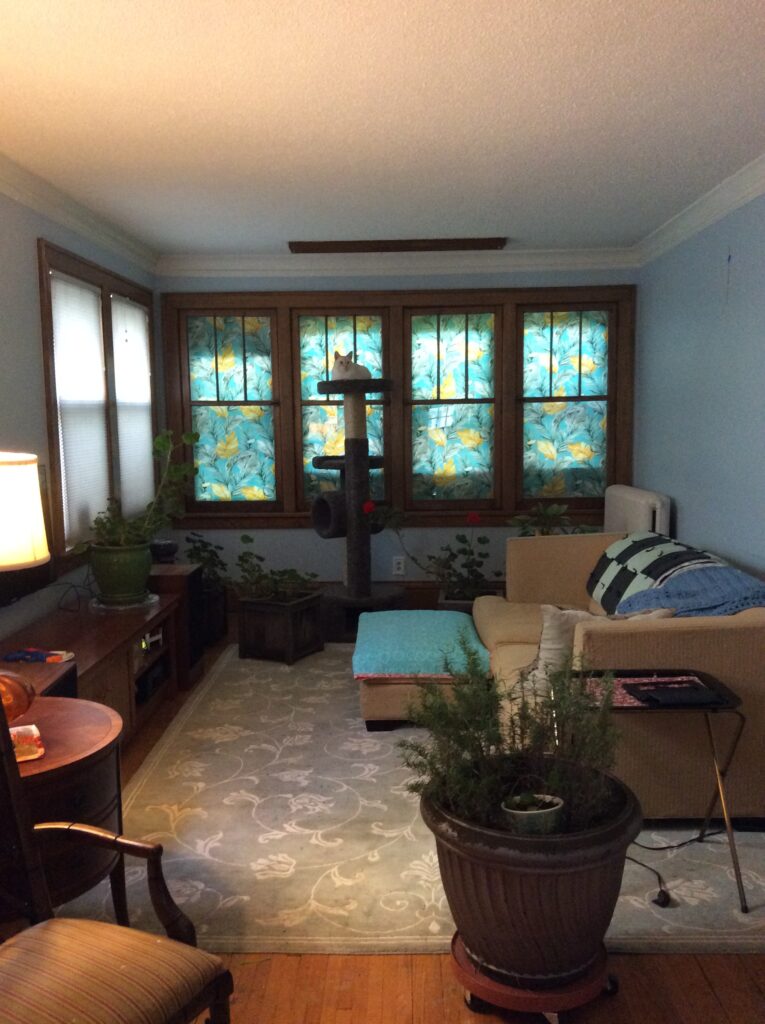
When I painted the living room I took down the honeycomb blinds that covered the four French windows there and I never put them back. While I contemplated a better solution for these south-facing windows, I used reflective insulation to block the summer heat. It worked great, though it looked terrible. However, once the coverings were removed after the hottest part of the day had passed, the unadorned windows made for a beautiful view.

The windows need cleaning but you get the idea.

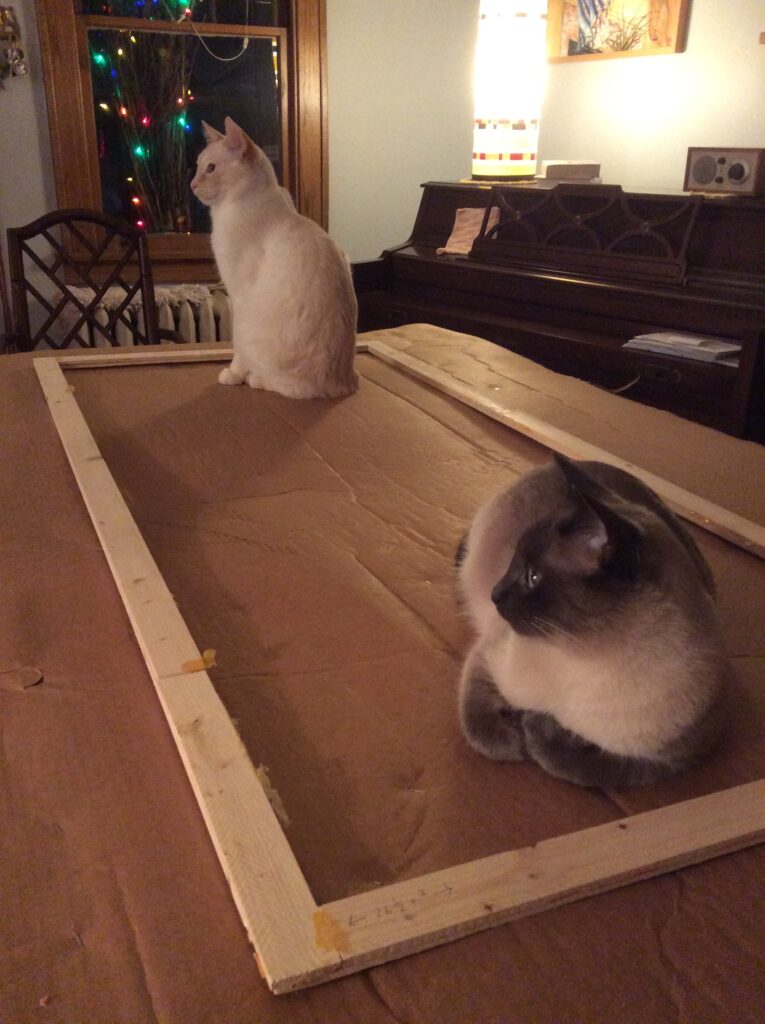
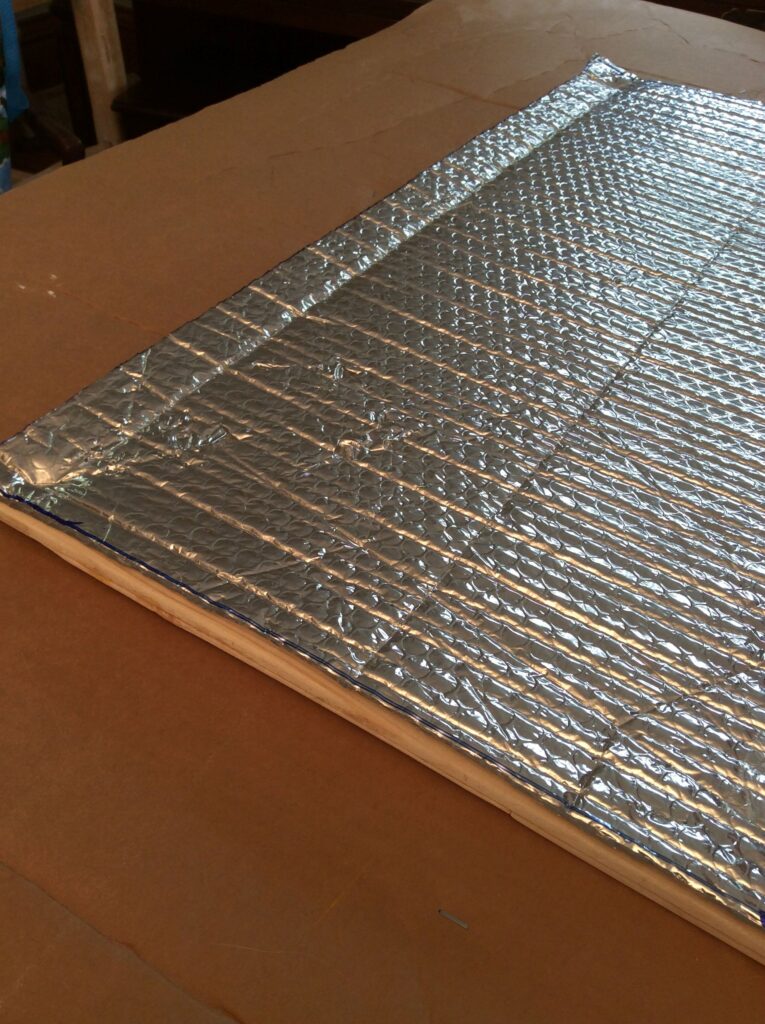
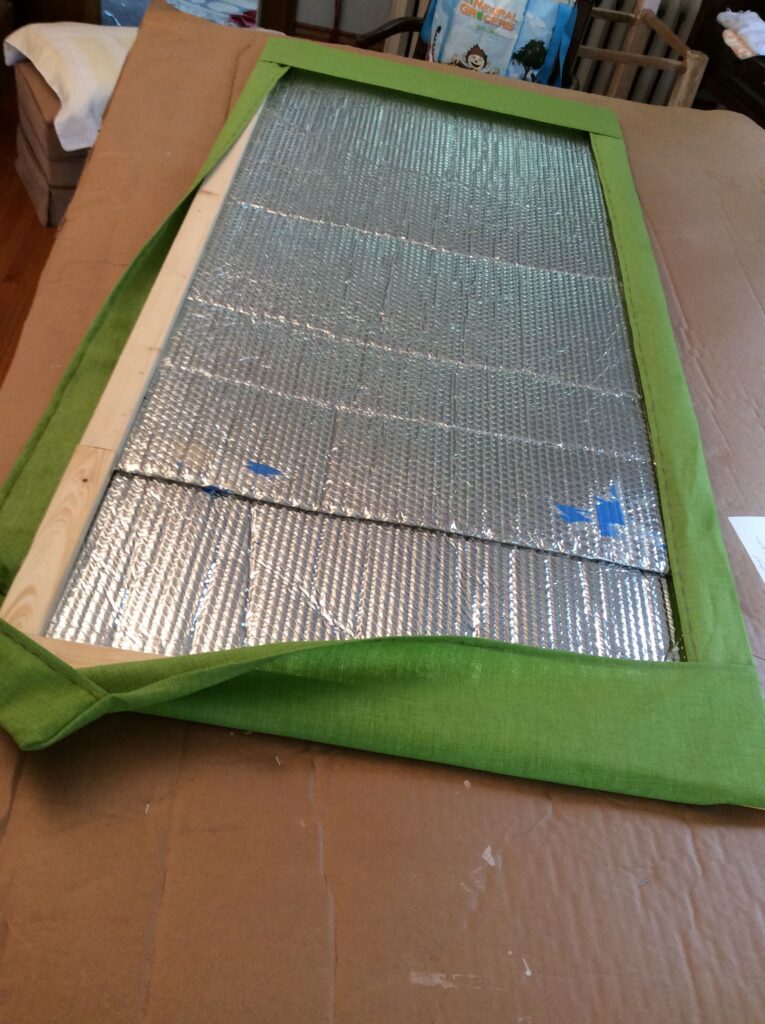
After a few seasons of this, I finally got around to covering the insulation with fabric to make them look nicer from the inside. After a few failed attempts, I figured out that my best option would be to staple the insulation to a frame before covering it.
Michael and Bert like to help.

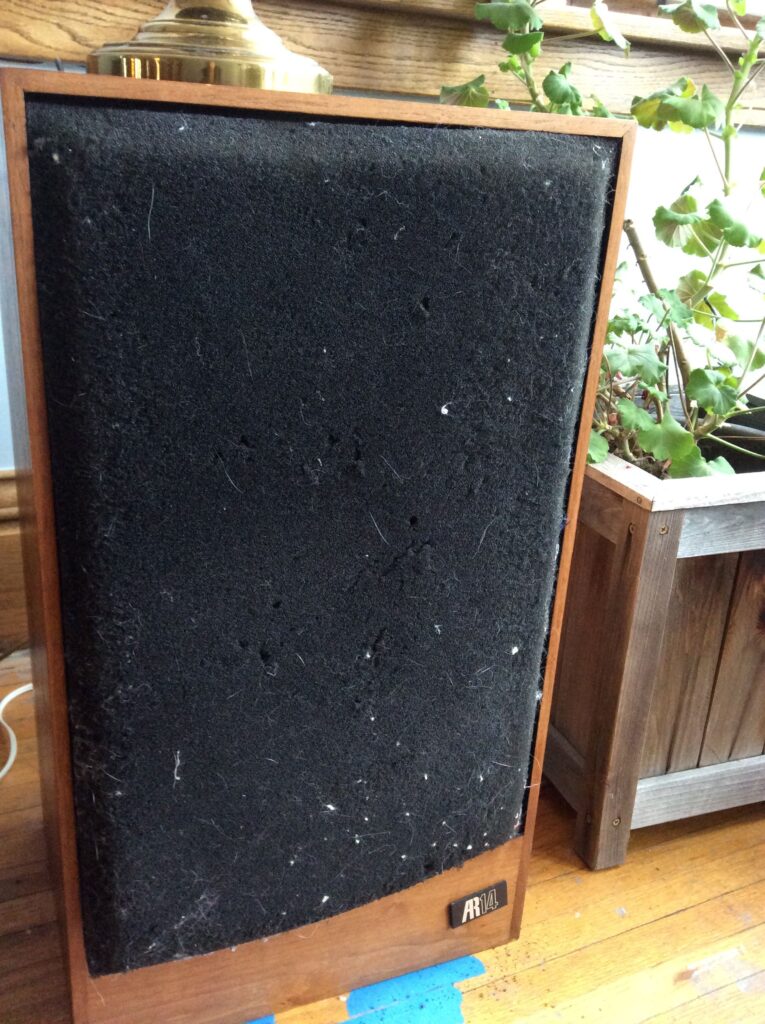
I made similar though much smaller frames to replace the foam on some old speakers with fabric.

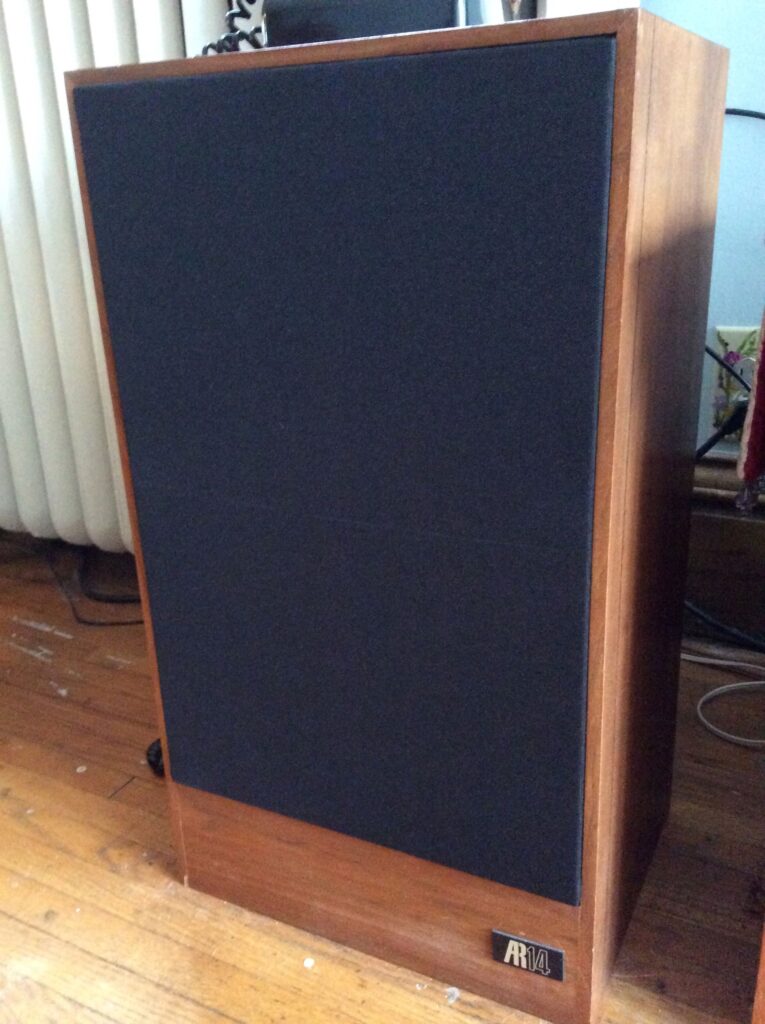
Old yucky speaker foam needs replacement but it’s impossible to purchase it.
The guy at the speaker store suggested making a frame and stretching speaker fabric over it. He said to use hot glue to secure it but I didn’t like that idea and wanted to use staples instead. However, the wood I used for the frames wouldn’t take a staple. So, I resorted to using the glue and it worked great.
Staple insulation to frame.

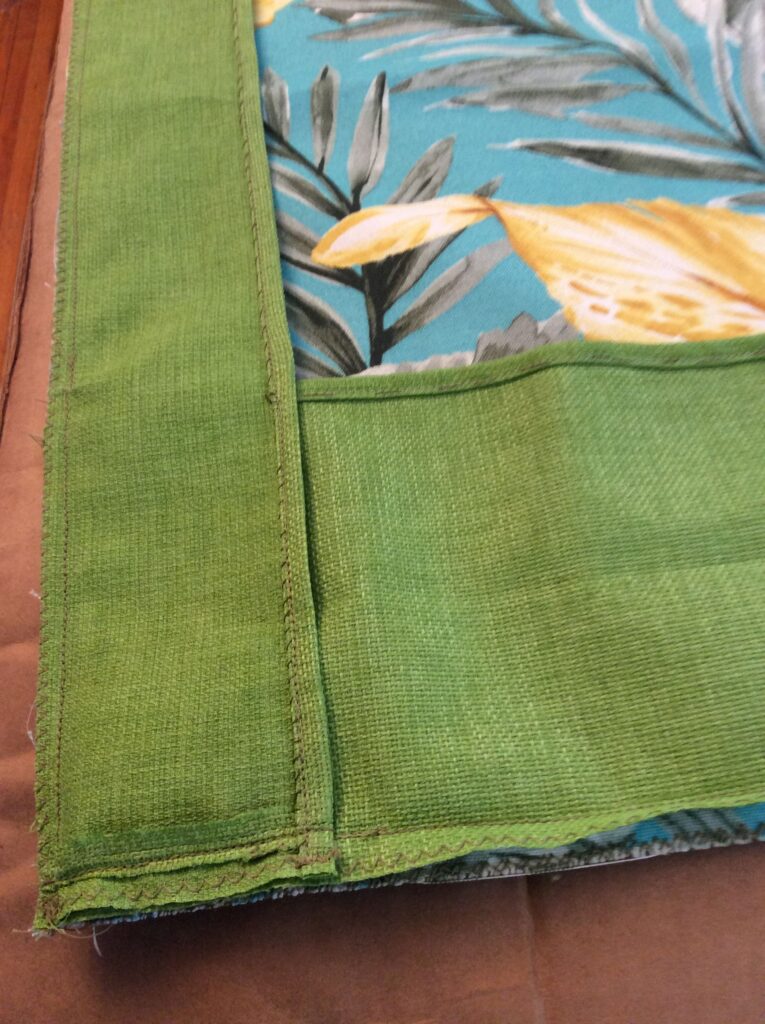
My next problem was designing a washable cover. After some trial and error that made me feel like a monkey involved in some kind of an intelligence experiment (it’s difficult for me to picture things backwards, which must be a requirement of sewing without a pattern), I decided to use four pockets (top, bottom, sides) on the back of the cover to finish the edges and hold it in place.

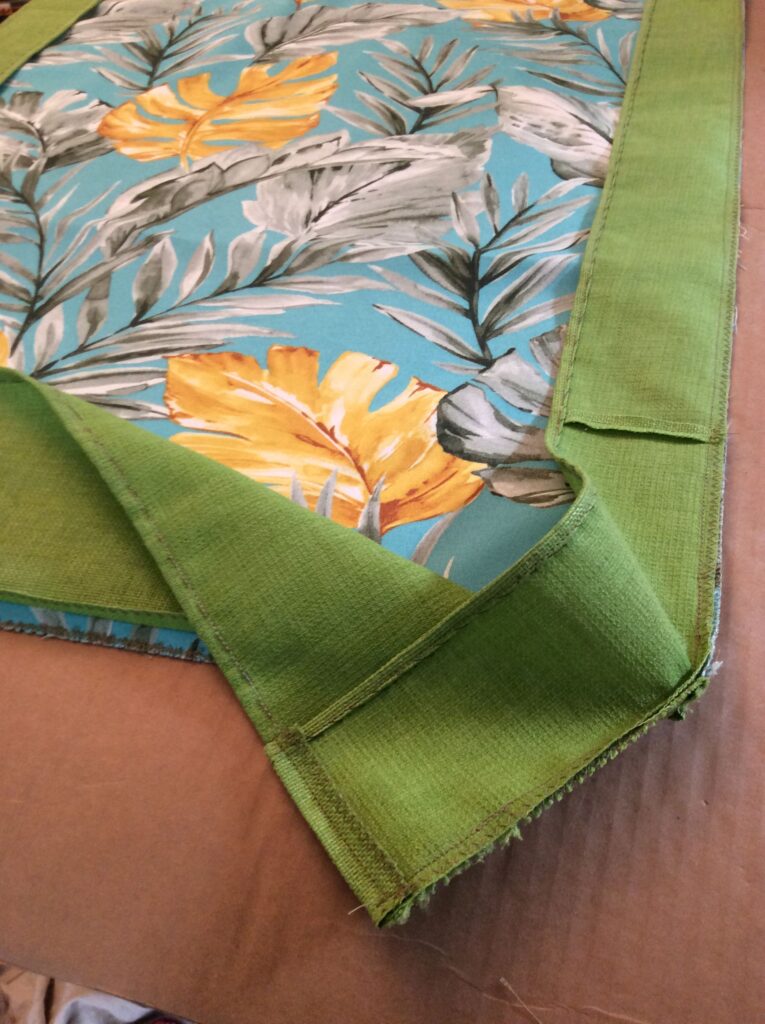
The top and bottom pockets are deeper than the side pockets. They are placed right sides together with the cover face. One of the narrower side pockets is sewn on top of the top and bottom pockets as shown.

While I hated to resort to using upholstery staples (as they will make it harder to wash the piece), it was the best option for getting a finished look. Staples were also practical since I needed to make one corner of the cover loose in order to fit it to the frame. As for solving that problem, I tried a few different options, including buttons that could be undone to give enough room to stretch all four corners of the cover over the frame.

The second narrow side pocket is sewn to the inside of the bottom pocket: Fold the bottom pocket down and sew the side pocket along the edges.
Stretch the cover over the frame and staple in place.
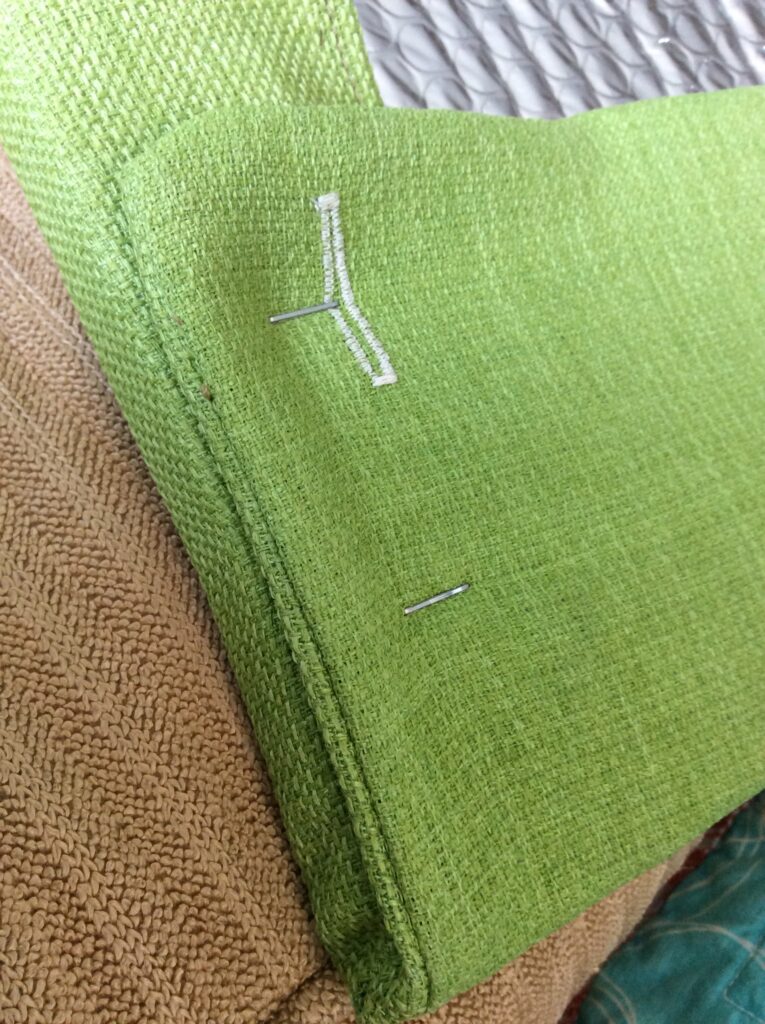
The “odd” corner that was sewn with the bottom flap open is tucked, folded up and stapled. I wish this were more elegant but it’s the cleanest look I could figure out. The buttonhole you see is left over from a previous idea about how to do this.
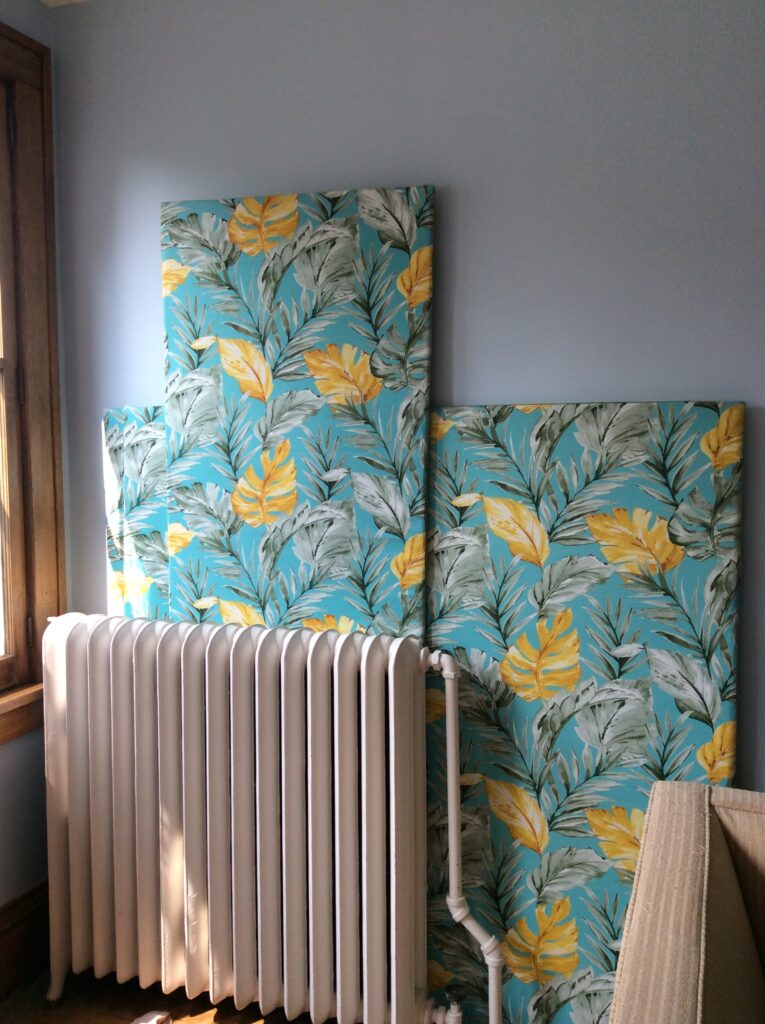
When not in use, the covers can be stored behind the radiator. Given some wire, they could also be hung on the wall.
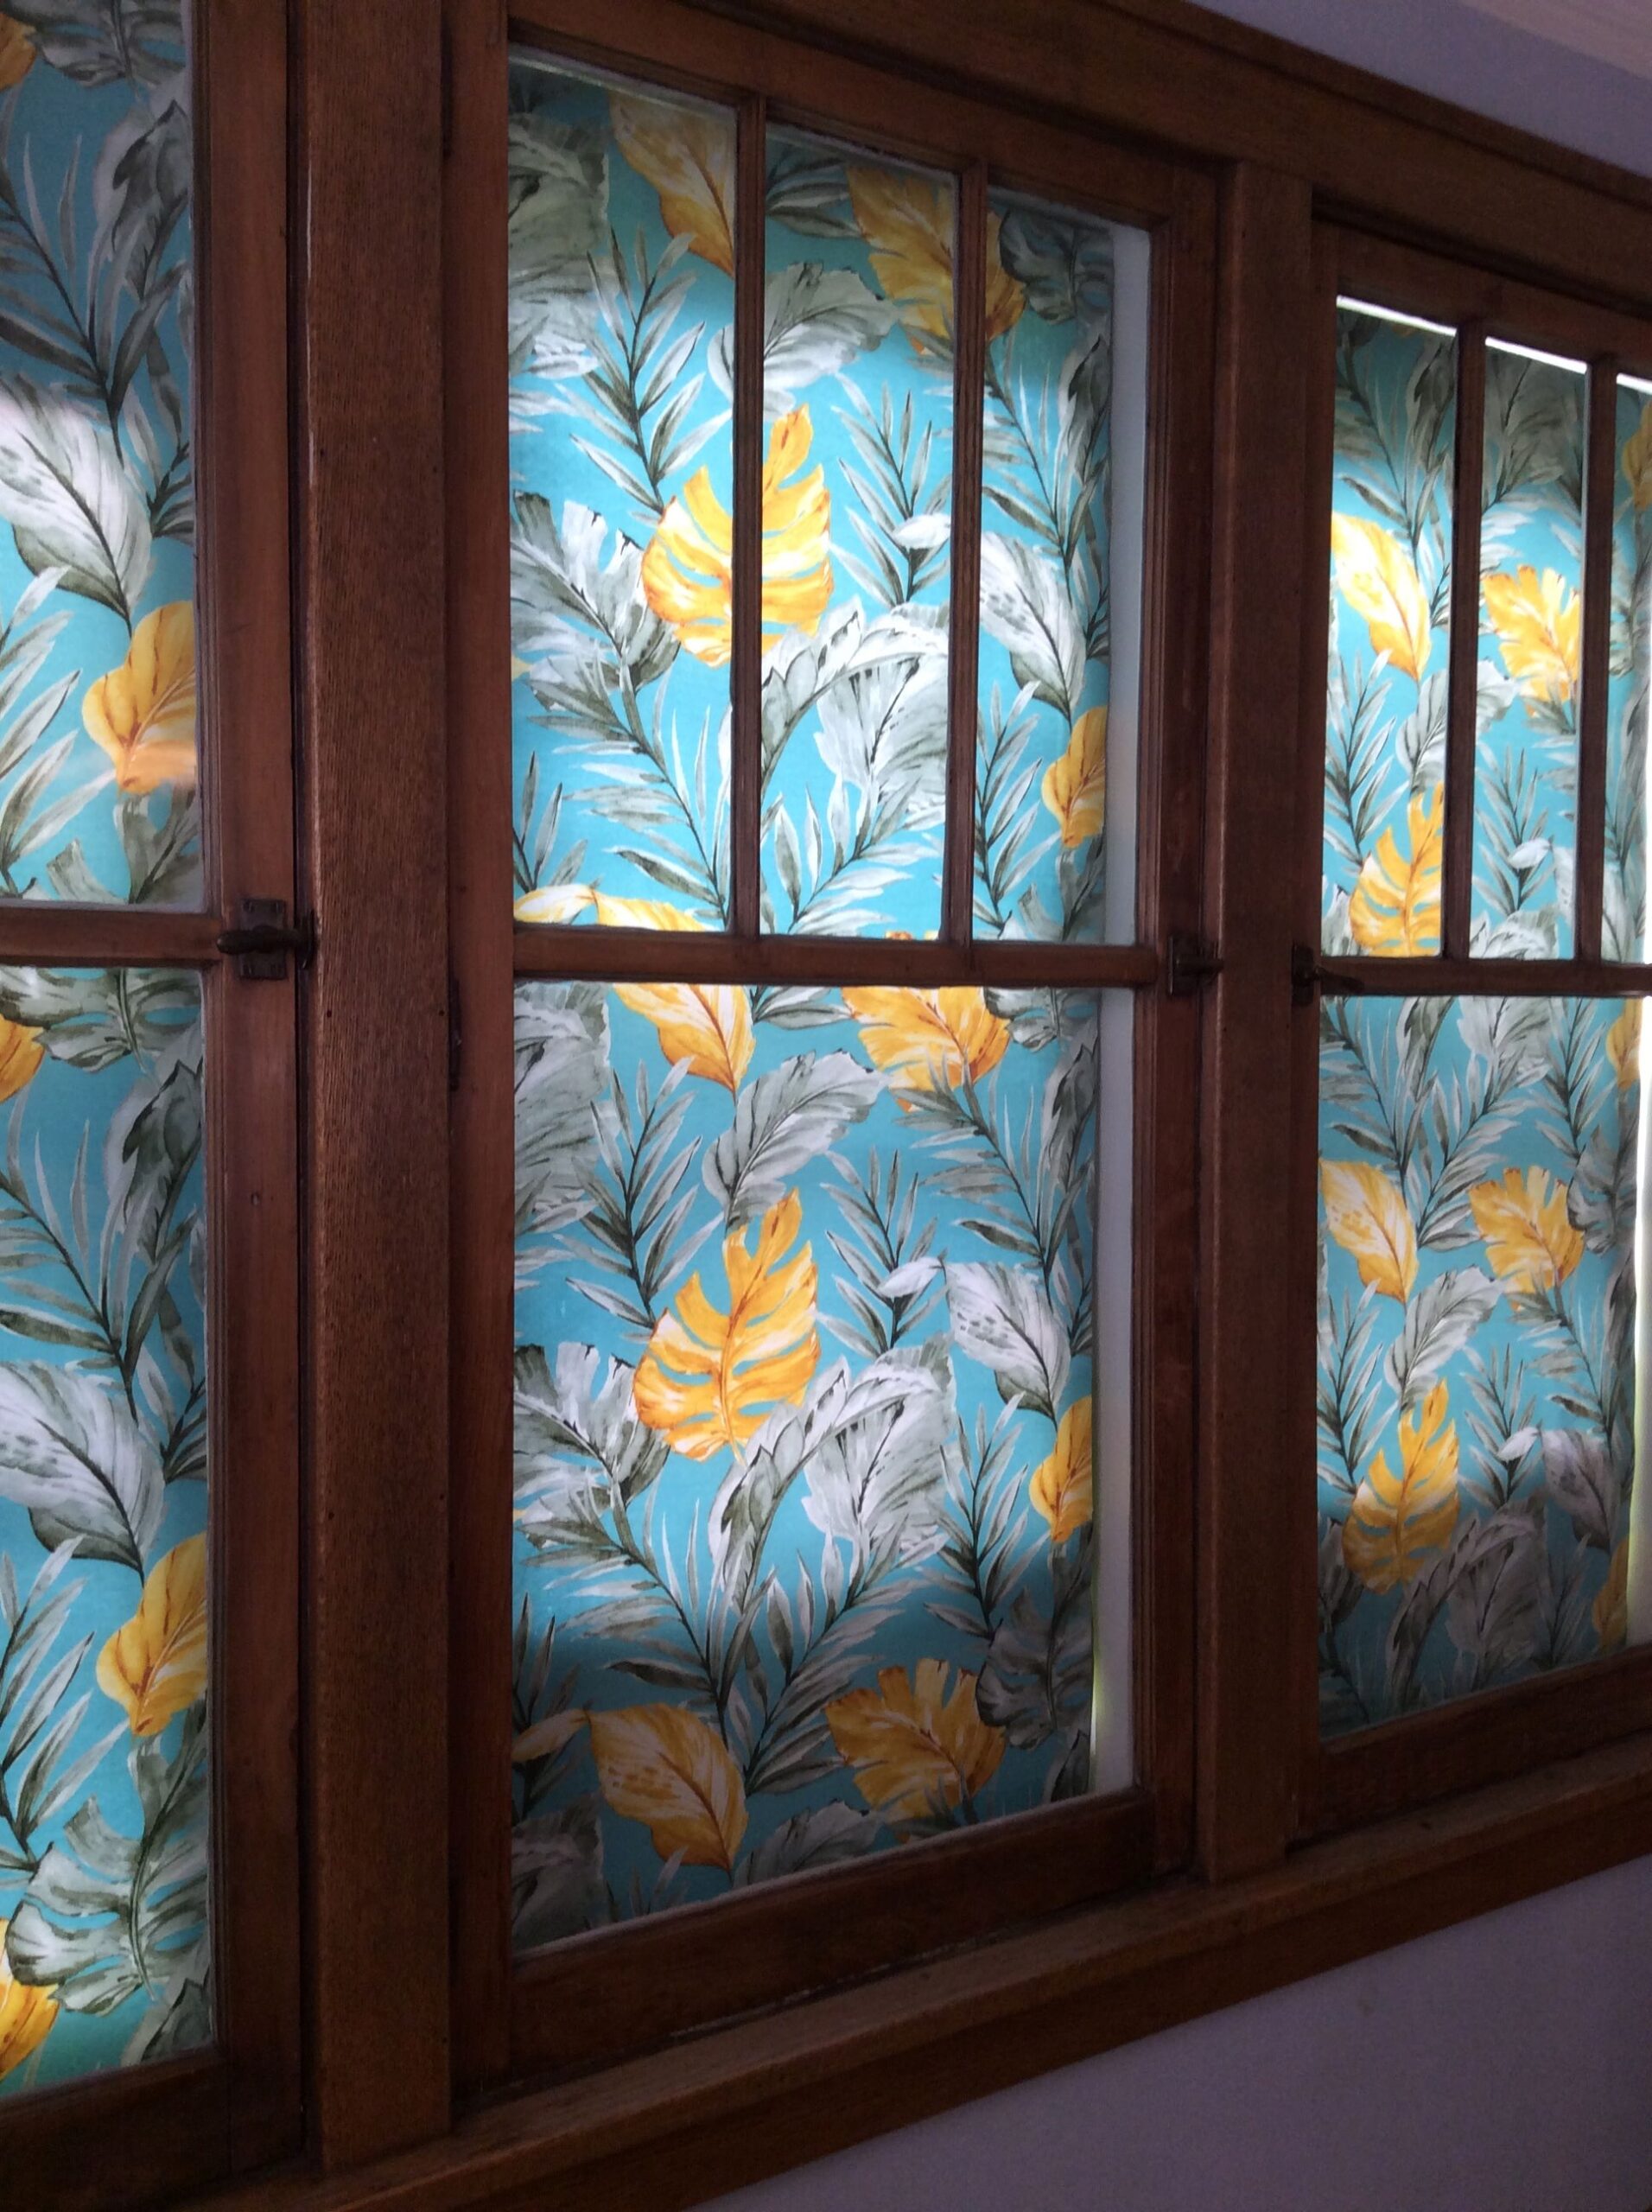
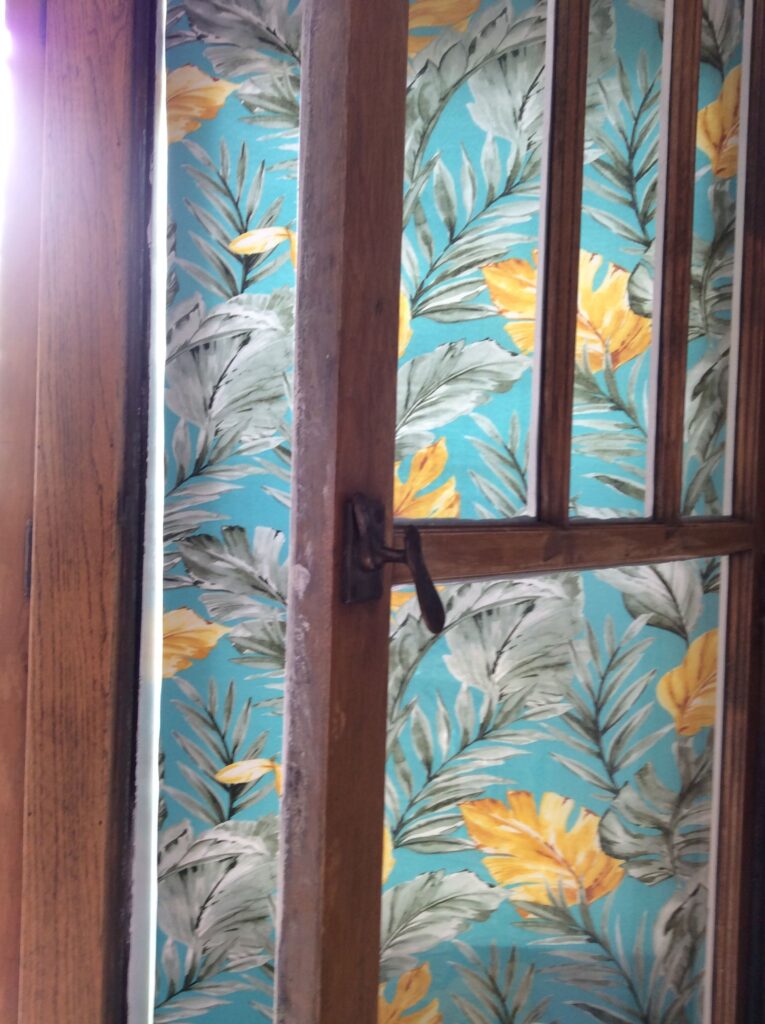
Place the covers inside the windows.

Back when I was using the plain foil insulation to cover the windows, I used blue painter’s tape to secure them. It took me a while to realize that putting the insulation behind the glass eliminated the need for it.

Though the same size, each panel is somewhat different because it took me a few tries to figure out what worked the best. That was a happy day. When I stumbled upon a solution, I felt relieved. It made me realize that while exploring and learning can be fun, it can also be fatiguing to be in the dark for too long. After all of this work, will I have anything I can use?

I like the effect of a big painting at the end of the room. While I like the fabric I chose for this project just fine, I don’t recall choosing it. What was I thinking? In any case, it makes the room feel cool (literally – yes – but I mean psychologically) which will be nice when it gets hot. And now that I have a pattern, changing the fabric should be straight forward. It helps that I documented what I did (e.g,, what fabric, what thread, machine settings, seam allowances, etc.).

This started with a paint job years ago when I couldn’t bring myself to put back the honeycomb blinds that never seemed quite right for these windows. One thing led to another and now here we are. Of course, now I’m thinking, why not curtains?

Window coverings from the outside.

Now that this project is done, I’ve started to do a “reset” and have taken the worktable back out to the garage.

This is the Night, Really Love

My better-late-than-never movie reactions

In addition to straightening up my physical office, this morning I took a minute to organize some digital files. In the process, I found a piece on two movies: This is the Night and Really Love. An updated/finished version of the June 2022 original is below.

I also came across some photos of pumpkins (top), which go even further back. I know this because last year was a bust squash-wise. Still, it was only recently that I used the last of some frozen puree to make pumpkin and black bean soup. I found the bee balm (below) in the same place, in a folder marked “Garden.” So, not so disorganized after all.

This is the Night (2021)

Spoiler Alert: Reading this before you see the movie This is the Night might lesson your enjoyment of discovering the various plot points on your own.

While I liked This is the Night (TITN), a movie written and directed by James DeMonaco, it pained Brian. However, it should be noted that he never nodded off. Not once. And that’s something. Nevertheless, the critics — at least those who bothered to review the movie — appear to be with Brian on this one. They hated it. 

Ignorance might have bolstered my enjoyment of the movie. One, I’m unfamiliar with DeMonaco’s previous work. So, warnings about how this movie is nothing like the Purge series are lost on me. Two, I know Rocky as a cultural phenomenon but I don’t know the movies, let alone Rocky III — the movie that’s at the center of TITN — specifically. In other words, I know the Rocky theme music and could pick out a movie still, assuming that Sylvester Stallone is boxing in it. Finally, I don’t presume to know the creator’s intent.

I know the Rocky theme music and could pick out a movie still, assuming that Sylvester Stallone is boxing in it.

If ever there’s a whiff of a contrived plot or hokey dialogue that points to the same, I will bail within twelve minutes of a Netflix movie. And as not to throw good time after bad, I can easily quit a movie halfway through it. Three-quarters. More. However, though TITN gave me pause at various points, I stuck with it. I’m not sure why. Nor can I find a review that captures it for me.

Where some critics saw a failed tribute to a popular movie, I saw a story where a popular movie served as the backdrop for characters who needed to wage their own fight and who — yes — were inspired by said movie. But it would be wrong to say that this movie was about Rocky, no matter what a superfan might post on a YouTube channel.

The movie was cartoonish and regardless of whether that was the intention, it worked for me. Nevertheless, I had my doubts along the way. For example, we begin with teens splashing around in a public pool, which I loved for the memories it evoked. That I could almost smell the chlorine promised a nostalgic style and the film delivered. But then a stock bully (Steve Lipman) is introduced when he razzes the protagonist, Anthony Dedea (Lucius Hoyos) (one of the protagonists, which I’ll explain later), for wearing a t-shirt in the pool. It’s cheesy. Fine. But the bully’s girlfriend (Madelyn Cline) sticks with him even though she disapproves of his mean behavior. And I have no love for a movie where a supposedly nice woman — even a naïve sixteen-year-old — is hooked up with a jerk just so we can see the part where she realizes that she likes the kind of self-conscious guy who wears his shirt in the pool.

Nevertheless, I stuck with it. Was it because of the way Rafe the Handsome Mailman (Constantine Rousouli) flirted with Anthony’s/“Shirty’s” older brother Christian (Jonah Hauer-King), hinting at a juicy side story that turned out to be much more than that? Was it wondering about whether the family restaurant could be saved? Did I just want to see how the Dedea mother (Naomi Watts) looked as a blonde or whether she would liberate herself from that cranky husband Vincent (Frank Grillo)? Or was it some other basic character-wants-x-will-she-get-it hook? Whatever kept me engaged, there was a definite moment when I decided to roll with it, despite the guy next to me who was sighing with every Rocky reference that went straight over my head.

It happens right after the Dedea family watches Rocky III in the theater. This is where our bully from the pool returns and makes it look like “Shirty” yells out, “Rocky is a pussy!” Now a mob is after the kid, including some out-of-place biker dudes whom DeMonaco must have resurrected from — as it happens — the 1986 Gary Busey film Eye of the Tiger. It’s ridiculous, just as some critics have complained. But then the manager of the movie house appears just in time to whisk the imperiled “Shirty” down a secret hallway and to a back door where he escapes. From that point, for reasons I can’t explain, I was on board. It’s possible that I wrested the wheel from the story’s creator. Either way, I enjoyed the ride.

So, when critics say that the fervor surrounding the premiere of Rocky III is unrealistic, pointing to the ticket lines that wrapped around the building (It’s surprising that no one took issue with the size of the theater. You could have filmed it in my living room.), or that it was laughable when an entire town turned on someone for hurling insults at “the greatest hero of our time,” or that the movie was overly sincere with one critic warning us not to give DeMonaco any credit by taking any of this with a grain of irony, I say phooey. I don’t care how DeMonaco would have me take it. I thought it was funny when the cops kicked “Shirty” and his friends out of the squad car when they realized that he’s the one who questioned — or supposedly questioned — Rocky’s manliness.

And now for an intermission…

… and we’re back!

There would be more cringey parts to come. The worst was when “Shirty’s” mother tells his brother Christian that she knows that he (Christian) is a cross-dresser. In fact, she insists that he put on a dress. She helps him put on a wig… and lipstick… Acceptance? Great. But this was a bit much. Maybe someone could pull off “blurry boundaries” without “incestuous” coming to mind. But this was bad. Cut to gratuitous nightclub scene (Every movie! Come on!) and more blurry boundaries where mom lurks after  dropping off her freshly-out Christian. I suspect that DeMonaco just needed “a moment” to extract an emotional response from his audience. He should have either smoothed over the rough edges of this scene, in which case he would have needed to start with a monster belt sander. Better yet, scrap it and try another approach.

Despite this, I stuck with the movie and discovered that all of these odd little parts — save a few that left even this sympathetic viewer scratching my head — add up to a satisfying and surprising and lovely ending. But wait! This only worked because there were accomplished actors who were able to wring water from a rock. Fine. The battle that the mother has with the father at the end of the movie is worth it. And when you consider that she was standing up for her non-conformist son who likes to wear dresses, it seems to me that Rocky is the perfect backdrop to this movie. And given the shift in the social climate where we are just beginning to see a transgender world, maybe even timely. It’s not a matter of giving anyone too much credit. It’s a matter of what I picked up on, regardless of anyone’s intent.

This brings us back to the idea of the multiple protagonists in this movie. The main character is obviously “Shirty,” right? That is to say Anthony who faces down the enemy and gets the girl. I’m not convinced. Though a small character by comparison, I would argue that it is the father who makes the biggest transformation when Mister That-would-be-stupid finally says yes. Or is it his wife, who finally puts her foot down? Or is it Christian who — at last — comes clean with his dad? I like a movie where you can make the case for multiple characters, even if the writer must choose one. For example, realizing that Troy Dyer (Ethan Hawke) is the protagonist of Reality Bites as opposed to the obvious choice, Lelaina Pierce (Winona Ryder), made the movie better for me. As for who Lelaina “ends up with,” I have strong opinions. But I’ll leave that debate between the generations for another time.

I don’t know if it will be worth it for you to get there, but I have no regrets about spending my time with This is the Night. Nevertheless, this is one case where I won’t be able to convince Brian that he might like this movie if he approached it with the right mindset. And judging from the comments elsewhere on the Internet, he holds the more popular view.

Really Love (2020)

We also didn’t see eye to eye on Really Love, directed by Angel Kristi Williams. I thought critic Roger Moore had it right: “…beautiful people doing beautiful things set to a silky smooth jazz score all do their best to atone for a script seriously thin on originality or conflict,” whereas Brian found a lot more to like about this film. There was something about a realistic evolution of a young romance that he liked, whereas I was bothered from the start. Again, Moore says it best: “They meet at a gallery show. He’s forward, fingering her necklace. She makes a lot of eye contact and allows it.” He also makes note of some “clunky dialog,” quoting the exact phrases that hung me up as well. The writer might have benefited from that belt sander — working up to super fine steel wool — once DeMonaco finished with it.

The ending of Really Love is predictable. It’s also lovely and it almost makes me forget the weird beginning and the glossed over middle where we are to accept without any evidence that there are real barriers to these two lovebirds to be together. I can’t recommend it. However, it is beautiful and it was fine to have on while I untangled some yarn and rolled it up into a ball. It kept my interest in that I wondered if the slow pace of the movie, which was great, was going anywhere. Alas, it was not.

Christmas Trees & Cats Don’t Mix

Happy New Year!

When I woke up this morning and looked out my bedroom window, the frosty tree limbs grabbed my attention. Maybe we should’ve cancelled coffee? Later, I found Brian standing in the middle of the alley looking like a caroling Peanuts character in his trapper hat. Through a crystal canopy that lined the way, he looked toward the golf course.

“It’s quite beautiful,” he said. “A real winter wonderland.”

He was on coffee duty. On Saturday mornings, it’s his job to set up the table and plug in the coffee pot in time to be ready for whoever shows up. When I moved my car to the front – also in preparation for our guests – I ran into Emily and Justin who were on their way over. When Emily stopped to notice the ice crystals that had formed on some dried wild flowers, “Close up!” was a natural thought. Despite the fancy camera and the tripod, these are mediocre snapshots.

Born of the pandemic, we’ve been hosting coffee for just over two years. Here’s what I posted about it in the early days:

“Three weeks ago, Brian Harmon and I bought a coffee urn. On Saturday mornings we’ve been offering coffee to the neighbors on the lawn (or in the garage if it rains). It’s BYOC (bring your own cup). I’ll be curious to see how far into the winter we can go before people quit coming. Or maybe that’s exactly when we’ll need such a thing, when we’re feeling even more cooped up. People have appreciated this (someone just left a medium roast from the Mississippi Market on my porch) and have done a good job of maintaining the proper social distance. We know that sometimes it might be just the two of us because it’s drop-in-if-you-feel-like-it, no RSVP needed. But so far that hasn’t happened. If you ever want to drop in to say hello, feel free. Rain or shine. We will be there.”

Rebekah Smith, Facebook, October 2, 2020

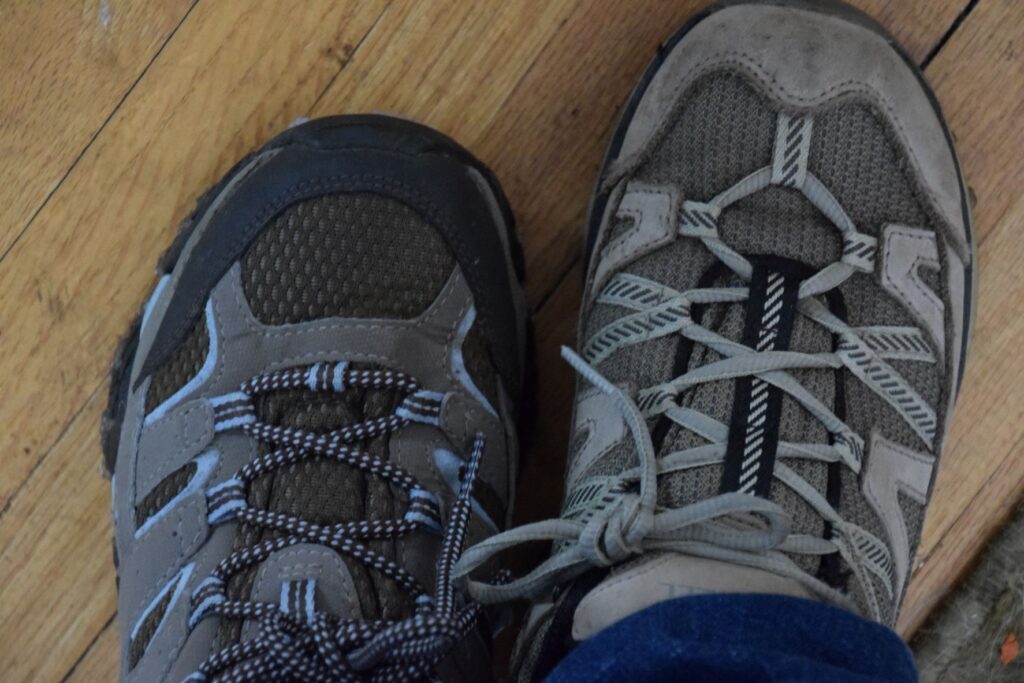
With all eyes on a beautiful sunny day, no one at coffee noticed that my shoes didn’t match. I didn’t catch it until I took them off, prompting me to quiz Brian.

“What’s wrong with this picture?”

Seeing Miss Ruby this morning was a treat. Zipped up in a comfy bag, she and her doll arrived on a Norwegian push sled pushed by her dad. Upon learning that her favorite song is Dancing Queen, Brian brought out the Red Sox Bluetooth speaker, a gift from his sister.

She let me off easy this year. It could have been a bedroom set.

After coffee, Brian usually makes a “rail hand breakfast,” a reference to the eggs and hash browns I used to order pre-pandemic. We haven’t been in a restaurant ever since a server at Pizza Lucé gave us her roller derby card. It was right before the first “safer in place”/lock down mandates. And I remember it feeling eerie sitting at the bar, like “Should we be doing this?”

Thank goodness for my friend Alex. We were discussing a time to meet and he mentioned Zoom, which was unknown to me at the time. “I’d rather meet in person,” I said. He set me straight. Along with the NBA shutting down when Rudy Gobert tested positive for Covid-19, it’s one of my first memories of “Oh, this is serious.” It was odd because I had recently attended a rally for Senator Bernie Sanders who was running for president. There were thousands of people there. I remember seeing one person – just one – with a mask and thinking, “What’s up with that?” The rally was at once exhilarating and foreboding. As the arena, twinkling with magical screens and going round and round and round in feverish waves, I couldn’t help but think: “Should we be doing this?” Now it’s strange to listen to the recordings I made that day. It was the last time since the onset of the pandemic that I have walked up to a random person on the street and said, “Can I ask you a question for my podcast?”

Maybe I’ve lost my nerve.

In addition to making breakfast on Saturdays, Brian names them. Today, he knocked on my office door, cracked it open and announced, “Your ‘Dancing Queen Irish Cream Rail Hand’ is ready.”

We covered “Dancing Queen,” Ruby’s favorite song. As for the Irish Cream, I assure you that coffee in the yard is usually alcohol-free. But it’s New Year’s Eve. So, when I brought out some chocolates, I grabbed a bottle just in case anyone might enjoy “a snort.” Is that how you say that? It’s not something I normally say but I heard it at coffee this morning and thought I’d give it a try.

Speaking of… Dancing Queen.

Speaking of… Irish cream.

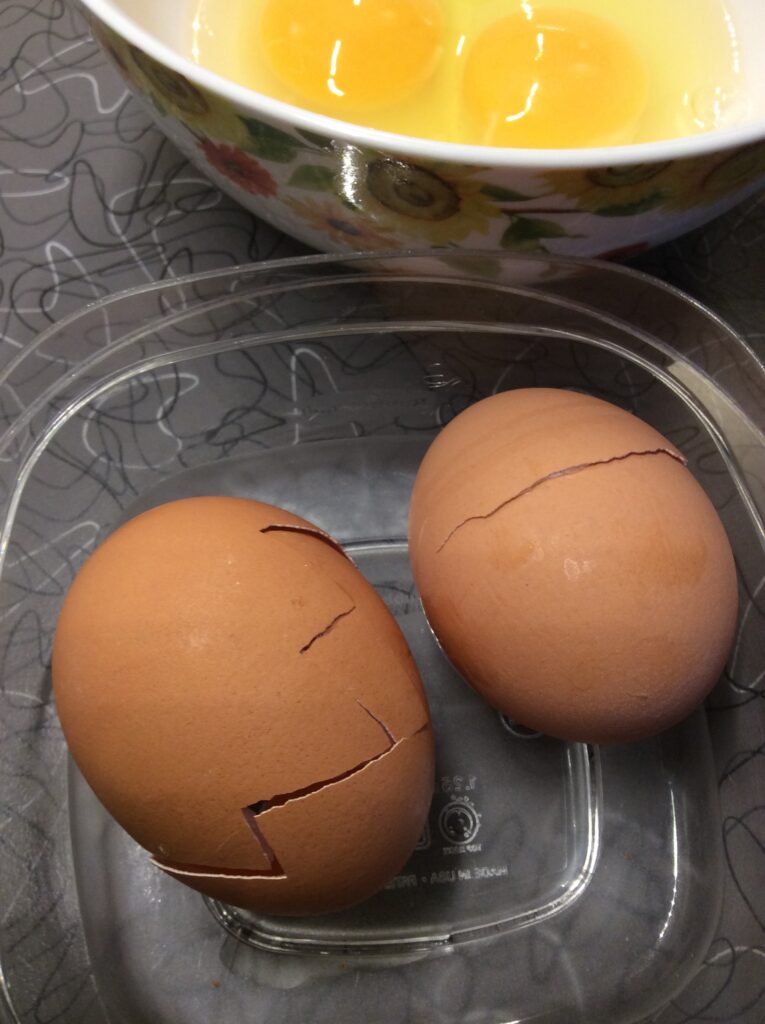
Speaking of breakfast… specifically eggs. Do you notice anything funny about this picture?

In one case (the eggshell on the right), the break is clean. In the other case (left), the egg is cracked with cartoon zigzags, like this:

As for Christmas, it was lovely. As Brian has said (and I have repeated too many times), “We’re up to our asses in socks, books and Clinique!” In fact, these words made it into my five-year journal, something I highly recommend that you keep:

Lovely Christmas Day with Brian and cats Michael and Bert. Chicken dinner reminded me of Grandma Choate. “We’re up to our asses in…”

Christmas, 2022 – Five-Year Journal, Rebekah Smith

The journal makes it easy to look back five years per page. For example, the entry above this was:

Brian made a roast for dinner. Nice gifts. Lots of stuff for woodworking. A router. Clamps. Power stapler…

Christmas, 2021 – Five-Year Journal, Rebekah Smith

And above that:

It’s hard to find a podcast that I like. Brian made a rail hand breakfast and we opened presents. He said he missed shopping this year and the Christmas vibe.

Christmas, 2020 – Five-Year Journal, Rebekah Smith

As I sit here right now, my ankles are warm thanks to my new socks and I am grateful.

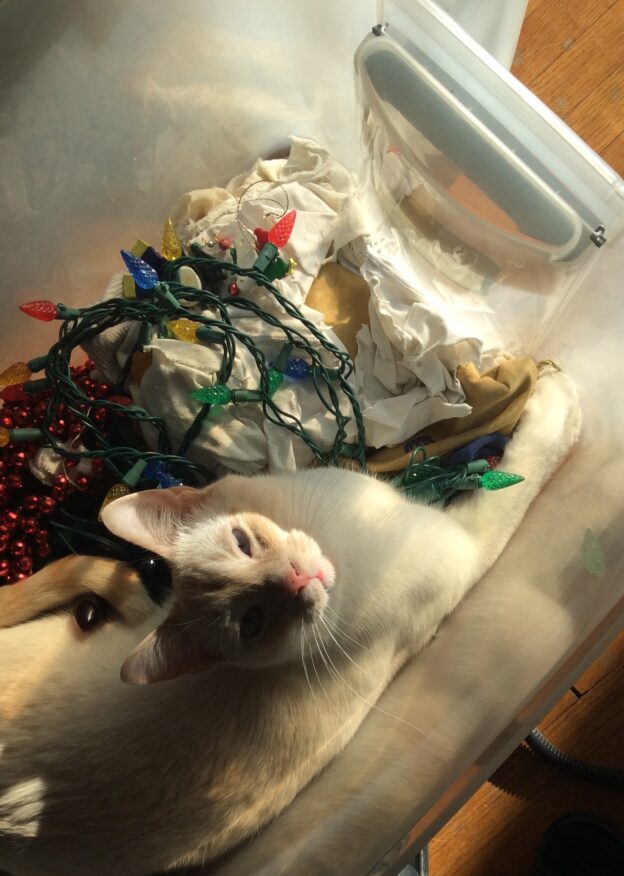
The big question this year was whether to put up a tree. For the past few years, we’ve been skipping it, partly due to these two clowns:

Now that Michael and Bert are older, I thought maybe they could handle it.

I was wrong.

They cannot handle it.

“No one can see me, right?”

Bert didn’t get interested in the tree until after we decorated it. And then he proceeded to undo it.

Captain Innocent.

It was lovely for about a minute. But now the tree is a mess because I’ve given up on fluffing it up and rearranging the lights every morning. So, I’ll probably take it down sooner than I normally would, which is just as well. Valentine’s Day is late for boughs of holly.

We were supposed to look at cross country skis today. Maybe tomorrow? Tonight, there will be a movie because my friend Craig insisted that I watch The Glass Onion. The coffee crowd agreed. We’re guaranteed to love it. Good. The last movie that Brian and I watched together was The Vanishing. As a palate cleanser afterwards, we went to Tom Papa. It was a good movie (I think). But it was intense. Tragic. Sad. Disturbing. Usually, my kind of movie. Not so much Brian. We still haven’t talked about it. Not much. Brian called it a story about breaking from procedures. Initially I saw it about – not greed exactly – but shifting morality. Pivotal escalating choices. However, the more I think about it, the more I like Brian’s perspective.

At coffee, Ralph said that he was in a Quaker group that would bring in the New Year with a meditation. From 11:30 p.m. until midnight, they would sit together in silence, except for the ticking of a thousand clocks. None of them synced. Insert smiley face here.

So, that’s the report, as disjointed as it might be.

Happy 2023.

Rebekah

Broken Mop Handle

In yet another installment of “There, I fixed it!” we have a mop handle repair.

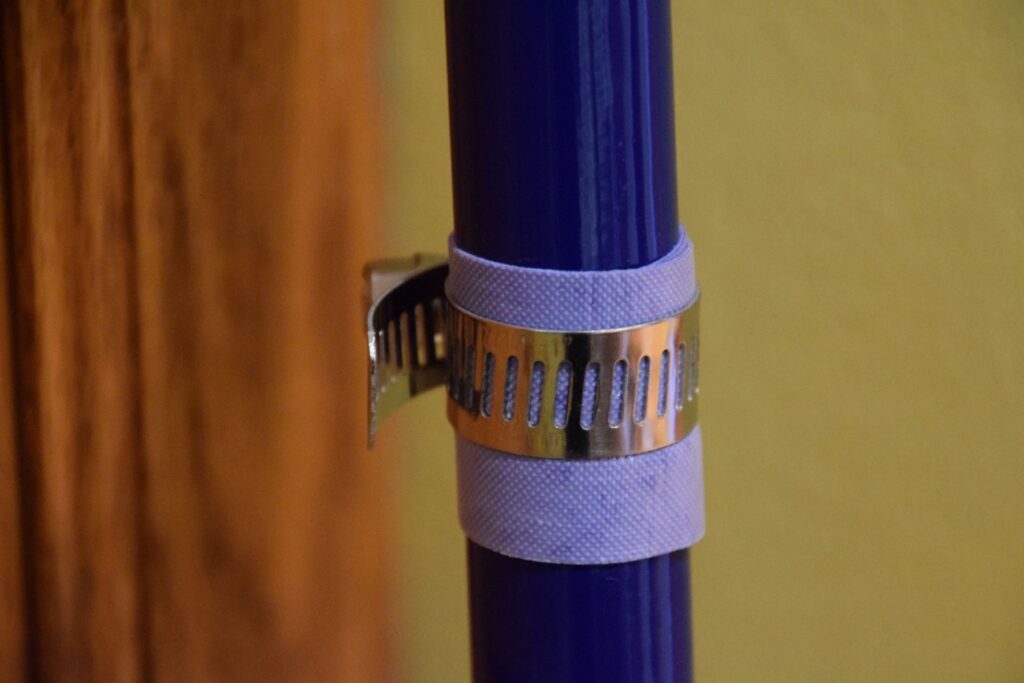
The handle came in two pieces that were screwed together with plastic threads on the inside of the rod. At least that’s how I remember it. Initially, I put a Band-Aid on the inside of the wider piece to add some grip and tension. It worked but required periodic attention. I can’t vouch for my current solution. However, five minutes after the repair it’s rock solid. As before, I padded the inside of the wider rod. This time I used a dab of tape that Brian bought for his tennis racket. I tapped the rods into place with a mallet. Then I covered the seam with more tape. Finally, I added a hose clamp. I wanted this mop to know that I meant business!

As with most projects like these, it required a stop at YouTube. While I had the inspiration to use a hose clamp, I didn’t actually know how these clamps worked. Now that I see how turning the screw feeds the band through a slot and tightens it, once again I’m in awe of tools. Sometimes I can be in the garage and screwing two boards together when – for a flash – I’m aware of how amazing it is that we live in a world were there are screws and screw drivers and electric drills… The history of joinery must be fasten-ating!

Fascinating. I never thought of that. To fasten. To fascinate. To hold. To hold one’s attention. To grip. The two words must be related, right?

In other YouTube news, I found instructions for making a jig so that I can make straight and uniform cross cuts with my circular saw. I’ve gotten by in the past but I want to build on my skills and make cleaner more precise cuts. The guy in the video puts the thing together in a few minutes. It took me two days (albeit not full days!) and three trips to the hardware store to get it right. I enjoyed figuring it out. At the same time, these days I feel nagged by other chores and projects that are always lurking in the background. I miss getting lost in a project where nothing else exists.

So, did the jig work. Yes!

As I was assembling, disassembling and reassembling my jig, a scene from Sex in the City kept looping through my head. In it, Miranda who is obviously pregnant is buying a wedding dress. When the store clerk suggests white she says, “The jig is up!” But it’s only now that I’m thinking about what it means. Would you hear “The jig is up!” in a factory. Like “order up”? Then maybe it came to mean that I recognize your pattern (a pattern of deceit?) and you can no longer fool me?

It was a nice theory, but it would appear that I’m wrong. After a quick search, most sources, including a second-hand account of what the OED has to say on the matter, attribute the phrase to an Elizabethan dance, the jig. “The dance is up!” In addition, jig also came to mean a trick or a practical joke. In other words, “The jig is up! Your trick has been exposed!”

Sometimes I think it would be fun to dedicate a YouTube channel to me following the directions for all manner of things I find on other channels. How to make fresh noodles. How to tie a quilt. How to remove a broken screw. But alas, it might lurk in the background along with the garage door that needs painting, the weeds that need pulling, rebooting a podcast that has been dormant, and outlining my next book.

I hope you are amazed by something today. Something simple. At least for a flash. And I hope that whatever you are doing, you can enjoy it fully. Those other things can wait their turn.

There, I fixed it.

It has been a long time since my friend Paul introduced me to a website that featured DIY plugger repairs. “There, I fixed it,” perfectly summed up the eyeglasses that were held together with zip ties or the mirror that was taped to a car. My latest low-budget solution indeed made me yell those words out loud. I solved a problem that had arose from the solution for a different problem, which in turn gave me an idea for a future episode of my long-dormant podcast, QuOTeD – The Question of the Day.

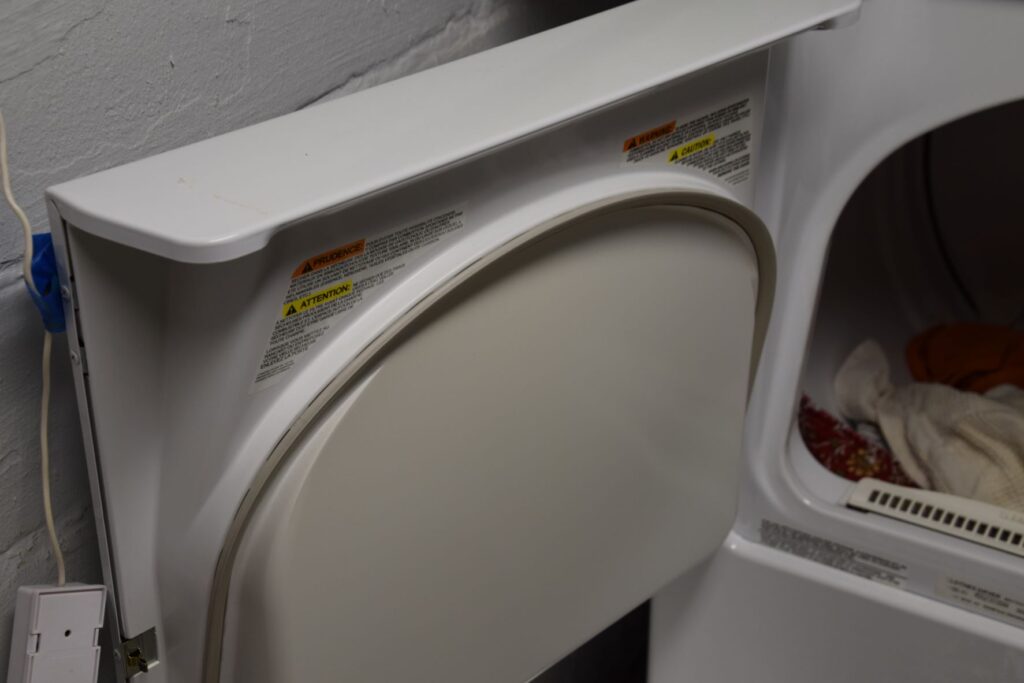
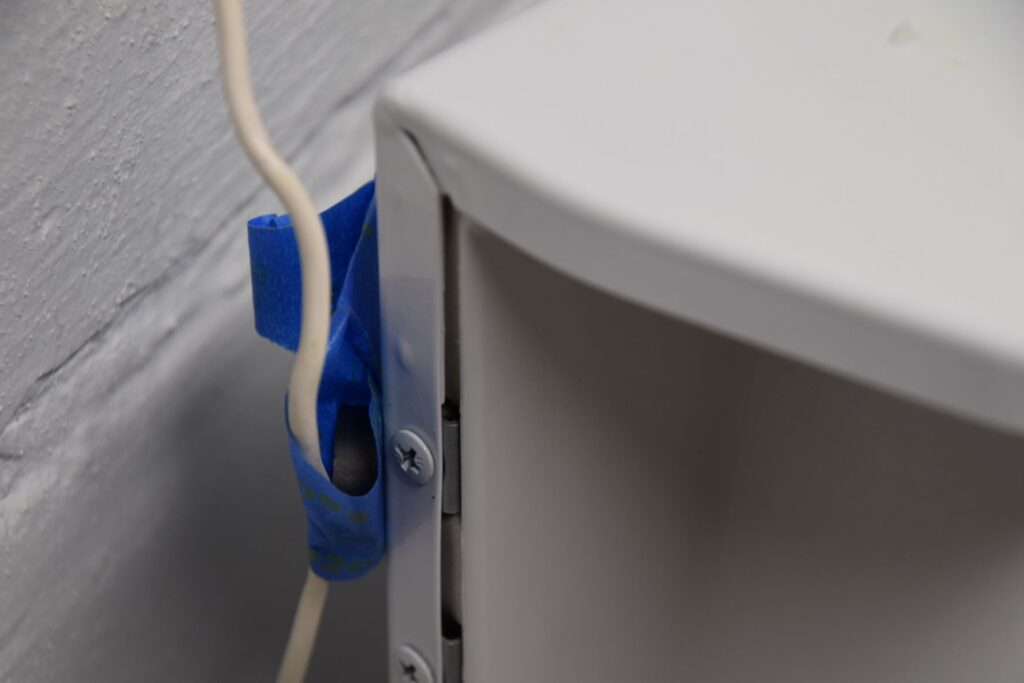
It only took 14 years of living in this house to realize that the door on the dryer is reversible. Making the switch would mean that I could transfer clothes from the washer to the dryer without the door blocking me. However, one improvement exposed the need for another one. The dryer isn’t level. Now the door swings closed from a resting state. It might be worse than the original problem was. The solution is to level the dryer. But until I get around to it, I’m using a magnet to hold the door open. It’s taped to a random wire that will be removed – again – when I get to it.

Hold dryer door open with magnet.
There’s a magnet buried in the blue tape.

In more fix-it news, I made some updates to the various websites that I manage. Had I been pinged by the social scientists who are collecting happiness data, it would have been a low point for me. But I don’t think it was the task itself that I hated. It was having to do it instead of something else. In fact, I might have preferred to troubleshoot websites over putting up the apples from my neighbor’s tree. In this case, any unhappiness I might have been feeling didn’t stem from a specific task, annoying that it might have been. But it was about the perceived or real pressure to do more than can be done in a day. I suppose one lesson here is to ignore the dire messages to make software upgrades until you can put it on the schedule. In the meantime, find your happiness in crossing your fingers and trusting that it’ll be fine.

Taking a walk this morning, Brian and I stumbled upon another swell fix-it job.

Cheap landlord or ingenious solution?

It’s nice when things fix themselves. I was late planting my garden this spring and on top of that, it appeared that I had planted some non-producing beans – if that’s such a thing. But then one day I was working in my yard and saw green beans hanging from the top of the arbor.

Nature doing its thing.

I wish the environment could fix itself on a timeline conducive to supporting life as we know it. Regardless, I’m still heartened by the bees that make the yard hum.

Bees go wild for the chives and sedum that line the back walk.
Chives and sedum make a pretty mix.

If only I would fix the compost, maybe Brian wouldn’t cringe whenever I hand him a bucket to empty. It’s pretty wild back there.

Can you spot the compost bin in this jungle?
You’ll have to fight the raspberries to get to it!

There’s a lot yet to fix around here. But it’s important to remember to stop and take pictures of the flowers.

As for my question, given that it took me over a decade to make a simple improvement – reversing the swing on the dryer door – I’m wondering if others have such projects. Are there easy home improvements or repairs that you put off doing until, for reasons you might not fully understand, you woke up and decided today is the day. You tackle a task only to wonder: What took me so long?

Not Bored but Maybe Boring

Brian groaned when he realized the purpose of our post-lunch errand. Nevertheless, he was relieved to find out that my haul would fit into a grocery bag. In other words, it wasn’t another chair.

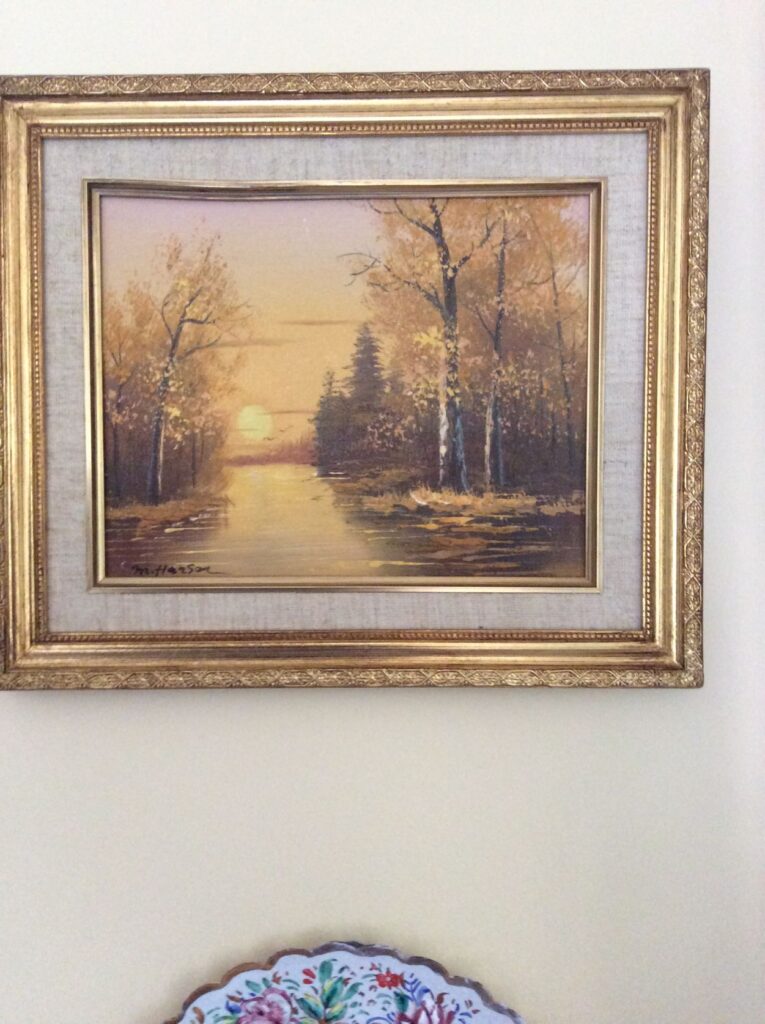
I love my recent acquisitions, two paintings I found on FreeCycle. The first is a sunset – or a sunrise? – that I see as I turn around to face the hallway at the top of the stairs.

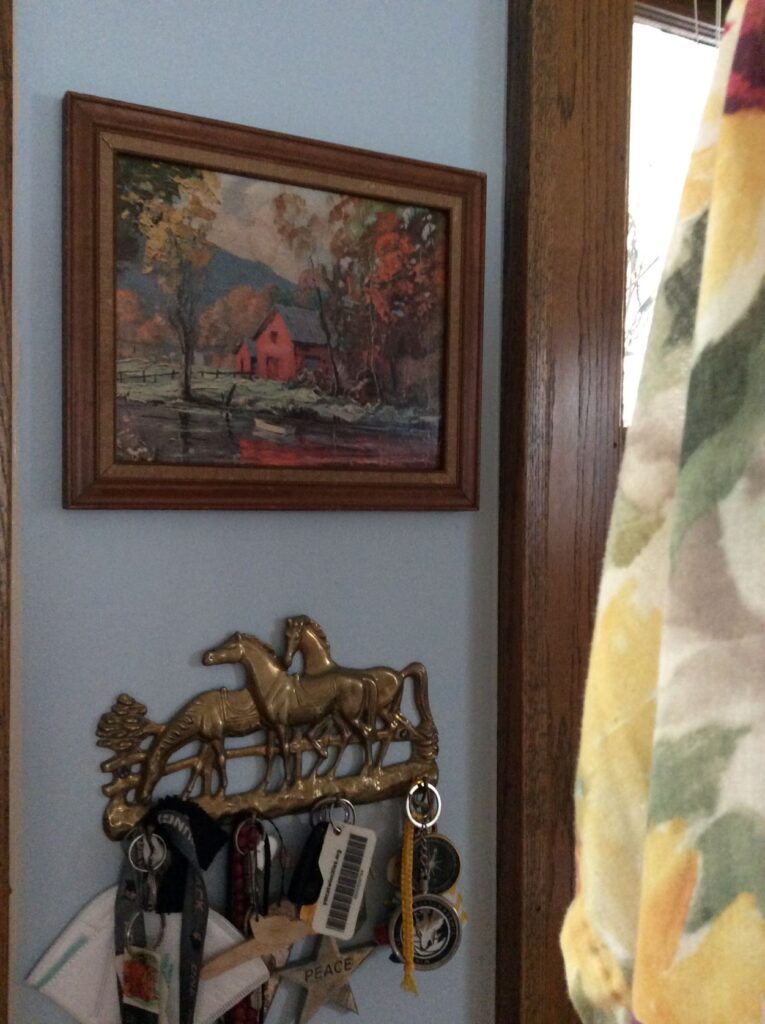
The second is a place that feels familiar, though I’ve never been there.

If you ask me what I’ve been up to, this is what I’ll tell you. I hung up two paintings the same day I got them. If there’s time and you seem interested, we could talk about how something as simple as a free painting can lift a person’s spirits or how these random paintings about which I felt lukewarm belong here. For the person who gave them away, these paintings were clutter or reminiscent of a time best forgotten or just ugly. Or maybe it was painful to give away her mother’s art that was collected over the span of a childhood? But she’s moving to Denver. Starting over after a messy divorce. No room. Downsize, like it or not. Or maybe she read Marie Kondo’s book and said, “These colors don’t spark joy! Get them out!”

Maybe.

Maybe.

Maybe.

Or I might tell you about how I’ve been replacing the boards on my deck and how being done with hauling 16-footers on top of my car (after hours of picking through them at the warehouse, ugh!) is a cause for celebration, even though there’s still more to do.

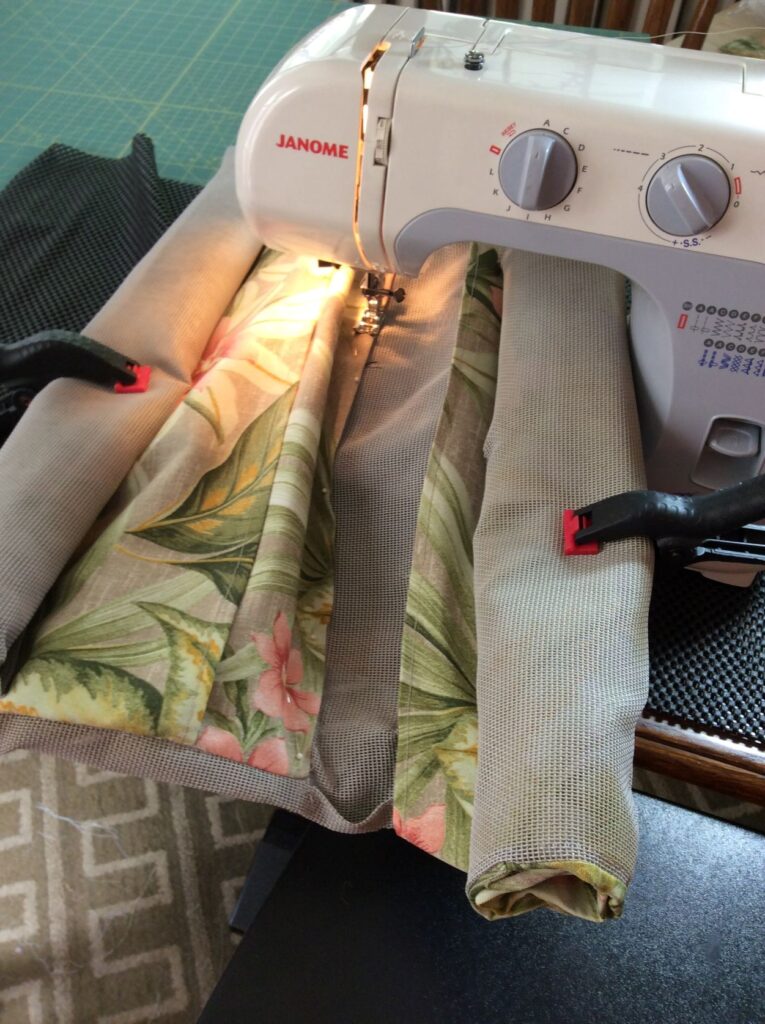
Or – being of limited skills in the way of needle arts – how I cannot believe that I managed to recover four patio chairs using my consumer-end sewing machine. It was tricky but not as hard as sewing a patch on some old jeans.

It’s an out-of-body experience to look at a finished product (mostly finished, I might add some buttons but I’m counting it as not to despair). It’s the same feeling I get whenever I see the door at the top of the stairs. It was caked with layers of brittle paint and it was a huge job to repaint it. The ceiling in the dining room. The office I’m sitting in right now used to be Pepto Bismol pink. These are good things to remember when you’re in the middle of a never-ending project like when there are still boards to cut, clamp and screw down to the framing of the deck. With every swing of the hammer, I wonder “Am I about to ruin my house?”

“I’m not bored but I might be boring.”

That’s what I told my mother when we were catching up this morning. She called just as she was sitting down with a fresh cup of coffee and just as I was about to do the same.

Boring is no badge of honor anymore than eschewing television makes you better than me. I would welcome adventure. But it’s still cool to take pleasure in second-hand art and to think, “Perfect! I love it.” And then to put away the drill that has a place because you’ve already done the boring task of organizing your tools, which didn’t bore you at all.

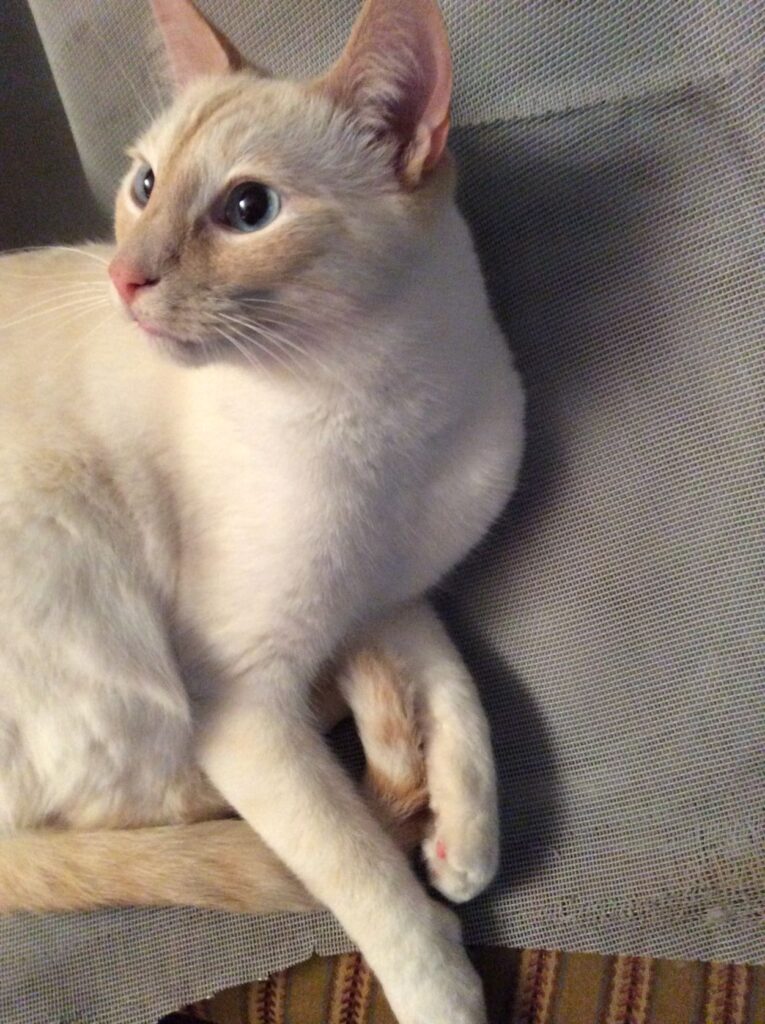
Bert claiming the materials to make the seat cushions. He loved the plastic mesh that I was able to reuse after reinforcing it with fabric.
“You’re not going to throw out these filthy cushions are you?”

I did document the patio chair project and keep meaning to post some tips, if not for the random person who might find it useful (Spoiler alert: pockets, as in shams, instead of zippers), then for me. Because it’s already starting to feel like someone else must have done it and I’m not sure I could do it again.