In the summer of 2020, I spent some time organizing the garage. This included facing the yogurt containers full of miscellaneous screws, nails, paperclips and the random cafe curtain ring. It was a tiresome task that used up my allotment of decision-making power for the day. Nevertheless, it felt good to do it. Tidying up always gives me a sense of accomplishment. And it’s particularly satisfying when I can benefit from my effort down the road, as I recently did.
I was, once again, organizing the garage and needed some really short screws that could be used to attach container lids to the bottom of a shelf. At first, it was looking like a trip to the hardware store was in order. But then I remembered that not only did I save some random screws, I organized them in such a way that they could be useful.
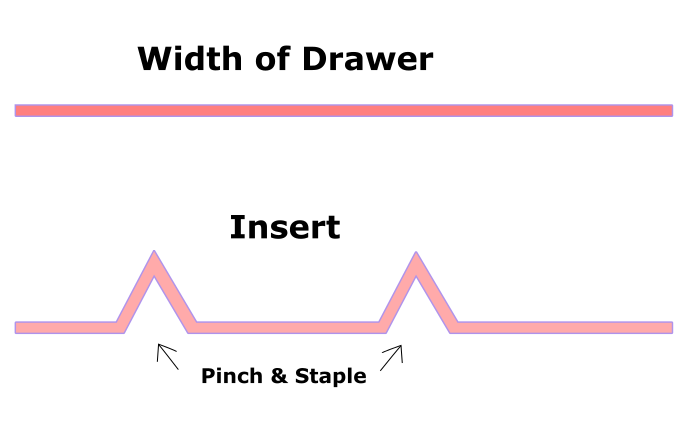
In one case, I used scraps of foil insulation to further divide the drawers in the hardware organizer that I was using. Other materials like a piece of thin cardboard would also work. Take a strip that is the width of and a bit longer than the drawer. Make a crease for however many dividers you want, being careful that the resulting divider doesn’t exceed the height of the drawer. Pinch. Staple. Insert.
Here’s a picture where you can see how two different types of nails are separated within the same drawer:
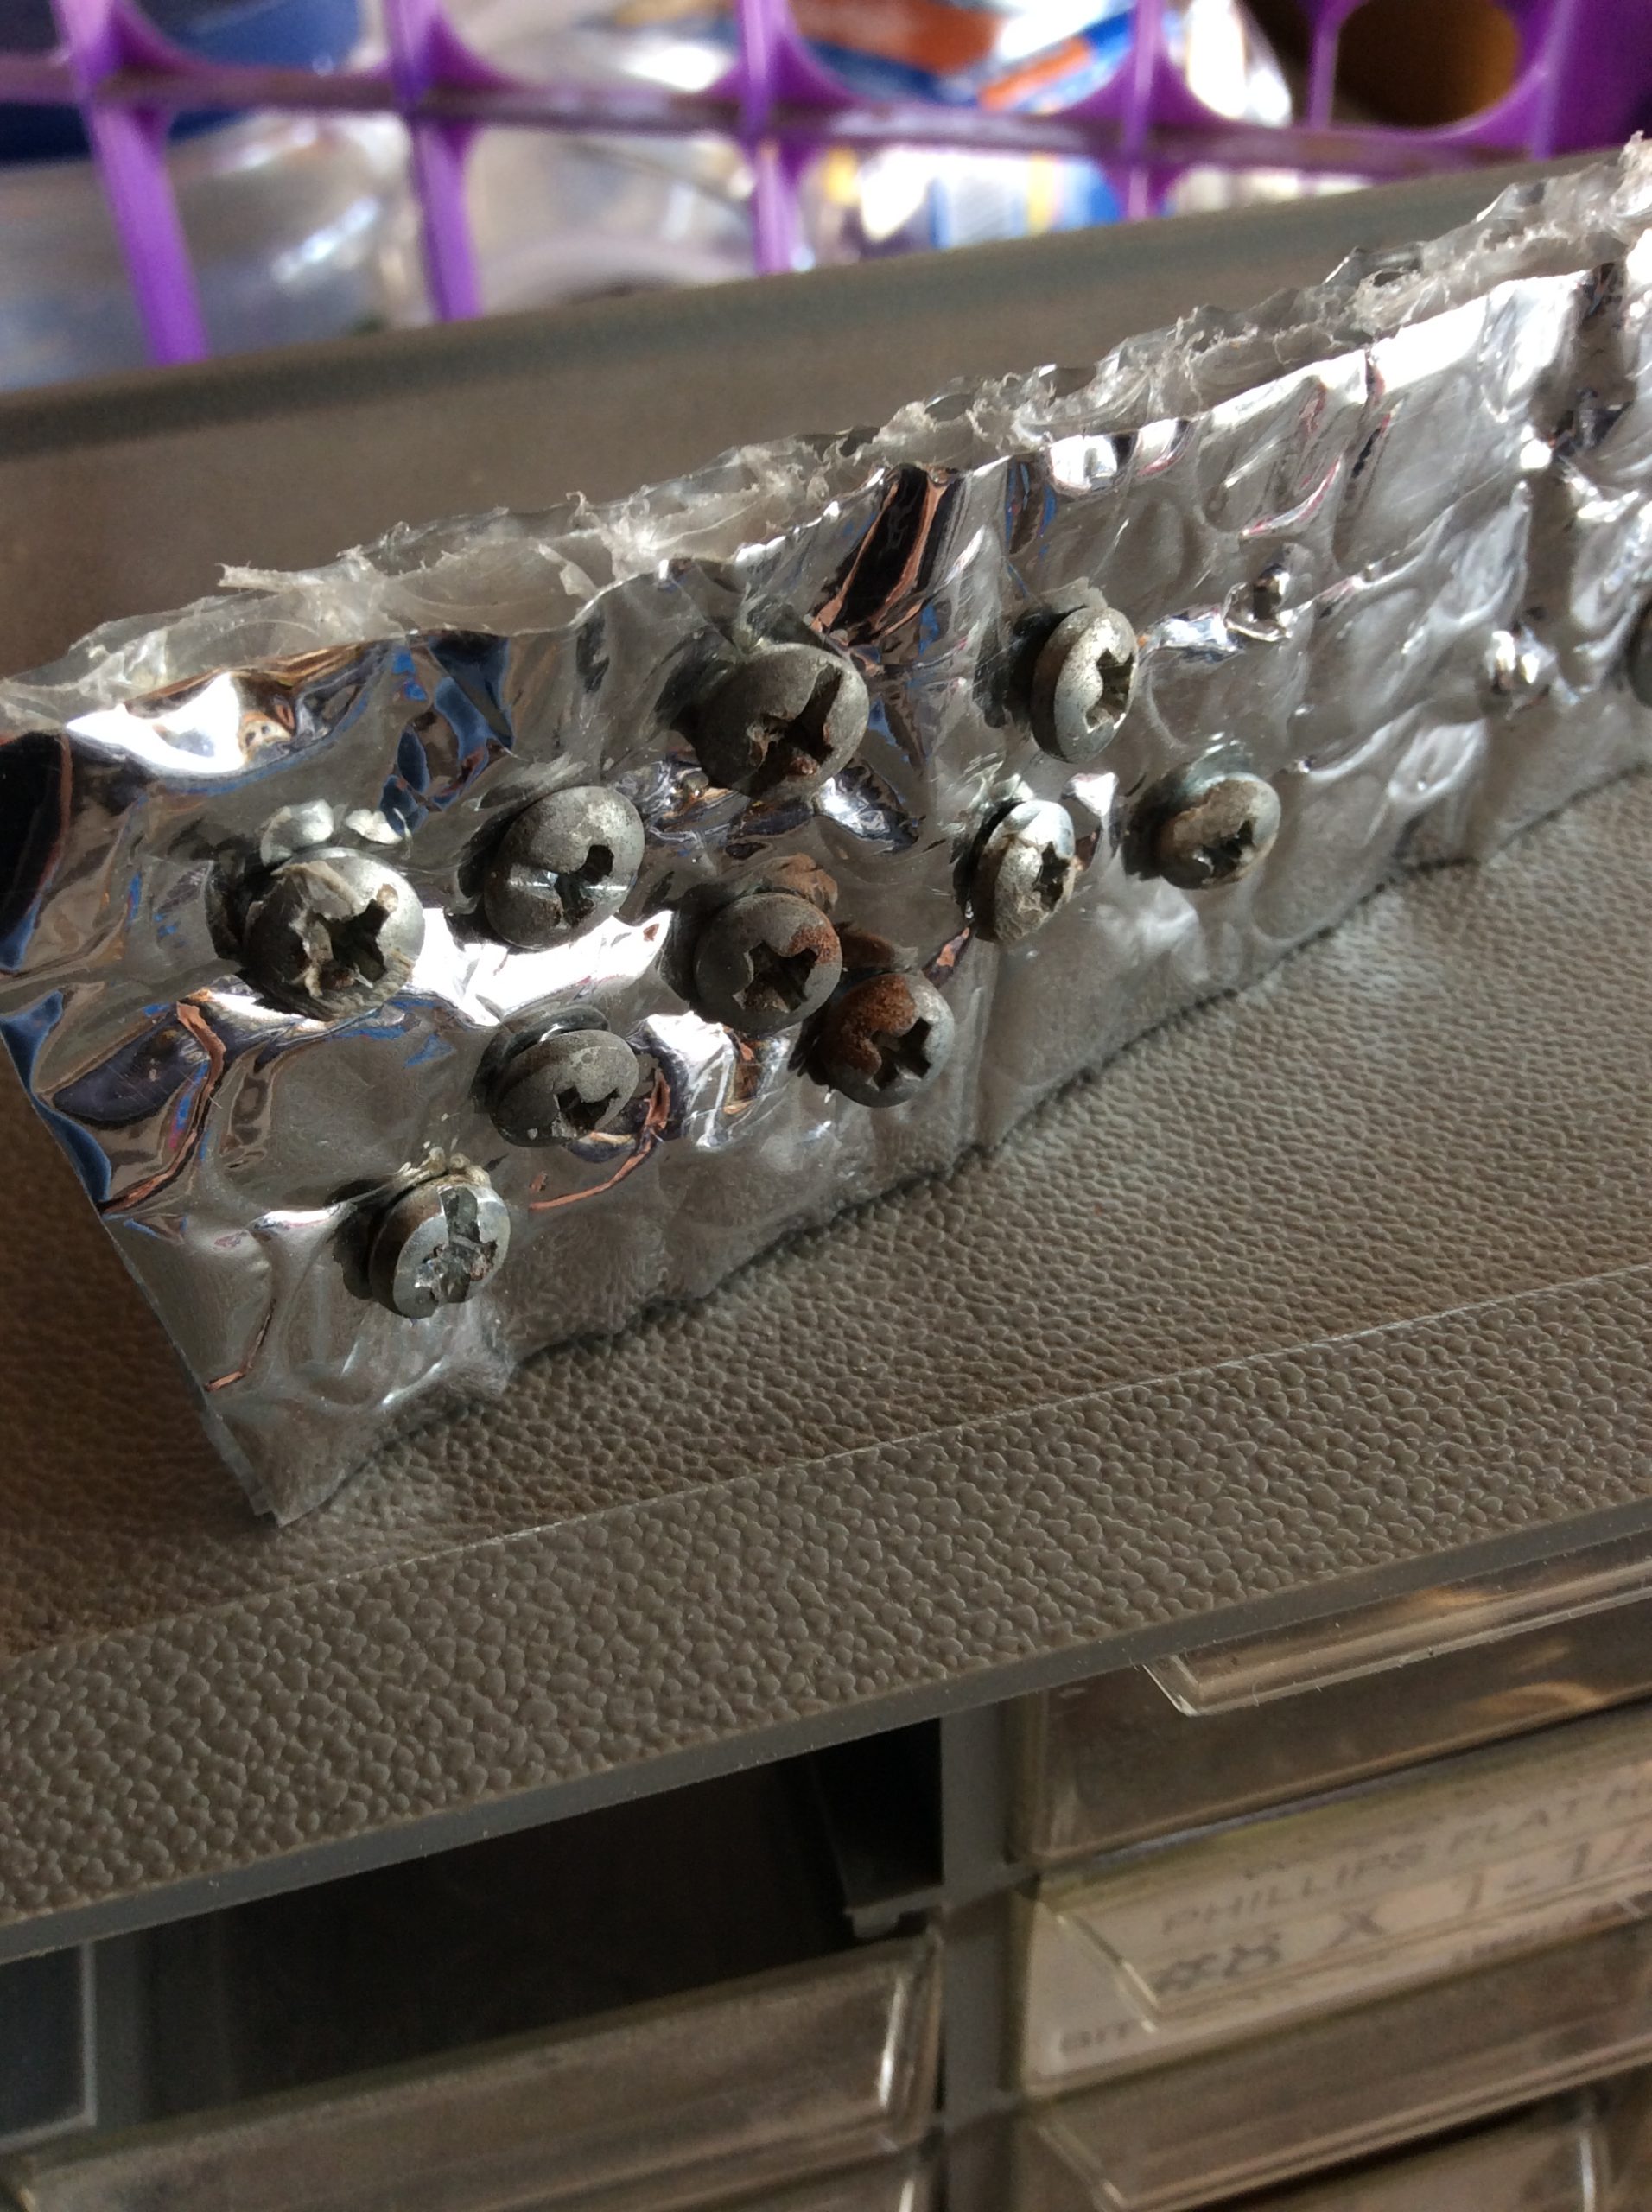
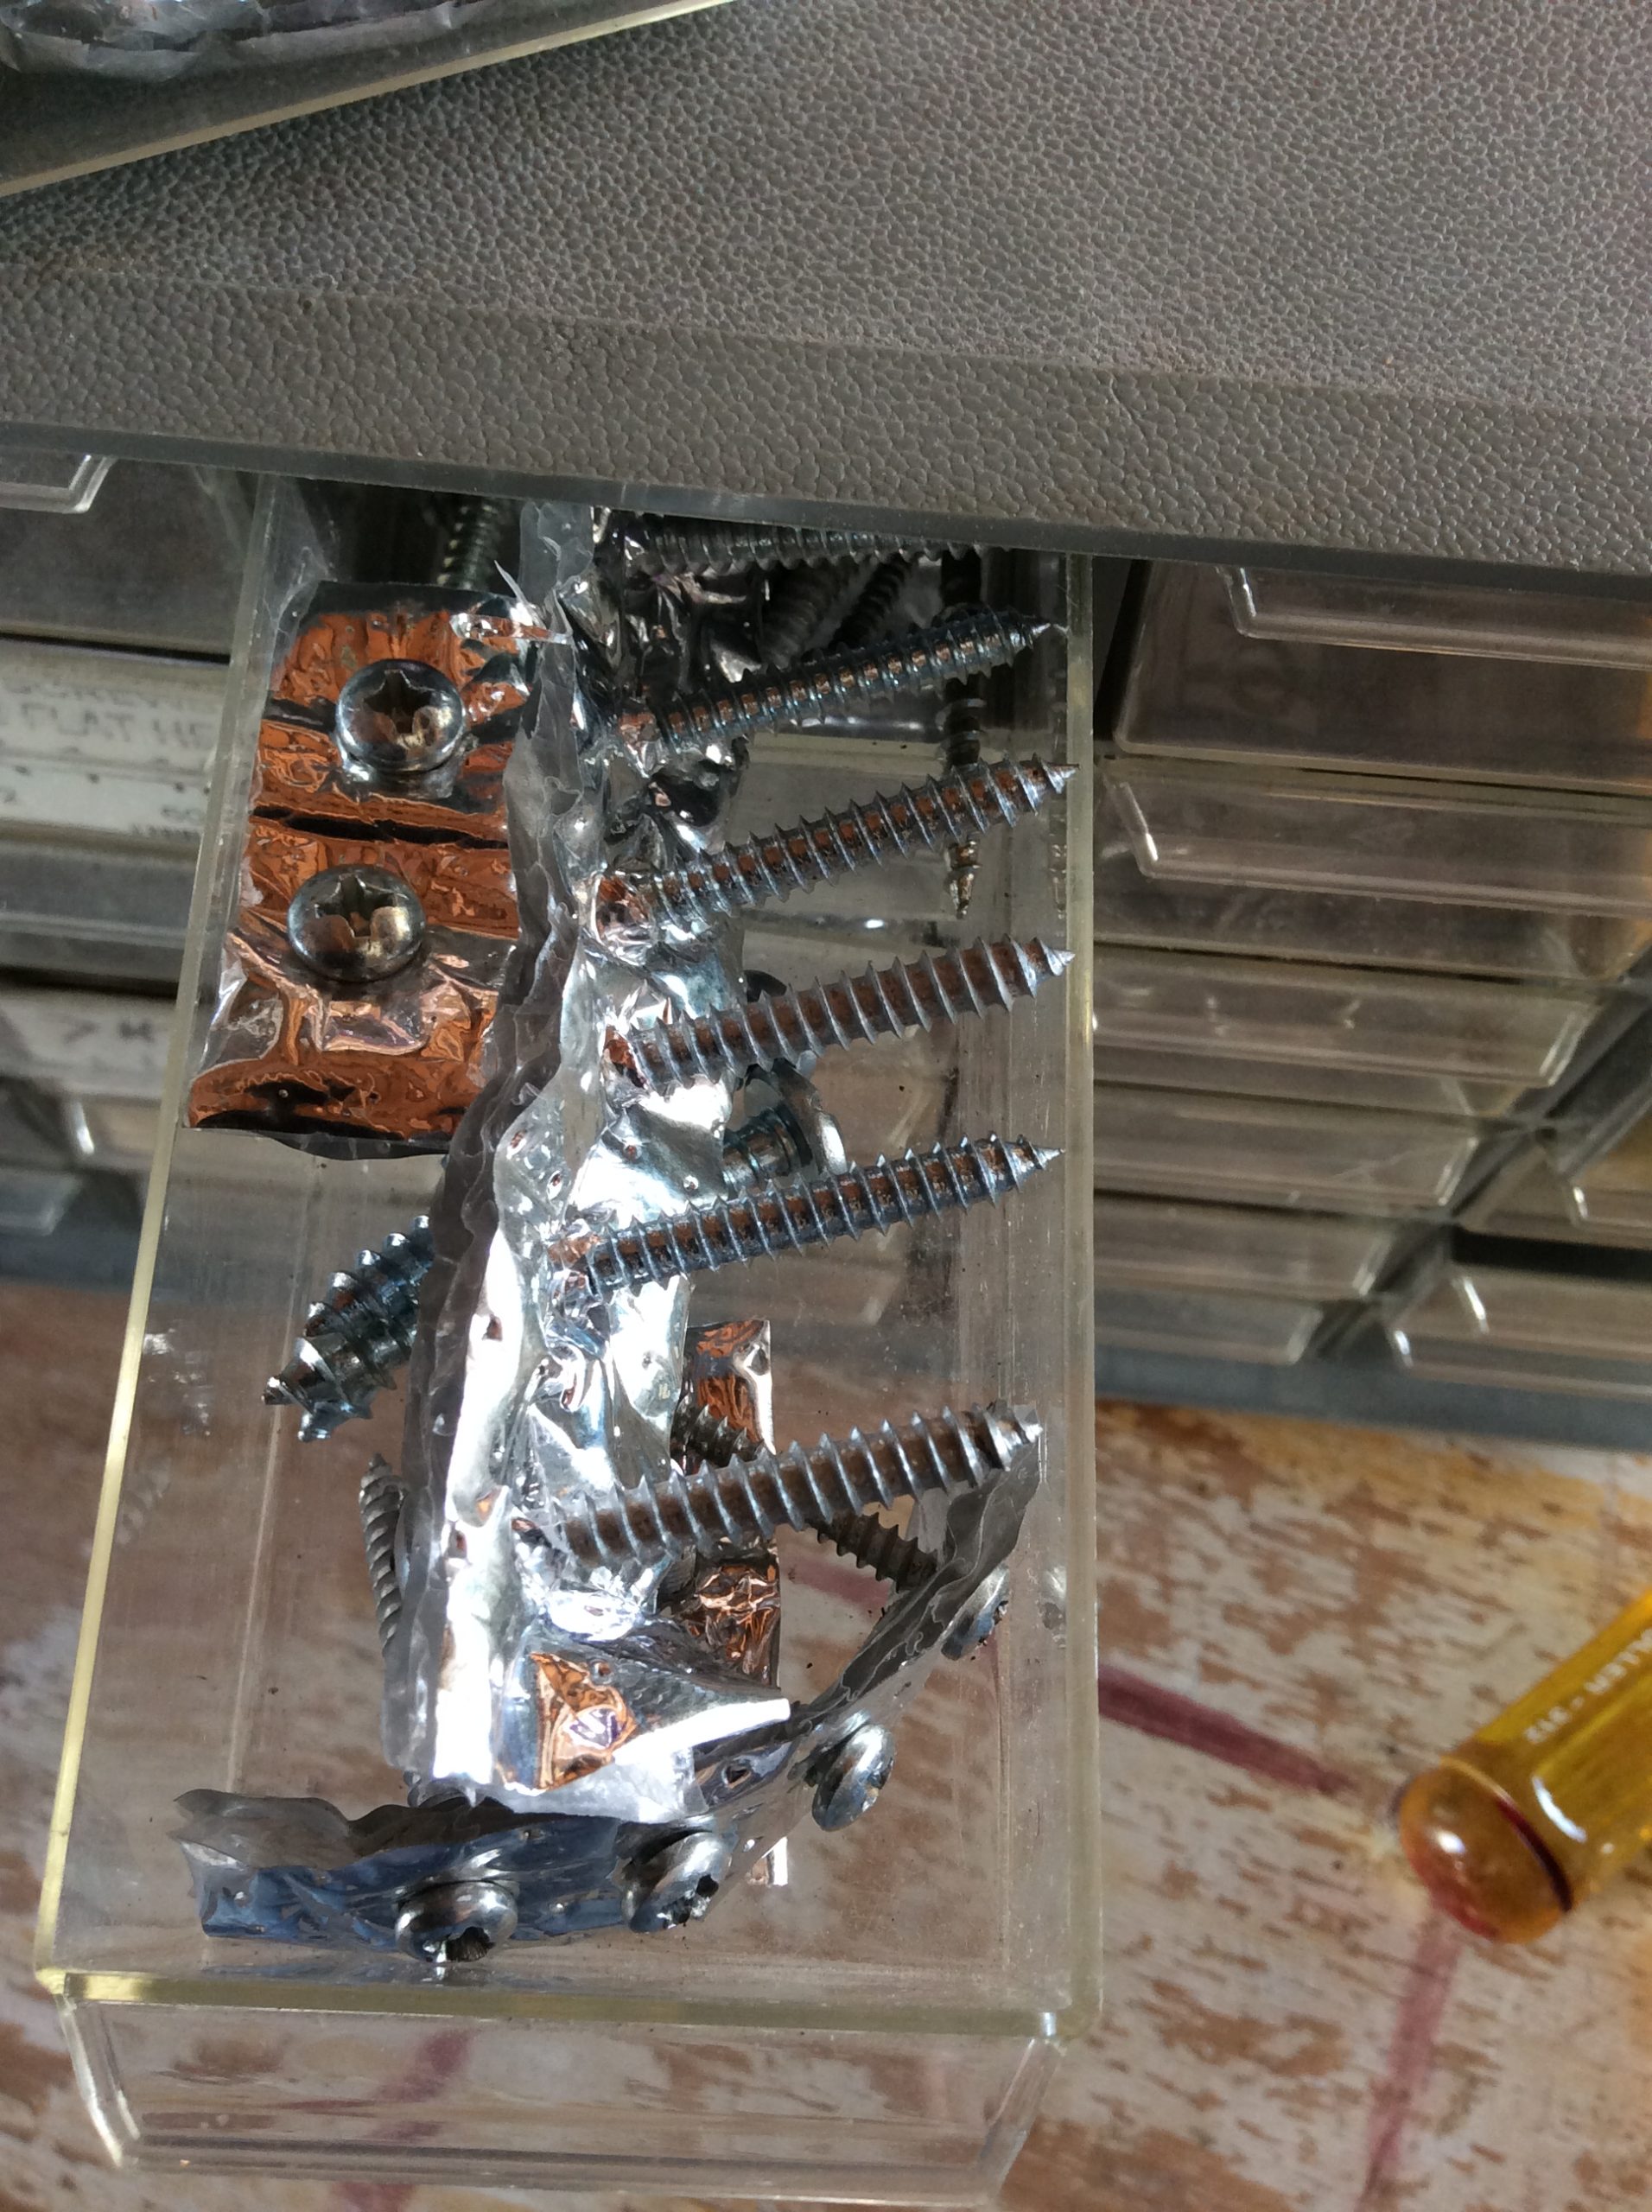
In another case, where I had a handful of onesies and twosies, I punched the screws through a scrap of foil insulation. This keeps them together nicely.
Then you can just put these little sheet of screws in a drawer:
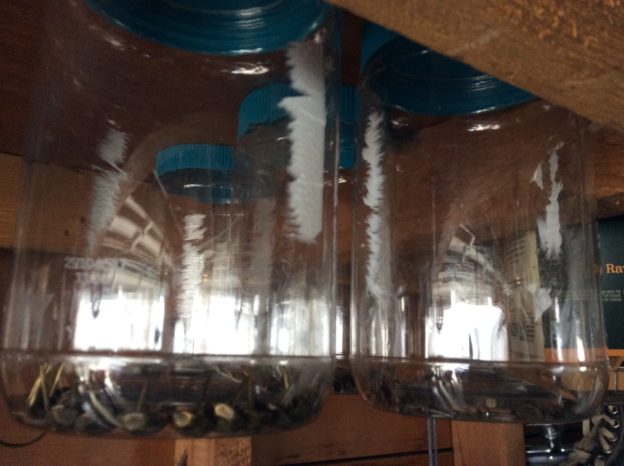
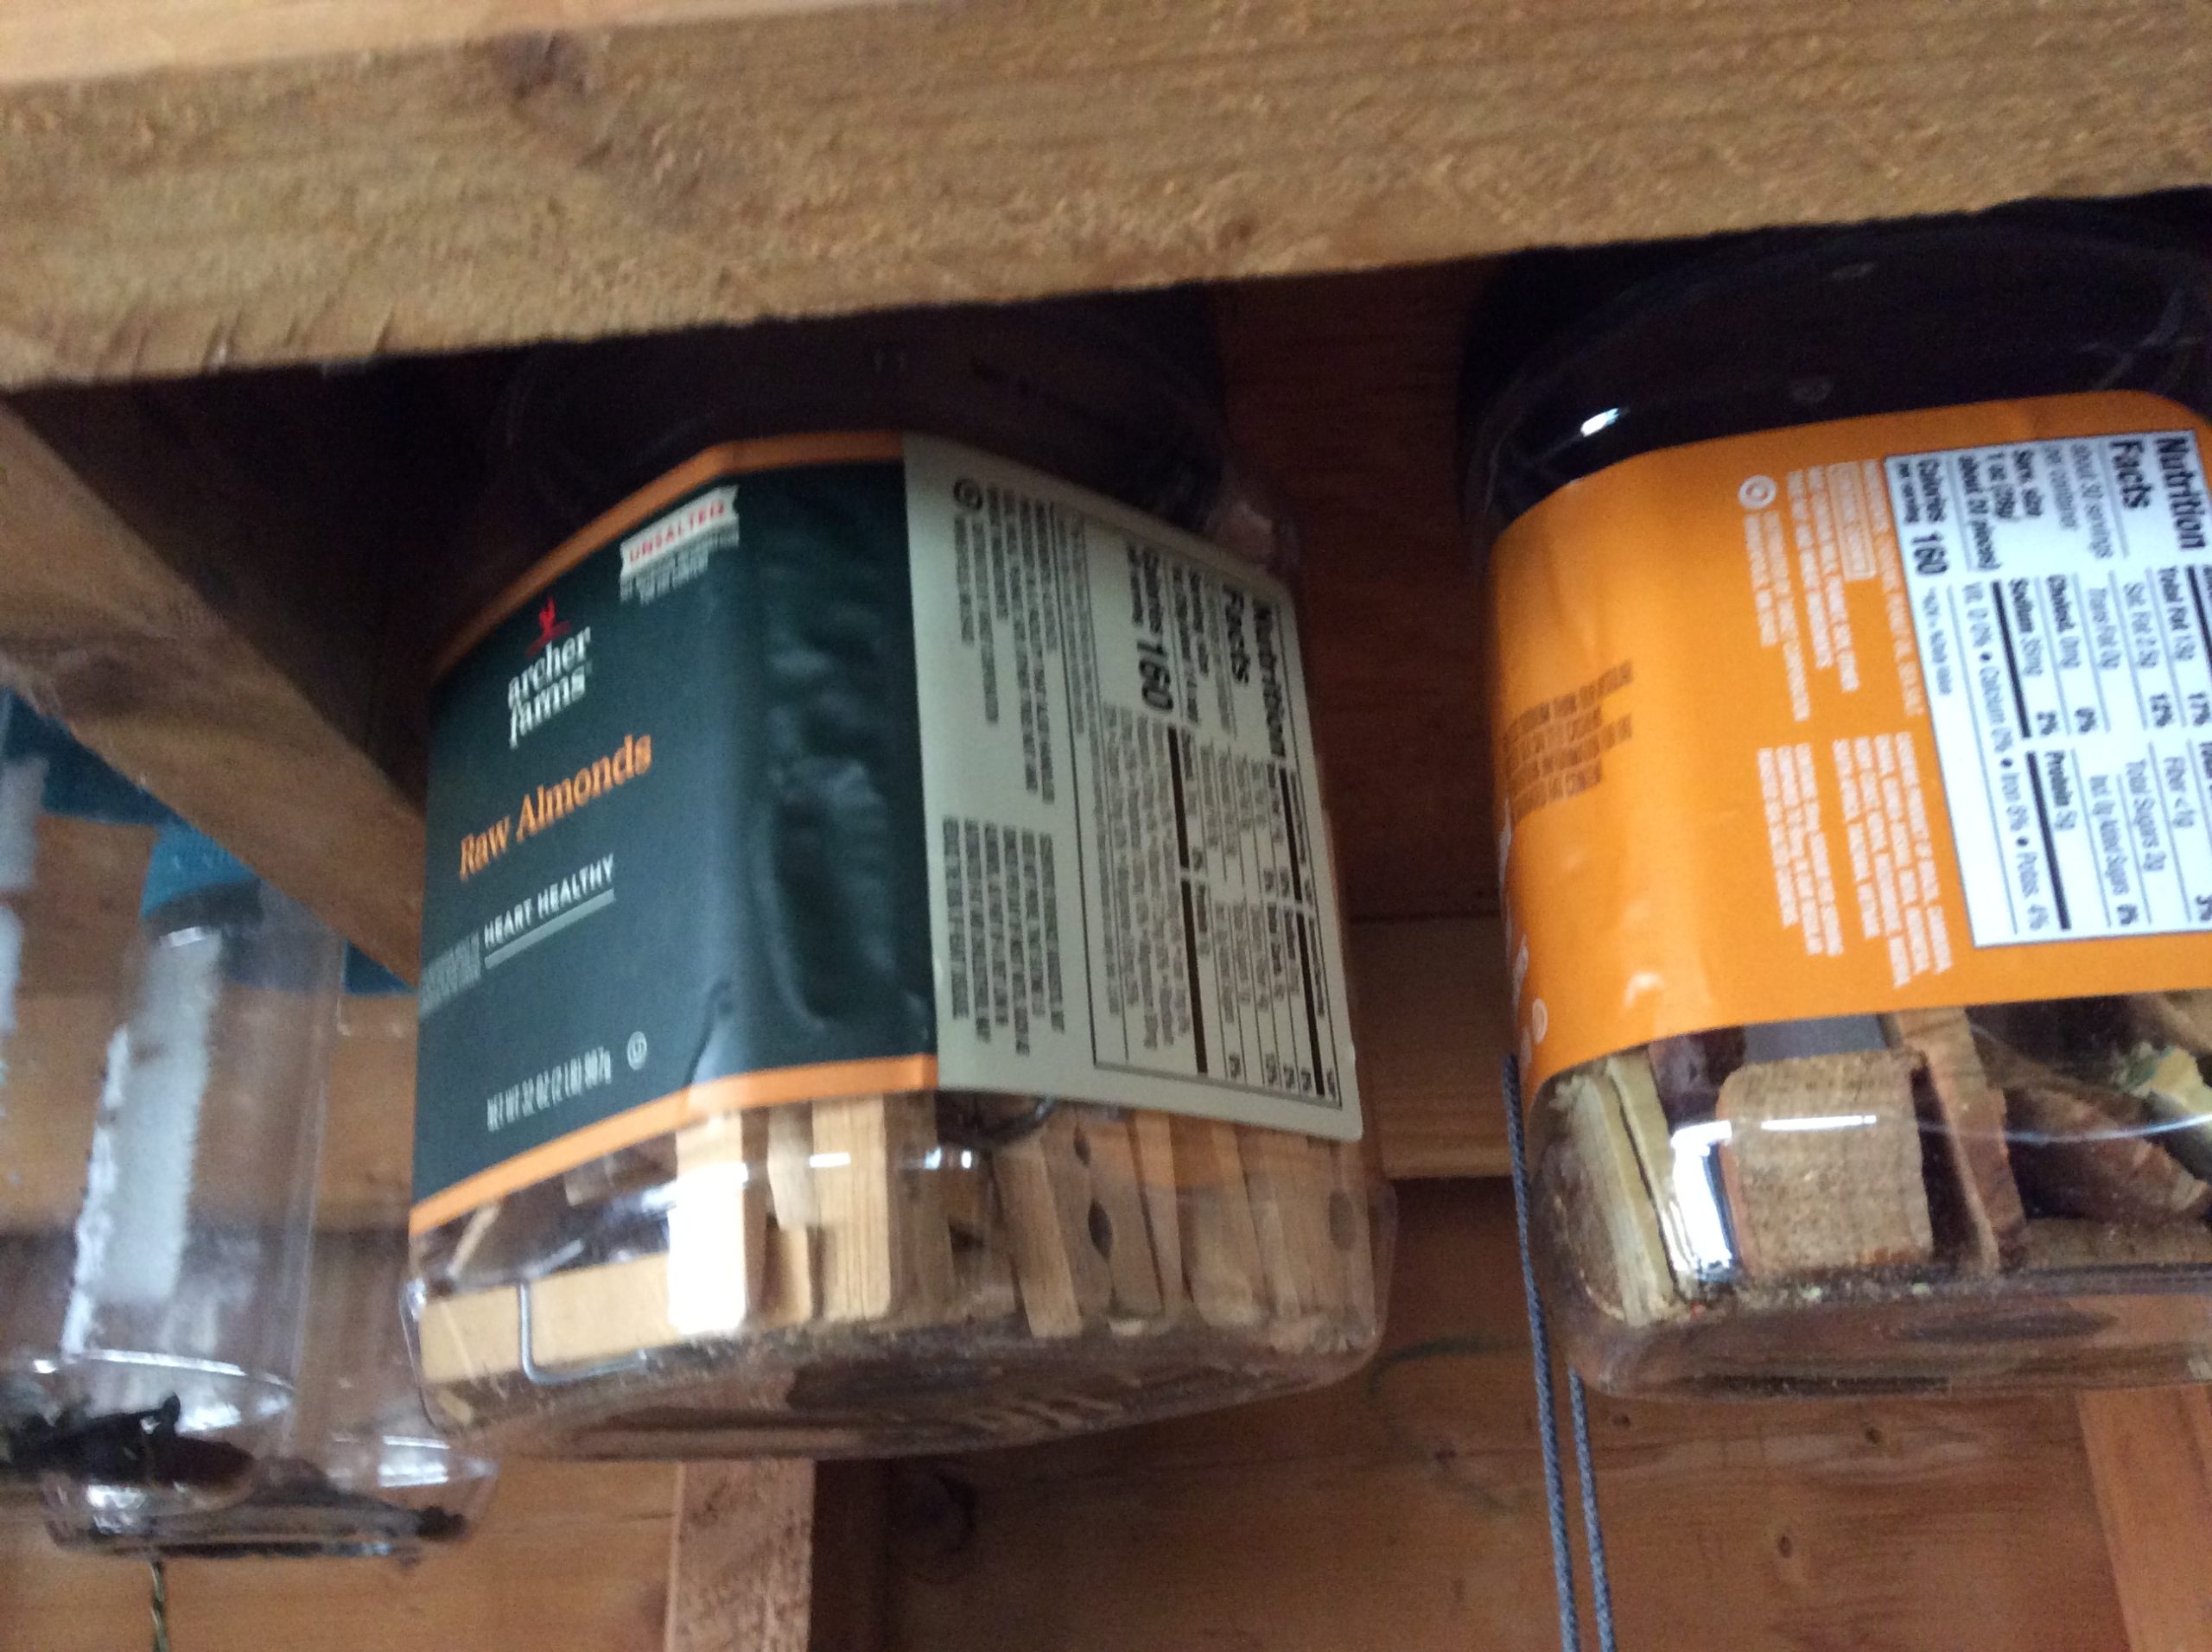
As for why I wanted to screw container lids to the bottom of a shelf: more storage.
Ironically, as I was tidying up this year, I found three – count ’em! three! – yogurt containers full of random hardware.
Today our friend Faith stopped by for our regular Saturday coffee hour. When she mentioned that she needed some mousetraps, I was happy to save her a trip to the store. Her visit was timely, as I’ve been in a decluttering mode. While extreme examples of hoarding make me feel sick to my stomach, even more repulsive is how easily we throw things away, wherever that is. A-W-A-Y. It sounds more like paradise than a landfill or an incinerator. Or it could be a prison: He’s going away for a long time.
The language around acquiring and discarding stuff is interesting. I feel sorry for the artificial Christmas tree that’s posted on Craig’s List or FreeCycle with a note that says: “We need to get rid of it by Sunday.” After twenty years of service, this is how it ends. They just “get rid” of you, as if treating a case of lice. It feels disrespectful. On the other end of the spectrum there’s “rehome.” That’s a little precious. “I would be glad to rehome the working treadmill that you’re not using.” Of course, up top, I’ve already said “upcycle” and “declutter”, two words that spellcheck doesn’t like, though it’s notable that “spellcheck” is just fine. If you can’t beat ’em, join ’em.
Staring into my kitchen drawer, I wonder how many oven mitts a person can use at once. It’s a maximum of two, right? One of the mitts has a hole in it, something I discovered months ago when I burned myself on a baking sheet. And yet, there it is. Un-re-homable. I’ll have to throw it away or let these things pile up until pictures of them are posted on the Estate Sale app next to my teddy bear.
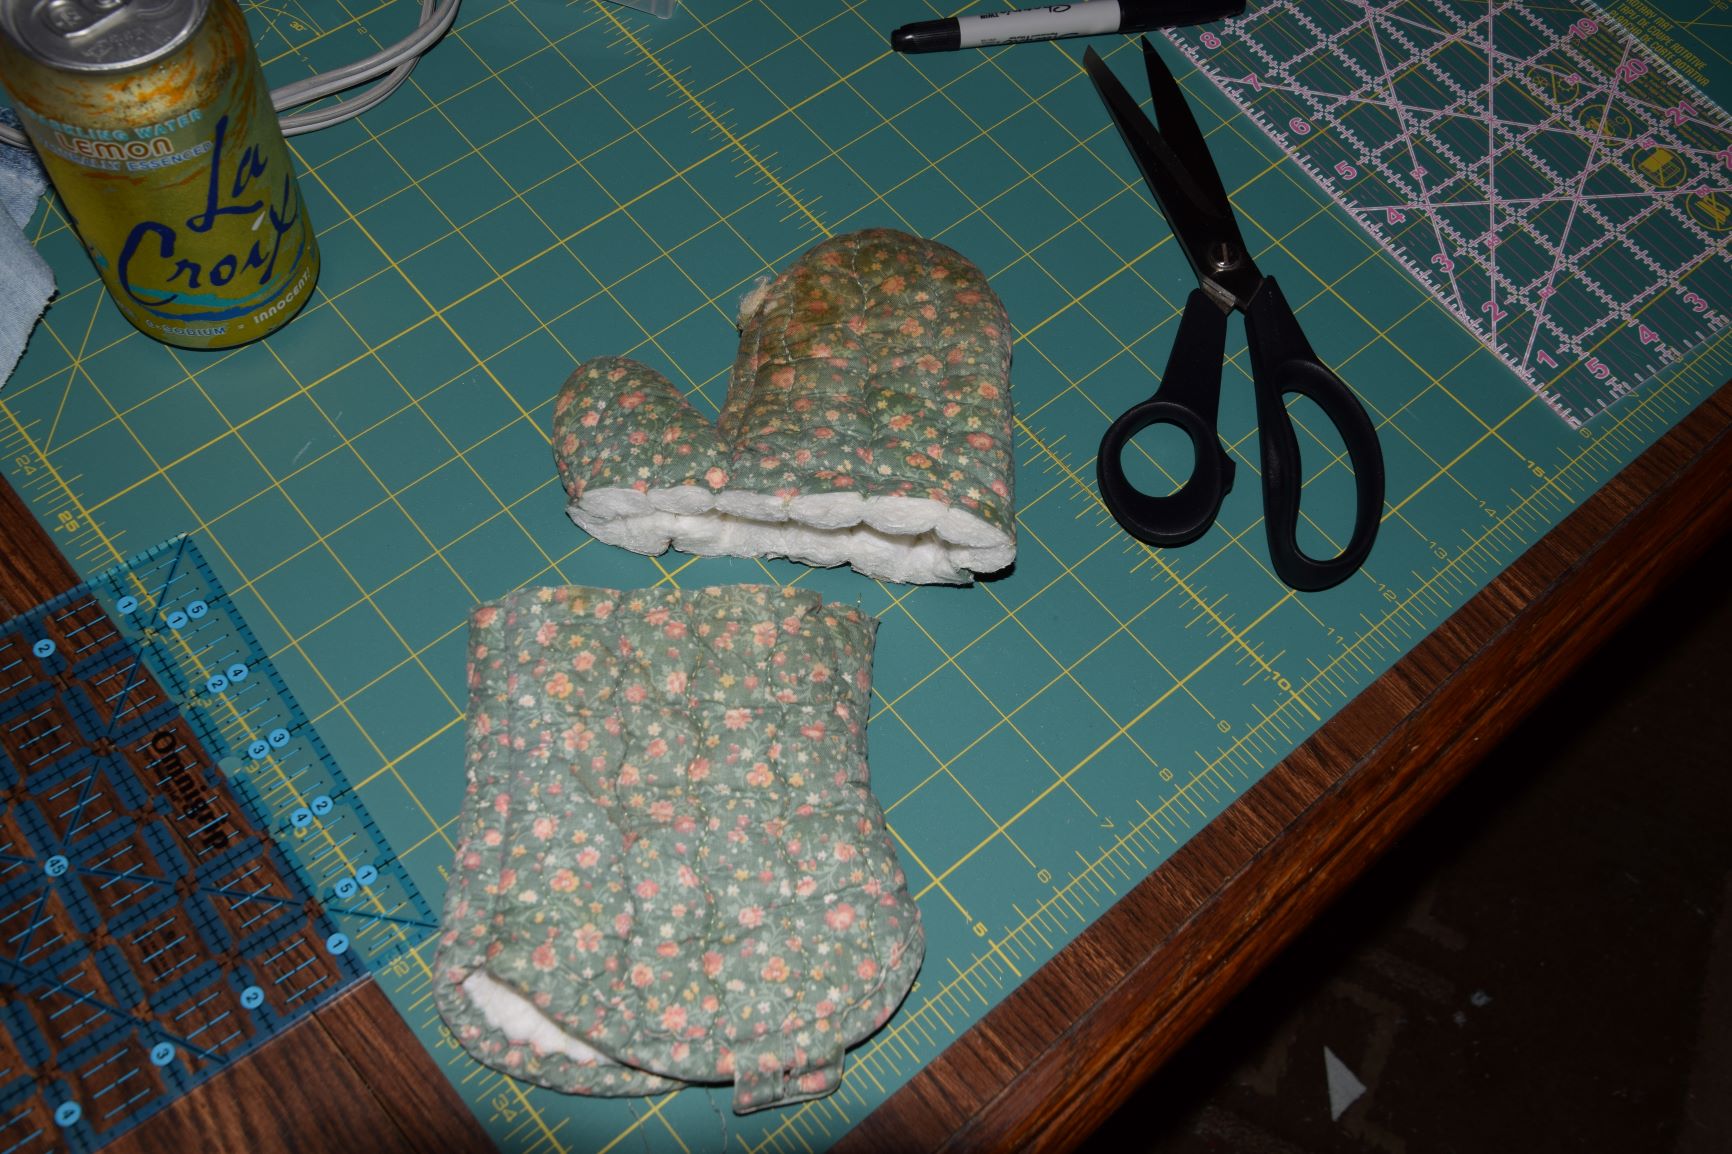
This is where YouTube comes in. Somewhere along the line, YouTube decided that I might be interested in learning how to reupholster furniture. One thing leads to another, and now I’m learning how to make box cushions. That’s why I saw a drink cozy as I looked at this useless mitt. While my sewing skills are limited, I could picture it. So, I tried to make one.
Being careful not to tap the soda can with the sharp scissors, cut the stained worn out top from the bottom that doesn’t wear out as fast. Take out one seam on the sides of each of the two pieces and open them up in a single flat layer. Trace a soda can on the top part of the open mitten. Then trace a bigger circle around that. If I did this again, I would use the measurement from the cup I used for the outer circle and use a compass to make a pattern.Wrap the bottom part of the mitt – finished side up – around the can. Move it so the top of the can extends past it enough to drink from it. Use a pin to mark the fabric where the bottom of the can is. Trim off the bottom from the pin plus a 1/2 inch or so for the seam allowance. Secure the binding on the top, if needed. Add more binding to each side. I used part of an old sheet (the red strip). Cut out the circle for the bottom. Mine didn’t look so great, so I topped it with denim from some old jeans. I covered the inside of the bottom with the red sheet, but didn’t do anything with the sides on the inside.
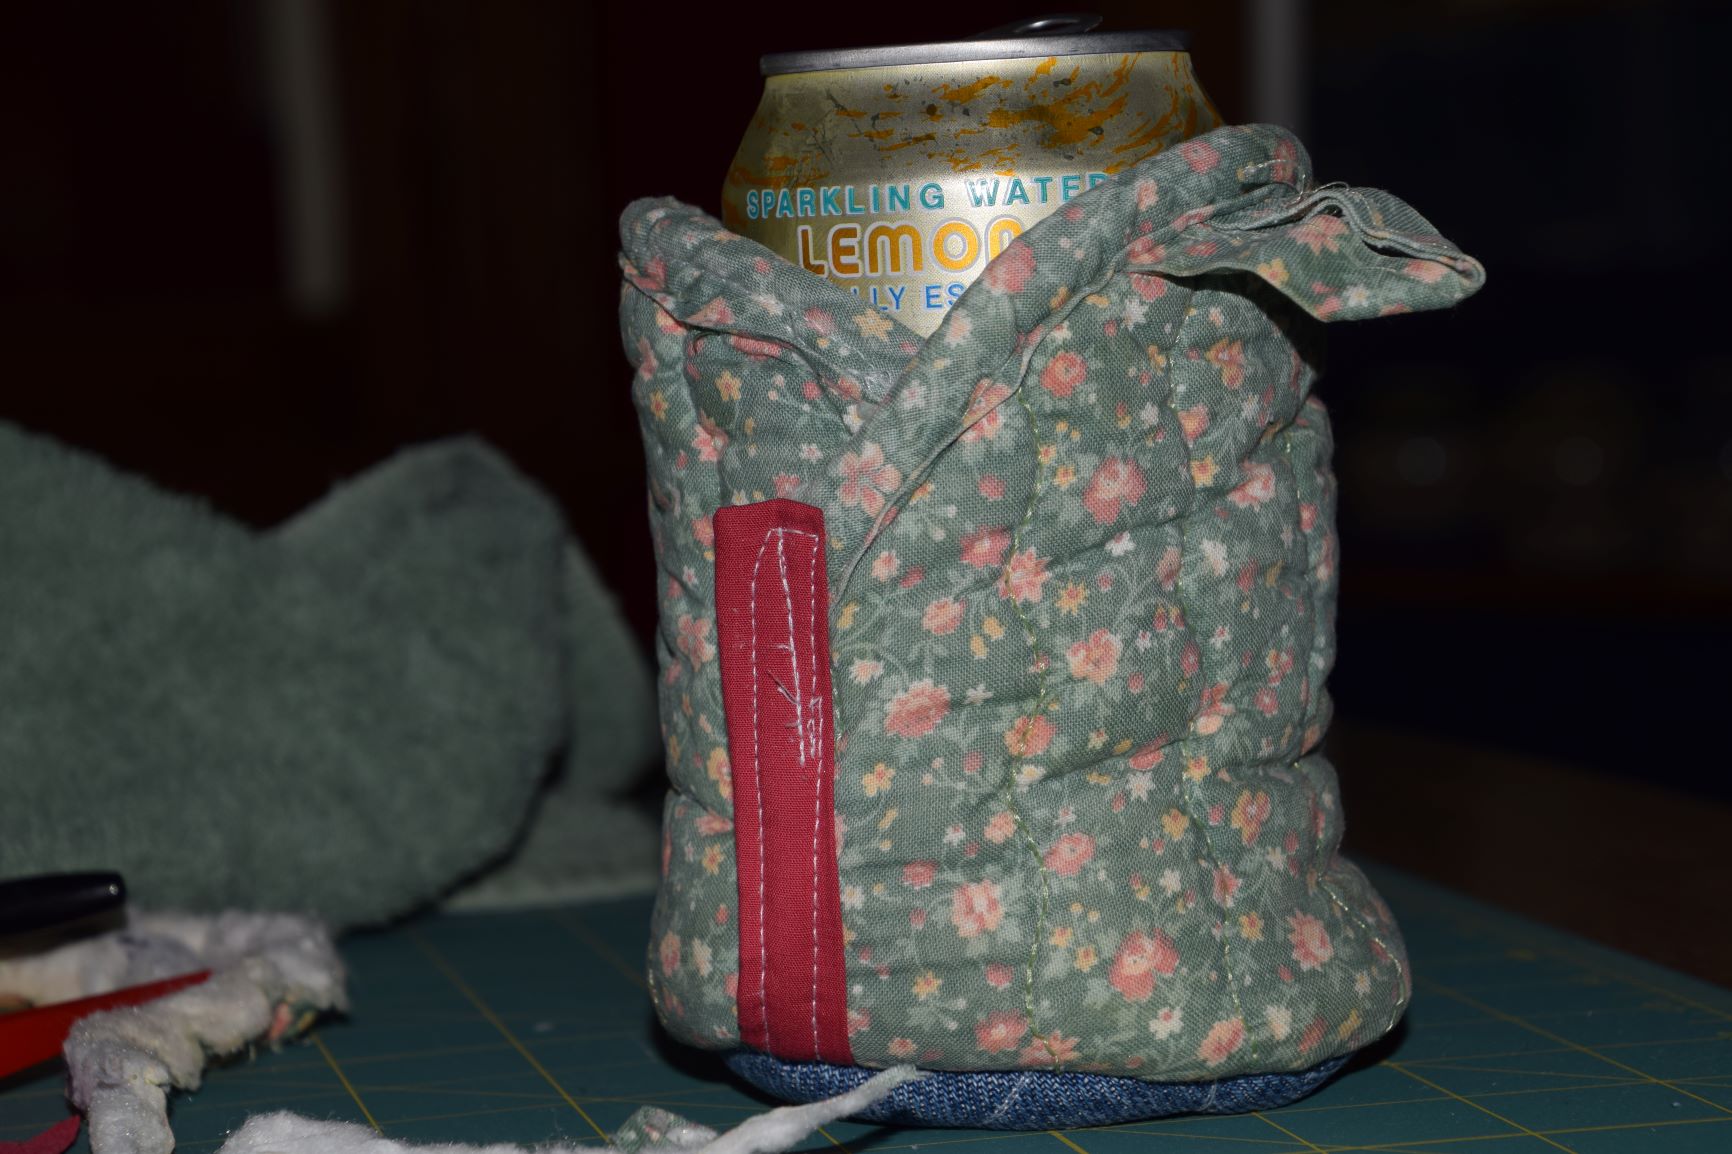
Once the two pieces were ready, I sewed the side piece to bottom, using what I learned from the YouTube videos about making box cushions. A better sewer could whip out a much nicer version of this in no time. Other than starting with a perfect circle, if I did this again, I would consider adding a button hole to the top edge of the overlapping side. I don’t think I can do that now that everything is assembled.
The good news is that there’s less to throw away. The not so good news is that we’ve never used cozy’s. We have friends who use them and that’s what gave me the idea. In fact, I have a foam cozy that was a freebie at an event and it was my intention to give this thing to my cozy-loving friends. Now, instead having one cozy that we never use, we have two of them!
At least I didn’t make a wind chime out of old CDs.
In the spirit of giving old things a new life, I gave my new cozy an honest try. I could appreciate the appeal of it. When Brian saw it he laughed and immediately recognized his old oven mitt. He had to admit that it was convenient to put down his drink without being tethered to a coaster.
After I’m dead, people are going to come to my estate sale and they’re going to find this cozy on a table full of kitchenware and possibly, unless a relative feels some attachment to it, a bear.
When Brian came home with an abandoned plant from the office that was in need of sunlight, I groaned. Where are we going to put this wild beast?
We were going to a show. So, after he came home from work, it wasn’t surprising to see Brian parking on the street in front of the house instead of in the garage. But something was up. He unlocks the front door. Then back to the car. What’s he doing? He probably stopped for groceries. I should help bring them in, but I don’t feel like it. I am a terrible wife.
Then I see it. He finally brought it home after weeks of preparing me for the possibility. There was this plant that Brian adopted after it had been abandoned during the most recent reorganization at work. It wasn’t doing so well. It used to be by a window, but because of the construction now it isn’t and now it’s sadly in decline. It needs sun. Brian is fine. Don’t worry about him. He can get up and take a walk. He assured me of this. But that plant! It’s just stuck there in this artificial light. Maybe he’ll bring it home. He never does.
…until he does. Another branch shriveled? Did too many needles fall? Did they pile up on January and refuse to be casually brushed aside? And now Charlie Brown over there is unloading this thing that is cramped in the back of his car, because while a grown man could sit relatively comfortably in the back of a Prius, this giant plant with its sprawling limbs is too big.
I’m always trying to stop things from coming into the house. I enjoy a good estate sale and am always imagining my own. When homes are disassembled and stripped of life, a whimsical collection of birds taken out of context and arranged on rented banquet tables, or a certain type of glass or enough pencils to last a hundred years can seem more like a window into the mind of a crazy person than anything beautiful or useful. It’s hard to win this battle – keeping our heads above the stuff – when you’re fighting against someone who has bonded with a tree. But I honestly cannot imagine where we are going to put this thing. A spare corner eases my mind and I was just beginning the enjoy the fruits of my labor. But what are the options? I fear the plant is going to bring the room’s energy down, like so many of those plants we saw in the photos of those houses for sale when we were in the market. Searching real estate sites, Brian and I used to laugh about how sometimes we weren’t really looking at a house so much as we were looking at people’s stuff. Sometimes, there might be a pet in the picture. A pet! Like I’m going to get a free dog if I buy this house? If the idea is to give me the impression that this is a good place for a family, why not stick grandma in there too? In any case, I wanted a fern. There is an empty pot on top of the built-in bookshelf that awaits its arrival. But this? This is too much. Too much.
The next day, Saturday, we spent some time rummaging for something that could elevate the new plant. A column, probably out of a church, from Architectural Antiques was not an option at north of eight hundred dollars. At one furniture store where we did not expect to find anything except for maybe an idea, a salesperson offered us mimosas. Furniture is art. Light fixtures and lamps are art. Rugs. Art. It makes sense that we would causally wander the gallery with our cocktails enjoying the “movement” of a particularly sleek sectional, knowing that it would never fit into our living room. I really just wanted to look at junk, parts with which to do something. I say this as if I were handy, as if I know how to weld stuff, as if I had the tools to make uniform cuts to make uniform slabs of wood. This is a dream. But we can dream. I still like to scrounge and imagine what could be done, if only…. if only.
We fail to find anything. We run out of ideas about where to look. I had just been to the Goodwill. I doubt there’s anything there. I’m kind of tired, but I want to “party on”, as I like to say to Brian whenever I’m feeling restless. I suggest we go to The Lab, a brewery near our house. There you can pour your own beer and pay for it by the ounce, which is perfect because I just want a taste.
As we walk into the place, a pair of queens are running a game of Bingo. A woman, part of a foursome at the next table, tells me that it’s free to play. She must have been disappointed when I did not leap up to fetch a card and a plastic cup full of Bingo chips. At one point between games, the queens start to lip sync, each taking her turn. People are holding up bills. The second act is racy. After a high kick it isn’t long before she sheds the 50’s-ish sheer red polka-dotted dress that sparkles to expose a bodysuit that looks as if it had been splattered with paint. The crowd howls. She does the splits. The cheering defies the time of day, a lazy afternoon, though it is different from the canned excitement of daytime television, which I loathe. Shouldn’t we be at a night club? A man on the other side of the room from where we are sitting is waving money. But he fails to get the dancer’s attention because there’s apparently too much money to track. I am mildly stressed by this, worried that the man feels rejected and wondering if Marilyn Monroe will ever get her five dollars. The dancer approaches the foursome next to us. They are eating up this odd mix of Bingo and bachelor party where at one point, the dancer pretends to spit into her hand and briefly simulates something that I will not directly say here, but it suffices to say that it made a grown man blush in front of his friends who were roaring with laughter.
And just like that it’s back to B-12 followed by whatever joke, story, fact or memory is triggered by the number. The dirtier the better. Of course, some numbers are obvious.
Someone comes around with a free sample of some kind of “super food” that has been juiced, some kind of berry. I didn’t catch the name of it, though it was repeated a couple of times. It’s an antioxidant. What else is there to know? It’s good for you. This particular sample has been mixed with alcohol. Try it! Later I will be mad for a few minutes thinking of the ridiculousness of it, but not as mad as I was about the show we saw the night that Brian brought that plant home and the utterly pretentious discussion that followed it.
The friendly – possibly drunk by now – free-bingo-cards! woman who had first spoken to us when we arrived leans over to me with a comment every now and then. She points out the entertainment value in watching people walk through the door to find the place in stitches, helpless against a Barbara Streisand perm, clear stilettos, and a pink rectangle-of-a dress that can barely cover a snatch. She’s right! Just look at those faces. Some unsuspecting dude walks in and confusion shifts to surprise and then delight. “Web cam!” I said. I could watch that all day.
That evening at the YMCA, Brian and I are talking as we walk the track, dodging teens who are playing basketball. I had regretted that we frittered away the day looking for a lousy plant stand that probably doesn’t exist. I am certain that he would have preferred to stay home to read. But he says that life isn’t supposed to be efficient. It’s probably one of the nicest things anyone has ever said to me.
When we get home from the gym, Brian goes upstairs to start a new book. I grab the iPad and do a search for DIY plant stands. I tried something with the idea of getting a sense of how high the plant should be, what kind of footprint would work, etc. You know, a test. It turns out that I liked my prototype better than I would have expected.
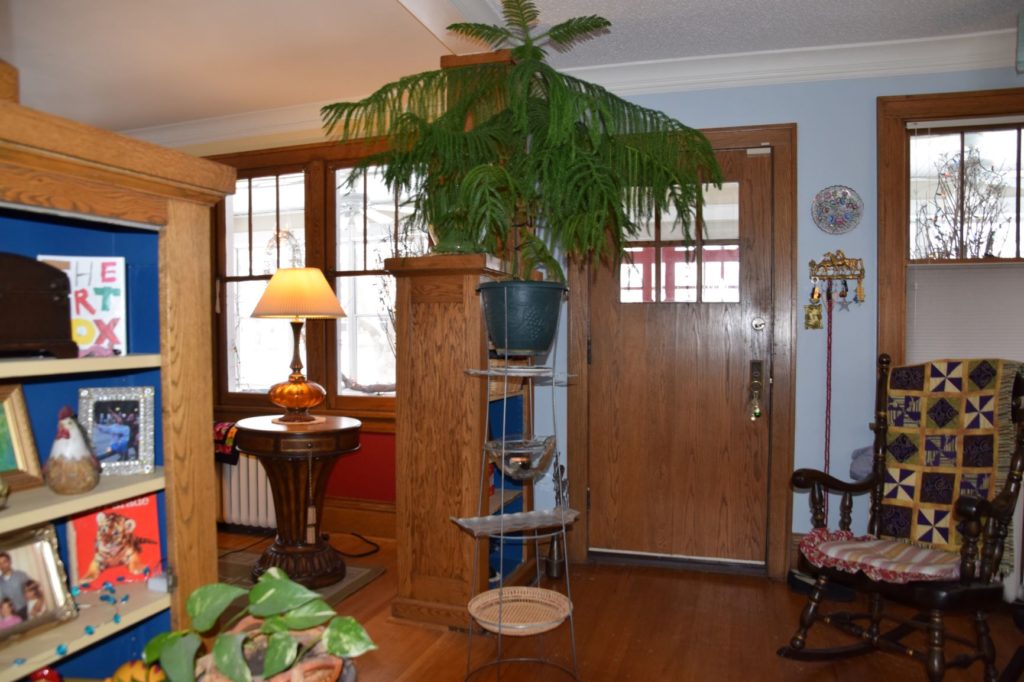
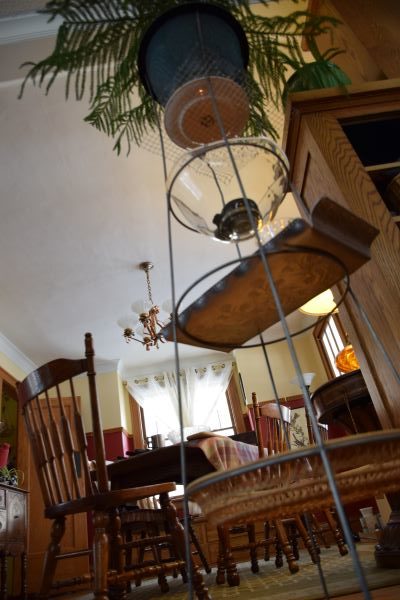
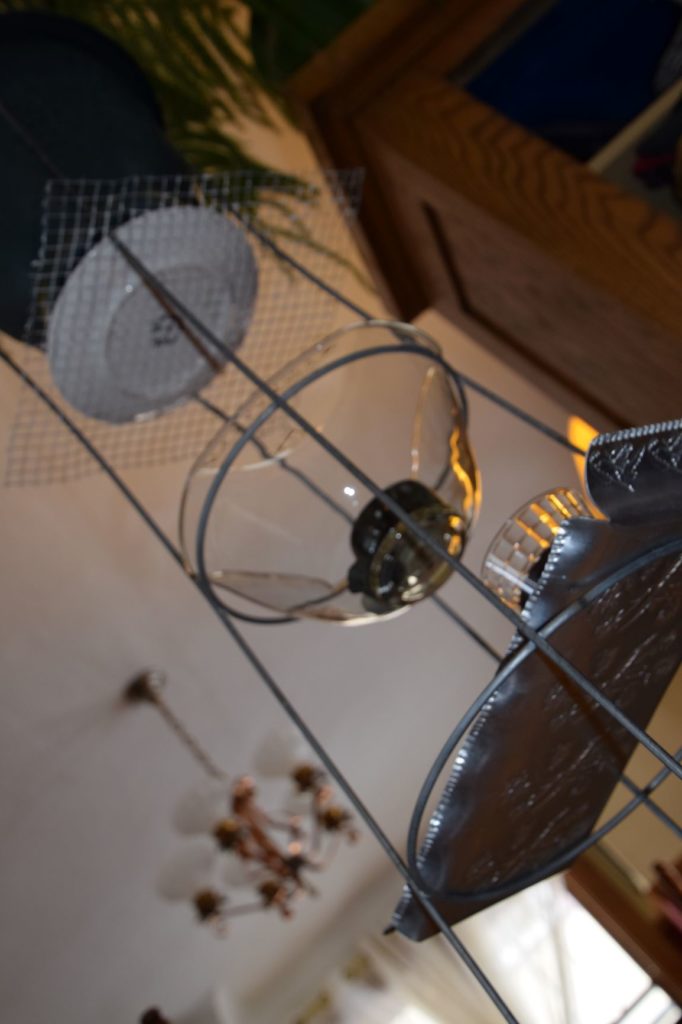
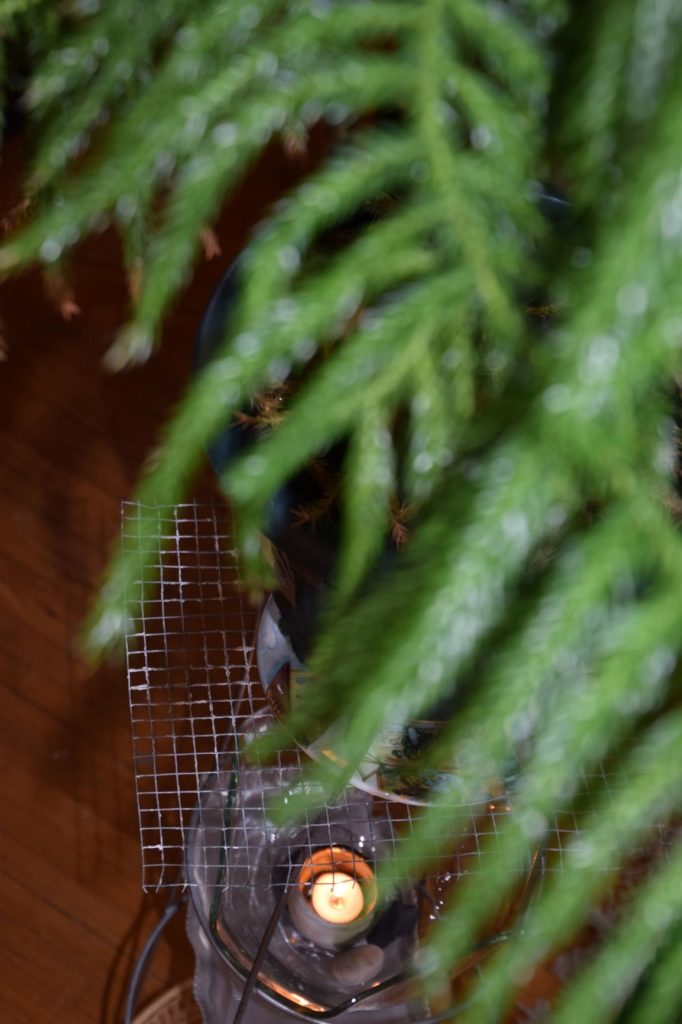
Here’s the big plant that Brian brought home. It’s supported by the feet of a tomato cage that are tucked under the rim of the pot. I found some things that fit perfectly on each tomato cage ring. Bottom: floor. Next Up: Flat basket. Then: An aluminum platter with roses. I also tried a cutting board here and that worked too. Next: Clear glass bowl with a candle and a few rocks inside. Above that is hardware cloth (that still needs to be hemmed or treated to address the rough edges) and a plate. Top: Plant.The aluminum tray is at a good height to put a drink, assuming there is a chair nearby. Looking down. The pot isn’t actually sitting on the plate below it. It is suspended above it.
I wish the pictures did this justice. It’s pretty sweet and didn’t cost anything on the current budget. I just used stuff I had around the place. If I stick with this idea, I’ll reinforce the connections between the tomato cage rings and legs with some lashing. Maybe I’ll paint it. Maybe I won’t. I’ll cover the bottom ring that rests on the floor with something to make it easier to slide without scratching the floor. I was thinking of using some old socks that have been cut into loops. (I could probably write a post titled “100 things to do with socks that have been cut up into loops.” Of course, first on the list would be to make a potholder using one of those potholder looms you might have had when you were a kid.)
Or maybe I will start over. Maybe this is a prototype. I’ve seen plant stands and little tables framed with copper pipes. I do have a saw and some sandpaper… stain to use up…
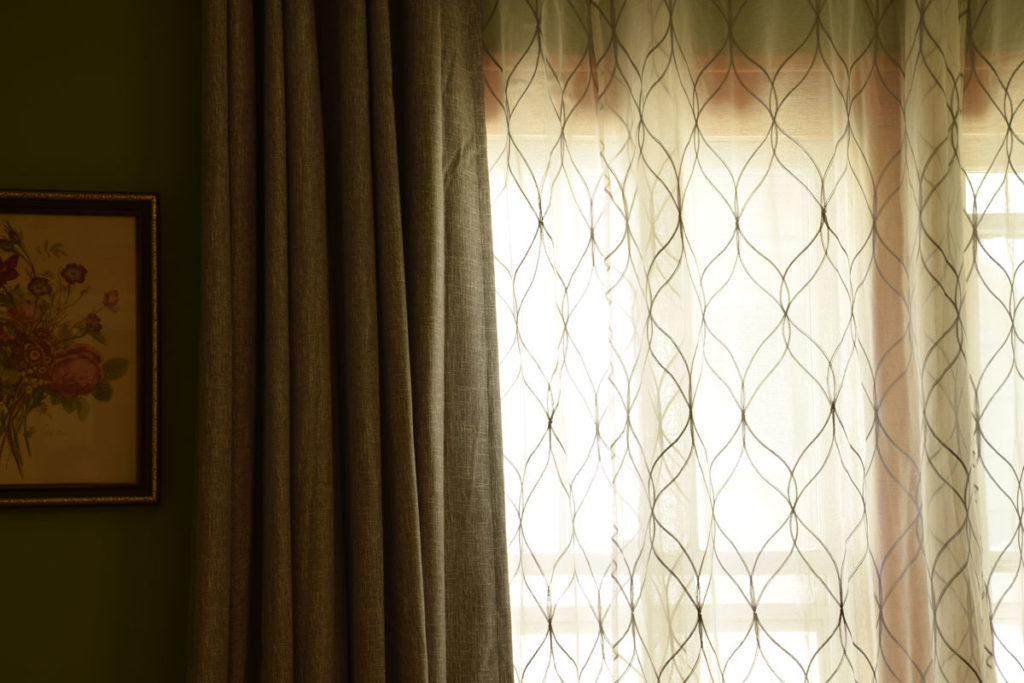
Once I vacuum the plaster dust off of the top of the window frame, I can put away the ladder. It has been in the office-guestroom for a number of days and sits behind me right now in front of the new curtains. I was determined to get the rod level – something I failed to do when I put curtains in our bedroom – and with Brian’s help and remembering some tips from my dad, I managed to do it this time. Brian doesn’t like curtains of any kind, referring to them as “cloth.” Yet he’s the one who picked out the rod. I love this. I love those finials that look like Christmas ornaments woven with muted gold strands. I like knowing that this is what he chose. We were going for brass but were told that Millennials aren’t buying it, so it can be hard to find unless you go online. It’s something I’d rather not do. For some reason I was stuck on the idea that the curtain rods throughout the house – actually not too many at this point – should have the same finish. So much for that.
Last night during a break in the World Series, Brian came up to help me add a third bracket to address a barely perceptible sway in the rod. It’s at these points in a project just as I’m about to do one more little thing that may or may not be necessary when I worry that I’ll screw it up. Every time I drill a hole I think, yep. This is where it all goes to hell.
I love the curtains and wish that Brian did too. But as much as he is trying not to ruin it for me, I know that he’s just being a good guy, a good guy who will to take me to the store. Fifty stores! It’s unfair to ask him to use his good eye for “cloth” but he knows me. I’m a shopper with little stamina and nothing to warn you when I’m about to run out of gas at which point I might cry, collapse or threaten to pass out. And without help, the chances are good that I’ll leave empty handed because an annoying song has driven me out of the store. So while Brian would rather replace Mick Mulvaney than cover the house with cloth, he does not leave me stranded and will share an opinion that can get me off the dime. There is also the judicious use of the veto power. A room darkening panel is going to make him groan, but it was the only thing in that soft gray tweed that I liked. Besides, we could use the added insulation. I mention this, thinking that he will be impressed. But I have failed. He will never be a curtain guy.
As we stood there in the store looking at the displays, I regretted that we did not get a double curtain rod so that I could put a sheer behind the curtain. I know. More cloth. We both know that we can go through the rigmarole to exchange the thing, but I’m anxious to be done. (Imagine me singing “I just want to be done” to the melody of “It had to be you”.) Still, it seems unfortunate. I should have made a better plan. Then I got an idea.
When I told the salesperson that I was going to put the sheers on the same rod as the curtain, she gave me a look. On the verge of wilting, I remember something my mother says. “It’s your house. Do what you want.” I tell the woman that I don’t care if the sheers will create a gap when you close the curtains. If total darkness is the goal, you could pinch them shut. But honestly, a column of light between the dreaded “room darkening” panels might be kind of cool. She is not convinced but doesn’t try to talk me out of it. Why would she care? She’s just happy to be looking at curtains with us, well past the point of helpfulness. She’s sixty-nine years old and would rather shop than work. Her words. But until she pays off her credit cards, her husband says that she has to have a job. What does sixty-nine look like? Not that. She probably gets this all of the time. “You look great! I never would have guessed your age!” I want to say something equally unoriginal. “What’s your secret?” But here’s my real question. “How much credit card debt do you have?” The words will not come out of my mouth and for this I count myself lucky.
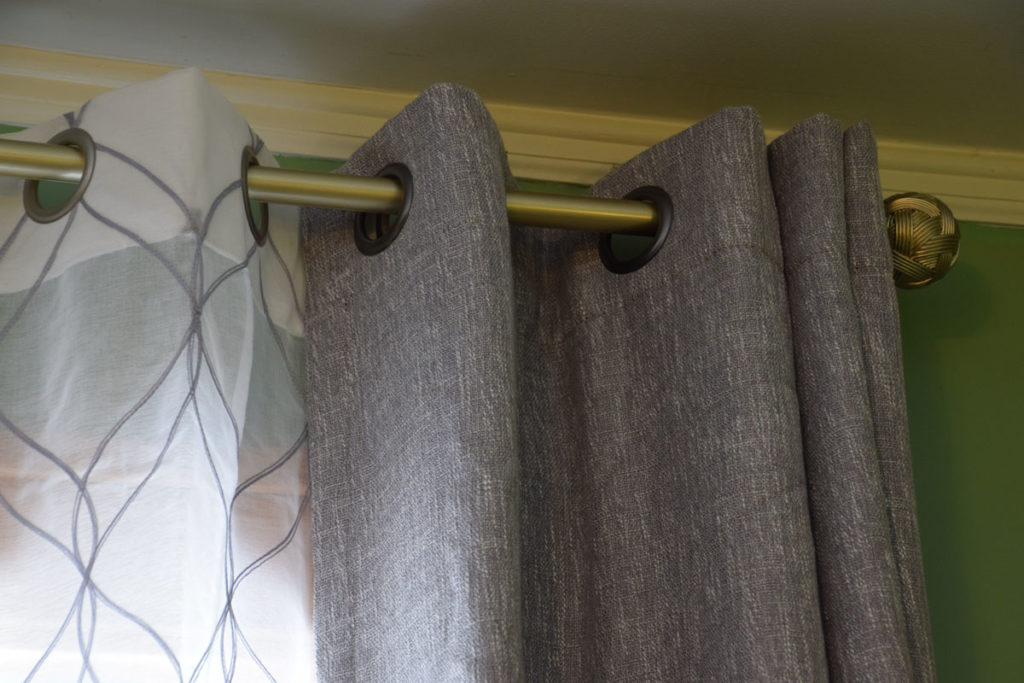
The sheer curtains overlap by two grommets behind the drapes. This keeps the pieces connected for opening and closing.
Well my idea wasn’t that crazy. It works fine and I would argue that putting the sheers on the same rod with the main curtain makes for a clean and simple look. Plus, when you use a double rod, you have to use pocket sheers as opposed to the ones with the grommets, which are easier to open and close. The other thing I ended up doing that played against convention was to offset the center supporting bracket. This accommodated the width of the off-the-rack panels so that fewer would be needed. Imagine two panels on one side and one on the other instead of two on each. I was stuck on symmetrical, but once I realized that this was just another application of the “rule of thirds” whereas in framing a picture – let’s say in a video – offsetting the subject will be more pleasing to the eye than perfectly centering it. I know that this is not radical. But in breaking these inconsequential rules for which I deserve no prize (or in this case, adopting a different set of rules to follow), I am aware of how little deviation is needed to make you feel like a rebel. What about the rules of substance? If a stranger with a part time job at Bed Bath & Beyond is going to tell me “that’s not done” when it comes to window treatments, who’s going to wield the stick when I really try to live my life?
Take the walker. He wasn’t “the walker” but just one of a number of people who have dropped out of the day-to-day grind to… well… walk. This particular walker was making loads of money at some kind of financial job until he quit to walk across the country to raise awareness about a cause – economic justice? the climate? the war? – something like that. I wouldn’t have known about the walker had it not been for co-workers who found him to be a self-riotous imbecile who had evidently never roofed houses in California in July. Otherwise, he would have known to cling to a job he loathed because an air conditioned office is nothing to take for granted. I’m pretty sure that had my co-workers had the chance, they would have been happy to pummel the walker silly with a stick. The ungrateful bastard would have deserved it.
Right now the panels hang to the side, leaving the full width of the window lights visible underneath the sheers. If Brian were here, he would certainly push all of “the cloth” to the sides so that the window was completely exposed. And he could. That’s the beauty of it.
This was a tricky picture to take. These curtains will easily open up to expose the entire window.
The cat is passed out on the floor next to me. For the moment she has given up on herding me into the next room where a choice of brushes sits on top of her purrniture.
Brush the cat.
Move laundry.
Get the vacuum cleaner.
Put away the ladder.
Lunch.
Glorious lunch.
Put the schefflera that is taking up the counter space in the bathroom back into the office.
The original mission was to replace the dishwasher. This presented the question of whether it was time to address the tile countertops. Albeit out-of-date, they looked decent enough. But there was nothing practical about having grout on working surfaces.
What did that tile ever do to me? Why should it be cast out where it would spend the rest of eternity in a landfill next to a diaper full of shit? If I ever wondered whether a partial kitchen remodel could be justified, the black spots found underneath the wood trim by the sink eased some of the guilt I feel whenever there is waste. It was time.
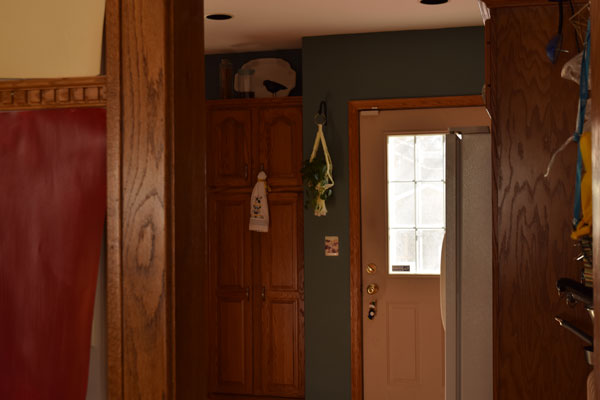
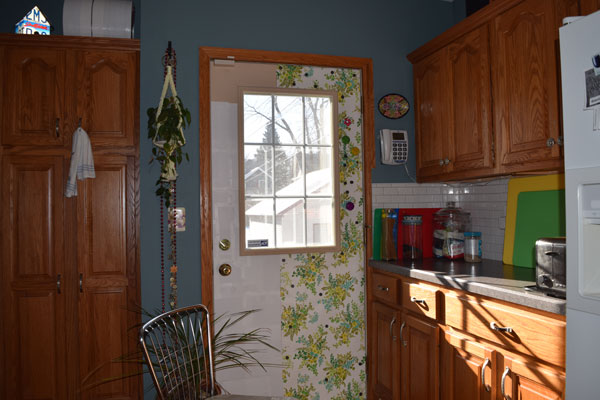
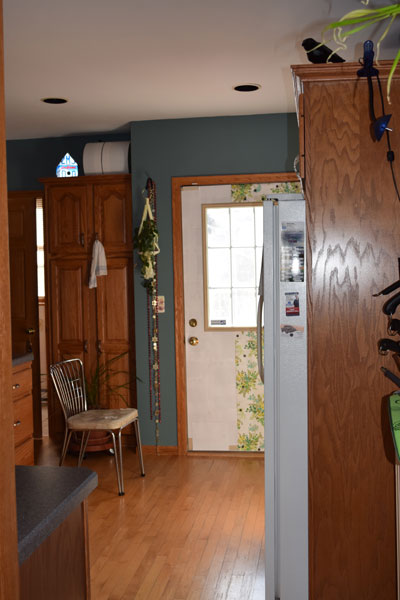
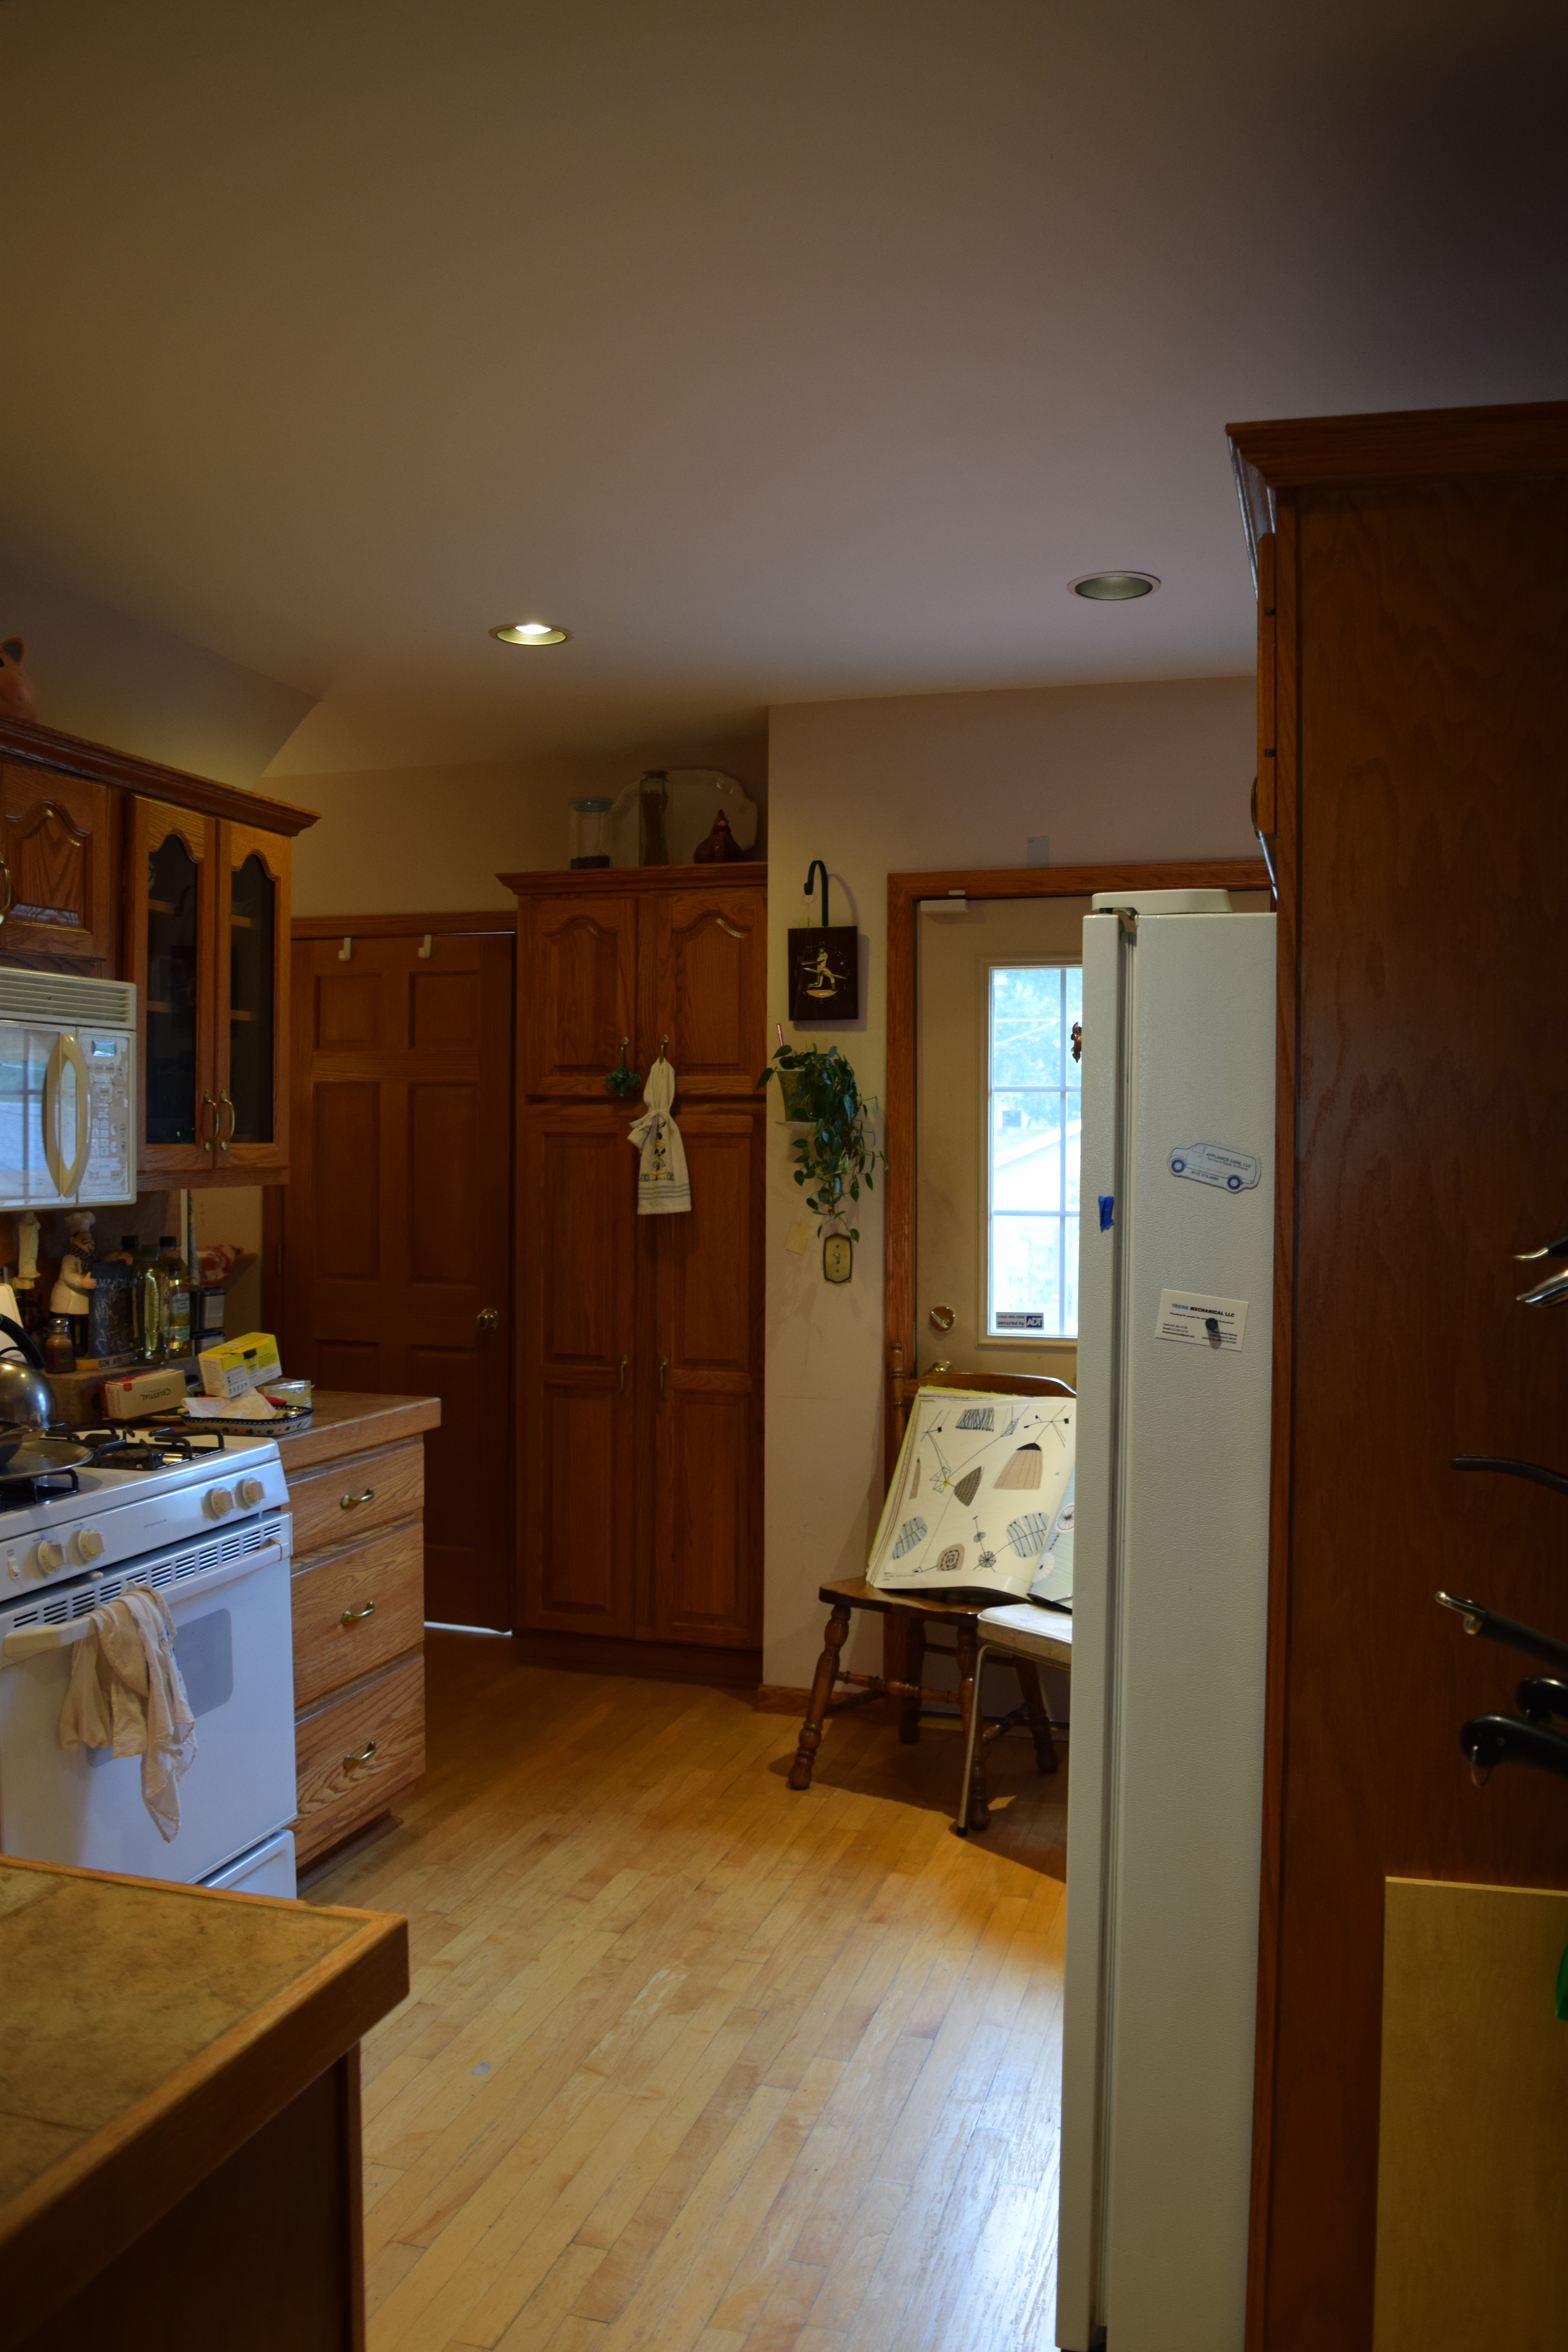
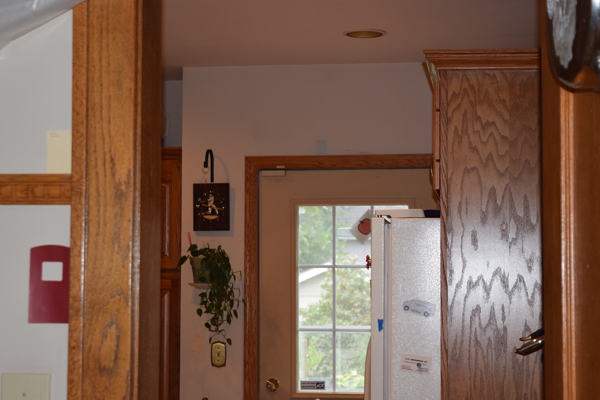
Months after the demolition began, it was about a year ago on New Year’s Eve when Margo packed up her tools for the last time and drove off in her red pickup truck. But things were not done-done. The new Formica countertops and the white subway tile backsplash made the brass cabinet pulls look out of place. And next to a freshly painted wall that went from a sickly bisque to a dramatic blue (honestly, it mostly looks green to me, but either way it is dramatic), the dinginess of the back door bugged me. For the longest time I had a large swatch of white taped to it. It seemed better, but I wasn’t convinced that it was right.
Then I remembered hearing about how my niece had used wrapping paper on the walls of her apartment. So I taped a sample of Christmas paper to the door. Stunning! Then I taped an old cover of an art magazine to the door. I liked that too. It turns out that while our color choice might have been “dramatic” it was also neutral. A lot of things worked. Newspaper? That did not work. I settled on some remnant wallpaper that I rescued from a garage sale maybe 10 years ago. After making a template with some recycled office paper, I cut out half of the pattern. But when I tried to hang it up, I discovered that there was no tape in the world that was going to stick to the back of this wallpaper. I tried rubber cement. So much for that. There was always the wrapping paper, right? Tape will stick to that.
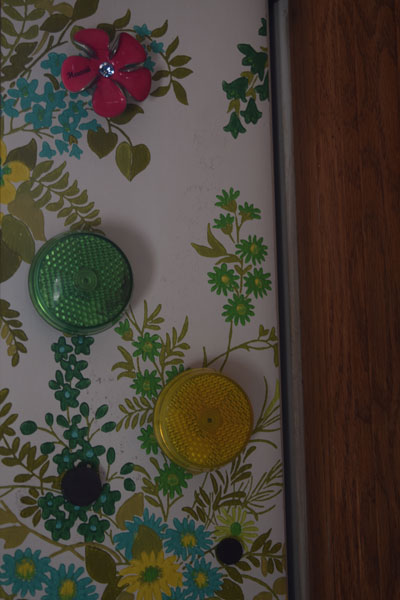
When I first got the idea to use magnets to hold the wallpaper to the metal door, I wasn’t convinced that it would be practical. The one magnet that I had that was strong enough for the job came from a gift shop at the Honolulu airport. It was a flower with a touch of bling in the center. It was perfect, but certainly too expensive; I thought I might need 50 of them.
Enter Axeman Surplus. They had some black disc magnets for 25 cents that were rated to hold a pound. In addition, they had loads of stuff I could use to dress up these generic magnets.
Unfortunately for Brian, the magnets worked great! He’s not a fan of this project. But so what? It’s not permanent. In fact, I have another wallpaper remnant that I can use whenever I want to change things up. And maybe after awhile, the door as it is won’t seem so horrible to me. Or I’ll find the right color and paint it. In the meantime, this is just fun.
[After painting the kitchen, this door needed something.]
[Here the door is half covered with some old wallpaper.]
[Magnets hold up the wallpaper on the metal door. I decorated a couple of cheap generic magnets with bike reflectors @ 30-something cents each. You can actually turn the lights on.]
[The white on the other side of the wallpaper is a template in the making. I used recycled office paper, a paper cutter and scotch tape.]
[Progress on the template.]
[Done! I didn’t have enough wallpaper to match up the pattern. Or maybe I should have worked from left to right? In any case, there wasn’t enough paper to avoid an extra seam in there. However, it doesn’t bother me.]
I can’t believe I’m going to share a picture of my kitchen drawer with you, but whenever I come across an organizing tip that actually works, it’s hard to resist sharing the news. My sister gave me the idea, which she got from a book about organizing your stuff. I think it might have been The life-changing magic of tidying up by Marie Kondō.
Downsizing and organizing seem to be popular themes these days. For the past month, I’ve been watching my recently retired neighbor hall things from her basement to either the trash or a pile destined for Goodwill. On the other side of me a neighbor unloaded some tomato cages, two of which I gladly took. There are entire podcasts devoted to convincing you to get rid of stuff.
Generally, the rule here is “Don’t let it in the house.” But swept up in the celebration of the team’s new logo, I caved and took a free Timberwolves t-shirt that was shoved into my hands on the way out of the arena. It wasn’t a good color for me. I didn’t like the cut. Was it supposed to be a souvenir? Fortunately I have some neighbors who are Wolves fans and they were happy to take the shirt and some other souvenirs. Basically we’re just trading stuff over here.
Another trick is to “Use things up.” When you get that candle on Christmas Day, get the matches out. Light it. Enjoy it every day until it’s gone. If you save it, pretty soon you’ll have two candles and then three. People will get the idea that you collect candles. Then you’ll get even more until you won’t live long enough to burn them all. So use the lotion. Eat the candy. Drink the wine. If it’s not for you, give it away right away. I mean, nobody wants a box of half eaten candies or a candle that was lit once and then stored where it collected dust until it came time for your estate sale.
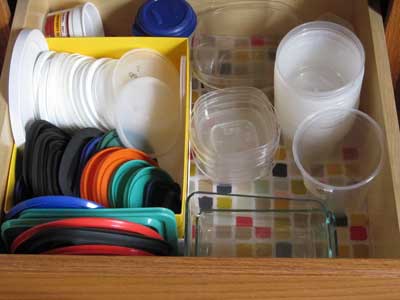
For the stuff you do keep. Put it away. Even if it’s ultimately a contained mess like my kitchen drawer with the food storage containers, having a place to put things is a start. Until recently, I saw no reason to improve this isolated chaos. It was easy to toss things in willy-nilly and not such a big deal to fish things out as needed.
But when my sister mentioned this storage method where you store things vertically, I wondered if would work for this drawer. I arranged things and it worked great. The real test would be whether the system could more or less maintain itself. After having used this organizing tip for several months now, I’m hooked. It works for socks. It works for t-shirts (should you collect too many freebies). Towels. It works great. It also indicates when it’s time to recycle deli containers I might save. If it doesn’t fit, it’s out. Not wedged in. Not off into an auxiliary storage area. Out.
So here you have it folks.
My kitchen drawer.
My kitchen drawer. The container lids are stacked vertically in a shoe box.
How can wallpaper break your heart? Find the one that you love. Then find out that it isn’t made for kitchens unless you’re a character on Sex In the City who never cooks or you’re the super duper careful type (not me) or you won’t mind adding routine repair jobs to your chores or – and this isn’t really fair – you’re staging a home for sale.
Updating Oak Kitchen Cabinets
The goal is to update the kitchen working with the existing reddish oak cabinets and replacing the tiled countertops. As long as we are doing that, we’ll raise the countertops by 3/4″ to accommodate a standard sized dishwasher. We’ll also add better lighting under the cabinets.
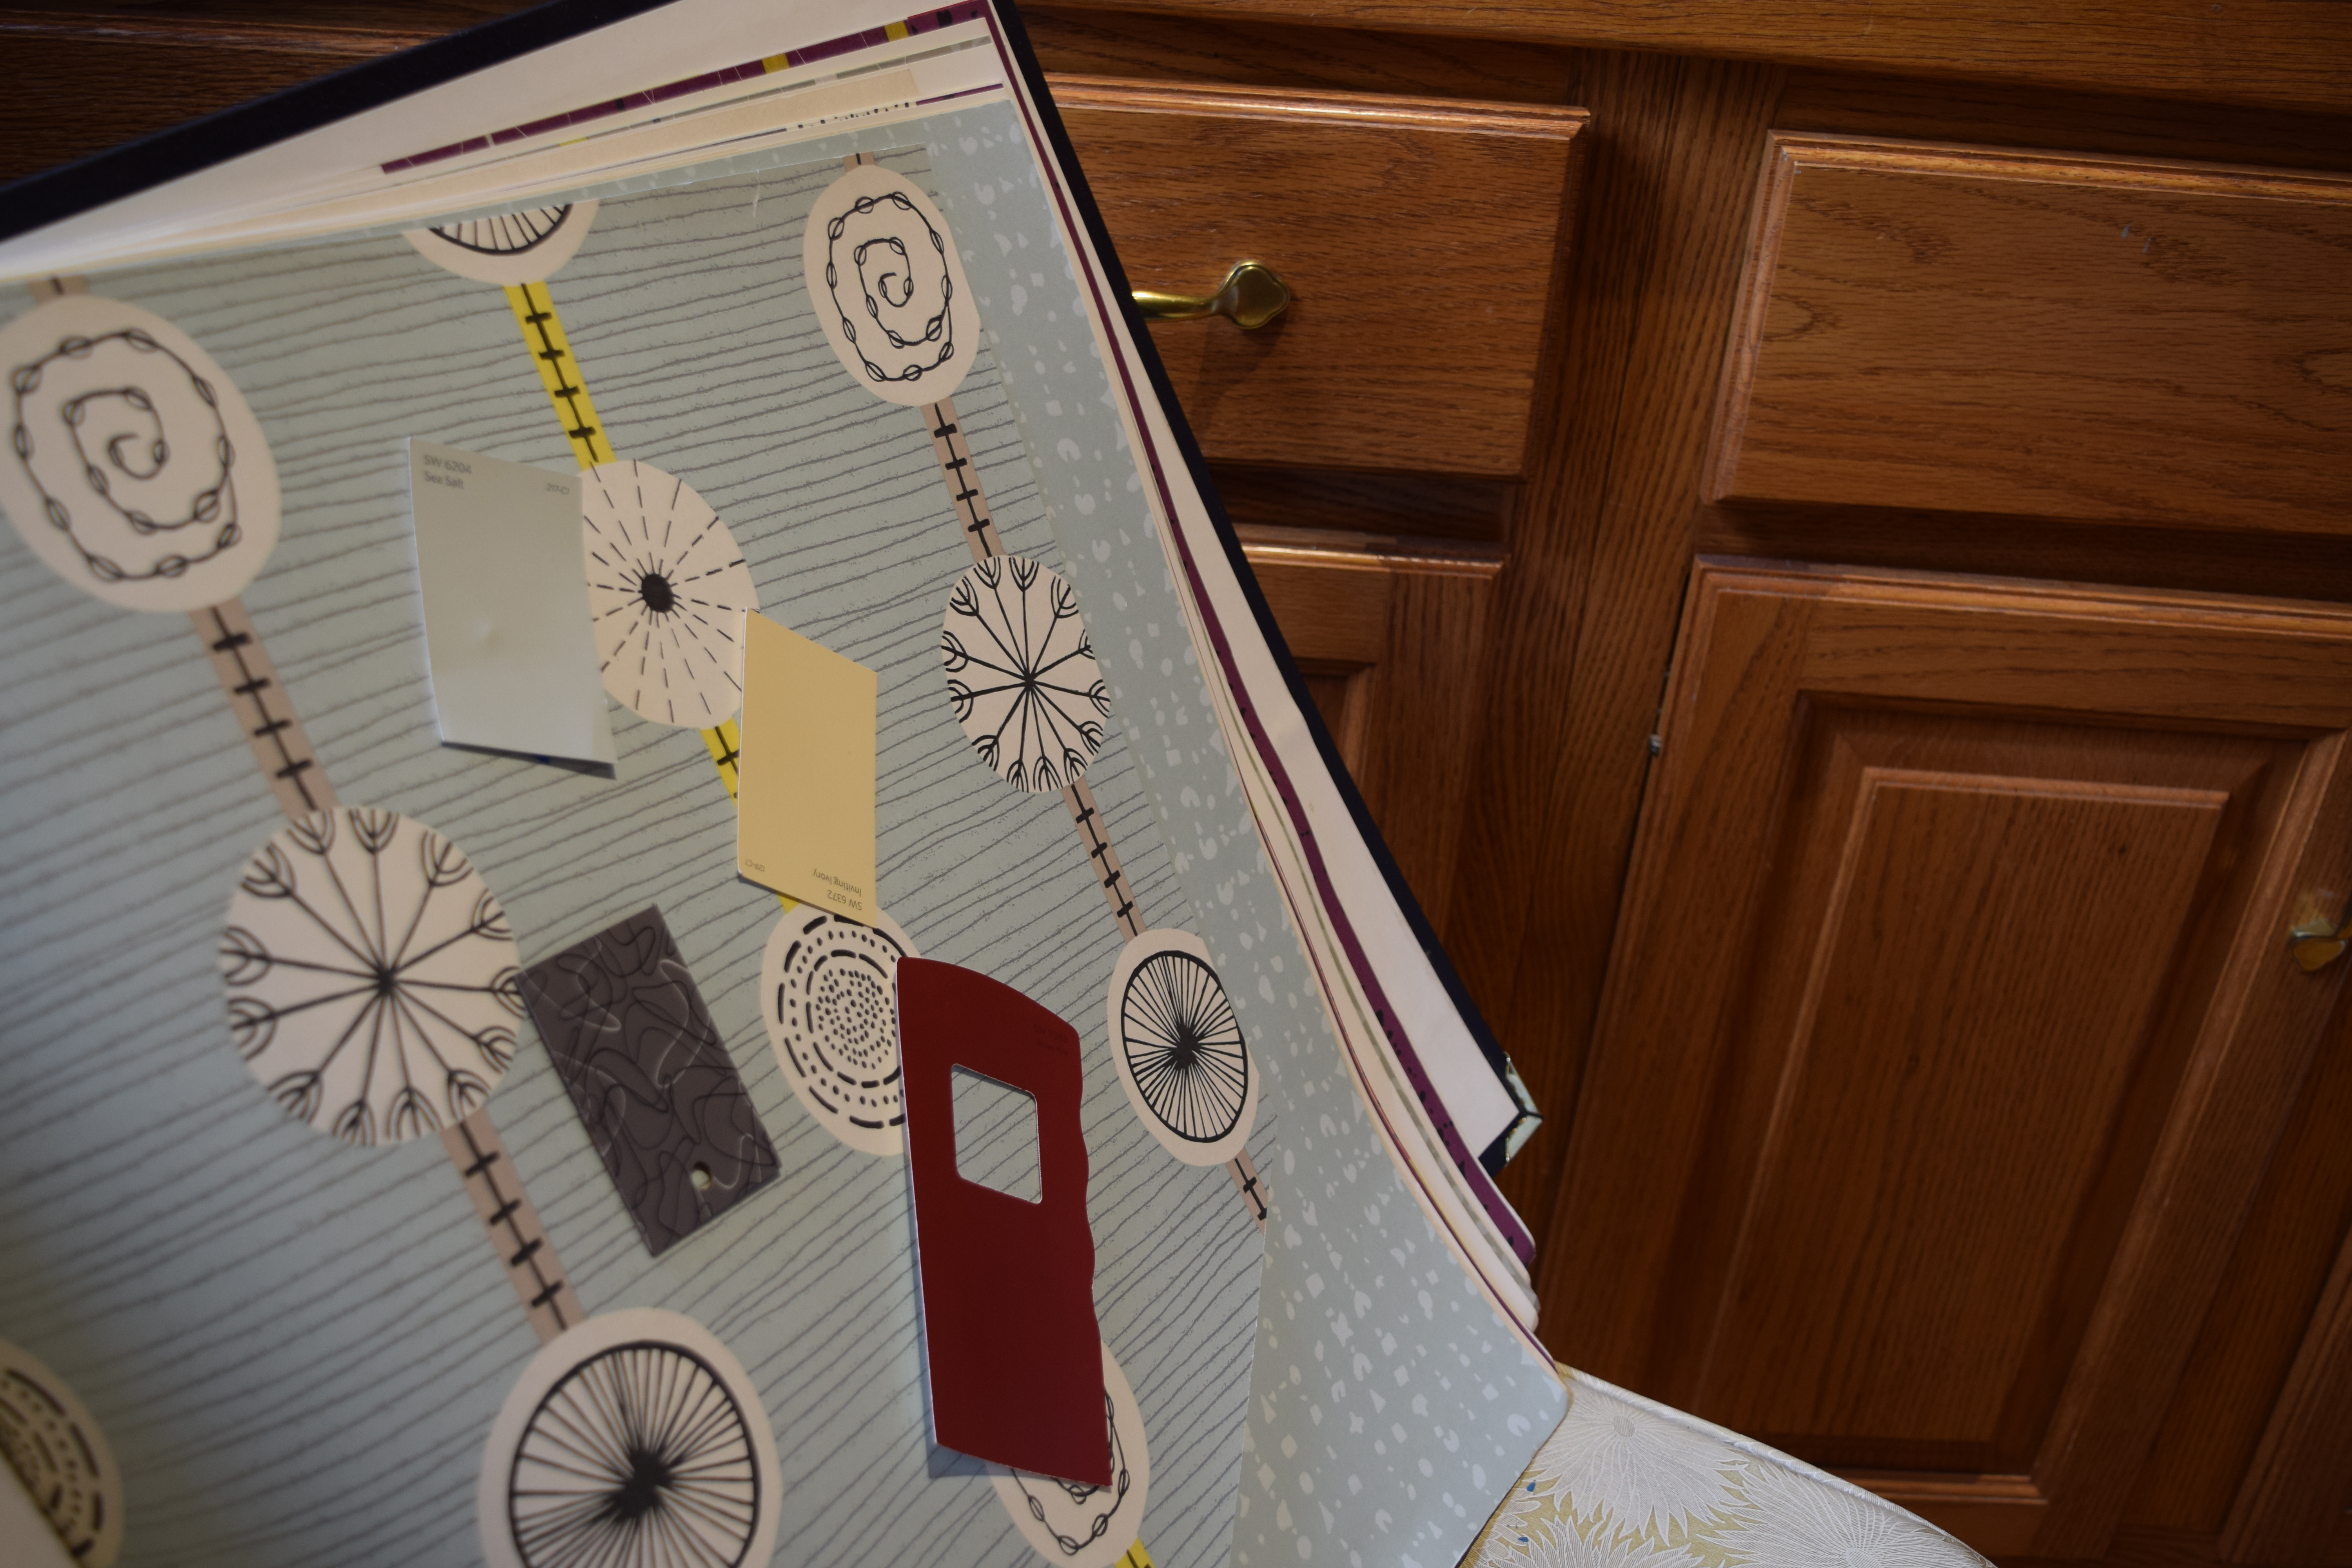
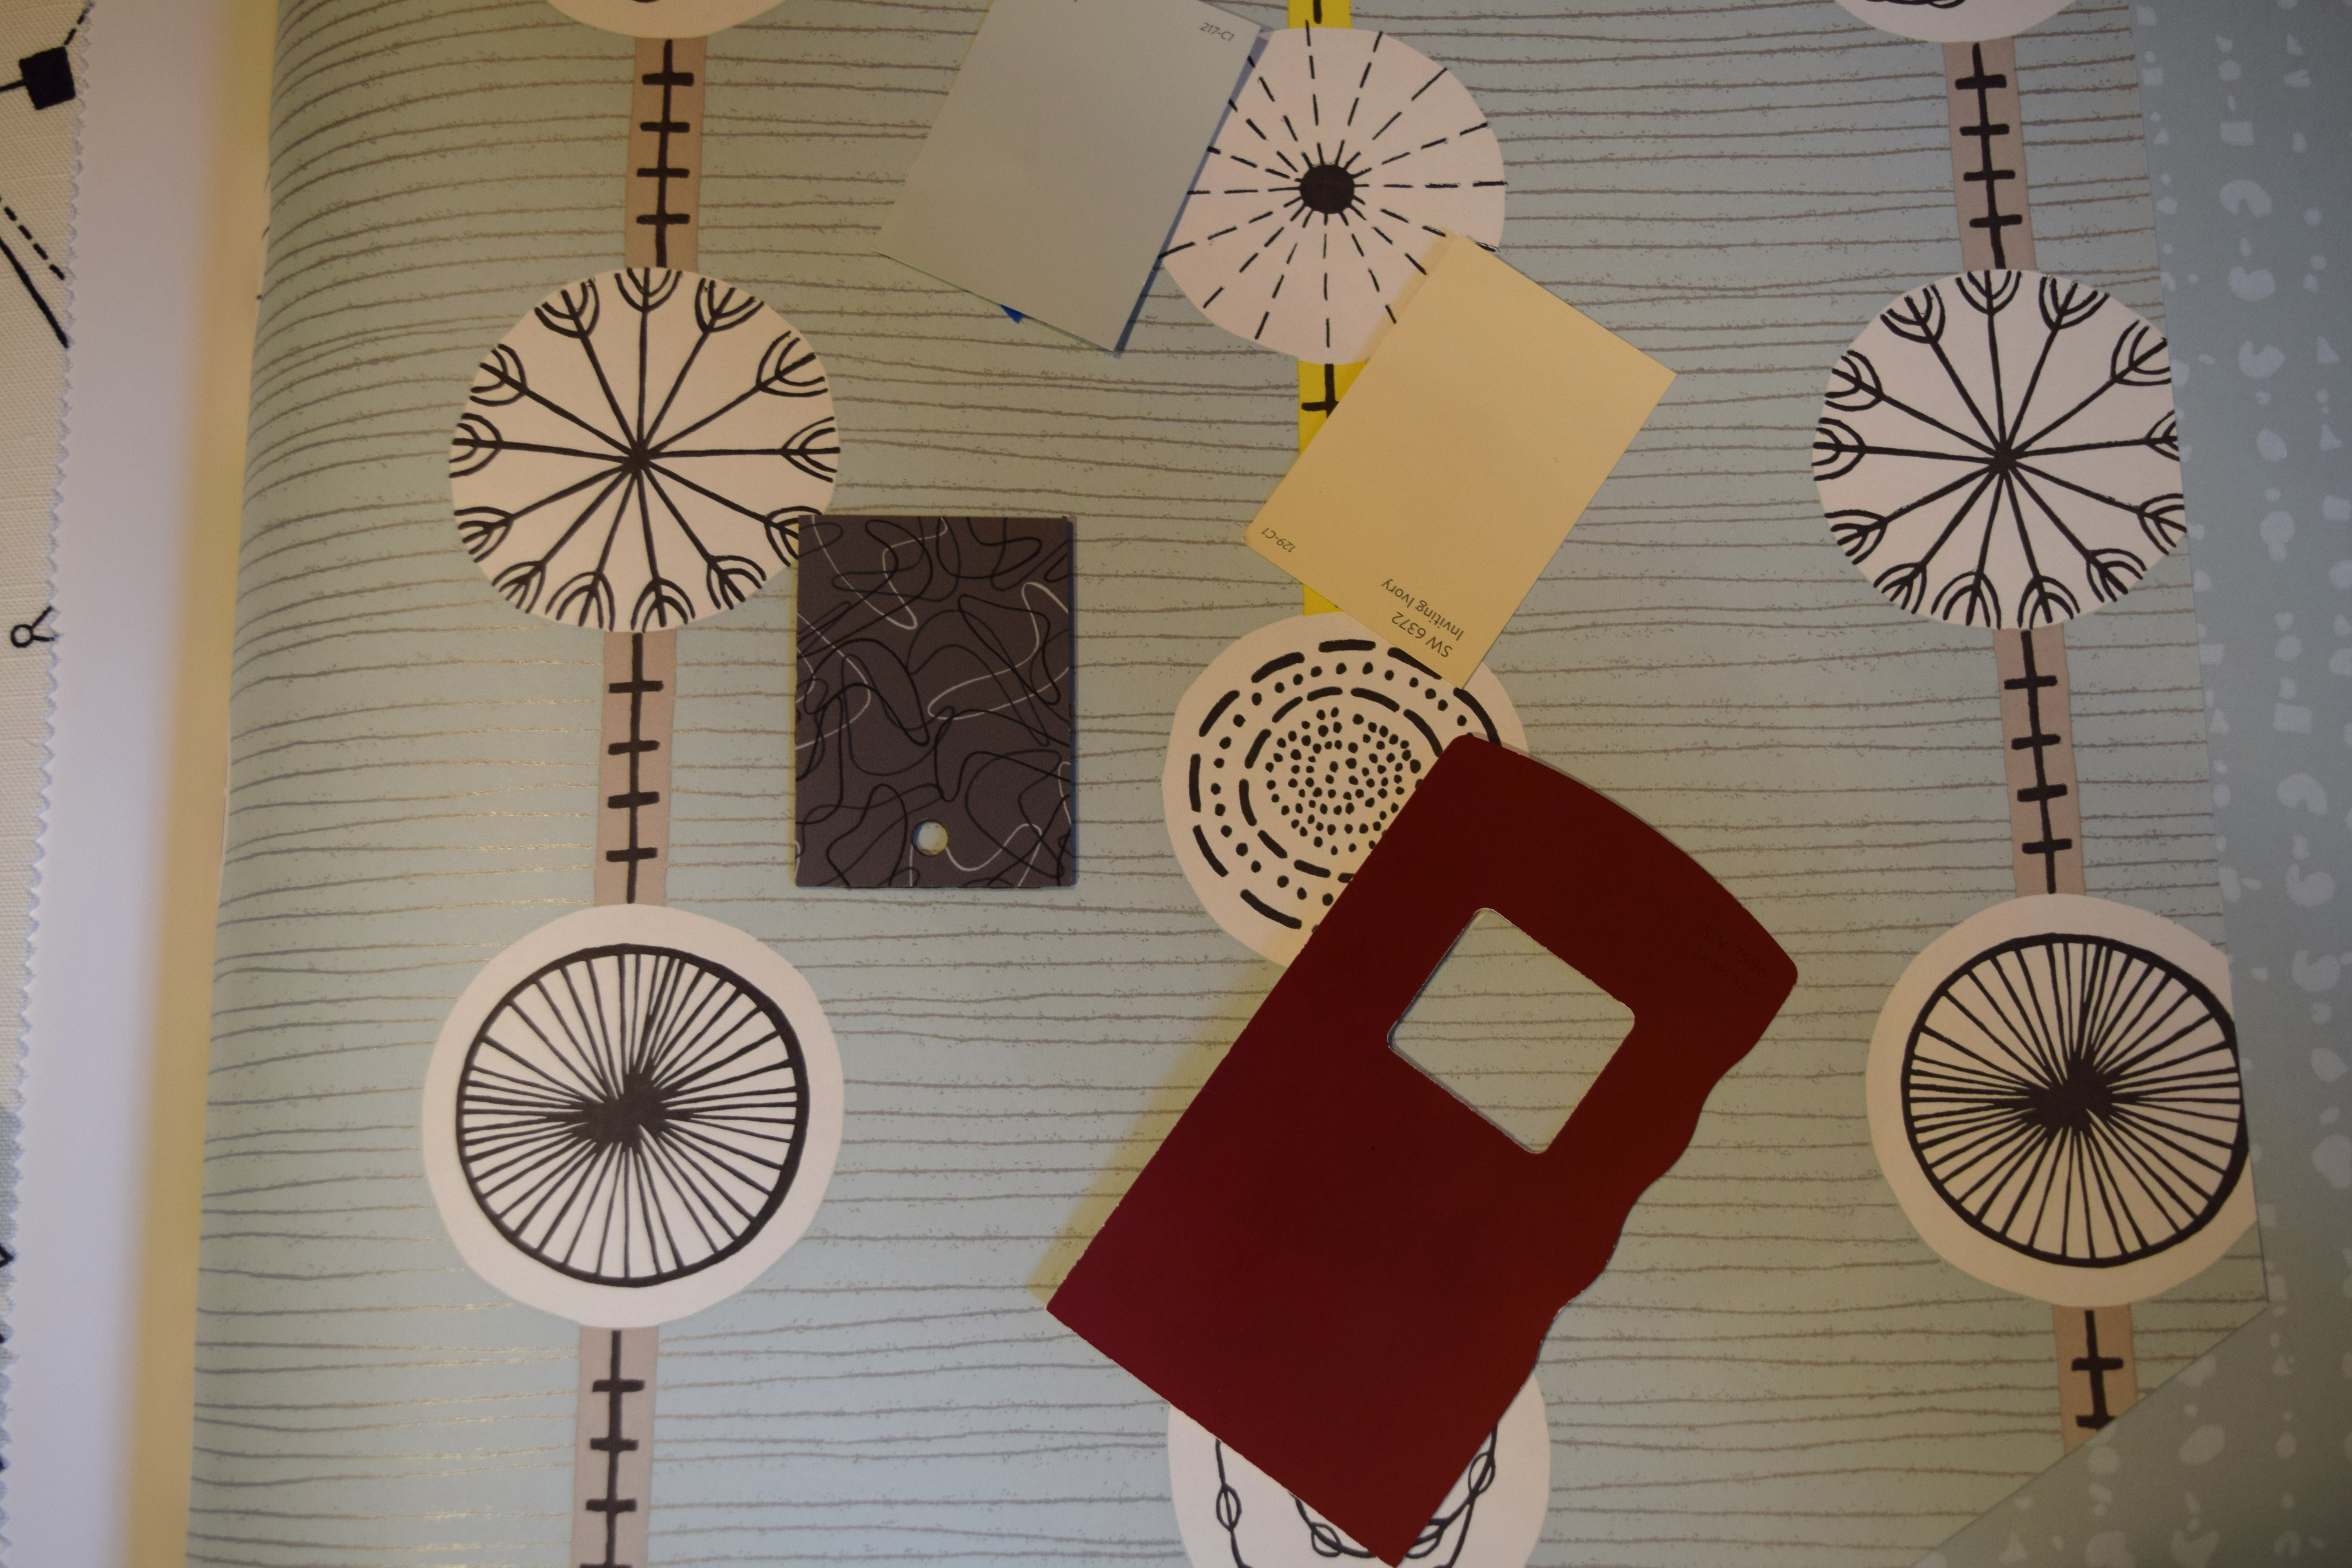
[I love this wallpaper that goes with the gray laminate we chose for the countertop. However it turns out it isn’t suitable for use in the kitchen.]
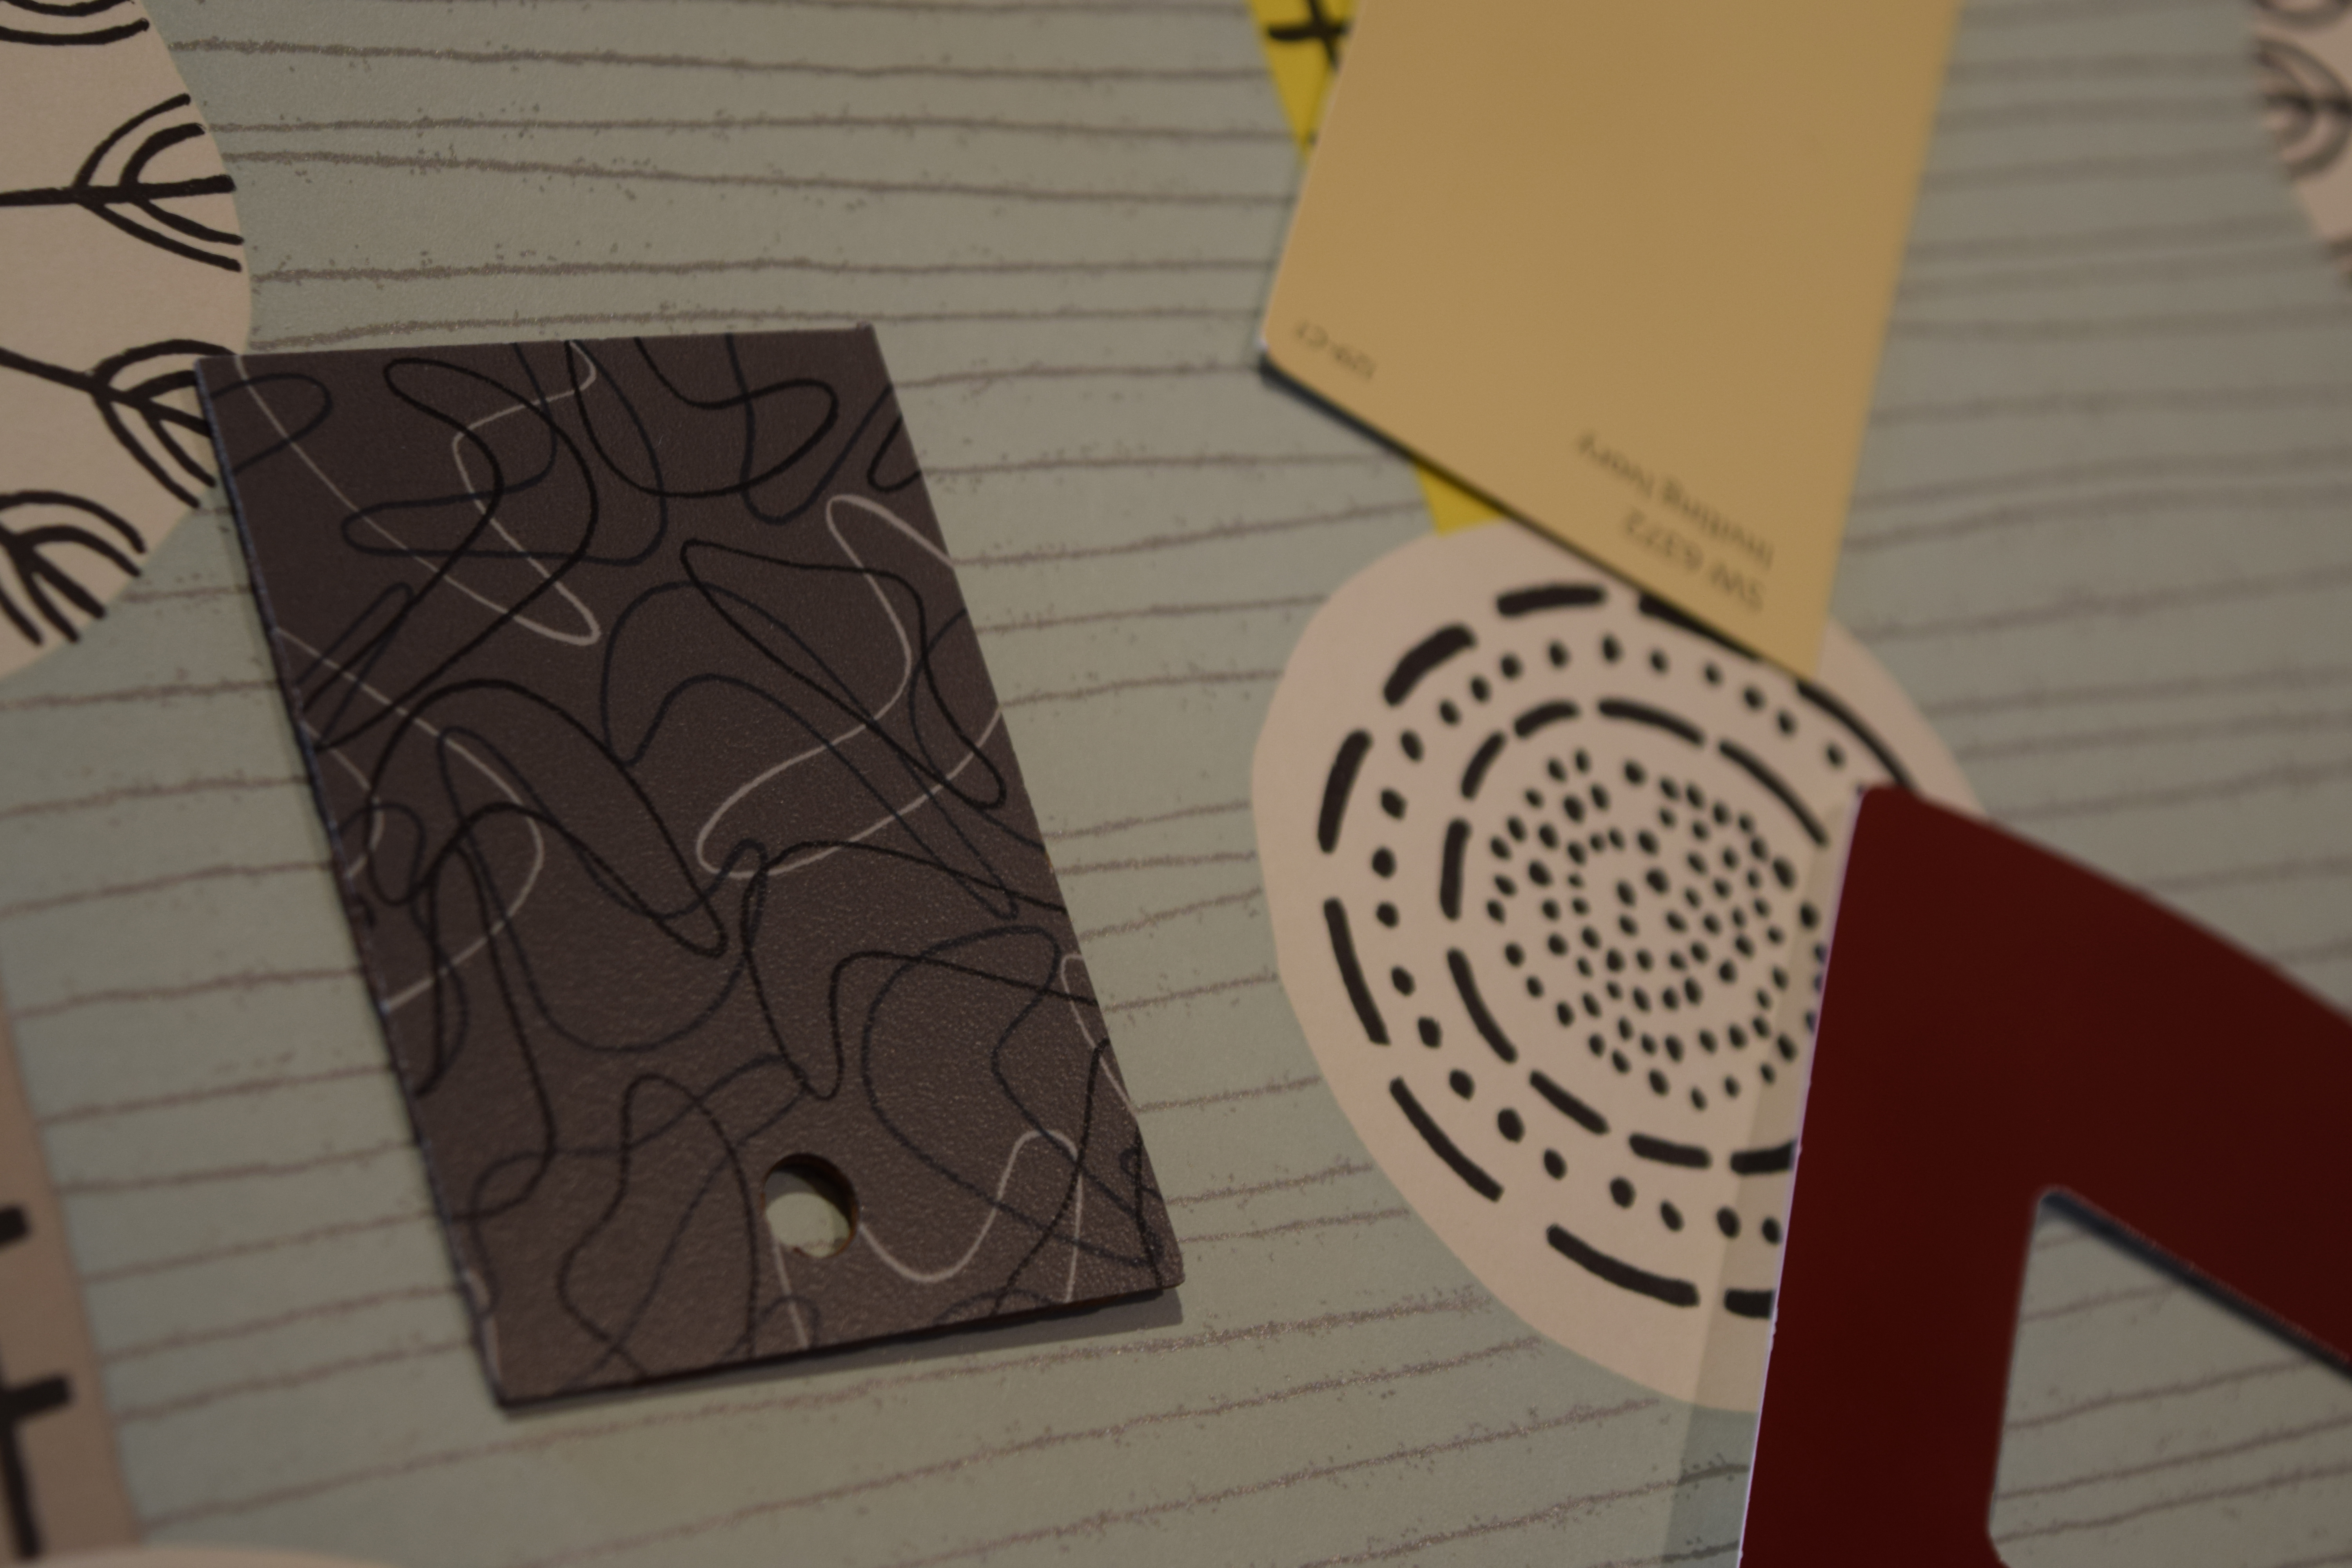
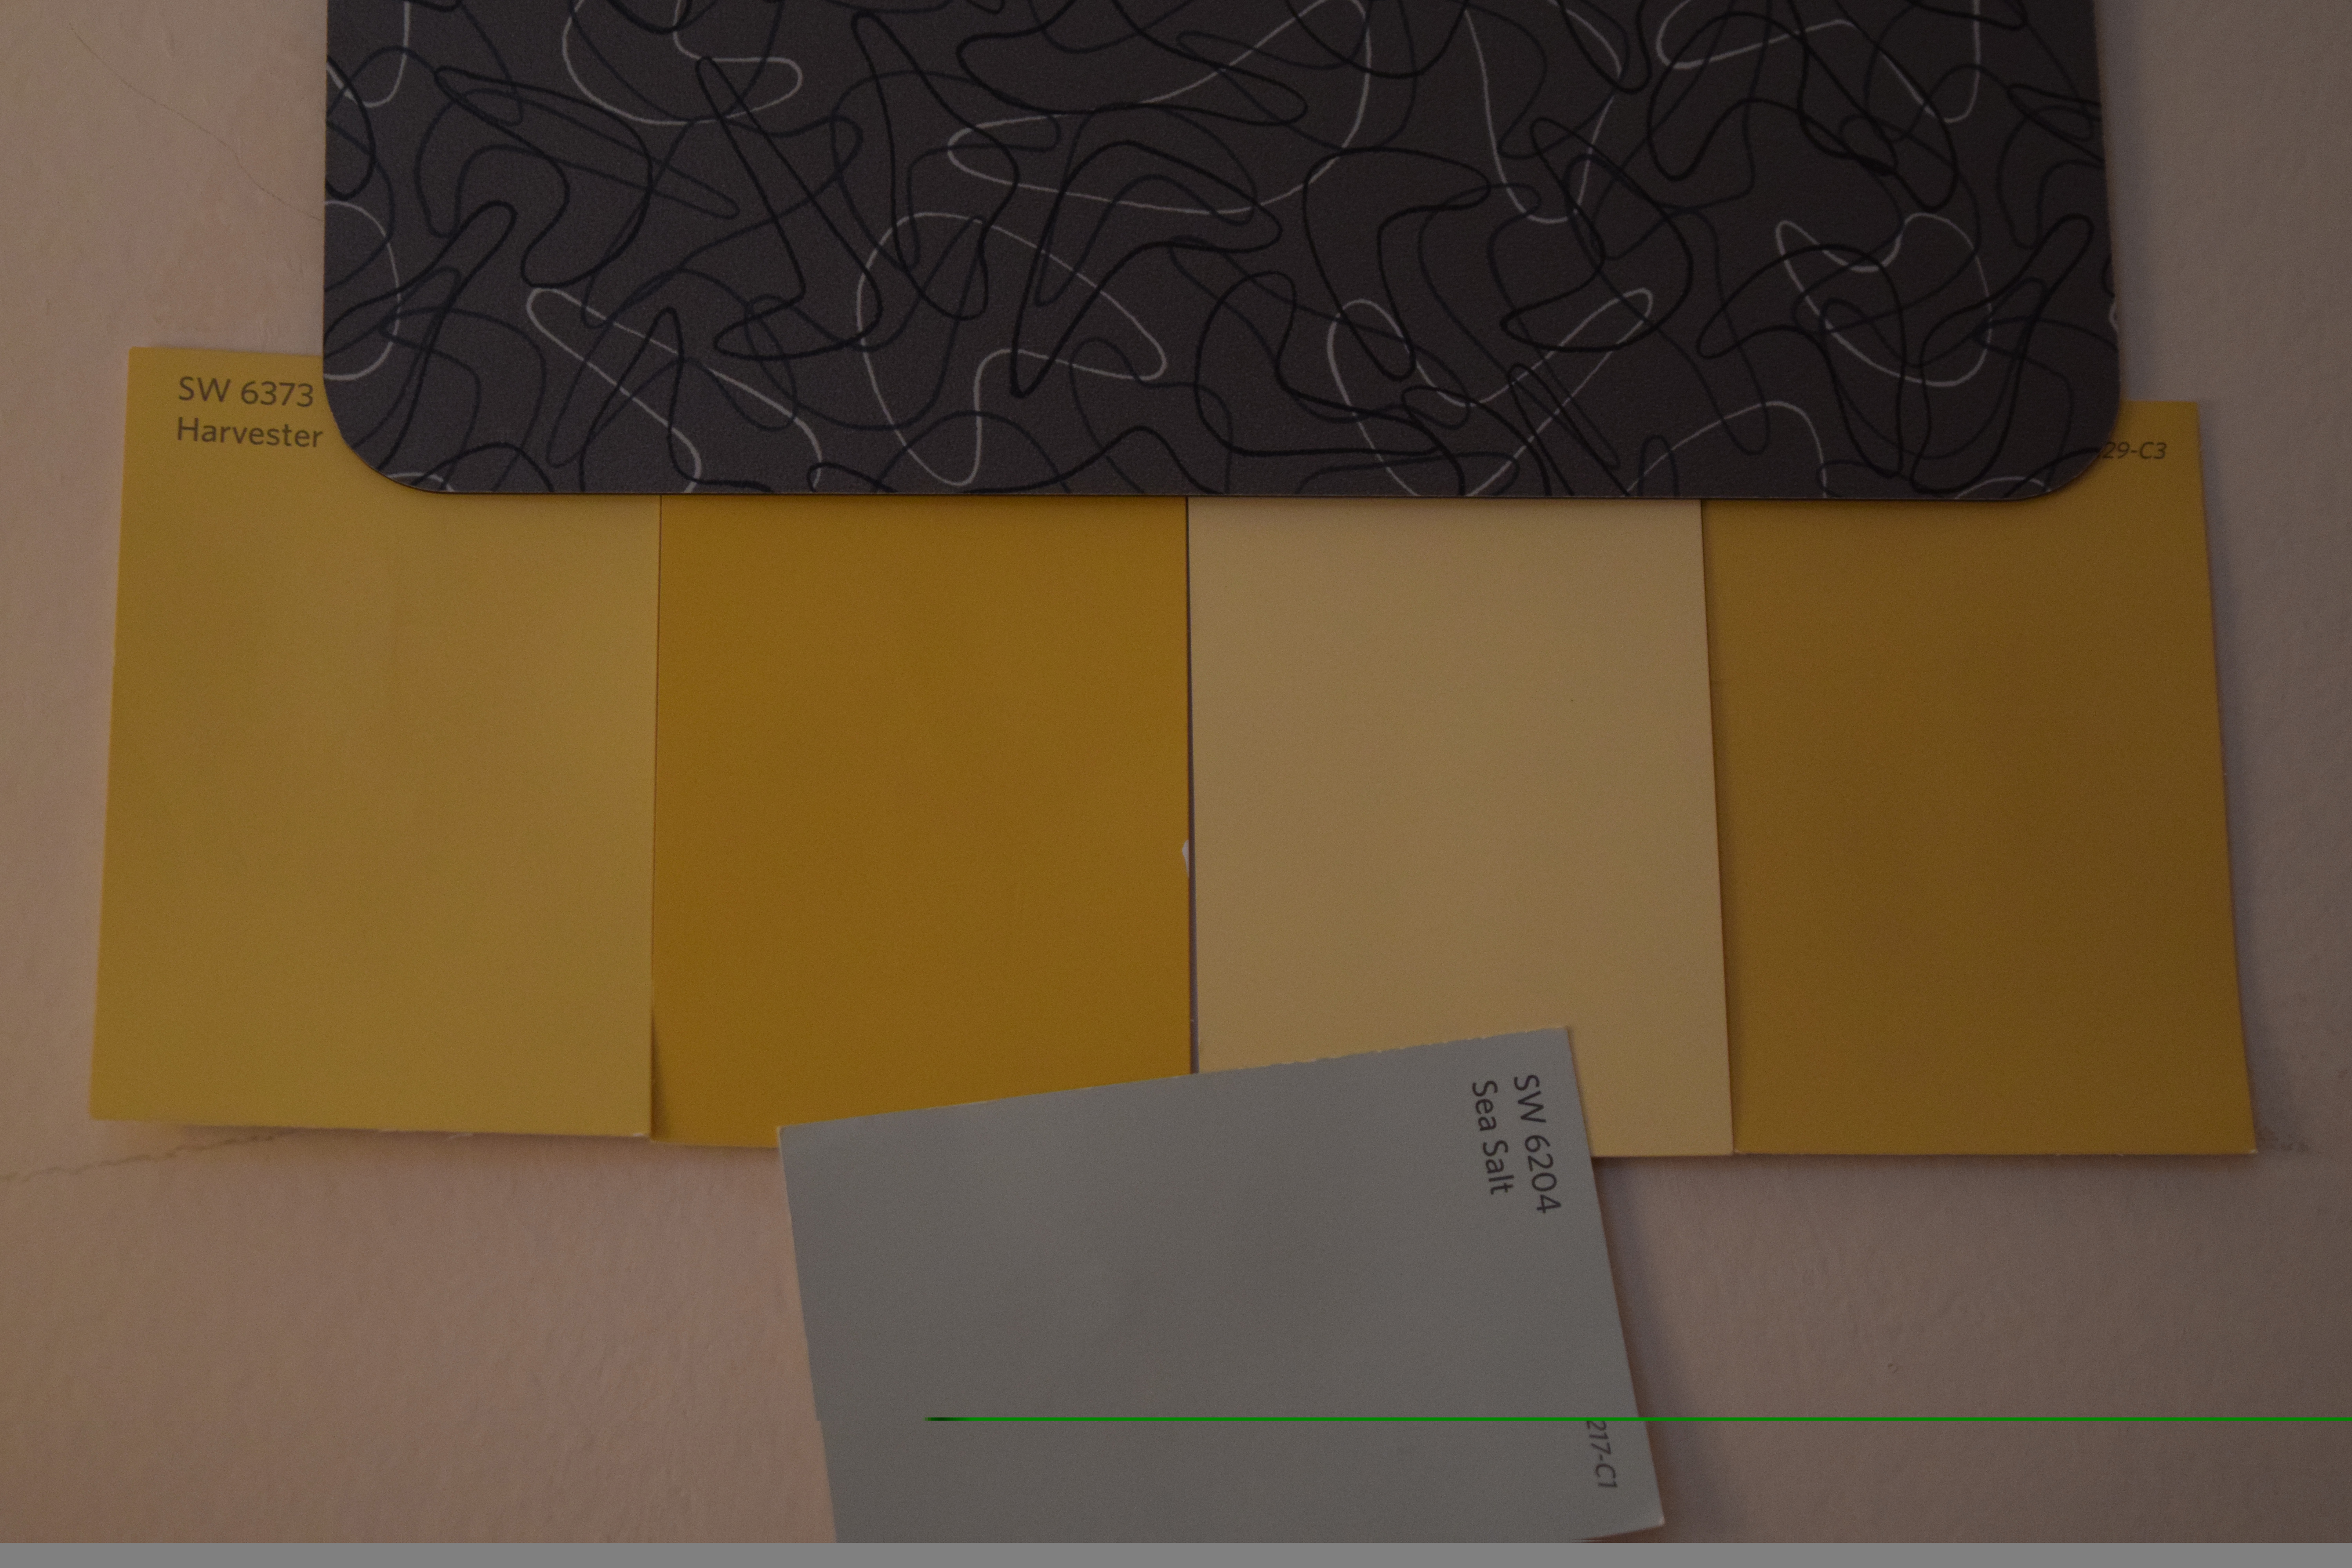
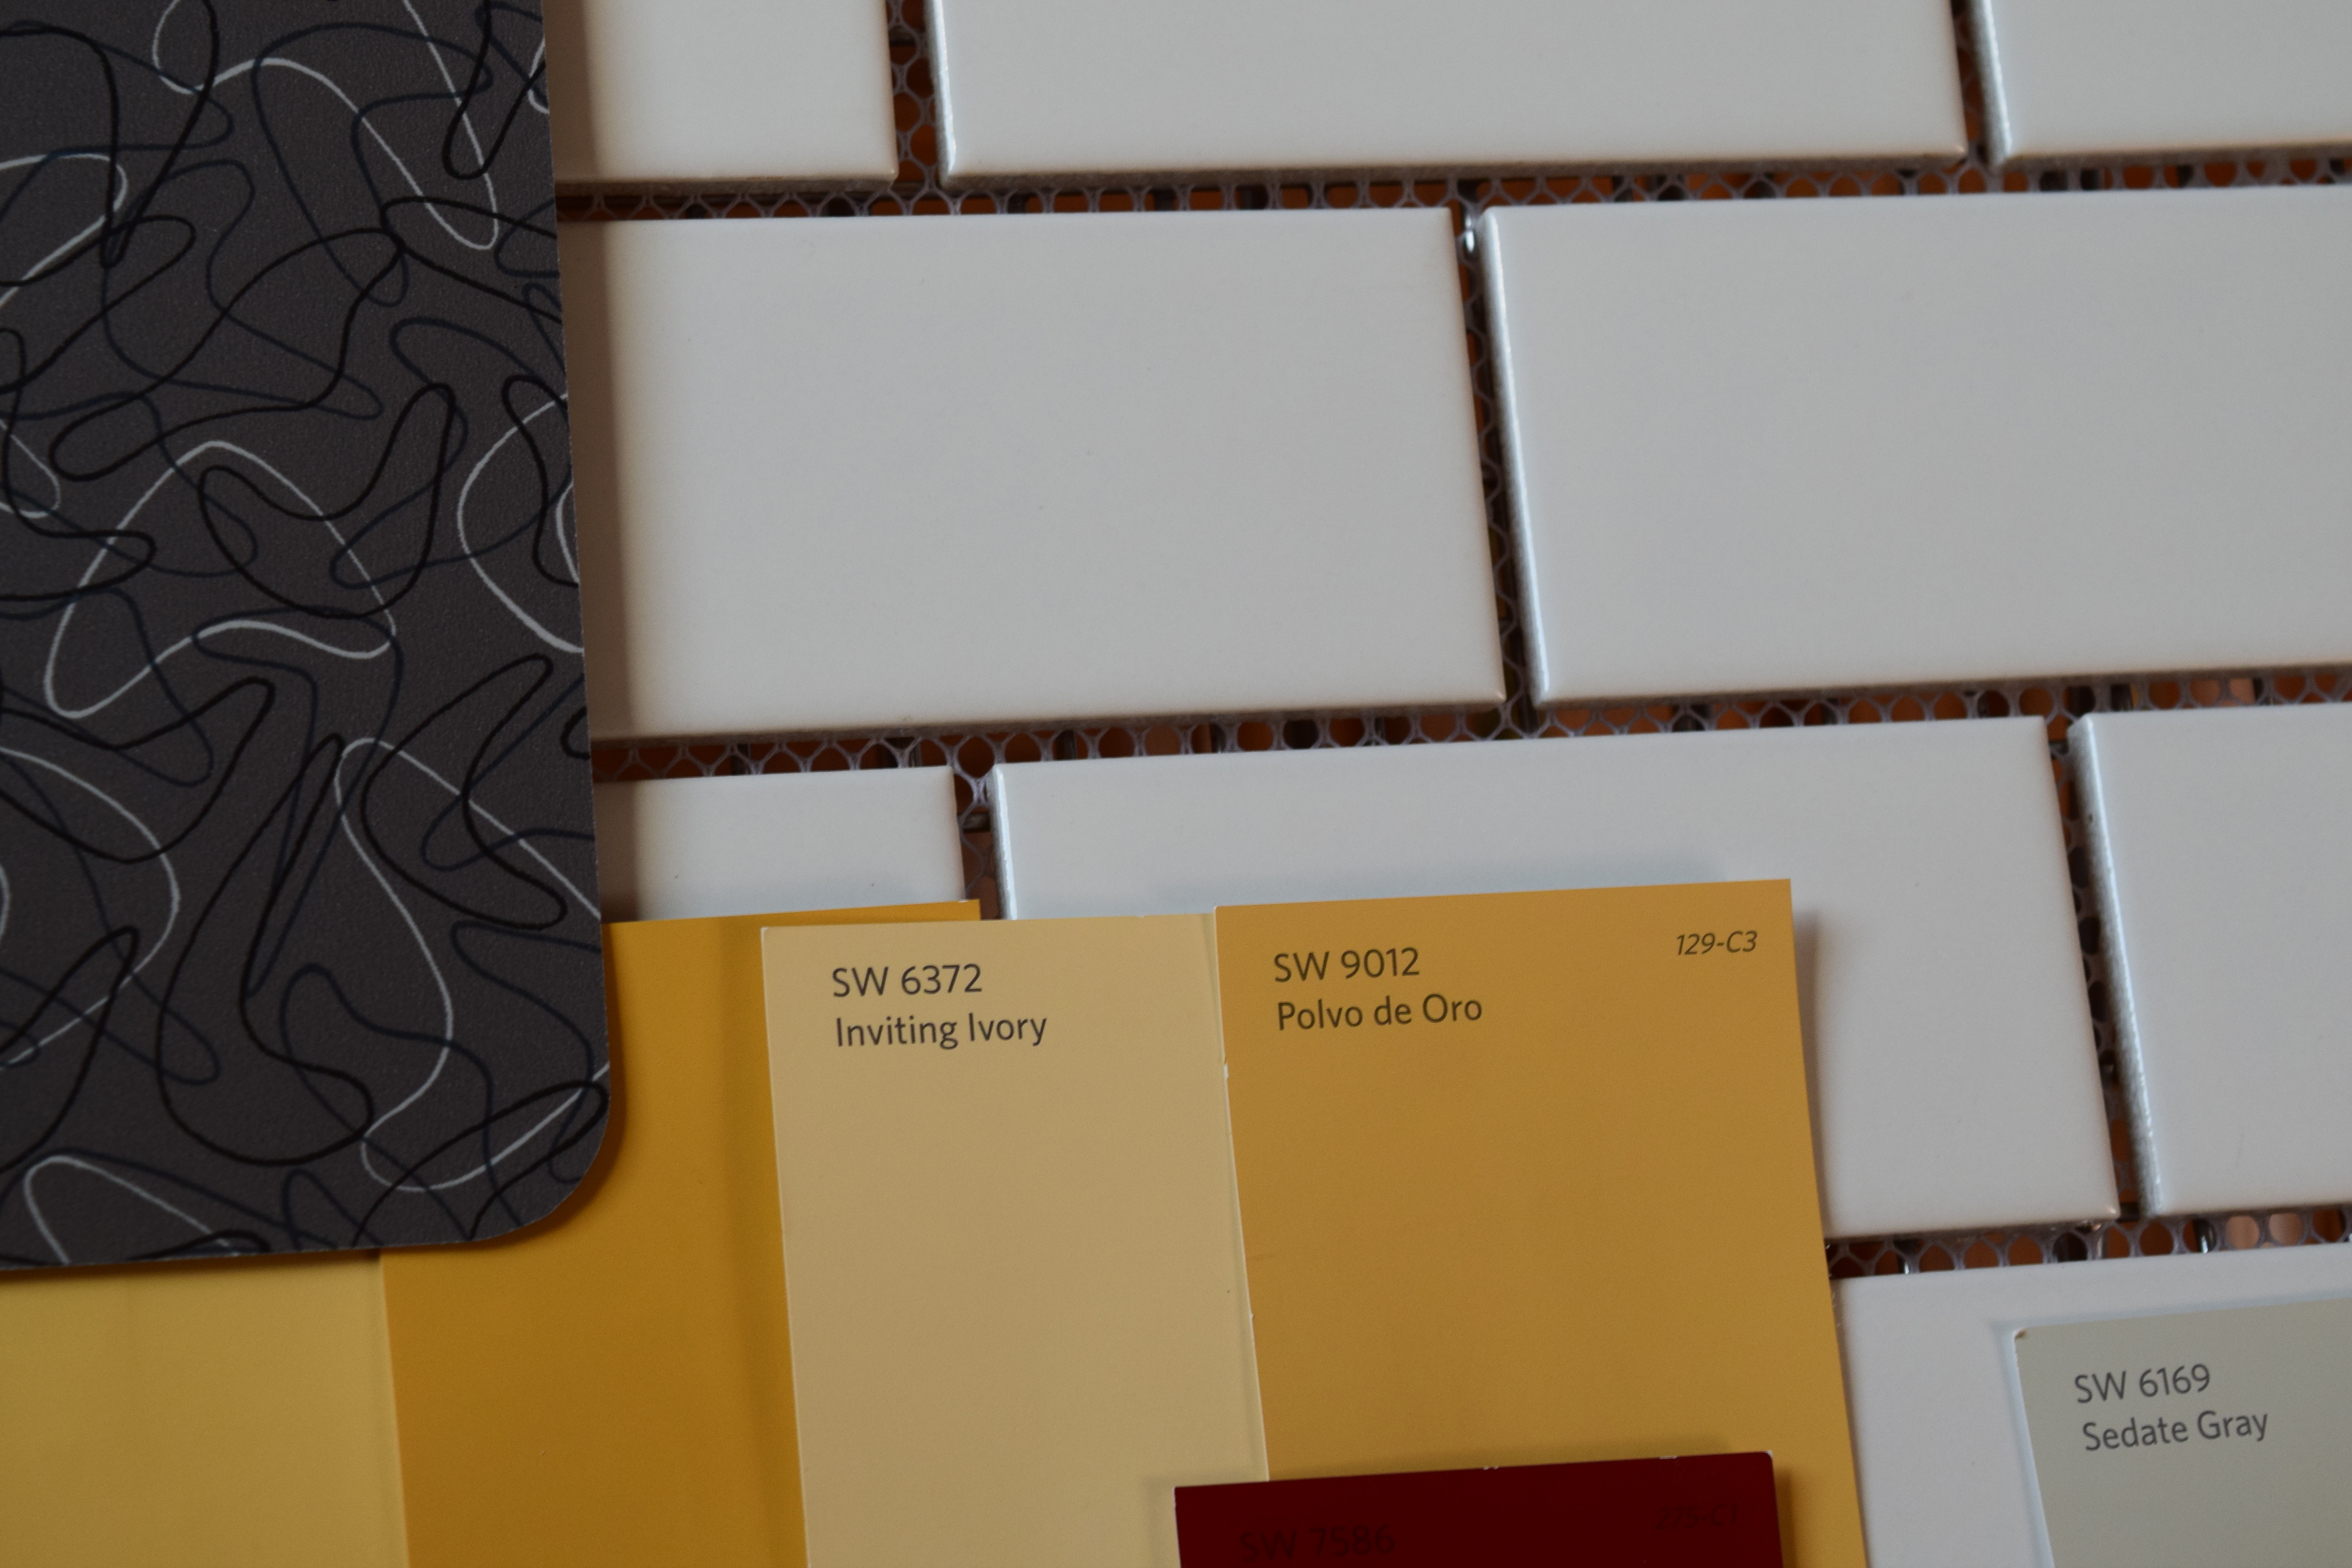
[Here you see the Charcoal Boomerang laminate with the red and the yellow that will be in the dining room. At the top you also see a sample of Sea Salt, a Sherwin Williams color that is supposed to go well with oak cabinets according to this blogger. It also happens to coordinate with Balmy, the color in our living room.]
[Here it is up close. When choosing a wallpaper to go with a pattern that has a small print and some “movement”, a designer I briefly talked to at Abbot Paint suggested going with a medium pattern and straighter lines. I’m not sure this paper falls within those rules, but I still think it works.]
[The paper would have been used on the back wall that surrounds the door. But since I can’t use it, Sea Salt it will be. You see a swatch of it above the door.]
[The Sea Salt will sit behind the red and yellow in the dining room.]
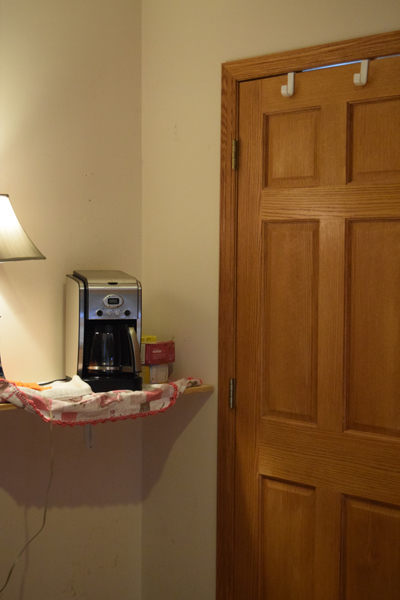
[Then there is this nook to do. A shelf will be made to match the countertops. A sconce will be added if I can find the right one. But the wall is tricky because it leads to the basement, which is turquoise. The Sea Salt will work okay, but it could be better.]
[For this coffee nook in the back of the kitchen, I thought about using the yellow from the dining room. When I was trying different shades of it, I got the idea to try stripes. Here you see it with the Charcoal Boomerang laminate and the Sea Salt.]
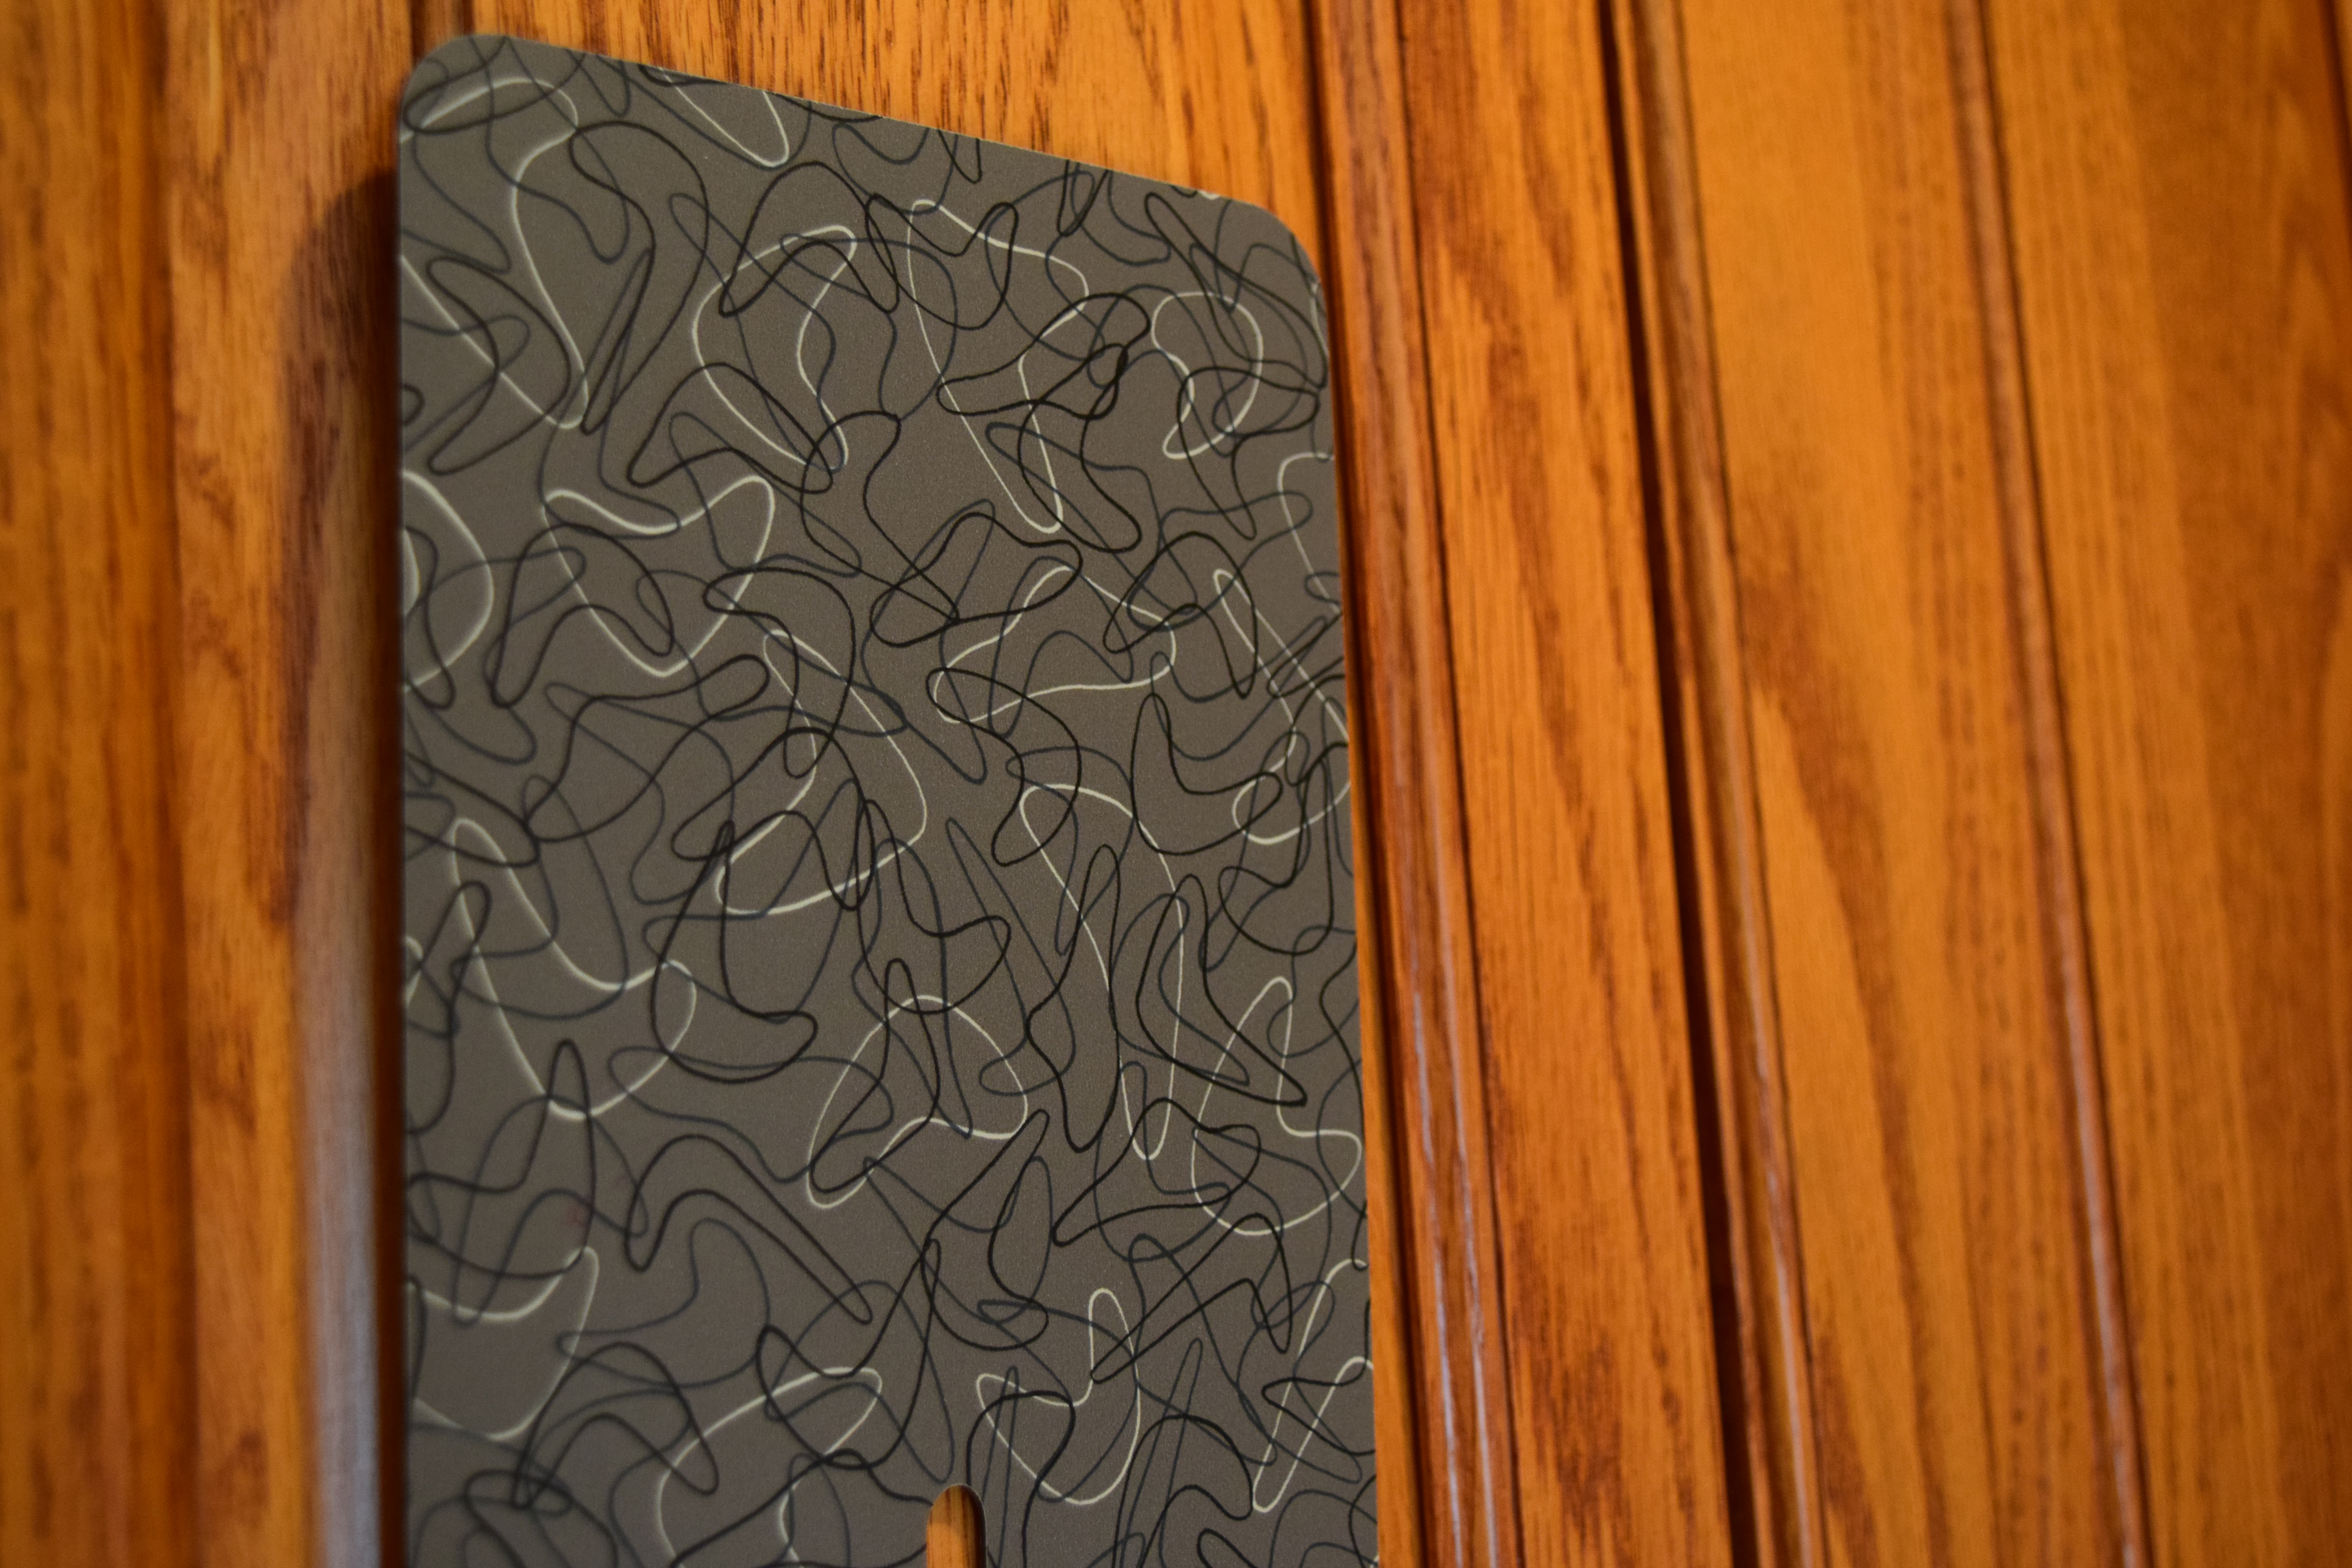
[Here’s the Charcoal Boomerang laminate with reddish oak cabinets. We tried the darker colors that I’ve seen with similar cabinets, but they just didn’t seem right. I keep coming back to this one.]
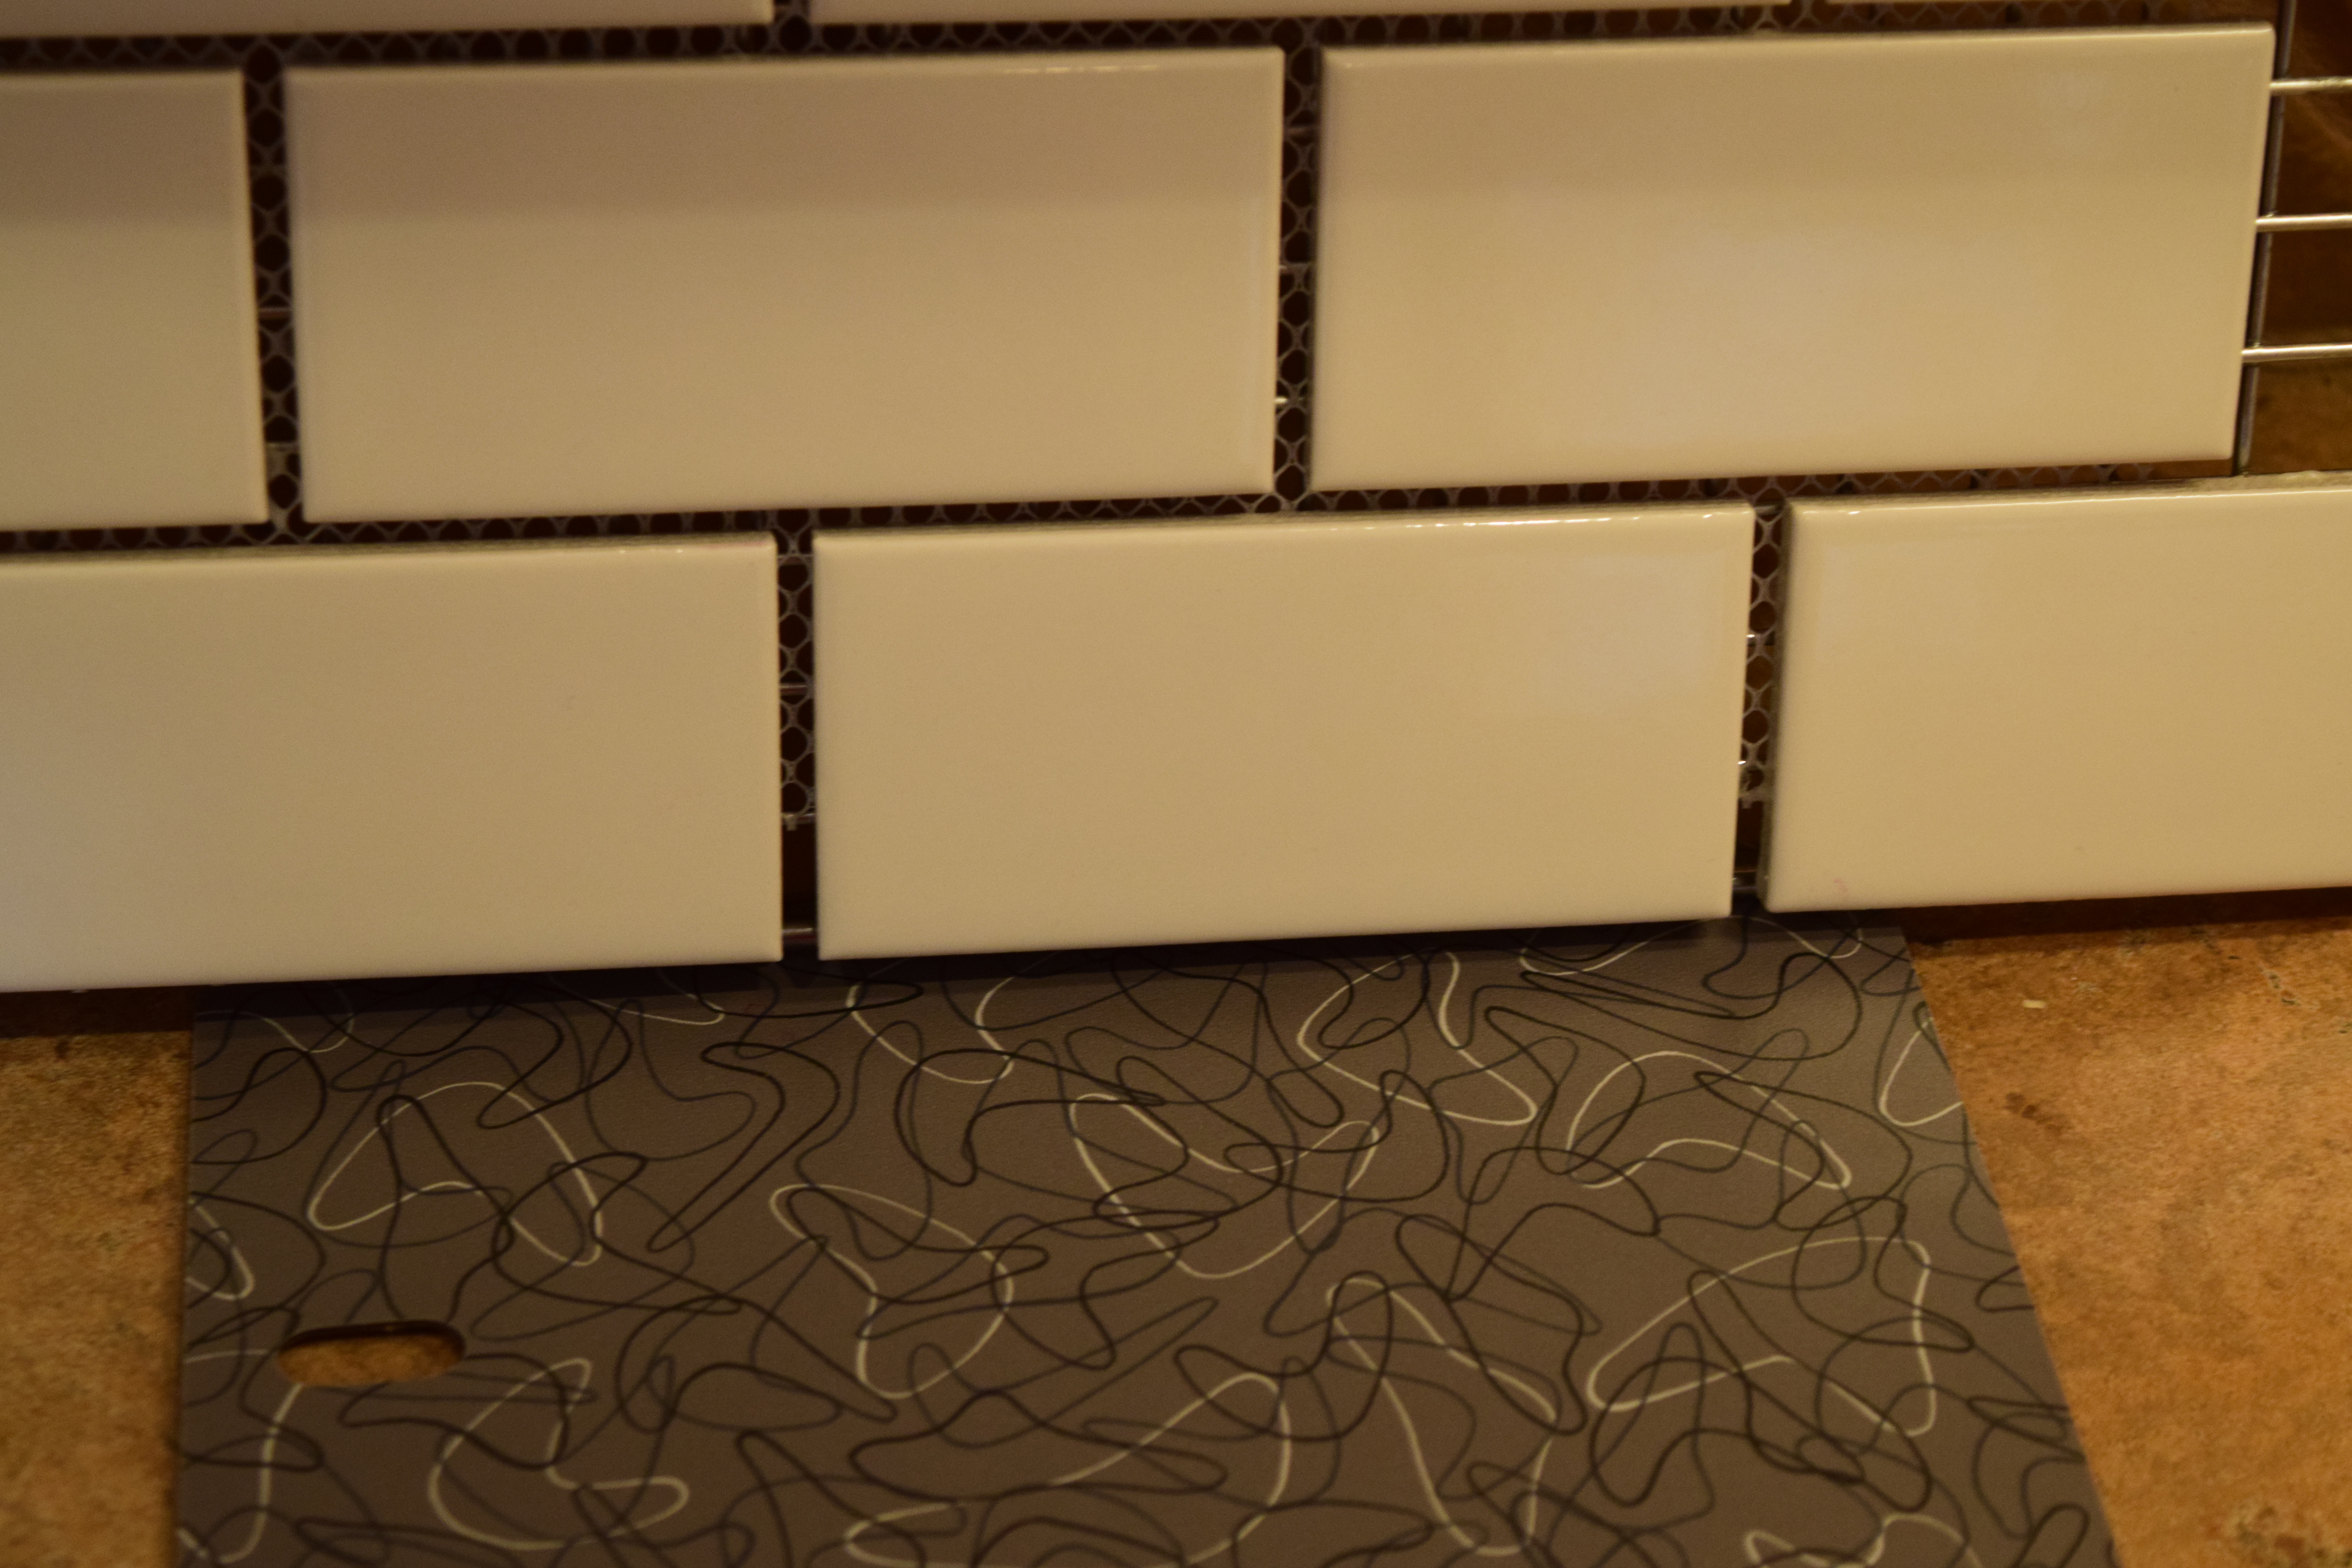
[Here’s the laminate with tile we are considering. Taking a tip from the person who was giving me advice about the wallpaper, I’m favoring straight lines. I love this size and to my eye it looks good. But I wonder if it is too small for the pattern on the laminate.]
[Here’s everything together. I see I included Sedate Gray from Sherwin Williams. That will go in the bathroom off of the kitchen.]
This is still a work in progress, but we are getting closer to finalizing some decisions.
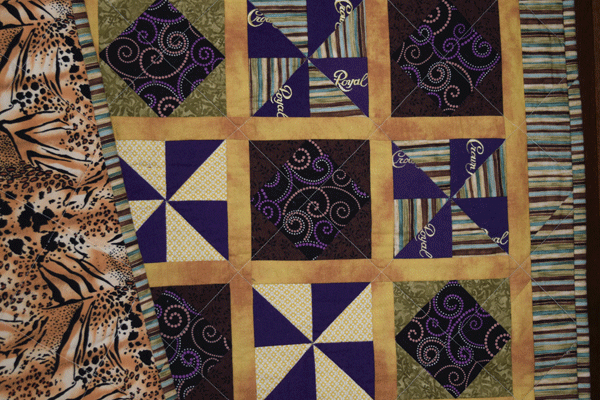
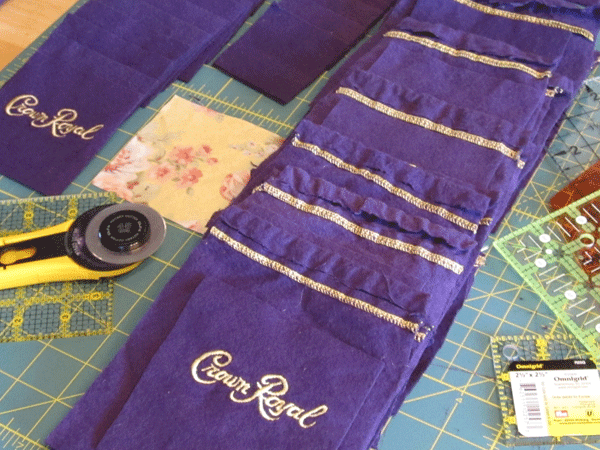
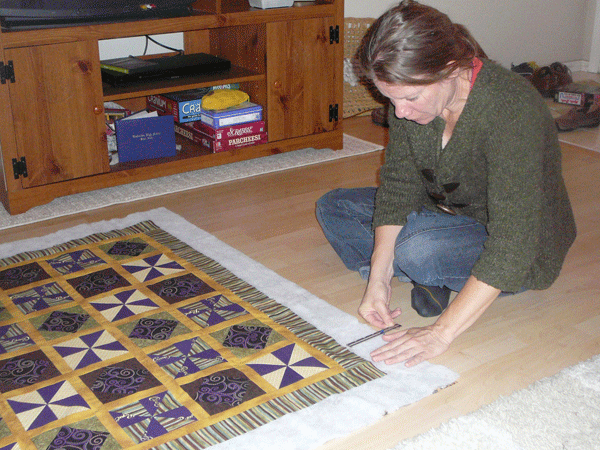
Crown Royal bags can be used for quilts, rag rugs and more. We have free ones for anyone who can use them.
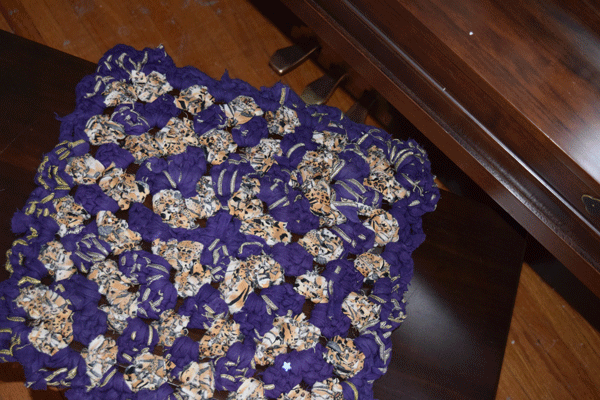
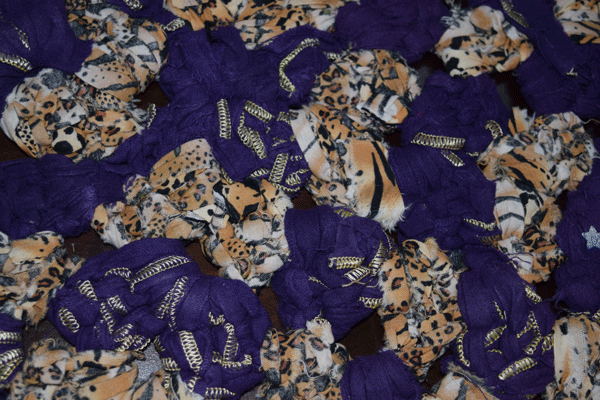
Over the years we’ve accumulated quite a few Crown Royal bags and a friend has even more to add to our pile! They are free to anyone who can use them. While they can be handy for things like storing scrabble tiles and while my mom and I made a quilt with some and my sister crocheted a rug/seat pad with others, we have more than I can ever use. For more ideas about what you can do with these bags, just do a quick Internet search. There’s a ton of ideas out there!
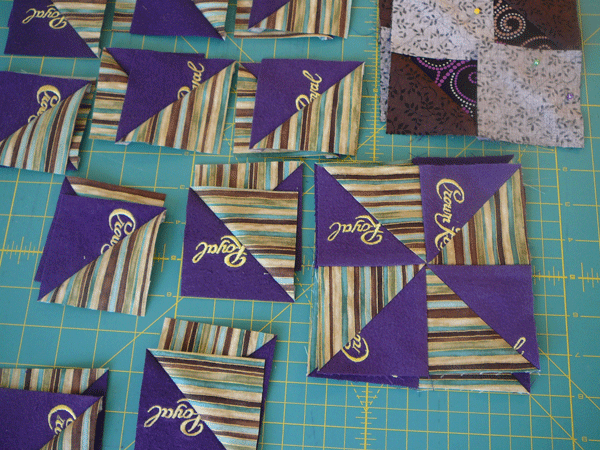
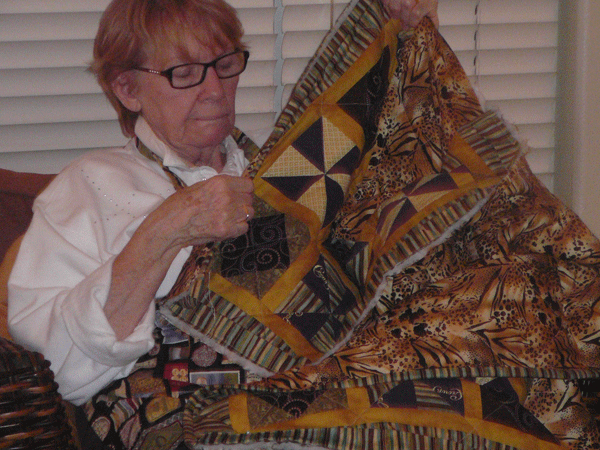
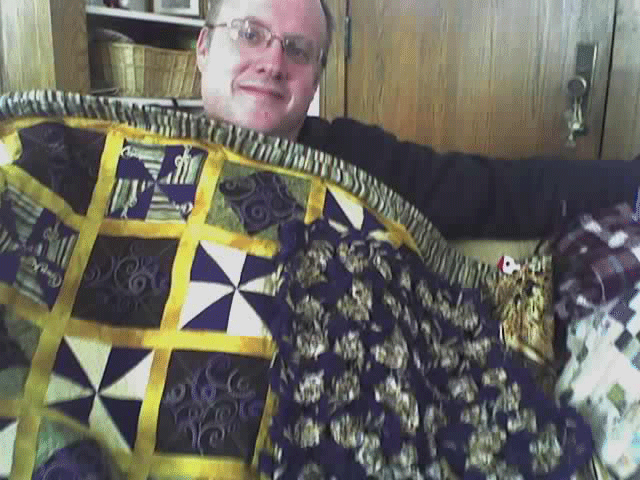
Quilt with Crown Royal bags.
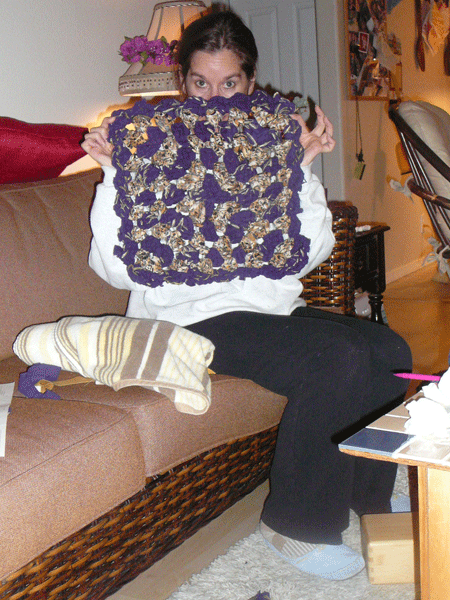
Seat pad crocheted with Crown Royal bags and other scrap fabric.
Seat pad crocheted with Crown Royal bags and other scrap fabric.
Crown Royal bags used for quilts.
My sister used scraps from our quilting project to crochet this seat pad.
I thought, “When I’m 90 it’s not going to be so easy to fish out these pans and lids from a cramped lower cabinet.” But it’s driving me nuts now! So I removed some minor irritations by using certain spaces and some objects in unconventional ways.
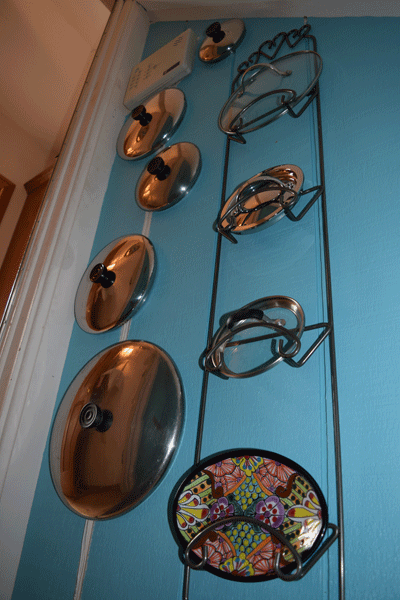
Lid Storage
I thought, “When I’m 90 it’s not going to be so easy to fish out these pans and lids from a cramped lower cabinet.” Then I realized that it’s driving me nuts now! So I removed some minor irritations by using certain spaces and some objects in unconventional ways.
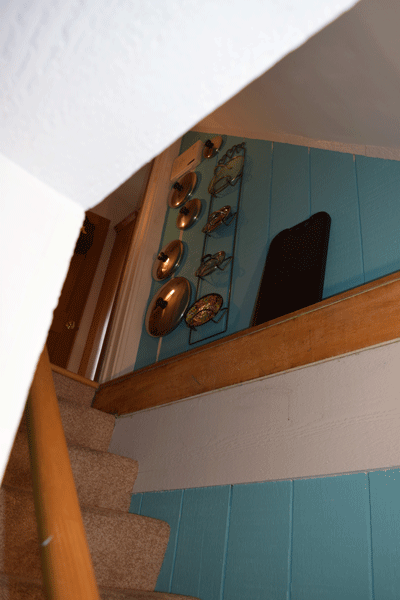
Pan lids are stored by maximizing underused space at the top of the stairway to the basement.
Pan lids are within easy reach, hanging just around the corner from the kitchen at the top of the stairway to the basement. Some lids hang on picture hanger screws. Others are resting on a two-dollar thrift store find, a rack we were using for mail.
The ledge along the staircase keeps the lids out of the way.
The ledge along the staircase gives enough clearance so that the lids don’t obstruct the path or make it likely that they’ll get bumped.
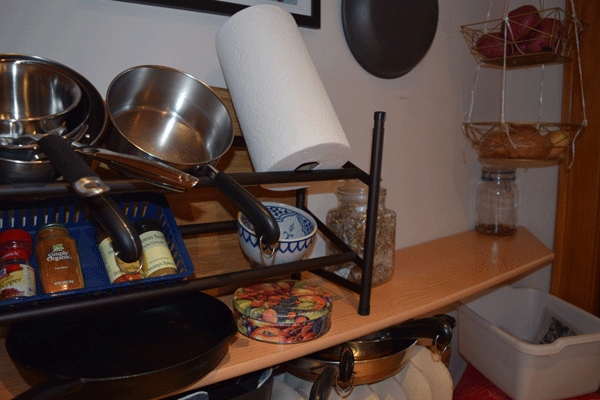
Storage for pans, spices, paper towels, potatoes, onions, garlic…
A shoe rack used to hold pans.
Commonly used pans are where I can easily grab them.
Pans on shoe rack.
In addition to saucepans, the shoe rack can hold often-used spices, a bowl for garlic (we’re out of garlic, it’s the blue and white bowl) and paper towels. More pans hang on the wall and sit on top of the radiator below. Baskets hang from a plant hanger and hold potatoes and onions.
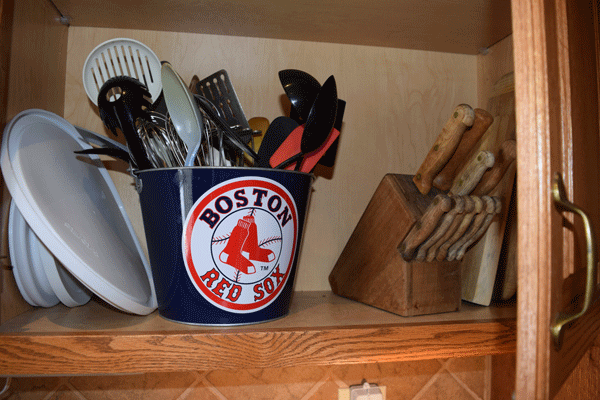
Where do you put a kitchen utensil holder, knives and cutting boards when there is no counter space?
Getting around limited counter space.
Storing the kitchen utensil holder in the cabinet freed up precious counter space. With open wall space also scarce, it’s a good solution for us. I also liked using what we already had. Brian’s Red Sox bucket was nice and roomy and lightweight. So instead of getting stored and forgotten as many souvenirs do, we get to enjoy it every time we reach for a wooden spoon!
Related to this, I have a friend who stores her cups and glasses in a drawer. When her kids were little she wanted them to be able to reach them so they could help unload the dishwasher. The point is, you can do what you want. Make it work for you. For me, I see the kitchen as a workshop.
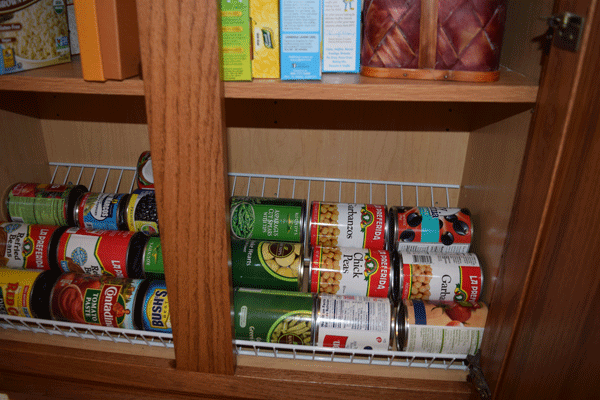
Getting more room out of the pantry for canned goods
Canned goods storage.
Putting canned goods on a sloping rack made the bottom shelf of the pantry more functional. I can see everything at a glance. I got the idea from another blogger (I’m sorry, I don’t recall which one) and it works great!
What’s next for my kitchen?
Painting – I’ve been painting the house and the kitchen will be included in this. Now that I’m mostly done with the basement and the living room, the dining room is next. Once that’s done, the color consultant will come back to help me with the kitchen.
New Counter Tops – Right now we have tile on the counter tops. I dream of grout-free counters.
Floors – The wood floors throughout the first floor of the house need to be refinished. I’m not sure when we’ll get to this, but that’s the plan.
Island – I can get more space with an island that can be rolled from in front of the dishwasher, where it would normally live. The extra prep space would be dreamy. I saw a good example of what I want at the Black Sheep, a pizza place in downtown St. Paul.
She was no bigger than me, not big. She had red hair and I think that was key. I think that had something to do with her superhero powers, but I’m not sure. I loved her! I
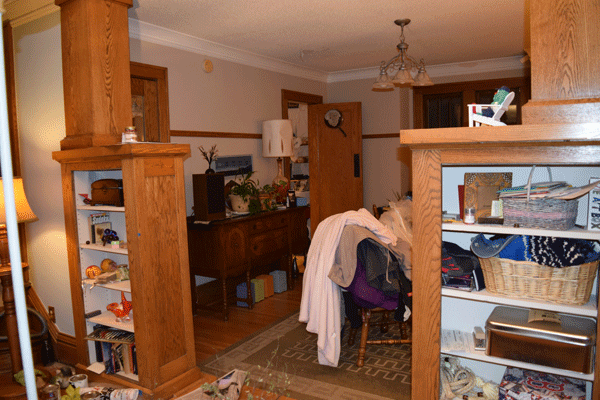
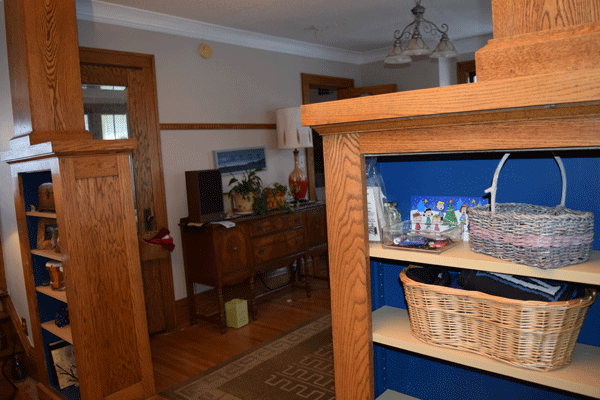
Before – Built-in shelves from living room/entrance to dining room
I’ve been listening to Love it or List It as I’ve been working on these shelves. On the show two people, usually a couple, disagree about whether to sell their home or remodel it. In the end they choose between their house that has been updated by a designer and a dream home found by a realtor. My messy shelves remind me of that show. Here’s a tip. Before starting fresh in a new house or even hiring a designer, try dusting off a few things. Put some stuff away!
After – Built-in shelves
The dining room is next. On the bottom of the dental molding will be red, like the fireplace. On the top will be “Inviting Ivory”, a buttery yellow, which will carry over into the stairway.
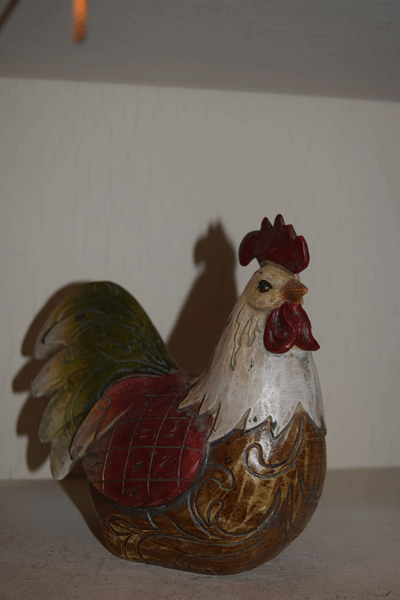
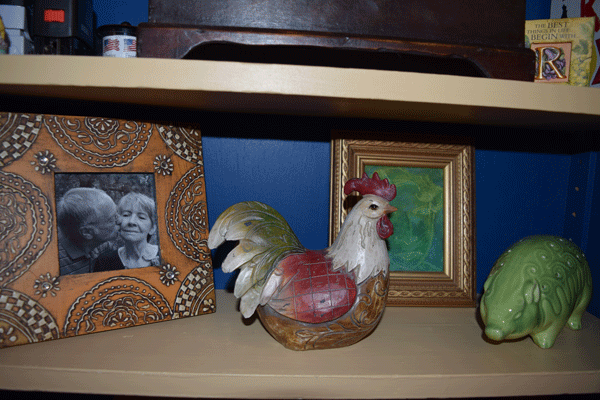
Before – Chicken on shelf
After
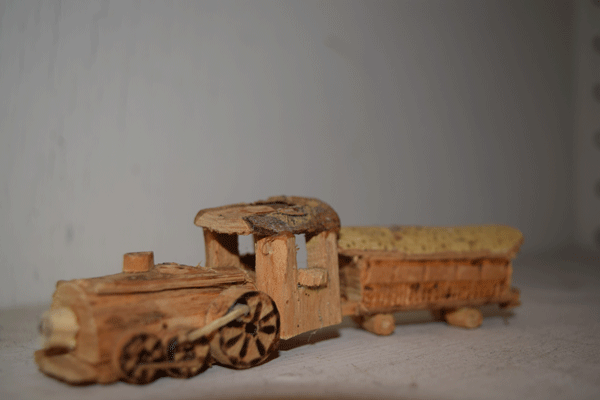
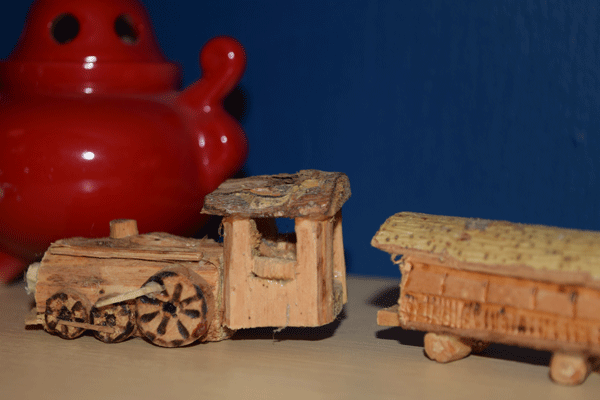
Before – Tiny train on shelf
After
I think that my dad made this little train, but I do not know for sure. I keep meaning to ask him about it. I found it buried in a package. I love it.
So painting and putting the cabinet back together was supposed to be a treat. Instead I was met with frustration that made me want to spit. I knew enough to note certain things when taking the shelves out. But, I didn’t know, for example, to note that four of the 32 clear plastic shelf brackets were different from the rest.
If only I were as sharp as the superhero who changed my tire. Triple A sent her one morning when I woke up to a flat. She was no bigger than me, not big. She had red hair and I think that was key. I think that had something to do with her superhero powers, but I’m not sure. I loved her! I watched her change the tire. Focused. Every bolt had a place. Every step was deliberate. She paid attention. When something didn’t work as expected, she calmly figured it out.
Sometimes I can be like her. Other times I’m defeated by an extra layer of paint.
My house just turned 100 this year. Things aren’t straight. Get a grip. Deal. Deal with it like a superhero. Oh, and enjoy. Love it. I vote “Love it!”