Weaving an Acapulco Chair

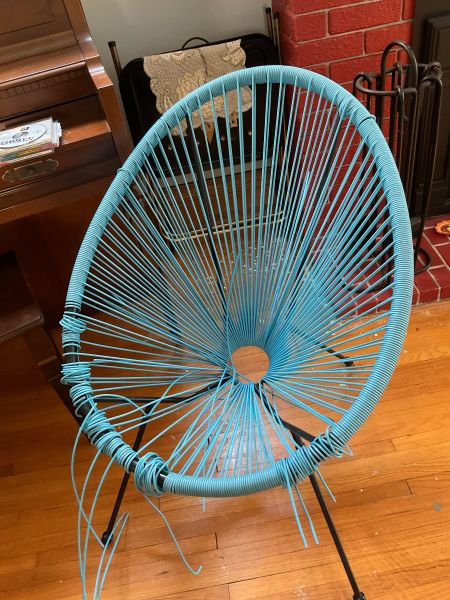
When I scored a free Acapulco chair on Craigslist, I didn’t know what it was called. So, I couldn’t easily find a tutorial to help me fix it. It was a good case for using the reverse image lookup on Google. Once I had the right search term, I could find some instructions for re-webbing the chair. The best ones I found were in Spanish and were clear enough for this non-Spanish speaking person. The worst tutorials touched on a pet peeve: time lapsed videos without any verbal instructions.

Acapulco chair needs repair
Free Acapulco chair needs to be fixed.

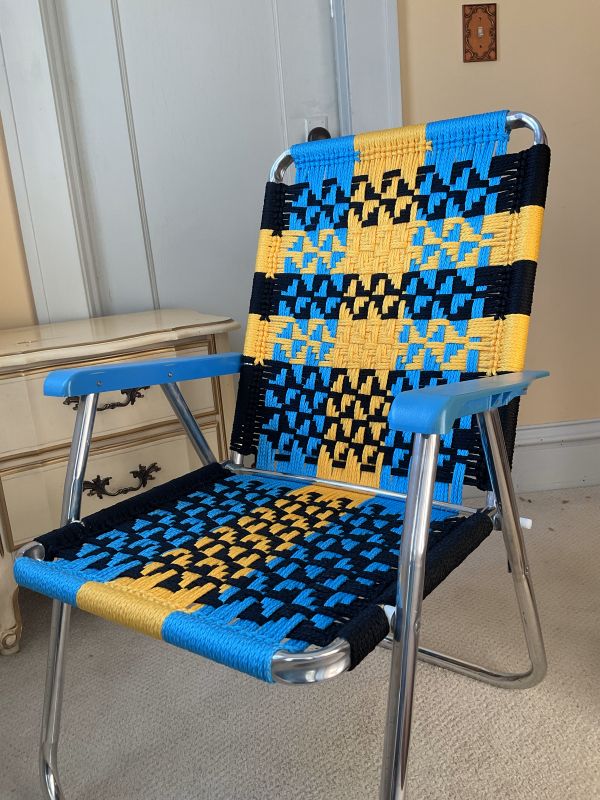
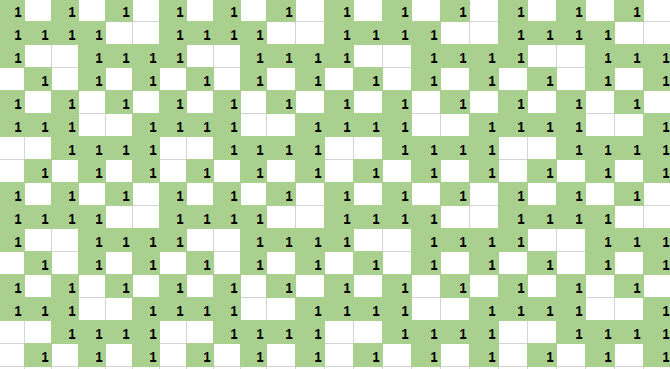
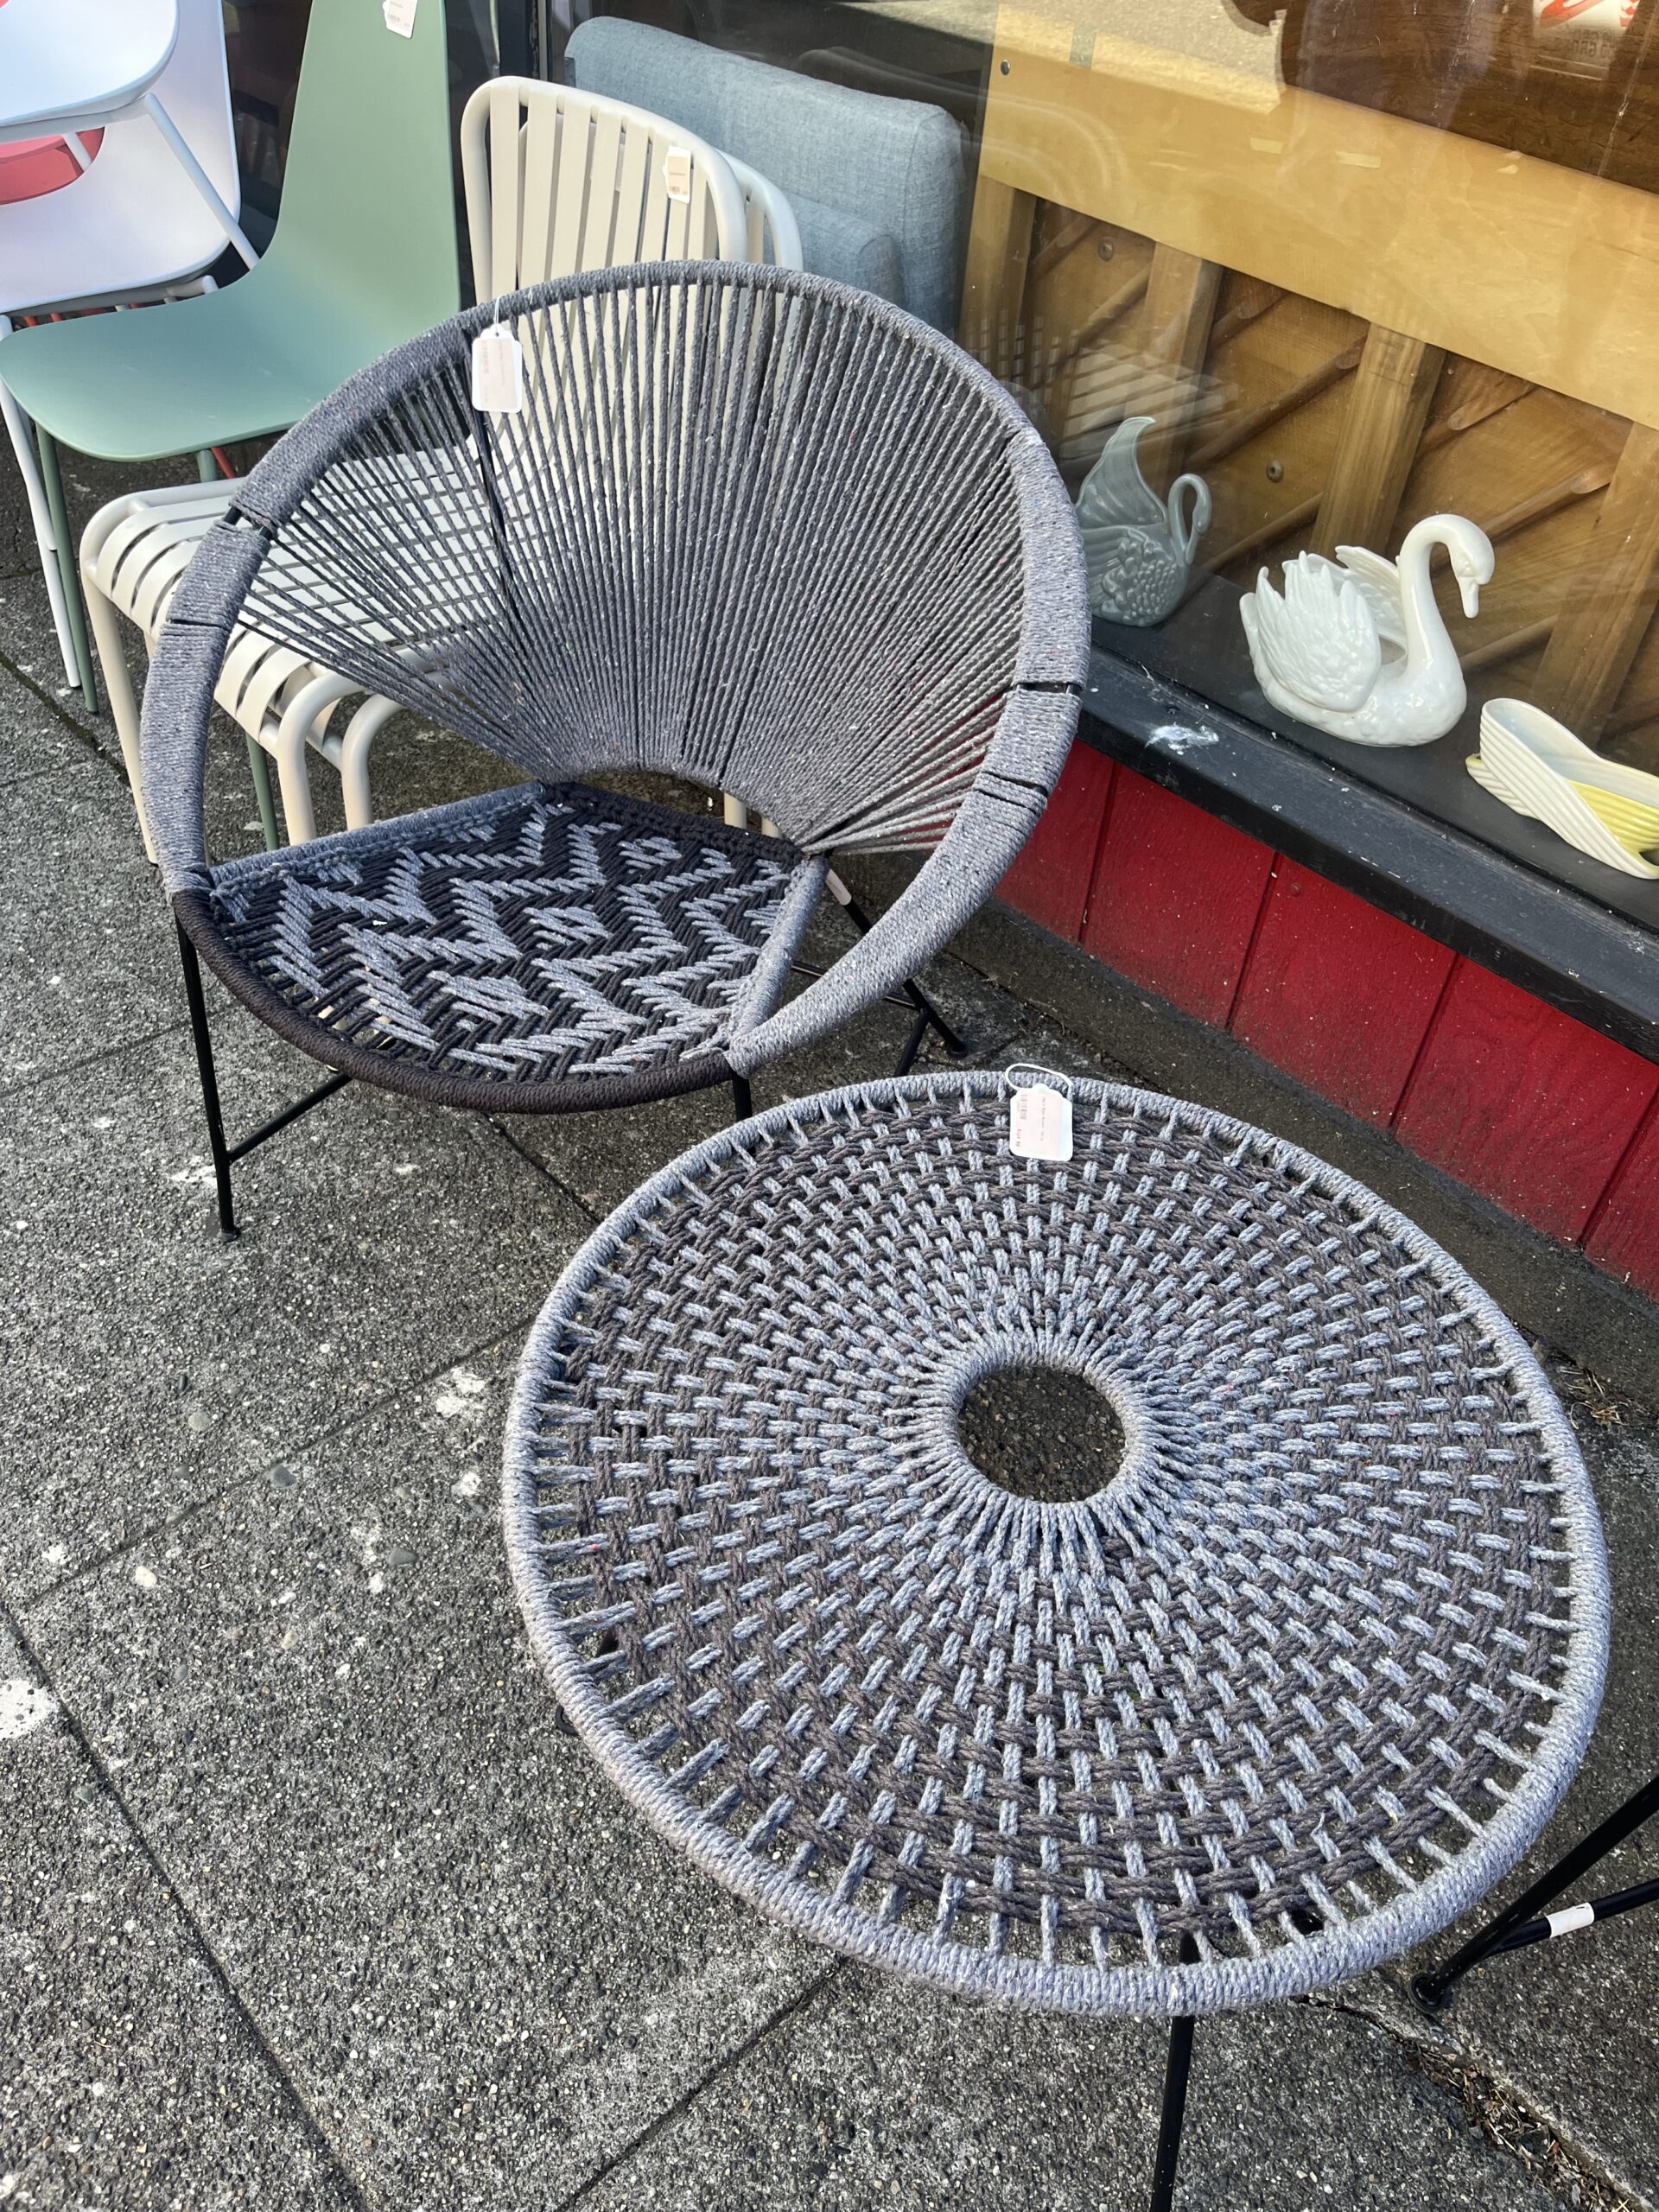
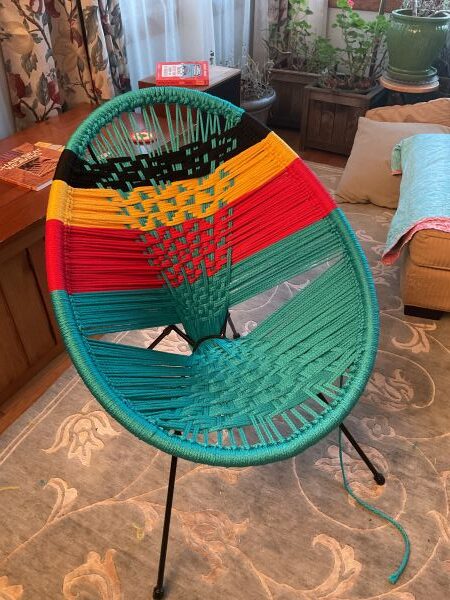
Given how I’ve been weaving seats onto other chairs where I was crocheting craft cord onto the frame, I wondered if I could do something like the chair my neighbor saw. Here’s the picture that Jill sent to me:

Woven Acapulco chair. Round woven chair and matching woven table.
Woven chair and matching table

After some trial and error, here’s what I did:

Woven Acapulco chair with retro vibe.
Macrame Acapulco chair

The trick was to figure out how to keep the back of the chair from resting on the frame, which would have been uncomfortable.

Back of Acapulco chair does not touch the frame.
The back of the chair does not touch the frame because a “bridge” holds up the vertical strings.

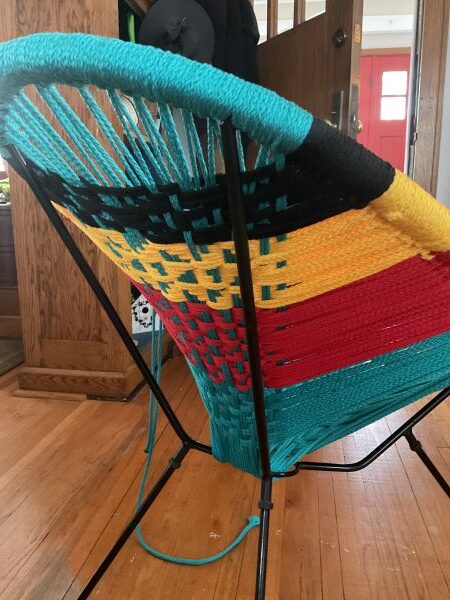
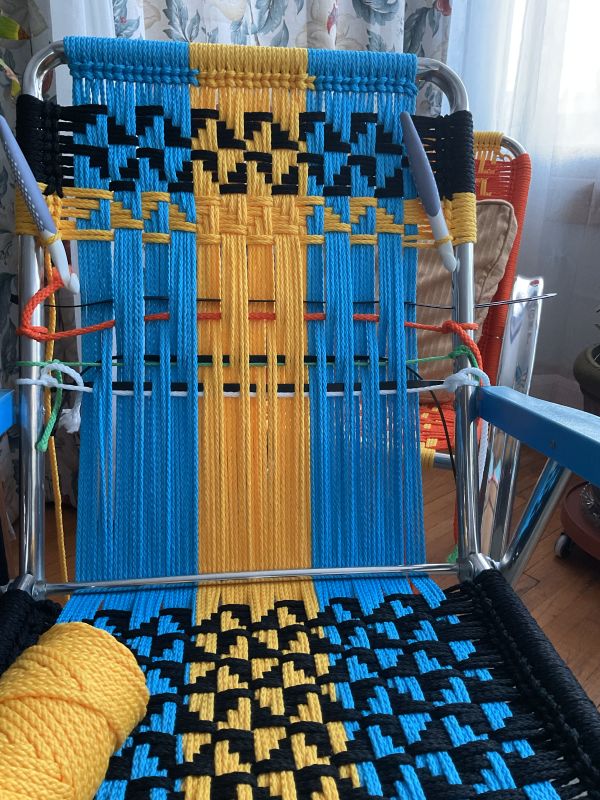
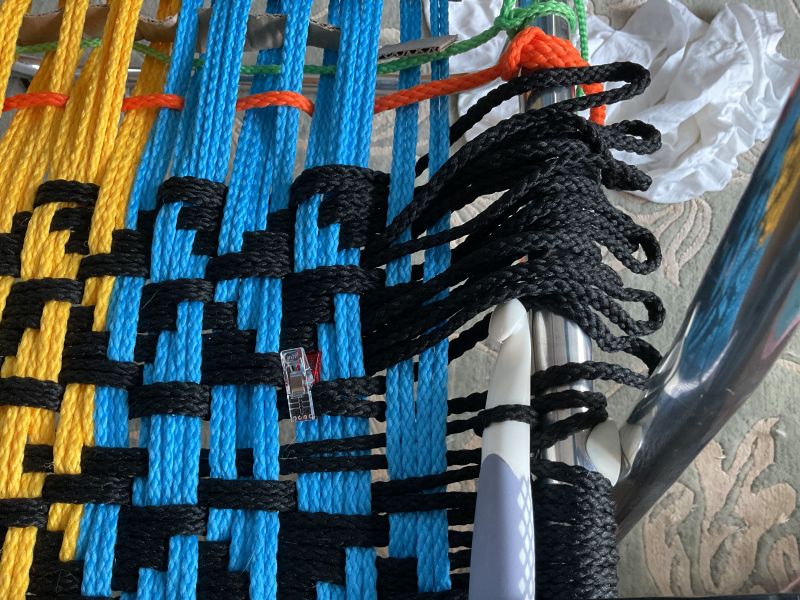
The solution was to start with a horizontal “bridge” that would hold vertical strings up off the frame. In this case, it is the black band of color on the chair. I made a guess as to the best position for the bridge. But I wouldn’t know if I got it right until I could sit on it.

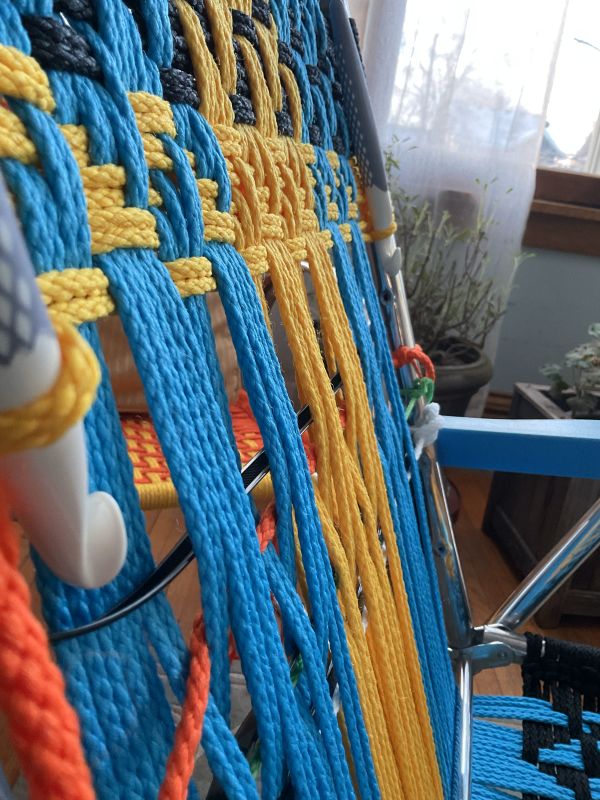
After the bridge was in place, I added the turquoise vertical strings. This required making spaces between the crochet knots along the frame because 1) the bottom of the chair was wider than the top of the chair, and 2) all the strings travel through a center hole with limited space. Though I tried to do the math and sketch this out on paper, figuring out how many and where to put the spaces took a few tries. Once I figured out how to do half of it, I could mirror the pattern on the other side. In the end, I was able to fit 20 vertical strings onto the chair, which was plenty.

Close up of Acapulco woven chair seat showing the spaces between the knots with strings, which are the knots without the strings.
Spaces between crochet knots

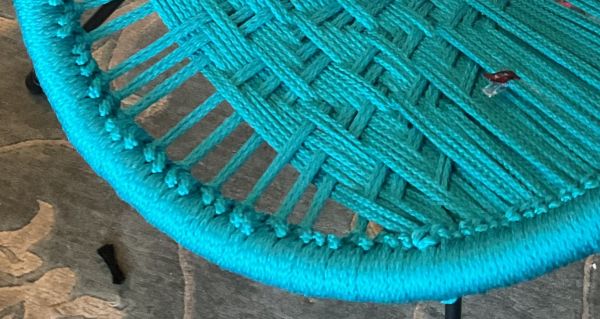
Making the spaces between the knots wasn’t hard. But it’s like a lot of things. If you’re out of practice, you can forget what you did. The tip that I would give to my future self would be to check to make sure that everything is in the normal position to start another loop once you’ve made your extra space (or two, or three). Another way to think of it is that a “space” is a knot that doesn’t have a string associated with it. This needs to be a full knot. If you make a half knot, then your string will not drape over the top of the bar in the ready position to make the next loop. And yet another way to see it is that you’re going through the same motions of making a loop around the top of the chair, except you don’t actually go around the top of the chair.

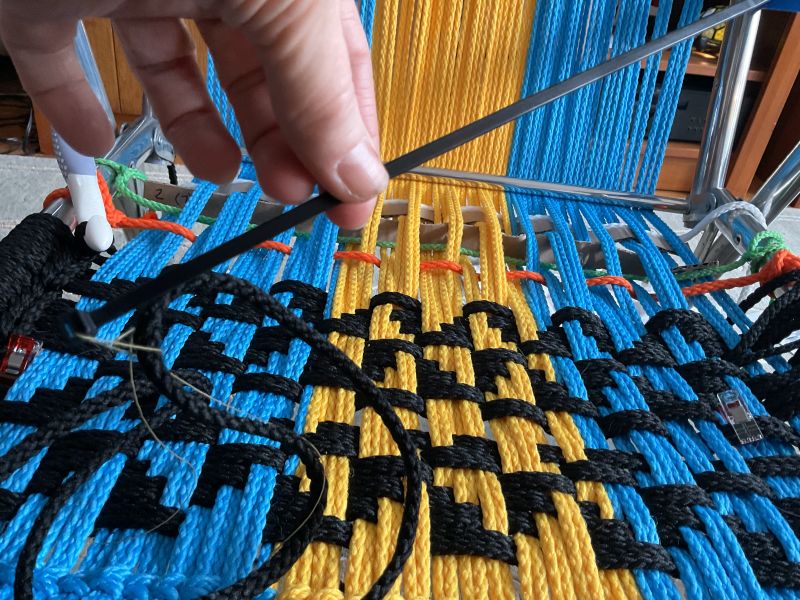
The final step was to weave in the remaining horizontal strings, in this case the yellow, red, and turquoise under the black on the back and the turquoise on the seat. This was a matter of making sure that both the back of the chair and the seat had enough room on the arms for the loops. To make everything meet up just right in the middle, I worked each side together.

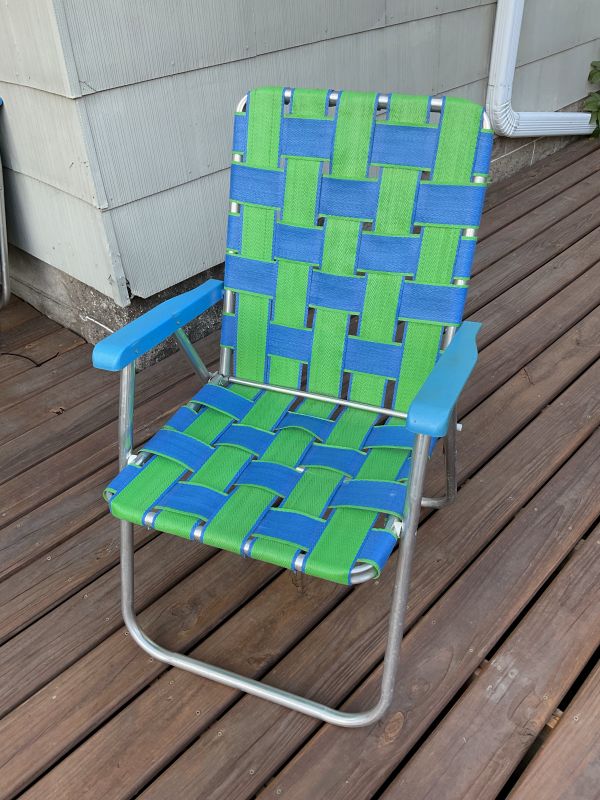
If you are trying to weave a chair like this and you have questions, let me know. My basic advice would be to start by weaving a standard lawn chair first.

“Macramé” Lawn Chair with QR Code

A friend pointed out that macramé is a pattern made with knots, hence the quotes. What I was doing, he said, was weaving. Here’s a chair that I made for my brother and his wife.

Macrame Lawn Chair with blue, yellow and black cord.

I wanted to weave a QR code into it, like this:

Macrame Lawn Chair with QR Code woven into it.

To make the pattern, I used a QR code generator. Then I transferred the image onto a spreadsheet. Because every line of code was different, it was slow and fussy work. In the end, weaving a QR code onto a lawn chair did not work, making the chair itself seem broken with its dead link. Using better contrasting colors and sticking to just two colors might have fixed the problem. But Christmas was coming and I didn’t have the time nor the patience to experiment further. For now, I’ll leave weaving QR codes to bamboo weaver Xie Shiyang.

On the bright side, starting over inspired a better way to keep track of a pattern without constantly referring to a piece of paper. First, note the pattern:

Macrame lawn chair pattern

Width=6
Height=8
Identical rows: 1 & 5
Reverse Rows: 4 & 8 are the reverse of 1 & 5; 2 & 7; 3 & 6

Next make a cheat sheet. R-1, R-2 and R-3 are unique. The remaining rows are either identical or the reverse of these three distinct rows. This is indicated with parenthesis on my cheat sheet.

Macrame Lawn chair pattern cheat sheet
Weaving Cheat Sheet

Another way to see this pattern is that there are two distinct rows: R-1 and R-2. The remaining rows are variations of R-1 and R-2. As an experiment, you could:

  1. In a 6 x 8 grid, make two random rows.
  2. For the 3rd row, shift R-2 to the left by three.
  3. R-4 is the reverse of R-1 (or shift to the left by 3, I’m not sure if there’s a difference)
  4. R-5 is the same as R-1
  5. R-6 is the reverse of R-3
  6. R-7 is the reverse of R-2
  7. R- 8 is the reverse of R1 (and R-5)

This is what I came up with in a few minutes of playing with my spreadsheet:

Weaving pattern. A 6 x 8 grid.

Here’s what the repetition looks like:

Weaving pattern. 6 x 8 repeated grid.

My spreadsheet (Excel) is set up to change colors when I enter a “1” in a cell, which makes it easy to experiment.

After making the cheat sheet (above), I wove in the corresponding colors into the chair. These temporary threads make it easy to weave without losing your place because you can see the pattern at a glance.

Macrame Lawn Chair - Keeping Track of your pattern with colored guides

A large zip tie can be woven alongside each colored guide and twisted as needed to hold up the threads for easier weaving. Though imperfect, it’s easy to imagine an improved tool.

Macrame Lawn chair with zip ties to hold up threads for weaving.

Zip ties can also be used as “needles” to get into tight spaces. Thread the eye of a zip tie with any string that fits and make a loop. Then thread your larger cord through the loop.

A zip tie can be used as a needle when you are weaving a lawn chair with macrame cord.

On a related note, it’s possible to correct a mistake without undoing rows of work. Depending on the issue, you can carefully untie rows, take out just the problem row, reweave it (a good use for the zip-tie-as-needle trick), and re-crochet everything back into place.

Correcting mistakes in the middle of the pattern Macrame lawn chair
To fix a mistake, untie the rows enough to get to the problem row. Then take out just the problem row and re-weave it. Then re-crochet/tie/lock down the ends.

Here’s the chair before the new seat. The webbing was worn out and it was due to be replaced. As you can see, the arms of the chair were originally blue. I did not paint them, though some wondered if I had.

Aluminum lawn chair.

If you want more of a tutorial about how to weave a seat onto a lawn chair frame, see my post here where I included links to the tutorials on YouTube that got me started.