Category Archives: Projects

It’s Just Paint

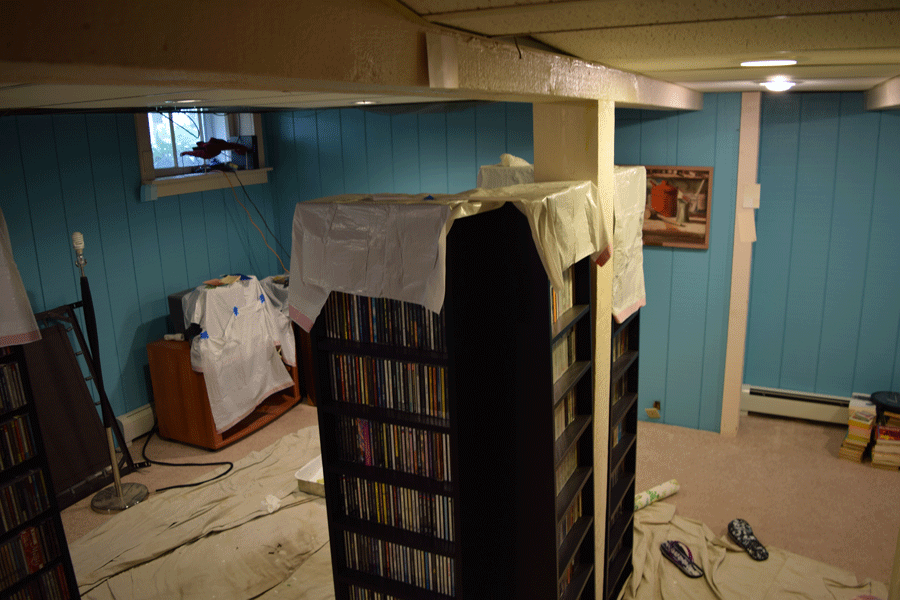
There was a lot of angst over choosing a new wood stove insert. To keep the larger stoves in play, we entertained alterations to the hearth and the height of the mantel; this gave the salesman the idea that I might be a prepper.

“Maximum capacity is a thing with them.” He said.

Worse than being outed as a screwball who believed that a complete economic collapse was possible within my lifetime, ruling nothing out added to the stress of making an expensive purchase that was expected to last forever.

When no one else could, the guy who came out to take the official measurements convinced me that it was possible to go too big. He regretted making the same mistake when he installed a new stove at his cabin on Lake Superior.

“It’s impossible to regulate the heat.” He told me as he sized up my living room. “Once it’s 90 degrees in here, it’s 90 degrees.”

But even after narrowing our choices down to two stoves, I was torn between giving up what I simply preferred and giving up 200 extra square feet in heating capacity. And while the stakes were low — to believe the salesman, we couldn’t go wrong — it was helpful to acknowledge that choosing one thing meant that I could not have the other thing. This is obvious. Nevertheless, noticing the fear, the cause of my indecision, aimed to quell it.

It felt good to put down the deposit and to know that we weren’t doomed to drag things out with false objections and the endless weighing of pros and cons. If we’d be met with buyer’s remorse, it would be a fluke with lessons that needed to be learned from direct experience; it would be life. It wouldn’t be for carelessness that we might somehow end up disappointed. “So enjoy it!” I kept telling myself. To celebrate, we followed a sign and ended up at an odd little place that served breakfast in seven tiny courses.

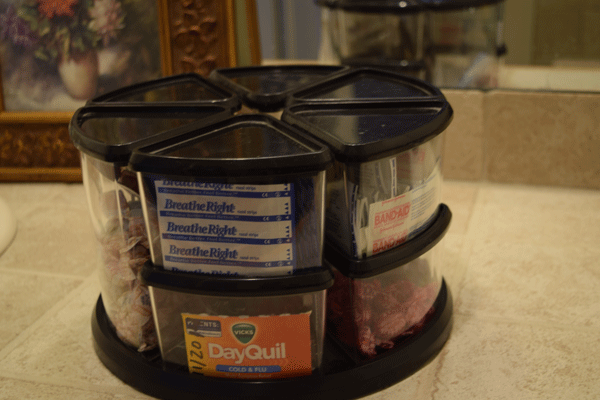
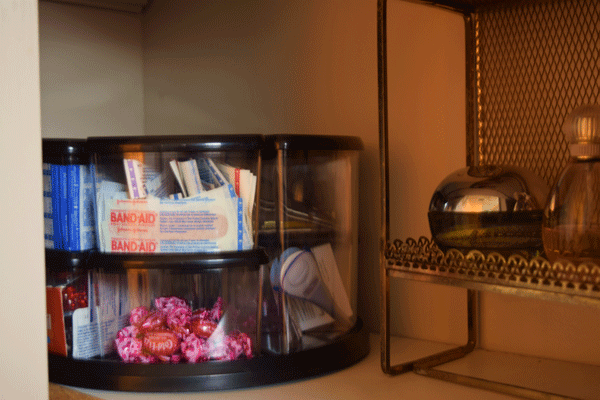
But still, I can kick myself over something as little as a failed 15-dollar purchase, a tortilla press to be exact. The selection at the mercado in Powderhorn was slim. I settled for a plastic model that had a grip that suited me and somehow seemed sturdier than the metal presses with their loose hinges. Once home, imitating a YouTube video, I promptly cranked down on the handle to achieve the desired paper-thin dough and snapped the sucker off. While it rankled me to be out the cash, chucking the broken press into the trash within hours of buying it seemed criminal, although I wasn’t sure where to place the blame. A mistake so easily corrected, Brian couldn’t be bothered with it. I, on the other hand, hail from the camp of there-ought-to-be-a-law, as in: “There ought to be a law against manufacturing junk!”

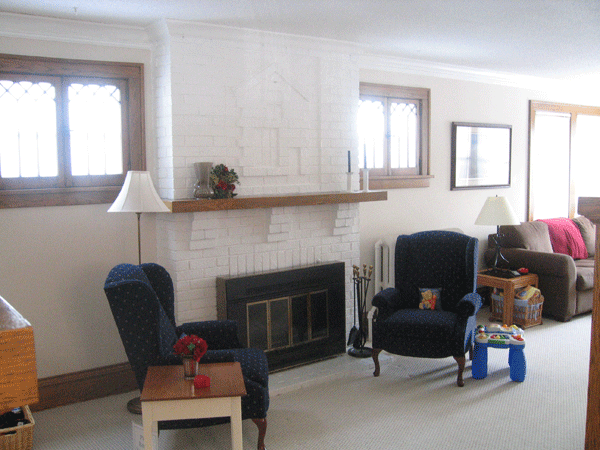
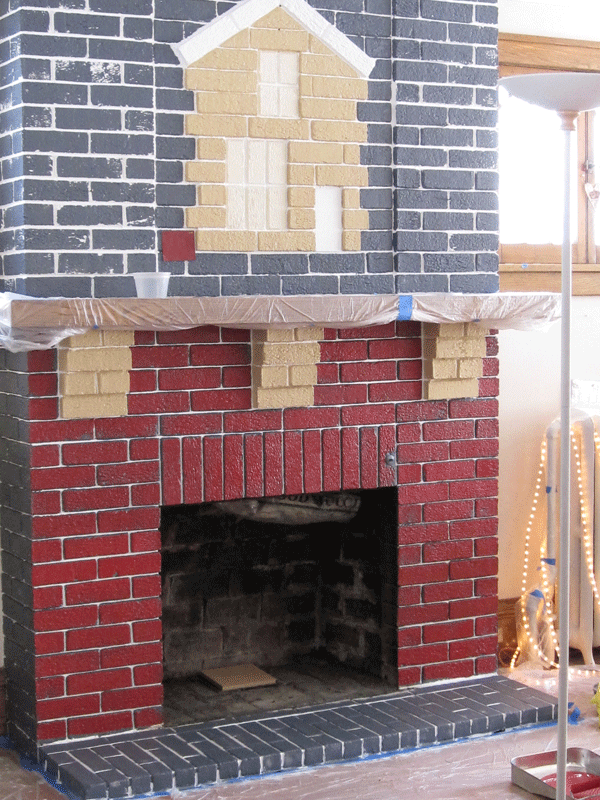
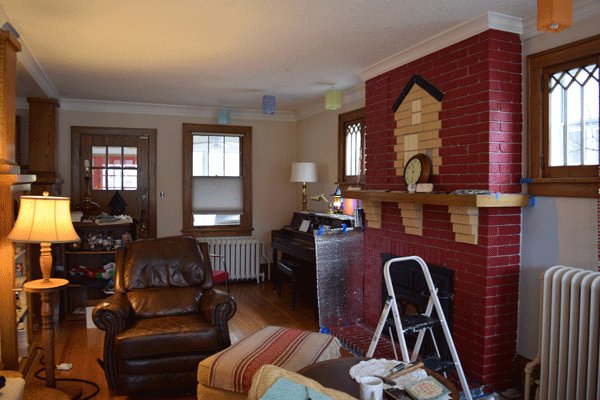
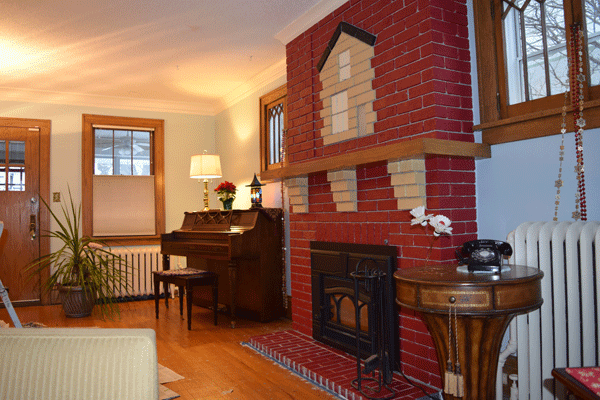
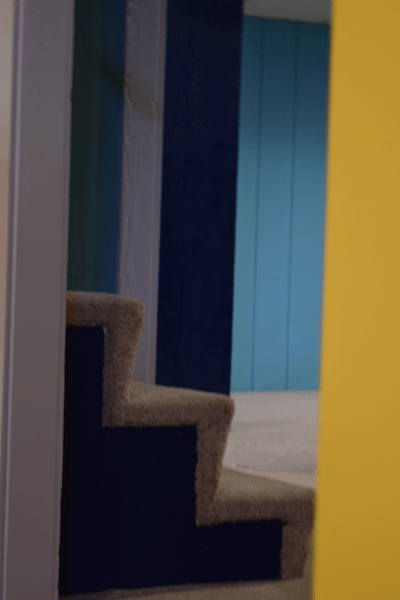
I had always been charmed by the fireplace and recall the house blocked out with a few bricks coming into focus for the first time. “Oh, there’s a house.” I said standing there in my socks and down coat. “Cute.” The realtor piped in from where he sat at the head of the dining room table to tell me that no one else had ever noticed it. While I didn’t care that the fireplace had been painted white, others — certain friends, the plumber — were easy to pronounce it an atrocity that spoiled the integrity of the old house. Their revulsion stirred my insecurities.

The fireplace needed to be repaired before we could safely use it.

The fireplace needed to be repaired before we could safely use it.

“We didn’t paint it.” I would say instead of checking my unsolicited critics. “It was that way when we bought the house.”

“Hideous!” the chorus would answer. “You should take it down to the natural brick!”

A quick Internet search suggested that it was unlikely that any of these assholes had ever tried to remove paint from brick. Still, I could imagine that the fireplace might look dingy next to the new stove. I wasn’t sure how, but I suspected that it could be better. So I consulted with a professional colorist.

Removing the white paint on the fireplace was not an option.

The white fireplace with the insert that we would replace with something more efficient.

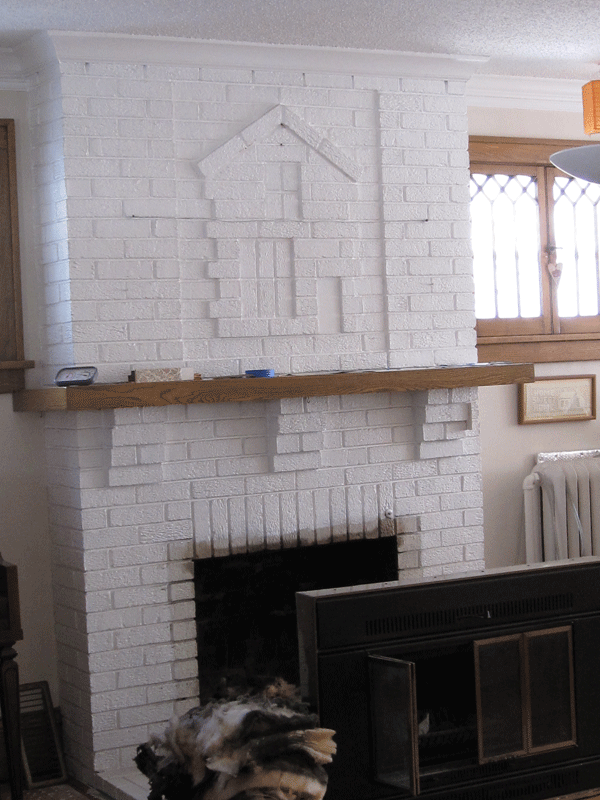
Staring up at the fireplace that by now was covered with a gray primer, I asked Brian if he missed the white and he admitted that he kind of did.

Gray primer on white bricks.

Gray primer on white bricks.

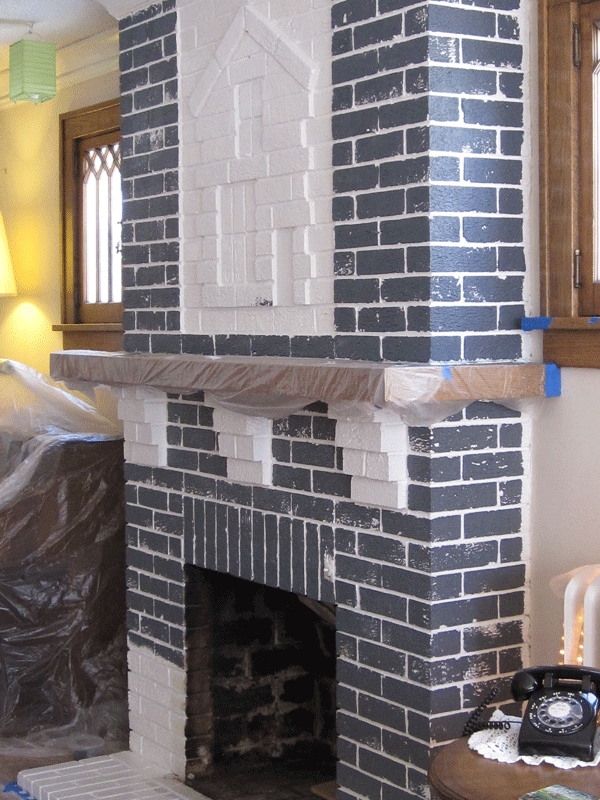
The following week, I called Brian to warn him that his living room was starting to feel like the lobby of a McDonald’s. But he saw promise and favored sticking to the plan.

I was starting to feel uncertain about this!

The consultant suggested that we highlight the decorative house on the fireplace. It’s rare according to everyone who has seen it. People often ask if we did it, but it’s original.

I'm told that the house on the fireplace is rare. People often ask if we did it, but it's original.

We were happy with the results.

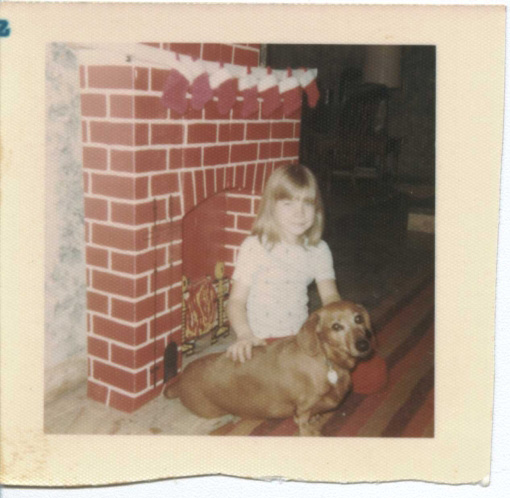
When my mom saw our new red fireplace, she was reminded of the cardboard one we used to set up at Christmas time when I was a kid. Here I am posing in front of it with our dog Rusty. Notice the stockings. There are seven. Seven? Six kids. Mom and Dad. Eight! I count eight!

Rusty was a good dog.

Rusty was a good dog.

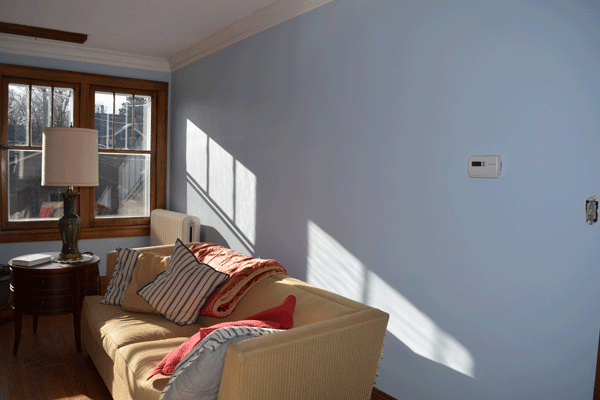
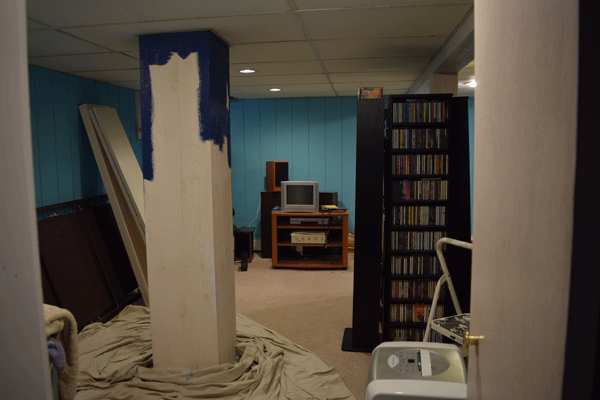
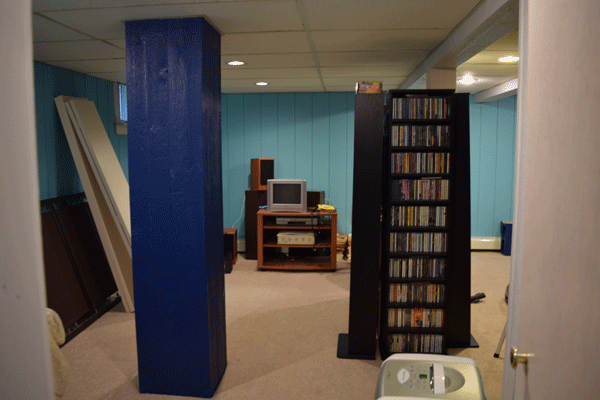
And then came the walls. After finishing one side of the room with “Balmy”, a color from Sherwin Williams, I would swear that I loved it and would marvel at how beautifully it showed the woodwork. Then I couldn’t tell or sometimes I just felt like I was in someone else’s house and I wasn’t sure I liked that so much.

The blue is supposed to set off the wood.

The blue is supposed to set off the wood.

Hey, lady! It’s just paint!

I know.

And then I noticed a cup of ice in a photo, one of the before shots.

I was taking a picture of the couch, but it's the cup of ice that caught my attention.

I was taking a before shot of the wall, but it’s the cup of ice that caught my attention.

The photo was a haunting reminder of a time when I couldn’t be without my cup of ice. It reminds me of how Brian would wait for me to fish out the last cube before getting out of the car, patient no matter the weather and regardless of the thing that needed doing. After years of a crawling decline, so slow that it would redefine normal, I found out that my addiction was a common symptom of chronic anemia. So seeing that cup of ice reminds me of a time when I couldn’t carry a load of laundry up two flights without losing my breath. I thought I was out of shape. I thought it was age. It reminds me of the lawn mowers that hummed outside my window. “You can’t do that!” They taunted. It reminds me of being torn over invitations, only to have my skipping rare gatherings affirmed by yet another ruined pair of pants. Getting to the bottom of the problem was scary and full of decision points that can put the biggest of choices into perspective let alone the color of paint.

Realizing that “it’s just paint” isn’t necessarily going to make me a more decisive person overnight. But as a second-guesser, an apologizer and worrier, I am starting to see the value of determining the gravity of a decision before applying a blanket worst-case scenario and giving my emotional well-being over to the whims of a tyrant. For example, I recall having a tough time proceeding with repairing a window because I was afraid that I’d break the glass. I mentioned this to a friend who asked, “What’s the worst that could happen?”

I’ll break it!

“Say, you break it. You’ll take some measurements and buy a replacement piece.” He made it sound so simple. I had been stuck for no reason. Sometimes this is clear. Sometimes it isn’t.

Even if I couldn’t bare to lose the antique glass with its imperfections that soften the southern light, casting wavy shadows on the walls and floors, it wouldn’t be impossible to harvest it from salvage shops or even from the alleys next to trash bins or from the random curb side. Sheets of college ruled paper hastily yanked from spiral notebooks are routinely slapped on these masterpieces with two dabs of masking tape; a semi-dry Sharpee barely manages: FREE!!!

Here's the couch with the new color.

Here’s the couch with the new wall color.

I used the comics for this decoupage project.

One of my favorite treats after painting a room is choosing outlet covers. In this case, I found a spot for a goofy decoupage experiment where I used the Sunday comics.

As I start to put the furniture back into place, I like the blue more and more.

As I start to put the furniture back into place, I like the blue more and more.

The next step will be to paint the insides of these built-in bookshelves.

The next step will be to paint the insides of these built-in bookshelves. Behind the shelves you see the dining room, which will also be painted. I can’t wait!

I'll use a dark blue on the interior and the same camel/napery color from the fireplace for the shelves.

I’ll use a dark blue on the interior and the same camel/napery color from the fireplace for the shelves.

The new color should show off the objects better

The new color should show off the objects better.

Painting the Basement – Part 2

Painting the Basement – Part 1

Update: November 29, 2015

Bookshelf Progress

One of my favorite Thanksgiving Day holidays would have been the time my friend Jackie came over to my apartment to help me assemble a dresser-armoire unit that I had bought at a garage sale. The white laminated particle board furniture came with a matching dresser that had sticky glides and a lingerie chest that had the same problem. There were no directions. No diagrams. Just various pieces strapped together with blue painters tape, a stack of drawers and a Ziploc bag full of hardware and a hex key. Putting this thing together with one person holding something steady and the other tightening screws was comforting. How many friendships have been fortified by the quiet assembling of things?

The memory comes to mind because this Thanksgiving my friends Al and Craig and my sister Amy helped me take a huge step forward with making my bookshelf; it is the thing that needs to get done before the anything else can.

Craig and I went over to Al’s workshop where Al showed us how to cut the wood for the support boxes. Then he showed us a couple of different ways we could assemble them.

Amy and Craig assembling the boxes for the bookshelf.

Amy and Craig assembling the boxes for the bookshelf.

Amy and Craig assembled many of the boxes while I made pumpkin black bean soup and cornbread for dinner. The goal was to get them done in time to reclaim the dining room for Thanksgiving the next day.

Quite the team!

Does this make me Charley?

New rule: No pie before the boxes are done!

New rule: No pie before the boxes are done!

It's coming together.

It’s coming together. It was fun reading random titles aloud as I put books on the shelf, Amy crocheted, and Craig and Brian replaced a light switch.

I plan to add another shelf, likely in the spring. For now, I’m thrilled to have emptied several boxes of books that have been taking up floor space. It will help me see the room and figure out what to do next.

I'll sand and shellac the boxes as I have time.

I’ll sand and shellac the boxes as I have time.

I love my bookshelf. I especially love the people who helped me make it. I love sitting in the chair next to it, tucked away where I’m not so easy to find. Once discovered, Brian will say, “You’re staring at your shelf again?”

Yes. Yes I am.

Painting the Basement – Part 1

Medicine Cabinet Storage Tricks

Storing pharmaceuticals.

Office storage solutions for sorting cough drops and Band-Aids?

There was a website I needed to finish. Then there were raspberries to preserve before a quick trip to Rapid City. Oh, and what to do with the tomatoes? I couldn’t get everything done that I like to do before a trip – mainly cleaning the house. I didn’t sit down at 3 o’clock for a break as planned. Instead, I checked things off the list until the garage door shut and we sat in the alley debating whether to take a bucket of worms from my vermiculture system home for the nephews to see. I would have to find another way to be the fun aunt.

It turns out that wrapping kids up in a blanket and swinging them as if they were in a hammock (Hey! We forgot to say

One for the Money
Two for the Show
Three to Get Ready and
Four to Let Go!

)

or dragging them chariot-style across the lawn was probably more fun than red wigglers. Until Sioux Falls, I was certain that I would regret leaving them behind; I never did.

In the alley we also considered our route and made guesses as to which was least likely to be choking with straggling rush hour traffic. We sailed west on I-94 for about a minute and 20 seconds before I hit the breaks. It was stop-and-go until south of the suburbs.

Brian has never understood why thoroughly cleaning the house is part of the ritual of hitting the road and from what I can tell from the comedy channels on my Internet radio, he’s not alone (and neither am I!). While I thought this was about the simple pleasure of coming home to a clean house, I’m just realizing that it’s also about the surprise and the feeling of being cared for. While keeping a clean house is an excellent way to care for yourself (or someone you love*), it can be a grind. The laundry is done until I change my underwear. And by the time I’ve dusted a bobble head (ahem) in one room, a spider has begun reconstruction in the next. There is rarely enough time or the distance to enjoy the results of my labor. But if I change the sheets before getting out of town, when I come home not only will there be fresh linens to enjoy, there will be the perception that someone else made the bed (or vacuumed the staircase, or polished the baseboards, or shined the mirror, or washed the windows)…for me.

And then there are those household organizational tricks that you can keep rediscovering because they maintain themselves. For example, pictured here is another use for a desktop storage container, which has the prestigious honor of having not only been spared the Goodwill pile but of being something I did “find a use for someday.” The open bags of cough drops and the flimsy boxes of Band-Aids and other odds and ends that can clutter up the medicine cabinet were driving me nuts. This was a perfect solution. The clear containers make it easy to see what’s what and the rotating base maximizes the corners of closet shelves without compromising easy access. For better visibility, tear off and date the box covers to use for labeling the containers.

Clear containers lets you see what's inside.

Clear containers let you see what’s inside.

A rotating base maximizes closet corners.

A rotating base maximizes closet corners.

*There are many stories I could tell about helping people clean and getting help cleaning my house. Right now I am thinking of Dawn who had the good sense to make me wash the dishes after my dinner party, a distraction from an upsetting breakup. Late into the night, everyone except for Dawn started to file out. She stayed behind to help with the dishes, which was the last thing I wanted to do. I told her that I would take care of it in the morning; I wanted to go to bed. She would have none of it. In my depressed state, she feared that waking up to a mess would send me over the edge. So, she washed and I dried -or the other way around- until everything was in its place.

Painting the Basement – Part 1

Painting the Basement – Part 2

A few years ago rainwater got into our basement and damaged a finished bedroom there. To address the source of the problem, I spent a summer fiddling with the grading on the side of the house. This year, with the help of a friend who showed me how easy it was to do, I repaired the the mortar of the cement block walls before applying Drylok. Then, we replaced the old fiberglass batting with a rigid Styrofoam product, bringing the insulation up to code. We had considered using a two-part spray foam because we were under the impression that it is the best product available. However, after reading about some negative experiences people had with chemical sensitivities that caused headaches and, in extreme cases, made homes uninhabitable, we decided it wasn’t for us. The decision saved us the hassle of boarding our cat at a friend’s house while the work was in progress. The contractors assured us that it wouldn’t be necessary to do this. However, our veterinarian disagreed.

We also took the opportunity to insulate the rim joists with foam boards that are held in place with a one-part spray foam. This had been on the to-do list ever since our first energy audit in ’08. The work required taking some panels out of the drop ceiling and moving everything out from the walls. Result? Boxes of books all over the house. I’m anxious to unpack! However, with the basement largely dismantled, I thought it would be a good time to paint.

The Internet is full of tips for choosing a color for a basement. The short answer for our situation (not a ton of natural light, adequate recessed lighting) was to stay away from pastels. They can look drab without enough light to reflect. Also recommended was a saturated color that doesn’t have too much black in it. After a few false starts, we settled on Behr’s Pure Turquoise.

Here are some pictures so far.

Looking from bedroom to media room.

Looking from bedroom to media room.

Before

Before

A bookshelf will go here. We're going with

A bookshelf will go here. We’re going with “college style” bricks.

I have a fun color picked out for that post.

I have a fun color picked out for that post.

Before

Before

After

After

It's shaping up

It’s shaping up

The left is the trim. The right is the

The left is the trim. The right is the “fun color”.

I want to paint a mural on this door.

I want to paint a mural on this door.

This old laundry cart was inspiring...

This old laundry cart was inspiring…

Update: August 18, 2015

I’m still enjoying working on this project and try to make progress every day – even if it’s just to tidy up or re-position the drop cloths to get ready for the next thing. Here is some evidence of progress.

Painting this post was a treat.

Painting this post was a treat.

I like how this turned out.

I like how this turned out. The ceiling tiles have also been freshened up with paint. It made a big difference in how the room feels.

I used the same blue for the cement blocks that will support shelves for books.

I used the same blue for the cement blocks that will support shelves for books.

I spent the morning getting the shelves ready.

I spent the morning getting the shelves ready.

Update: August 25, 2015

I just got back from Al’s workshop where he made me some pine boxes I wanted to try as supports for my bookshelf project. I love them! I’m excited to see the whole thing come together! My plan is to use a clear shellac on the boxes in contrast to the shelves where I used amber. I’m so glad that I asked for Al’s help as he steered me away from some design flaws and added some really nice finishing touches. For example, notice the edges on the face of the boxes are rounded. I learned a lot and that was fun!

10.5

10.5″ x 7/5″ pine boxes will be used for shelf supports.

Last week my friend Lucie who was escaping the Arizona heat came by for a look at the project. I took her suggestion and went with the dark blue accent color for the wedge that is revealed on the side of the staircase.  I love how it turned out.

No one would ever see the room from this view, but I still like the effect.

No one would ever see the room from this view, but I still like the effect.

I met this little guy when I first got started on the project and didn’t have the heart to dislodge him. I figured he’d eventually move on. But there he is in the same spot by the window.

Spare the spider!

Spare the spider!

Update: November 8, 2015

I’m not sure I would have ever finished painting the “pink room”, had it not been for my mom’s encouragement. Starting with the discovery that paint was coming off of the wall in sheets, that project turned out to be much bigger than I had expected and to some extent out of reach of my particular skills. We hired someone to repair the plaster. Margo Breivik did great work. Then there was the issue of the trim that had several coats of paint and visible drip marks. Too much paint gives a room the “old baggage” feeling, something that Brian and I noticed when we were house hunting. So I scraped. I used chemicals. With the intention of putting a fresh coat of paint on a clean surface, I took the baseboards down to the maple underneath. Then Brian sees the it. He likes it. Now I’m reading about how to finish the trim with a stain and this adds several more steps to the process.

There were external factors too. There always are. At one point I’m staring into the room and telling my mom that I don’t see how it will be possible to finish. She boils it down. Do something every day, big or small, and eventually it will get done. It might be a week from now or years. But, plug away and you will finish. As for the “years” she says, “It’s your house. What’s the hurry? Do what you want.”

The room turned out great. I felt proud when my dad marveled over it. He has high standards. He always does good work.

So, I’ve been plugging away at the painting the basement. There’s much left to do, but I don’t (and never did) have the feeling that will never get done, despite the delays. Here are some highlights.

Stuck on More Color Decisions

For the longest time I was stuck on the idea of making the stairwell two-toned, turquoise on the bottom like the rest of the basement and something brighter on the top near the kitchen. Answer (courtesy of Brian): Use the turquoise on the top and the bottom. It turned out great, but what color for the ledge? You see it there on the left?

Stairwell: Two colors or one?

Keeping it simple was the answer. Using the turquoise on the top and bottom of the stairwell was perfect.

To what level do you want to take it?

“To what level do you want to take it?” is a question I kept hearing from the same handyman who told me that I do not live in the Taj Mahal. When I’m doing the work, asking the question is more about what I’m capable of doing; it’s about my curiosity. “How would that look?” It’s not usually about who’s on the clock. In this case, I was second-guessing the color I picked for the ledge in the stairway. What was underneath the 80 layers of paint? As I was getting ready to go out for lunch with my friend Santwana, I literally dropped what I was doing (applying mascara) to grab a scraper to find out. Sold.

I’m not going to lie. Prepping for this job has been a bitch. To what level do I want to take this? Way beyond whatever a flipper might do.

Other Pressing Things

Then there are just the other things that need to be done by a specific time. This is the beauty (and I really mean it – beauty) of living in a place that has four seasons. There are real deadlines. In this case, there was a deck that was in sore need of staining and food to be harvested.

Behr DeckOver

Day four of deck staining. I still have time to play with recording some things.

Staining the deck

Almost done with the first coat. We painted the cracks with a brush and then rolled the rest.

Staining the deck

Almost done.

acorn squash

I gave away a lot of acorn squash and still have plenty.

Fun Times

Then there is just taking a break.

Fish Fry

We made it to South Dakota for my mom’s birthday, which was celebrated with my brother-in-law’s famous fish fry. I’m still thinking about that food.

And some actual progress…

Finishing the 12-foot pine boards for the bookshelf I’m making was definitely progress. I applied four coats of shellac and by the end it got a little tedious. It was worth it. In addition to moving a step closer to completing the project, I opened up a parking stall in the garage. And that puts me back in compliance with my rule to always keep the garage clutter-free enough to keep our cars in it. I’m not sure such a rule is necessary. We live in Minnesota! Yet I can see that the threat of winter isn’t motivation enough for some people. So, I made a rule in case I was the sort who needed it.

Painting the Basement – Part 2

Sewing Paper

My uber creative niece expressed no surprise when I told her that I discovered you could sew on paper. I wanted to make money cards for Christmas and one morning between sleep and coffee, a solution drifted into my consciousness such that I understood the perfectness of using a light bulb to represent inspiration. It was exactly like that. Out of nowhere, “I could sew it!” Ding! By 4 a.m. I had confirmed my theory and was loving the results. Old news or not, I might as well have discovered fire.

Needing containers for my collection of cassette tapes that are awaiting digitization and inspired by first considering a grocery bag – a terrible idea as it would have been too deep to be useful – I remembered my experiment and came up with a shorter, more rigid bag that works great.

Container for cassette tapes.

Sized to maximize shelf space, a shorter bag means that I can easily see what’s inside.

How to Make a Custom Bag with a Grocery Bag

Supplies:

  • 2 grocery bags that are the same size
  • Ruler
  • Pencil
  • Stapler
  • Marker
  • Paper cutter wide enough for the bag; rotary cutter, mat, and straight edge; or scissors and a straight edge
  • Tracing wheel
  • Iron

Steps:

  1. Remove the handles of two grocery bags, being careful not to tear the bag or the handles. If you do accidentally tear anything, don’t worry about it. Set aside one of your bags and the handles you just removed for later use.
  2. Measure from the bottom of your grocery bag up to how deep you want your bag to be. Make a dot at this point with a marker (Dot #1). So, if you are making a bag that will be 5″ tall, you would measure 5″ from the bottom of the bag to Dot #1.

    xx

    Measuring from the bottom of a grocery bag, mark how deep/tall you want your new bag to be.

  3. By measuring from the dot you just made (Dot #1) upwards to just short of the height of your bag, mark Dot #2. So, if you are making a bag that will be 5″ tall, Dot #2 will be a little less than 5″ above Dot #1.
    xx

    A Sharpie marker works great for marking your dots.

  4. Cut off the top of the grocery bag at Dot #2, the top dot. Save the cut off piece for Step #6. I love my Swingline paper cutter for this job. A rotary cutter, a mat and a straight edge would also work. If you use scissors, draw a straight line around the bag before cutting.

    xx

    I wasn’t sure if this paper cutter was going to be what I needed. So, far I haven’t run into any serious limitations for the types of things I am doing.

    xx

    My paper cutter has different settings for cutting, creasing, perforating…

  5. Make a crease at Dot #1. I used the crease setting on my paper cutter to do this and it worked great. A smooth tracing wheel might also do the trick.
    xx

    The crease will make folding the bag easier.

  6. If needed, trim the top of the grocery bag you cut off in Step #4 such that when it is inserted in the new bag you are making, it falls just below the crease made in Step #5. Insert this piece inside the bag, loosely lining up the sides and corners as shown.

    xx

    Lining the inside of the bag with this extra scrap will make it sturdier. I turned my liner inside out, thinking that it would look nicer to show the pattern. However, this gets covered up, so skip that step.

  7. At the crease made in Step #5, fold the top of the bag down inside itself. This will cover up the liner you just inserted and hold it in place.
    xx

    It’s starting to look like something!

    xx

    There!

  8. Sew a hem along the top of the bag.
    xx

    I wish fabric handled as easily as a grocery bag does! Different bags behave differently.

    xx

    The bag will turn itself as you sew.

    xx

    Voila! A low-cost way to practice sewing!

  9. To make the bag more rigid and look crisper, pinch the corners and sew them in place with a few stitches.
    xx

    The bag works fine as is, but its sides are buldging a little.

    xx

    Pinching the corners takes up the slack and gives the bag a neater look.

  10. Sew the handles you saved from Step #1 onto the bag as you like. You can use a temporary staple to hold them in place as you sew.
    xx

    Almost done!

    xx

    I’m loving how these are turning out!

  11. Fold your second grocery bag (handles removed) such that it is the size of its bottom. Trim off any extra paper that won’t easily fold and stay in place. Sew the folded bag around the edges to hold it together. Place the finished piece in the bottom of your new bag.
    xx

    The extra bottom will help hold the bag together.

    xx

    The insert also hides rough edges.

  12. You can iron the bag if you want it to look a little crisper. Put a cloth between the iron and the paper.

    xx

    The altered bag is amazingly strong. For example, it would take some effort to remove the handles.

Homemade Laundry Soap

When I was a young adult, I had friends who were devout Amway distributers. My former church youth counselors, Frank and Mary Ellen, took the vitamins, used the laundry soap and personal care products and they aspired to become Amway Diamonds, which meant a lifetime of financial security. They could retire early.

So it was Mary Ellen who first gave me an education on laundry detergent “filler”. Amway’s product didn’t have it. While somewhat ironic and perhaps true, Mary Ellen the Amway dealer considered commercial laundry soaps to be a total scam where a pound of sawdust was sold with every pound of soap. Since then I have watched boxes of Tide and other brand-name laundry detergents mysteriously shrink by about two thirds.

Non-Toxic Laundry Soap

A Sample of non-toxic laundry soap from a Community POWER recipient

Non-Toxic Laundry Soap

Recipe: Non-Toxic Laundry Soap

Flash forward to a presentation of the 2011 Community POWER grant recipients where I was giving a report on a residential composting initiative I coordinated. There I heard about one project that set out to debunk the more-toxic-more-suds-the-cleaner hoax and taught residents how to economize while reducing their environmental impact by – for one thing – making their own laundry detergent. I went home with a sample of the detergent and I tried it for the first time last week.

Non-Toxic Laundry Soap

This cheese grater did not work very well for cheese. But it worked great for soap.

In the load that I did using the sample, there were a few soap flakes that did not dissolve. It wasn’t the end of the world, but certainly not something you can expect the average person to accept. I’m wondering if this can be resolved when I make a new batch of detergent with more finely grated soap. As I recall from the presentation, any bar of soap will do. However, I’ve noticed that other recipes favor Fels-Naptha soap. I’m going to use what I have.

Here are other recipes for laundry detergent you could try:

Non-Toxic Laundry Soap

Less soap. Less Money. Less Space.

Non-Toxic Laundry Soap

3 TBLS is enough for a large load. Normally I would have used 1 scoop. Either way, if you’re not reading the directions and measuring the soap, you are most likely wasting money.

As a bonus, in addition to using less product (1-3 TBS), the powder fits in less space.

One blogger assures us that the lack of suds you’ll notice when using your homebrew is not a problem. She’s right. In the 1960’s marketers pushed suds as a way to tell that the soap was working. Today, we’re warned that too many suds indicate overuse. In addition, high efficiency washers have created a demand for low-suds products again. Marketing fads can be confusing.

Writer Michael Pollan says “Don’t eat what you see on television.” Given the detergent filler Mary Ellen warned me about 20+ years ago and a deceptive suds campaign that added no value but only aimed to distinguish one product from another one just like it, and given the overall advertising tactics that are turning us into neurotic Lysol junkies, I wonder if we shouldn’t apply that rule to all products advertised on television: Don’t buy them.

I think I’ll try it. 2014. Resolve to be Clean.


Links

The Soap Conflict, Thomas WhiteSide, The New Yorker, 1964.
“As the level of detergent suds in the American kitchen approached the stifling point a counter-movement set in. It started with a detergent called All; Procter & Gamble then put out Dash, with ‘low suds’ & ‘safe suds.’ Were suds good or bad?”

Vintage Commercials

Low Suds

https://www.youtube.com/watch?v=F1YTHr4mTQA

https://www.youtube.com/watch?v=vl7V8DGfGpg

https://www.youtube.com/watch?v=lWgIyywz4cg

Without Bleach or Bluing

With Bleach

Decluttering for the New Year

It's All Too Much, Peter Walsh
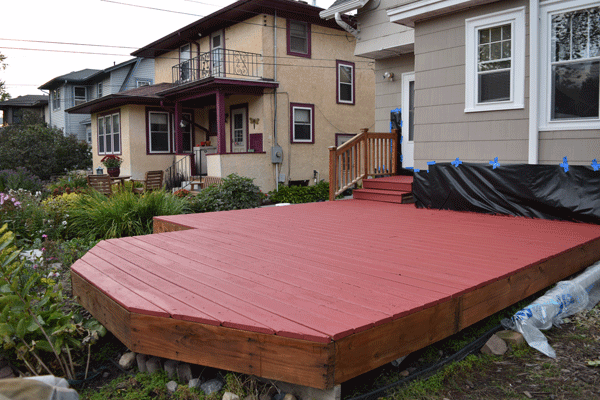
We went to Rapid City for Christmas and, motivated by a book I found while there, I returned ready to take a closer look at our home to see what might be encroaching on our corner of paradise.

Peter Walsh’s workbook, “It’s All Too Much”, begins with an assessment that would suggest that a family intervention isn’t imminent.

“Do you need to clear off the kitchen counter to prepare a meal?”

No.

“Do you regularly misplace your car keys or checkbook?”

No.

“Do you have to remove laundry… to get to your bed?”

Not usually.

Yet there’s a reason why I walked out of Books-A-Million with a receipt. We have kitchen gadgets that we do not use. I couldn’t do my taxes tomorrow without taking a day to gather the necessary papers and I feel daunted by a stash of plastic bags that is ever growing thanks to our newspaper subscription.

I was also drawn to some of the exercises in the book. The “I might need it one day” and the “It’s worth a lot of money” excuses for hanging on to stuff are quickly neutralized. Not being a huge hoarder myself, I was surprised to notice that I relied on some of them. It was liberating to be ready with a sensible response:

“If I can’t use it today, right now, for who I am in the life I am living, I don’t need it.”

As clutter piles up over time it becomes invisible. So, in the “What I see – What I’d like to see” exercise where you note in detail what is in each room, you learn to see again.

The “Room Function Chart” was another eye-opening exercise. Room by room you are to note the current and ideal function of a space. Based on that, you can determine what is needed and what must go. Doing this exercise, I discovered that our office was serving too many functions. I had been struggling to find a credenza/armoire/cabinet with very specific dimensions and features so that we could reduce the footprint of stereo cabinets and whatnot on the crowded floor. But then I realized that if we quit using the office/video-audio studio/guestroom for overflow clothing, there would be ample room to serve these other purposes. As a bonus, the search for furniture that doesn’t exist could finally stop.

We need to live within the space that we have. I have always believed in Rule #1 and for the most part we do okay. We certainly aren’t paying for storage, which was the subject of a sermon at my parents’ church back in Rapid. The preacher said, “We fill our houses to the brim, packing every closet until we can’t get into them anymore. We stuff the attic with things we will soon forget. When that’s full, we move boxes we never unpacked from our last move into the garage. Then we rent climate-controlled storage space. If it weren’t for the bill, we would forget about that too. Why do we need so much stuff?”

Rule #2 prioritizes the use of space. So, not only do we have to live within the space that we have, the space must make it possible to easily do what we want to do. Keeping this in mind, it is suddenly much easier to choose between a few jackets that I never wear and having easy access to my collection of taped interviews.

Shoes

I don’t wear them. They’re out.

While difficult to overcome the temptation to move clutter from one spot to another, I won’t be able to do that now without remembering Rule #3: “One room’s clutter is still another room’s clutter.” So, I have a nice little pile of stuff accumulating for the Goodwill, the used bookstore, and Craig’s List.

As I worked through some very tiring exercises, I thought of friends for whom clutter is a constant issue and considered whether this book might be a nice centerpiece to a support group. It might be. I thought of people who are relocating to warmer climates or with a job and who have no choice but to look at and handle absolutely everything they own. Whether they decide to pack it all up or dispose of certain things in one way or another before loading the truck and moving on to the next chapter, they’ll have to make a lot of decisions. I wonder what I would decide about the shoebox full of dried out pens that occupy prime real estate in my closet.