Author Archives: Rebekah Smith

The Veggie Burger I Wish I Could Order at my Favorite Restaurants

Some restaurants deserve credit for offering vegetarian options, especially if there’s an attempt to elevate veggie burgers beyond the commercial stuff. But I’d  prefer a Boca Burger to an over-salted “patty” that oozes out of the bun with every bite. If I wonder “Why isn’t this a burrito?”, then your black bean concoction doesn’t cut it on a bun. The ideal veggie burger is firm. Texture is critical. Having sampled a number of them in the Twin Cities,  I’m not sure that any of them have nailed it, but there are some pretty good ones. I’ve listed some below.

Here’s the veggie burger I wish I could find in restaurants. It’s based on “Wonderful Walnut-Mushroom Loaf”, a recipe in Jazzy Vegetarian by Laura Theodore. The loaf was really good and the leftovers that were sliced and pan fried were even better.

The Ideal Veggie Burger
Author: 
Recipe type: Vegetarian
 
This is a rare homemade veggie burger that is firm, has a good texture and is packed full of flavor without overdoing the salt or garlic. It reminds me of stuffing. But for those who don't like sage and poultry seasoning (I'm thinking of my vegetarian sister), it has none of that.
Ingredients
  • 4 slices of bread, whole grain, rye... whatever or 2½ cups of bread crumbs
  • 2 tablespoons extra virgin light olive oil
  • 1 large onion
  • 5-6 ounces of chopped mushrooms, cremini works well
  • 2 cloves of garlic, minced
  • 1 heaping teaspoon brown sugar
  • 1 teaspoon tamari
  • 2¼ cups walnuts
  • ½ cup unsalted roasted sunflower seeds
  • 1 cup shredded cheddar cheese, or vegan cheese
  • Zest from ½ lemon
  • 1 teaspoon italian seasoning
  • ¼ teaspoon sea salt
Instructions
Equipment
  1. Toaster
  2. A large skillet
  3. The Rosle Multi Cutter or a food processor and a cutting board and a chef's knife
  4. Cheese grater
  5. Zester
  6. A big mixing bowl
  7. Rubber spatula
  8. Cookie sheet or pizza pan
Prep some stuff
  1. Toast 4 slices of bread, whole grain, rye... whatever and set aside.
  2. Warm 2 tablespoons of oil in large skillet.
  3. Chop 5-6 ounces of mushrooms. The Rosle Multi Cutter (RMC) is great for this job (see below). Set aside.
  4. Chop 1 onion. If using the RMC, roughly chop onion into wedges. Set aside a small wedge of onion and chop the rest. Don't overload the unit. Otherwise chop the whole thing on a cutting board as you normally would.
In the skillet add...
  1. Chopped onion. Saute for a few minutes until tender. Then add...
  2. Two cloves minced garlic. If using the RMC to mince, add cloves to the wedge of onion you saved. I find that the chopper needs something to grab onto to work, hence the onion.
  3. Mushrooms. Continue to saute for 10 minutes then...
  4. One heaping teaspoon of brown sugar and 1 teaspoon of tamari. Cook until the pan juices have evaporated.
In the meantime, put this stuff in a big mixing bowl...
  1. Pulverize toast to make 2½ cups of bread crumbs. Either use a food processor or the RMC. Just tear the toast into pieces that fit.
  2. Chop 2¼ cups of walnuts in a processor or the RMC until coarsely ground.
  3. Same with ½ cup sunflower seeds. Process until coarsely ground and add to mixing bowl with the other stuff.
  4. Add 1 cup of shredded cheese, 1 teaspoon Italian seasoning, lemon zest, and ¼ teaspoon of salt to the bowl.
  5. Toss everything together.
Mix it all together!
  1. Add the mushroom-onion mixture to the bowl and blend everything together with your hands or a rubber spatula. The mixture will form a ball that holds together.
Bake your veggie burgers
  1. Form medium sized patties and bake them on a cookie sheet at 350 degrees for 12 minutes. Turn them over and bake for an additional 10 minutes or longer to brown them.
Serve
  1. These were really good on soft whole wheat bagels from the Seward Co-op with a slice of a tomato from the garden. They were also good served over a bed of rice with chopped fresh tomatoes on top. To reheat, pan fry them in a little bit of oil.


Veggie Burgers in the Twin Cities

It has been a while since I’ve sampled some of these. Here’s what I remember.

  • Northbound Smokehouse Brewpub – Loved the beer. The wild rice veggie burger was a little heavy on the garlic the day I was there.
  • The Local – I must have had the Veggie Lucy. It was good enough to make the “I would order that again” list. I believe it’s the same sandwich you’ll find at The Liffey, which you can enjoy on the balcony that overlooks West Seventh Street in downtown St. Paul.
  • Speaking of the lucy, the Fried Vegetable “Juicy Lucy” at The Happy Gnome can hit the spot, although it’s on the heavy side. I have good memories of being at the Gnome on a snowy Sunday when they had some live music.
  • The Tiny Diner serves a spinach and walnut burger which sounds good in theory but the mushy texture lost me. That said, I love the Tiny Diner and have had other great meals there. Their outdoor dining under the solar panels is especially appealing.
  • Peppers and Fries has a black bean based veggie burger. It was okay, but the next time I visit I’ll stick with the burrito.
  • Pub 112 in Stillwater has the Gaelic Gairdin, which was perfect the first time I ordered it.
  • The Chef Shack – I think the beets made this one interesting and I might steal the idea for another iteration of the above recipe. I just wish it could be have been paired with an equally appealing texture.
  • The Pint Public House gets reasonable marks for its veggie burger but docked for the so-so bun that accompanied it.
  • The American Burger Bar that was on LaSalle Avenue where I tried their veggie burger closed. But there are other locations. The burger had one of the better textures of the ones I’ve tried but was on the bland side. So order yours with plenty of yummy toppings.

Rosle Multi-Cutter

Under the heading of gadgets that work as advertised, I present the Rosle Multi-Cutter. Brian’s sister gave us one as a Christmas gift. I love it and highly recommend it.

Free Crown Royal Bags

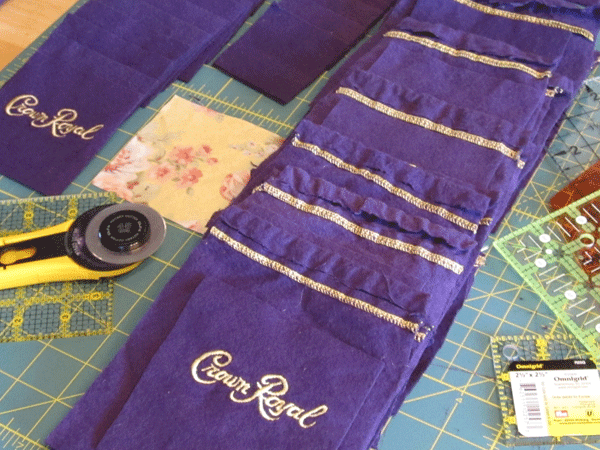
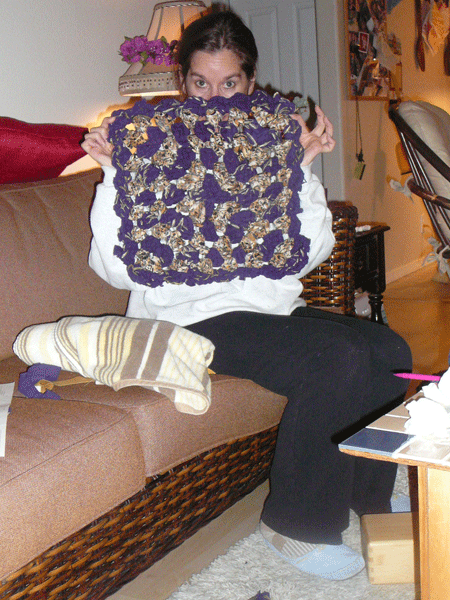
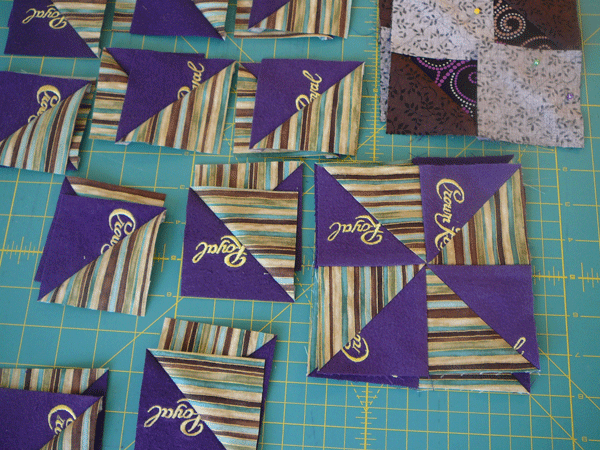
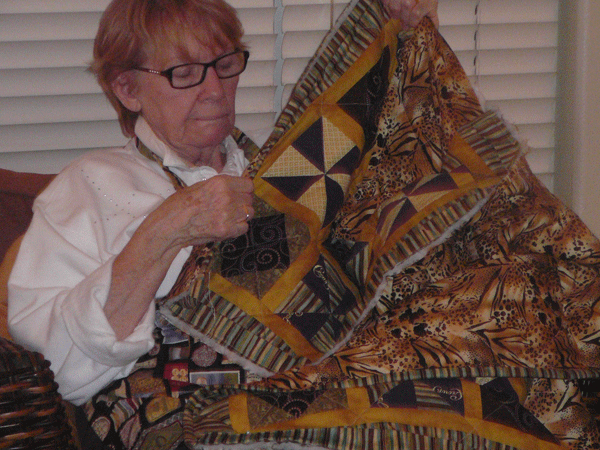
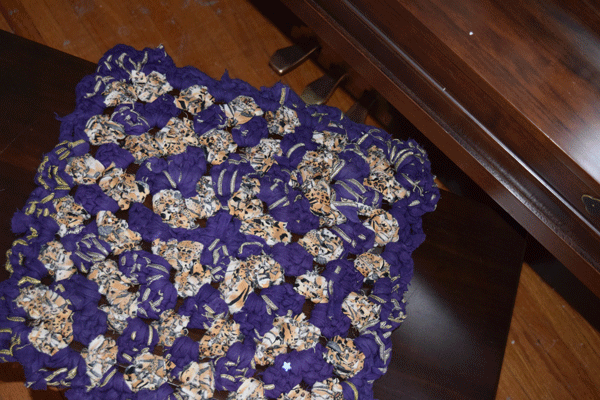
Over the years we’ve accumulated quite a few Crown Royal bags and a friend has even more to add to our pile! They are free to anyone who can use them. While they can be handy for things like storing scrabble tiles and while my mom and I made a quilt with some and my sister crocheted a rug/seat pad with others, we have more than I can ever use. For more ideas about what you can do with these bags, just do a quick Internet search. There’s a ton of ideas out there!

Quilt with Crown Royal bags.

Quilt with Crown Royal bags.

Seat pad crocheted with Crown Royal bags and other scrap fabric.

Seat pad crocheted with Crown Royal bags and other scrap fabric.

Seat pad crocheted with Crown Royal bags and other scrap fabric.

Seat pad crocheted with Crown Royal bags and other scrap fabric.

Crown Royal bags used for quilts.

Crown Royal bags used for quilts.

My sister used scraps from our quilting project to crochet this seat pad.

My sister used scraps from our quilting project to crochet this seat pad.

Crown Royal quilt in progress.

Crown Royal quilt in progress.

My mom sewing the back/front/batting together.

My mom sewing the back/front/batting together.

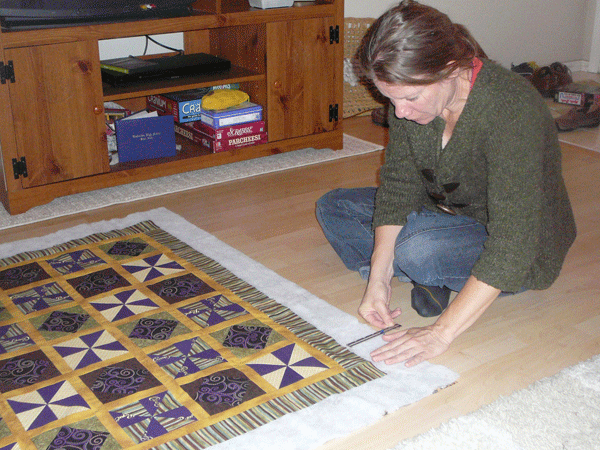
Me pinning the top of the quilt to the batting.

Me pinning the top of the quilt to the batting.

Brian enjoying some Christmas gifts.

Brian enjoying some Christmas gifts.

Getting More Space Out of Your Kitchen With What You Already Have

Lid Storage

I thought, “When I’m 90 it’s not going to be so easy to fish out these pans and lids from a cramped lower cabinet.” Then I realized that it’s driving me nuts now! So I removed some minor irritations by using certain spaces and some objects in unconventional ways.

Kitchen Storage

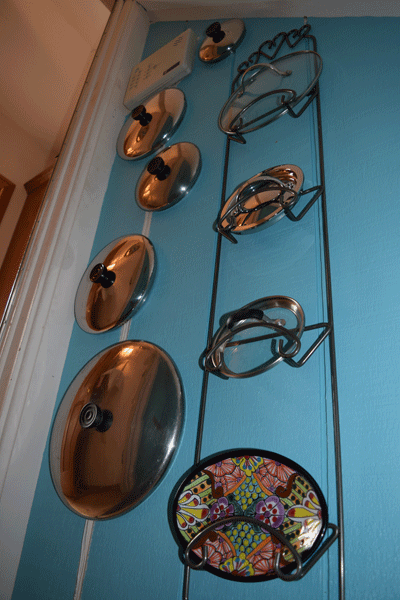
Pan lids are stored by maximizing underused space at the top of the stairway to the basement.

Pan lids are within easy reach, hanging just around the corner from the kitchen at the top of the stairway to the basement. Some lids hang on picture hanger screws. Others are resting on a two-dollar thrift store find, a rack we were using for mail.

Kitchen Storage

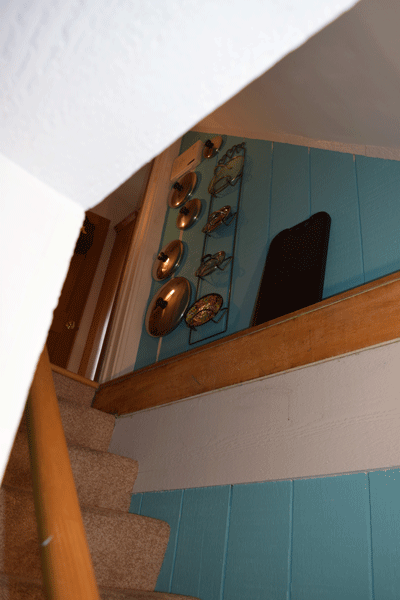
The ledge along the staircase keeps the lids out of the way.

The ledge along the staircase gives enough clearance so that the lids don’t obstruct the path or make it likely that they’ll get bumped.

Storage for pans, spices, paper towels, potatoes, onions, garlic…

yyyyy

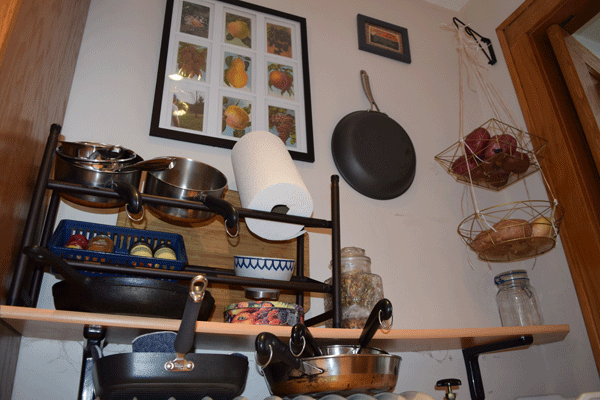
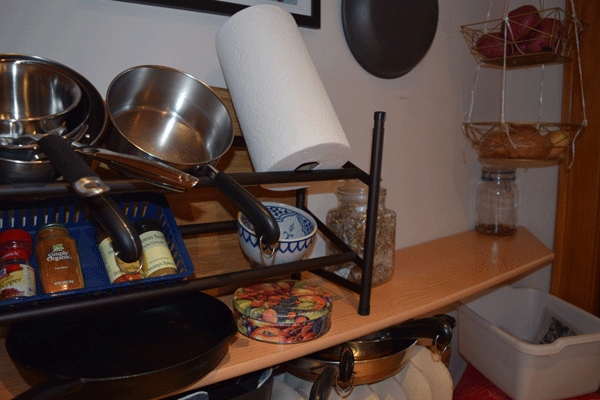
A shoe rack used to hold pans.

Commonly used pans are where I can easily grab them.

Pans on shoe rack.

Pans on shoe rack.

In addition to saucepans, the shoe rack can hold often-used spices, a bowl for garlic (we’re out of garlic, it’s the blue and white bowl) and paper towels. More pans hang on the wall and sit on top of the radiator below. Baskets hang from a plant hanger and hold potatoes and onions.

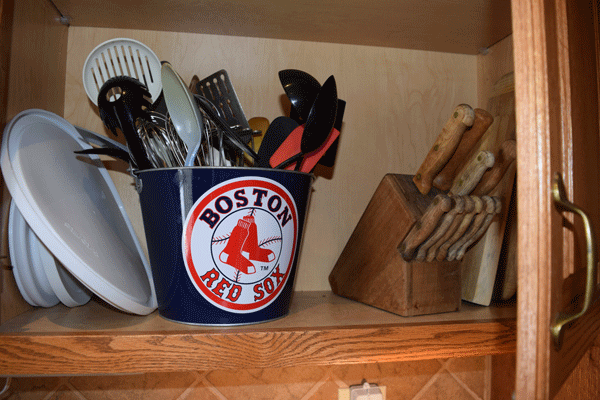
Where do you put a kitchen utensil holder, knives and cutting boards when there is no counter space?

Getting around limited counter space.

Getting around limited counter space.

Storing the kitchen utensil holder in the cabinet freed up precious counter space. With open wall space also scarce, it’s a good solution for us. I also liked using what we already had. Brian’s Red Sox bucket was nice and roomy and lightweight. So instead of getting stored and forgotten as many souvenirs do, we get to enjoy it every time we reach for a wooden spoon!

Related to this, I have a friend who stores her cups and glasses in a drawer. When her kids were little she wanted them to be able to reach them so they could help unload the dishwasher. The point is, you can do what you want. Make it work for you. For me, I see the kitchen as a workshop.

Getting more room out of the pantry for canned goods

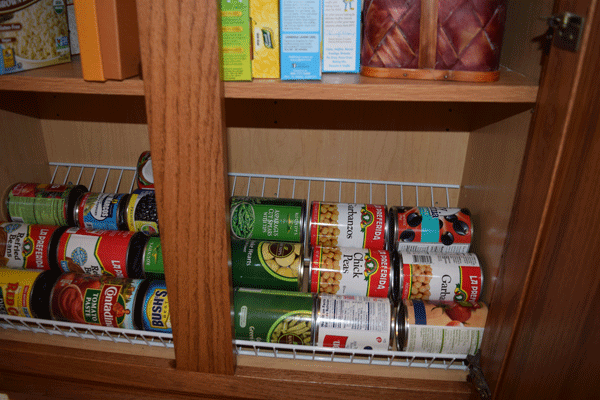
Canned goods storage.

Canned goods storage.

Putting canned goods on a sloping rack made the bottom shelf of the pantry more functional. I can see everything at a glance. I got the idea from another blogger (I’m sorry, I don’t recall which one) and it works great!

What’s next for my kitchen?

Painting – I’ve been painting the house and the kitchen will be included in this. Now that I’m mostly done with the basement and the living room, the dining room is next. Once that’s done, the color consultant will come back to help me with the kitchen.

New Counter Tops – Right now we have tile on the counter tops. I dream of grout-free counters.

Floors – The wood floors throughout the first floor of the house need to be refinished. I’m not sure when we’ll get to this, but that’s the plan.

Island – I can get more space with an island that can be rolled from in front of the dishwasher, where it would normally live. The extra prep space would be dreamy. I saw a good example of what I want at the Black Sheep, a pizza place in downtown St. Paul.

So much for the “fun” part

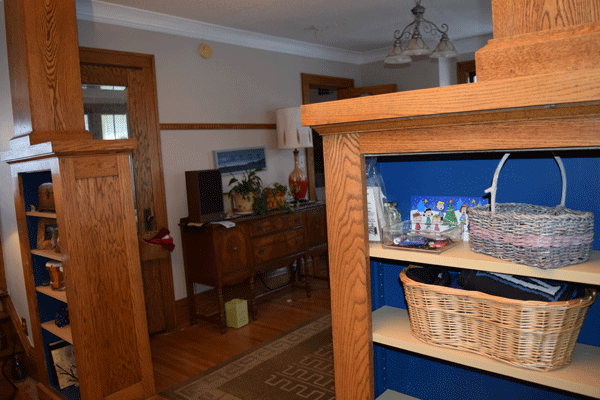
The next step will be to paint the insides of these built-in bookshelves with a color that will show the contents better.

Before – Built-in shelves from living room/entrance to dining room

I’ve been listening to Love it or List It as I’ve been working on these shelves. On the show two people, usually a couple, disagree about whether to sell their home or remodel it. In the end they choose between their house that has been updated by a designer and a dream home found by a realtor. My messy shelves remind me of that show. Here’s a tip. Before starting fresh in a new house or even hiring a designer, try dusting off a few things. Put some stuff away!

After

After – Built-in shelves

The dining room is next. On the bottom of the dental molding will be red, like the fireplace. On the top will be “Inviting Ivory”, a buttery yellow, which will carry over into the stairway.

Before

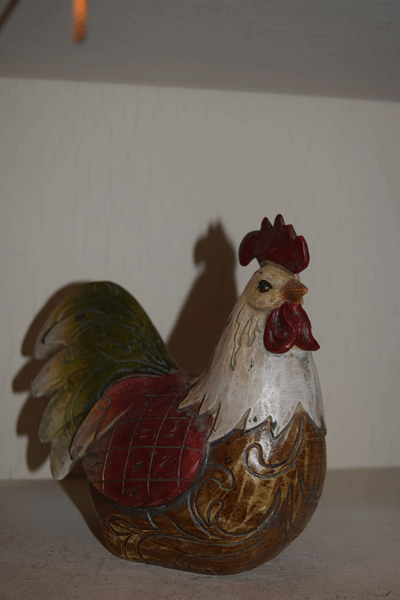
Before – Chicken on shelf

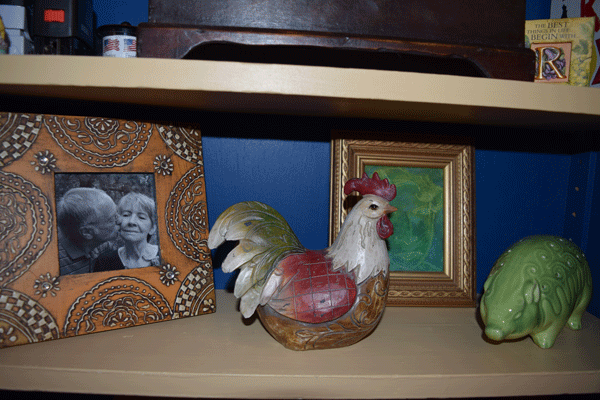
After

After

Before

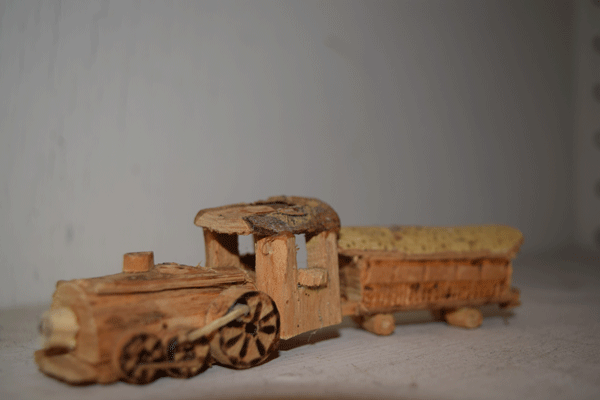
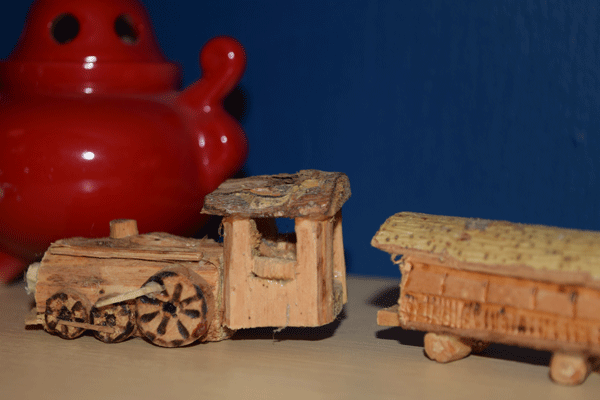
Before – Tiny train on shelf

After

After


I think that my dad made this little train, but I do not know for sure. I keep meaning to ask him about it. I found it buried in a package. I love it.

So painting and putting the cabinet back together was supposed to be a treat. Instead I was met with frustration that made me want to spit. I knew enough to note certain things when taking the shelves out. But, I didn’t know, for example, to note that four of the 32 clear plastic shelf brackets were different from the rest.

If only I were as sharp as the superhero who changed my tire. Triple A sent her one morning when I woke up to a flat. She was no bigger than me, not big. She had red hair and I think that was key. I think that had something to do with her superhero powers, but I’m not sure. I loved her! I watched her change the tire. Focused. Every bolt had a place. Every step was deliberate. She paid attention. When something didn’t work as expected, she calmly figured it out.

Sometimes I can be like her. Other times I’m defeated by an extra layer of paint.

My house just turned 100 this year. Things aren’t straight. Get a grip. Deal. Deal with it like a superhero. Oh, and enjoy. Love it. I vote “Love it!”

It’s Just Paint

There was a lot of angst over choosing a new wood stove insert. To keep the larger stoves in play, we entertained alterations to the hearth and the height of the mantel; this gave the salesman the idea that I might be a prepper.

“Maximum capacity is a thing with them.” He said.

Worse than being outed as a screwball who believed that a complete economic collapse was possible within my lifetime, ruling nothing out added to the stress of making an expensive purchase that was expected to last forever.

When no one else could, the guy who came out to take the official measurements convinced me that it was possible to go too big. He regretted making the same mistake when he installed a new stove at his cabin on Lake Superior.

“It’s impossible to regulate the heat.” He told me as he sized up my living room. “Once it’s 90 degrees in here, it’s 90 degrees.”

But even after narrowing our choices down to two stoves, I was torn between giving up what I simply preferred and giving up 200 extra square feet in heating capacity. And while the stakes were low — to believe the salesman, we couldn’t go wrong — it was helpful to acknowledge that choosing one thing meant that I could not have the other thing. This is obvious. Nevertheless, noticing the fear, the cause of my indecision, aimed to quell it.

It felt good to put down the deposit and to know that we weren’t doomed to drag things out with false objections and the endless weighing of pros and cons. If we’d be met with buyer’s remorse, it would be a fluke with lessons that needed to be learned from direct experience; it would be life. It wouldn’t be for carelessness that we might somehow end up disappointed. “So enjoy it!” I kept telling myself. To celebrate, we followed a sign and ended up at an odd little place that served breakfast in seven tiny courses.

But still, I can kick myself over something as little as a failed 15-dollar purchase, a tortilla press to be exact. The selection at the mercado in Powderhorn was slim. I settled for a plastic model that had a grip that suited me and somehow seemed sturdier than the metal presses with their loose hinges. Once home, imitating a YouTube video, I promptly cranked down on the handle to achieve the desired paper-thin dough and snapped the sucker off. While it rankled me to be out the cash, chucking the broken press into the trash within hours of buying it seemed criminal, although I wasn’t sure where to place the blame. A mistake so easily corrected, Brian couldn’t be bothered with it. I, on the other hand, hail from the camp of there-ought-to-be-a-law, as in: “There ought to be a law against manufacturing junk!”

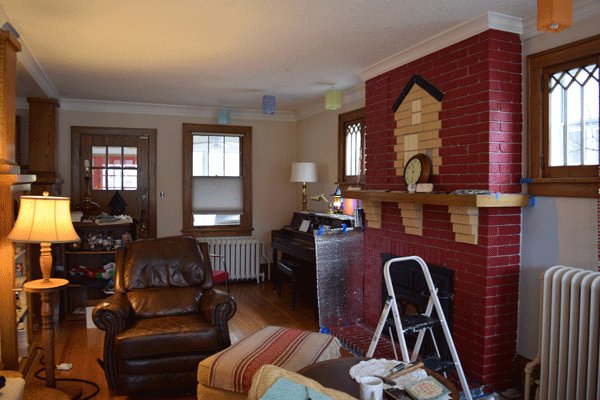
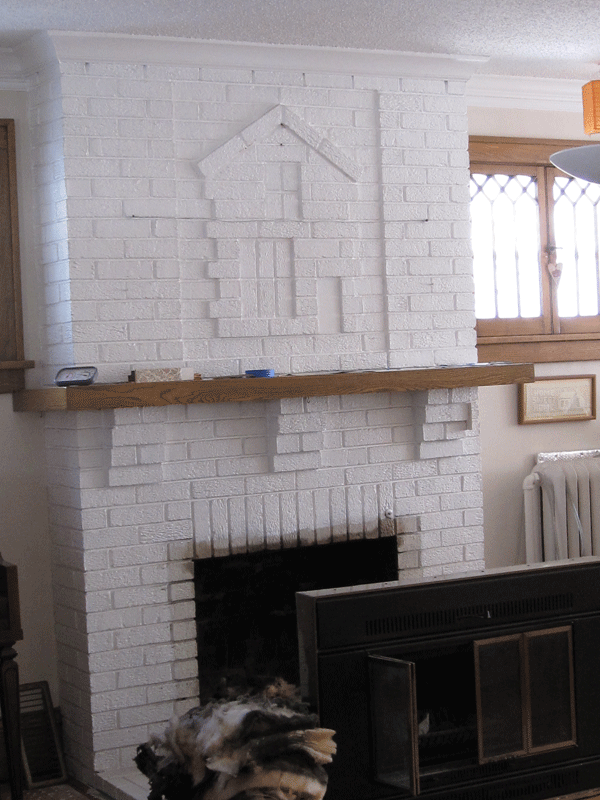
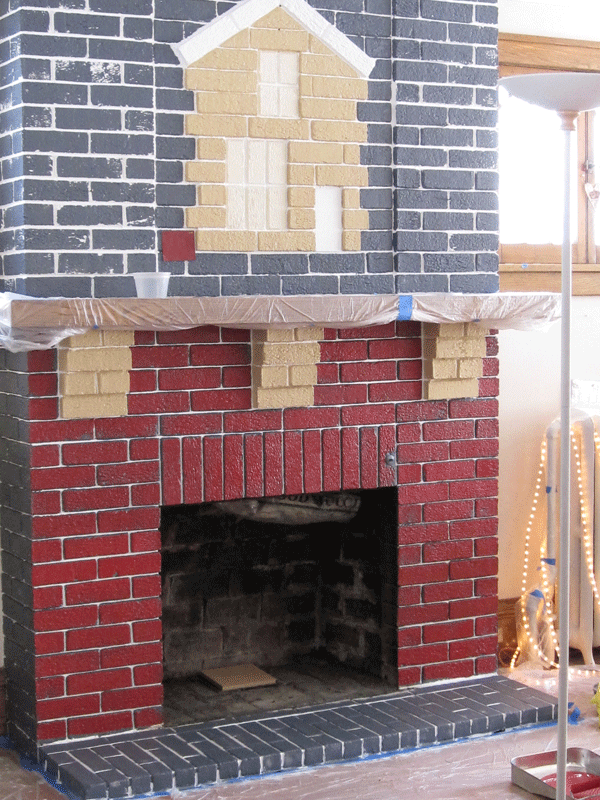
I had always been charmed by the fireplace and recall the house blocked out with a few bricks coming into focus for the first time. “Oh, there’s a house.” I said standing there in my socks and down coat. “Cute.” The realtor piped in from where he sat at the head of the dining room table to tell me that no one else had ever noticed it. While I didn’t care that the fireplace had been painted white, others — certain friends, the plumber — were easy to pronounce it an atrocity that spoiled the integrity of the old house. Their revulsion stirred my insecurities.
The fireplace needed to be repaired before we could safely use it.
The fireplace needed to be repaired before we could safely use it.
“We didn’t paint it.” I would say instead of checking my unsolicited critics. “It was that way when we bought the house.”

“Hideous!” the chorus would answer. “You should take it down to the natural brick!”

A quick Internet search suggested that it was unlikely that any of these assholes had ever tried to remove paint from brick. Still, I could imagine that the fireplace might look dingy next to the new stove. I wasn’t sure how, but I suspected that it could be better. So I consulted with a professional colorist.
Removing the white paint on the fireplace was not an option.
The white fireplace with the insert that we would replace with something more efficient.

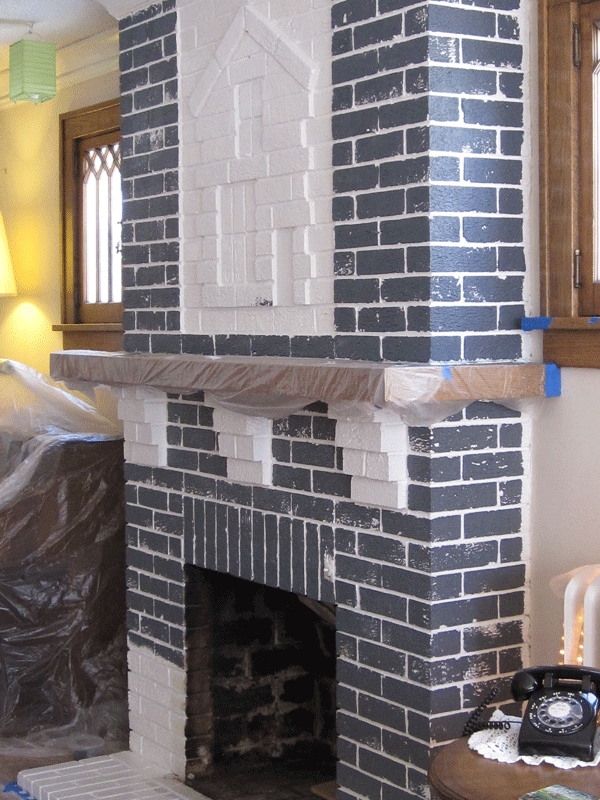
Staring up at the fireplace that by now was covered with a gray primer, I asked Brian if he missed the white and he admitted that he kind of did.

Gray primer on white bricks.

Gray primer on white bricks.

The following week, I called Brian to warn him that his living room was starting to feel like the lobby of a McDonald’s. But he saw promise and favored sticking to the plan.

I was starting to feel uncertain about this!

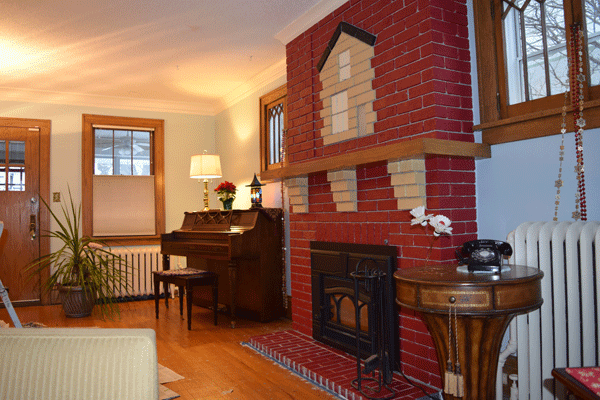
The consultant suggested that we highlight the decorative house on the fireplace. It’s rare according to everyone who has seen it. People often ask if we did it, but it’s original.

I'm told that the house on the fireplace is rare. People often ask if we did it, but it's original.

We were happy with the results.

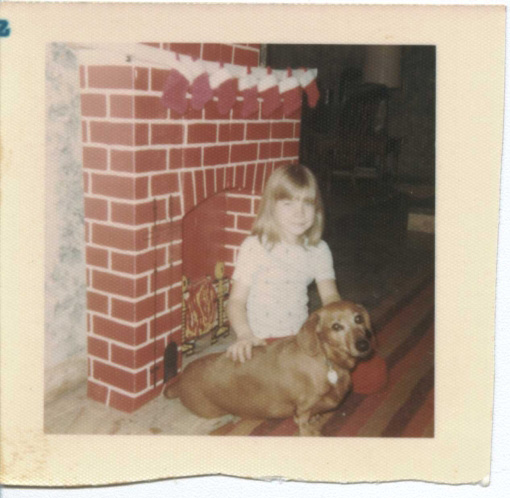
When my mom saw our new red fireplace, she was reminded of the cardboard one we used to set up at Christmas time when I was a kid. Here I am posing in front of it with our dog Rusty. Notice the stockings. There are seven. Seven? Six kids. Mom and Dad. Eight! I count eight!

Rusty was a good dog.

Rusty was a good dog.

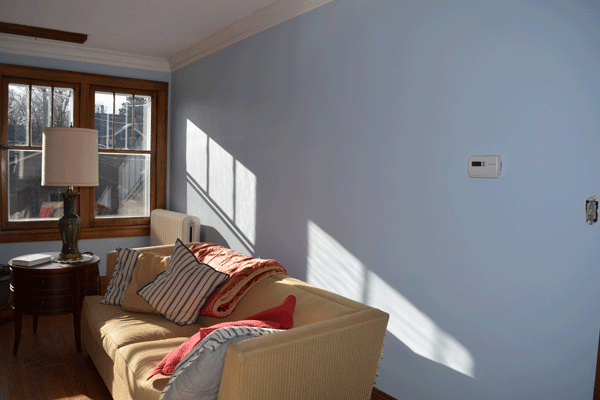
And then came the walls. After finishing one side of the room with “Balmy”, a color from Sherwin Williams, I would swear that I loved it and would marvel at how beautifully it showed the woodwork. Then I couldn’t tell or sometimes I just felt like I was in someone else’s house and I wasn’t sure I liked that so much.

The blue is supposed to set off the wood.

The blue is supposed to set off the wood.

Hey, lady! It’s just paint!

I know.

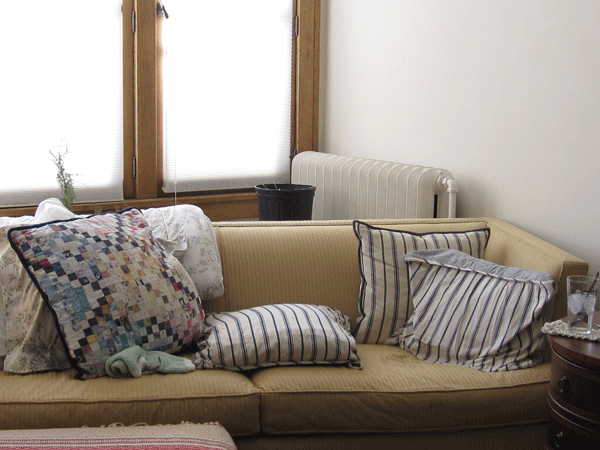
And then I noticed a cup of ice in a photo, one of the before shots.

I was taking a picture of the couch, but it's the cup of ice that caught my attention.

I was taking a before shot of the wall, but it’s the cup of ice that caught my attention.

The photo was a haunting reminder of a time when I couldn’t be without my cup of ice. It reminds me of how Brian would wait for me to fish out the last cube before getting out of the car, patient no matter the weather and regardless of the thing that needed doing. After years of a crawling decline, so slow that it would redefine normal, I found out that my addiction was a common symptom of chronic anemia. So seeing that cup of ice reminds me of a time when I couldn’t carry a load of laundry up two flights without losing my breath. I thought I was out of shape. I thought it was age. It reminds me of the lawn mowers that hummed outside my window. “You can’t do that!” They taunted. It reminds me of being torn over invitations, only to have my skipping rare gatherings affirmed by yet another ruined pair of pants. Getting to the bottom of the problem was scary and full of decision points that can put the biggest of choices into perspective let alone the color of paint.

Realizing that “it’s just paint” isn’t necessarily going to make me a more decisive person overnight. But as a second-guesser, an apologizer and worrier, I am starting to see the value of determining the gravity of a decision before applying a blanket worst-case scenario and giving my emotional well-being over to the whims of a tyrant. For example, I recall having a tough time proceeding with repairing a window because I was afraid that I’d break the glass. I mentioned this to a friend who asked, “What’s the worst that could happen?”

I’ll break it!

“Say, you break it. You’ll take some measurements and buy a replacement piece.” He made it sound so simple. I had been stuck for no reason. Sometimes this is clear. Sometimes it isn’t.

Even if I couldn’t bare to lose the antique glass with its imperfections that soften the southern light, casting wavy shadows on the walls and floors, it wouldn’t be impossible to harvest it from salvage shops or even from the alleys next to trash bins or from the random curb side. Sheets of college ruled paper hastily yanked from spiral notebooks are routinely slapped on these masterpieces with two dabs of masking tape; a semi-dry Sharpee barely manages: FREE!!!

Here's the couch with the new color.

Here’s the couch with the new wall color.

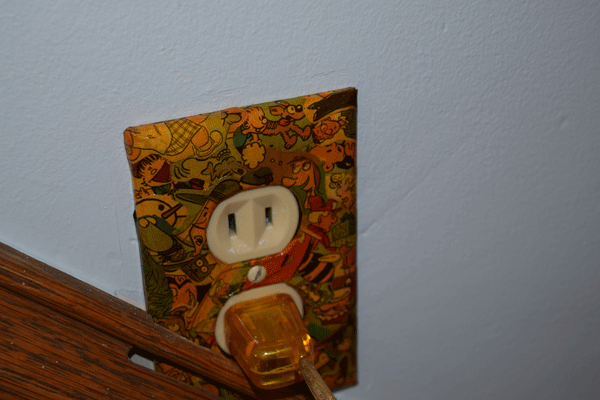
I used the comics for this decoupage project.

One of my favorite treats after painting a room is choosing outlet covers. In this case, I found a spot for a goofy decoupage experiment where I used the Sunday comics.

As I start to put the furniture back into place, I like the blue more and more.

As I start to put the furniture back into place, I like the blue more and more.

The next step will be to paint the insides of these built-in bookshelves.

The next step will be to paint the insides of these built-in bookshelves. Behind the shelves you see the dining room, which will also be painted. I can’t wait!

I'll use a dark blue on the interior and the same camel/napery color from the fireplace for the shelves.

I’ll use a dark blue on the interior and the same camel/napery color from the fireplace for the shelves.

The new color should show off the objects better

The new color should show off the objects better.

Painting the Basement – Part 2

Painting the Basement – Part 1

Update: November 29, 2015

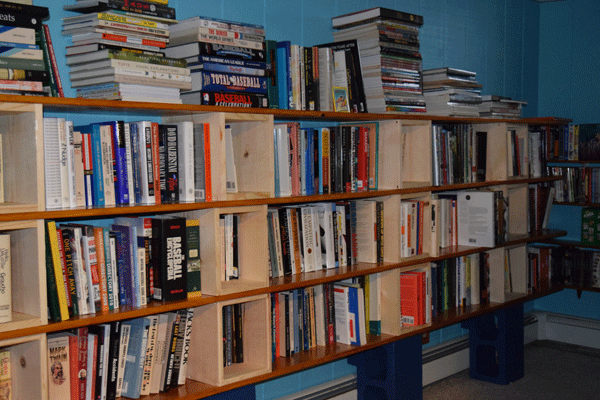
Bookshelf Progress

One of my favorite Thanksgiving Day holidays would have been the time my friend Jackie came over to my apartment to help me assemble a dresser-armoire unit that I had bought at a garage sale. The white laminated particle board furniture came with a matching dresser that had sticky glides and a lingerie chest that had the same problem. There were no directions. No diagrams. Just various pieces strapped together with blue painters tape, a stack of drawers and a Ziploc bag full of hardware and a hex key. Putting this thing together with one person holding something steady and the other tightening screws was comforting. How many friendships have been fortified by the quiet assembling of things?

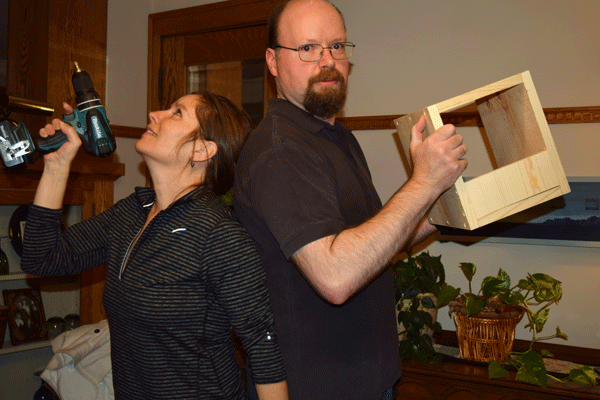
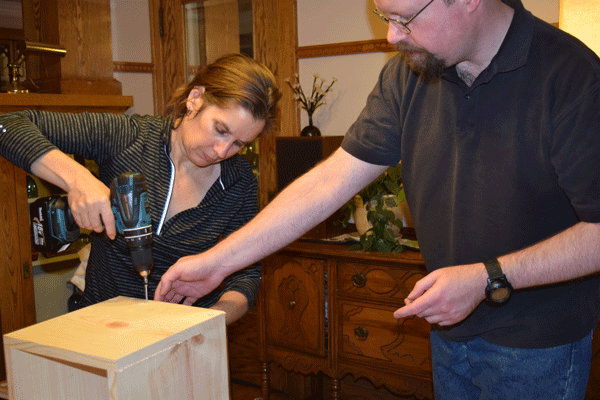
The memory comes to mind because this Thanksgiving my friends Al and Craig and my sister Amy helped me take a huge step forward with making my bookshelf; it is the thing that needs to get done before the anything else can.

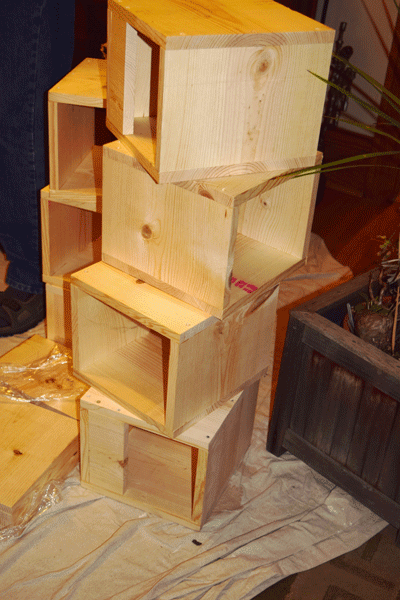
Craig and I went over to Al’s workshop where Al showed us how to cut the wood for the support boxes. Then he showed us a couple of different ways we could assemble them.

Amy and Craig assembling the boxes for the bookshelf.

Amy and Craig assembling the boxes for the bookshelf.

Amy and Craig assembled many of the boxes while I made pumpkin black bean soup and cornbread for dinner. The goal was to get them done in time to reclaim the dining room for Thanksgiving the next day.

Quite the team!

Does this make me Charley?

New rule: No pie before the boxes are done!

New rule: No pie before the boxes are done!

It's coming together.

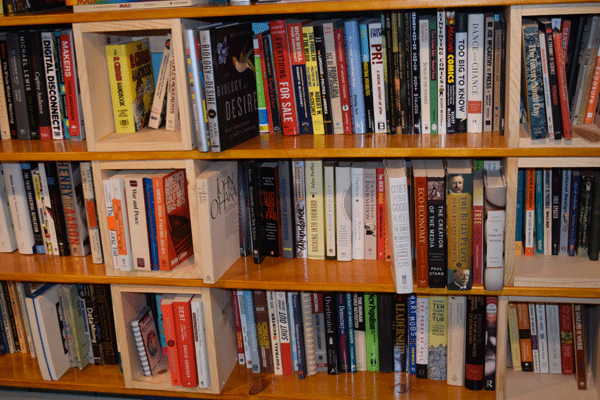
It’s coming together. It was fun reading random titles aloud as I put books on the shelf, Amy crocheted, and Craig and Brian replaced a light switch.

I plan to add another shelf, likely in the spring. For now, I’m thrilled to have emptied several boxes of books that have been taking up floor space. It will help me see the room and figure out what to do next.

I'll sand and shellac the boxes as I have time.

I’ll sand and shellac the boxes as I have time.

I love my bookshelf. I especially love the people who helped me make it. I love sitting in the chair next to it, tucked away where I’m not so easy to find. Once discovered, Brian will say, “You’re staring at your shelf again?”

Yes. Yes I am.

Painting the Basement – Part 1

Preserving Berries

Raspberries_001
Inspired by my neighbors who gave me some homemade raspberry jam and who assured me that it was easy to make (“Just get some Sure Jell or some other kind of pectin and follow the directions.”), I gave it a try. It was easy, although for one batch I forgot to skim off the foam, making for a cloudy product… or at least I think that’s what happened.

With a number of things to get done before Thanksgiving, I was looking for an even easier way to preserve the last of my harvest. In the past, I used a trick my friend Mary Ann shared. Just put the berries on a plate such that they are not touching. Pop them in the freezer. Once they are frozen, transfer them to a plastic bag and freeze. Pre-freezing the berries prevents them from clumping. It works perfectly.

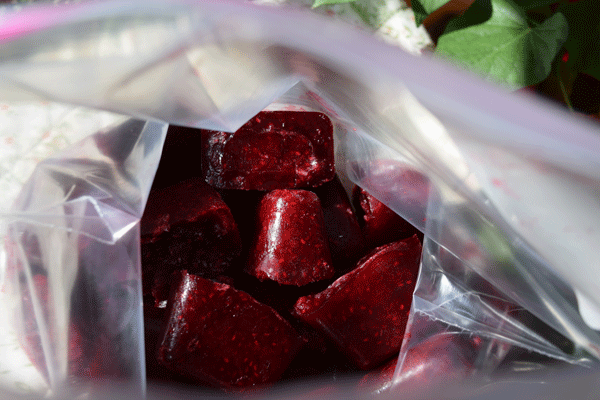
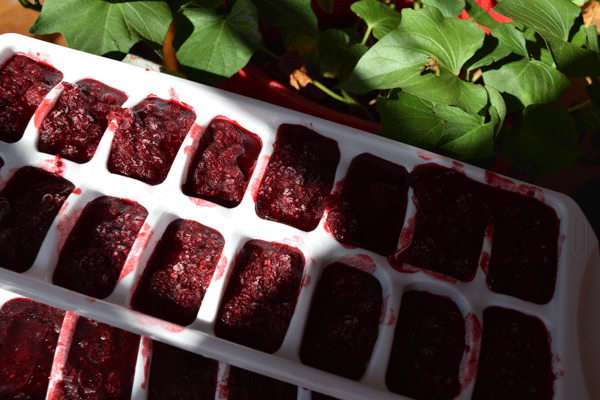
This year I tried something even easier. I rinsed the berries and cooked them down on a low heat to make a sauce. Then I distributed the sauce into ice cube trays. Once frozen, I popped the cubes out of the tray and put them in a plastic bag for storage in the freezer. The raspberry cubes can flavor yogurt, oatmeal, desserts, and – one of my favorites – salad dressing. An added advantage is that there is no sugar added to the cubes. That can be controlled whenever they are used.

Medicine Cabinet Storage Tricks

Storing pharmaceuticals.

Office storage solutions for sorting cough drops and Band-Aids?

There was a website I needed to finish. Then there were raspberries to preserve before a quick trip to Rapid City. Oh, and what to do with the tomatoes? I couldn’t get everything done that I like to do before a trip – mainly cleaning the house. I didn’t sit down at 3 o’clock for a break as planned. Instead, I checked things off the list until the garage door shut and we sat in the alley debating whether to take a bucket of worms from my vermiculture system home for the nephews to see. I would have to find another way to be the fun aunt.

It turns out that wrapping kids up in a blanket and swinging them as if they were in a hammock (Hey! We forgot to say

One for the Money
Two for the Show
Three to Get Ready and
Four to Let Go!

)

or dragging them chariot-style across the lawn was probably more fun than red wigglers. Until Sioux Falls, I was certain that I would regret leaving them behind; I never did.

In the alley we also considered our route and made guesses as to which was least likely to be choking with straggling rush hour traffic. We sailed west on I-94 for about a minute and 20 seconds before I hit the breaks. It was stop-and-go until south of the suburbs.

Brian has never understood why thoroughly cleaning the house is part of the ritual of hitting the road and from what I can tell from the comedy channels on my Internet radio, he’s not alone (and neither am I!). While I thought this was about the simple pleasure of coming home to a clean house, I’m just realizing that it’s also about the surprise and the feeling of being cared for. While keeping a clean house is an excellent way to care for yourself (or someone you love*), it can be a grind. The laundry is done until I change my underwear. And by the time I’ve dusted a bobble head (ahem) in one room, a spider has begun reconstruction in the next. There is rarely enough time or the distance to enjoy the results of my labor. But if I change the sheets before getting out of town, when I come home not only will there be fresh linens to enjoy, there will be the perception that someone else made the bed (or vacuumed the staircase, or polished the baseboards, or shined the mirror, or washed the windows)…for me.

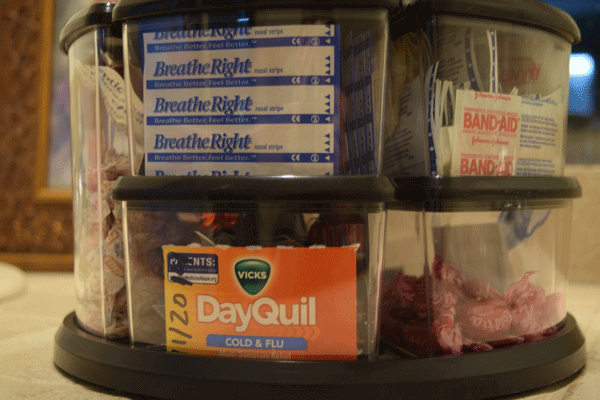
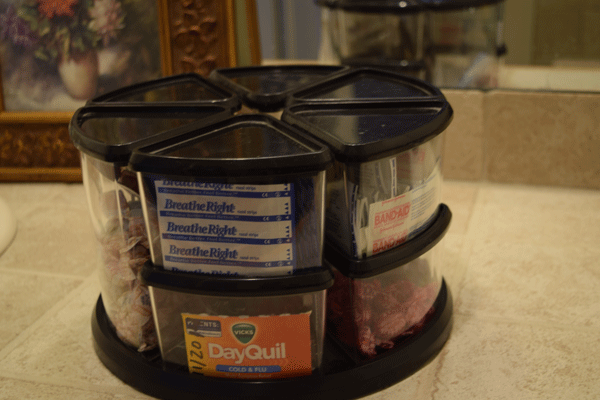
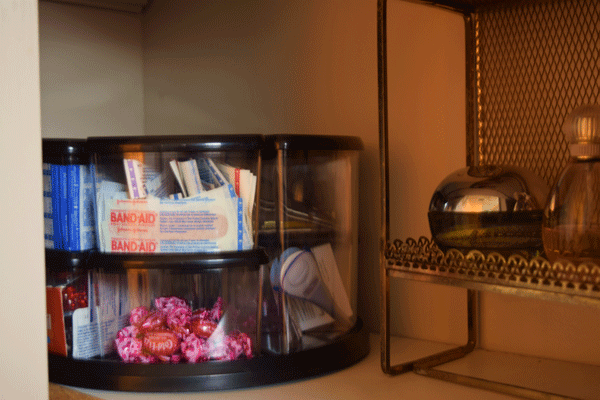
And then there are those household organizational tricks that you can keep rediscovering because they maintain themselves. For example, pictured here is another use for a desktop storage container, which has the prestigious honor of having not only been spared the Goodwill pile but of being something I did “find a use for someday.” The open bags of cough drops and the flimsy boxes of Band-Aids and other odds and ends that can clutter up the medicine cabinet were driving me nuts. This was a perfect solution. The clear containers make it easy to see what’s what and the rotating base maximizes the corners of closet shelves without compromising easy access. For better visibility, tear off and date the box covers to use for labeling the containers.

Clear containers lets you see what's inside.

Clear containers let you see what’s inside.

A rotating base maximizes closet corners.

A rotating base maximizes closet corners.

*There are many stories I could tell about helping people clean and getting help cleaning my house. Right now I am thinking of Dawn who had the good sense to make me wash the dishes after my dinner party, a distraction from an upsetting breakup. Late into the night, everyone except for Dawn started to file out. She stayed behind to help with the dishes, which was the last thing I wanted to do. I told her that I would take care of it in the morning; I wanted to go to bed. She would have none of it. In my depressed state, she feared that waking up to a mess would send me over the edge. So, she washed and I dried -or the other way around- until everything was in its place.

Hummus Veggie Wrap

Right before I had left my hometown to take a job in Saint Paul, I took a cooking class at my favorite restaurant in Rapid City. Veggies was a venture of Seventh-Day Adventists. Unlike Mary who was the owner of the restaurant and our teacher, I’m not positive that God intended for people to be vegetarians. Nevertheless, Mary did make a compelling case for being one (actually a vegan, it turns out) and eating whole unprocessed foods. She reaffirmed what I had read years earlier in a random book I found. Sugar Blues argued that sugar was a processed drug, not unlike (do I remember this correctly?) cocaine.

Maybe the book was overstating it. But, I’ll never forget the story Mary told us about a school that was having serious discipline problems. She claimed to have corrected the problem by taking over the cafeteria. She got rid of the sugar, the white bread, the dairy and – of course – the meat. She described a transformation where failing students with a penchant for picking fights became model citizens. Before they couldn’t concentrate or sit still. Now they could. And according to Mary, it was about the food. I believed her. After all, the reason I took her class in the first place was because I noticed that I felt better whenever I had lunch at her long-since closed restaurant. A meal there was always totally satisfying.

I still have the cookbook I bought when I took Mary’s class. The Best of Veggie’s has everything from main dishes like croquette’s with cashew gravy that will stand up to the comfort food of my childhood (think Grandma’s roast beef with mashed potatoes and gravy, corn, sweet carrots drenched in butter, rolls) to vegan mayo and homemade ketchup. So, I was surprised that something as basic as a hummus recipe didn’t hit the mark. Was the ¼ cup of lemon juice a typo? I made it work by adding more beans. But the hummus recipe that my mother gave me last week over the phone is better. From my post-it note to you, here it is with some adaptations:

Hummus Veggie Wrap
Author: 
Cuisine: Middle Eastern
Prep time: 
Total time: 
Serves: 6
 
A hummus veggie wrap is a quick and satisfying lunch or dinner.
Ingredients
Hummus
  • 1 can garbanzo beans - reserve juice
  • 2 ounces sliced jalapeno pepper (I used one big ass jalapeno from my garden. It could have taken more)
  • ½ TSP cumin
  • 2 TBS lemon juice
  • 3 cloves minced garlic
  • 1 TBS reserved bean juice
Note
  • The above makes a dry-ish mixture that didn't seem quite right. I added a dollop of peanut butter (I would have used tahini instead if it had been available), a splash of tamari, and a little extra bean juice.
Wrap
  • Hummus (see above)
  • Tortillas (buy or make, see below)
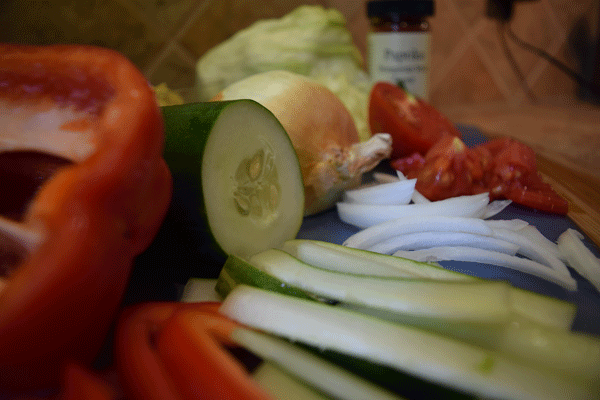
  • Veggies of your choice: I used cucumber, red pepper, lettuce, tomato, and onion. Black olives, pickled jalapeno and crushed walnuts would have been a good addition. I put crushed walnuts on everything.
Instructions
  1. Blend hummus ingredients in a food processor or mash by hand.
  2. Warm tortilla - I heat mine directly on a gas burner on the stove, turning it with tongs
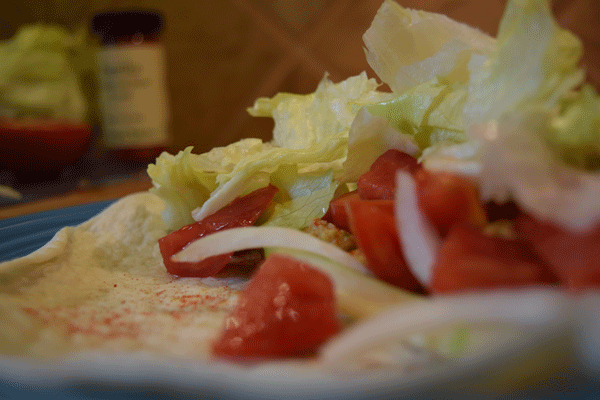
  3. Spread hummus down the center of a tortilla and sprinkle with paprika
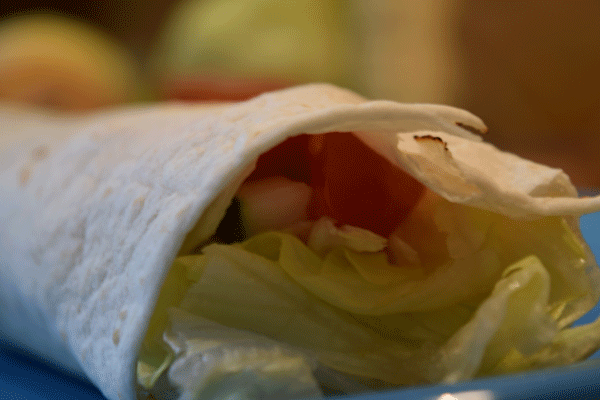
  4. Layer veggies on top of hummus and fold tortilla closed. Don't know how? Look it up on YouTube.

Brian knows that anything I cook is accompanied by the “How would I change this?” conversation. With the fresh tomatoes from my backyard shining in this dish, the obvious answer would have been to grow more of my own veggies. It’s easy to grow cucumbers, onions and peppers. Also, I could have replaced the canned garbanzo beans with cooking up some dried ones, which would have taken just a few minutes in the pressure cooker.

A more challenging improvement would be to make my own tortillas using just three ingredients as shown in this video. Is it really that easy? Or will my ambitions go the way of my pasta machine, which is rarely used even though fresh pasta is notably better than anything I can buy with the possible exception of what I can get at Cossetta’s?

The prominent “Handmade Locally” on the package of the tortillas I have in my fridge makes me feel good. The story on the back of the package about the family behind the business is also touching.

“…Together they worked long hours at low-wage job after low-wage job to support their family until they took a roll of the dice and began peddling an unlikely product: fresh corn tortillas.”

Never mind that it is flour tortillas that I have. After reading the list of 20+ ingredients of which I recognize three (bleached wheat flour, water and salt), these “locally made” marketing techniques quickly lose their luster.

Cutting the veggies lengthwise for a wrap works well.

Cutting the veggies lengthwise for a wrap works well.

Add whatever veggies you like.

Add whatever veggies you like.

Fold the bottom of the wrap up first then roll the sides in.

Fold the bottom of the wrap up first then roll the sides in.